If I’ve learned one thing by reading modeling related forums, it would have to be “don’t believe everything you read about any kit until you’ve held the plastic in your hands.” This has proven to be especially true when it comes to Hobbycraft kits.
If you solely base your opinion on modeling forums, you’d come away thinking Hobbycraft kits are simply awful. I’ve read them referred to as “Hobbycrap”. One poster called their models “laughable”. Another simply said “they’re not worth the time, effort or money.”
Funny, I actually had a chance to email one of those folks (on another subject), and when I asked for some clarification on what they thought of a particular kit from Hobbycraft (assuming by their description they’d owned the kit, or perhaps even built it), they replied they’d never actually seen the kit. Just read about it.
So it was with great joy I received Hobbycraft’s 1/48 Hurricance Mk. II “Night Intruder” boxing. My friend Wayne Dippold had picked it up for me at a model sale a while back. I’m always one to look for a bargain, especially with kits that I’ve read folks talk ill about. It’s a lot of fun to build them and actually enjoy them.
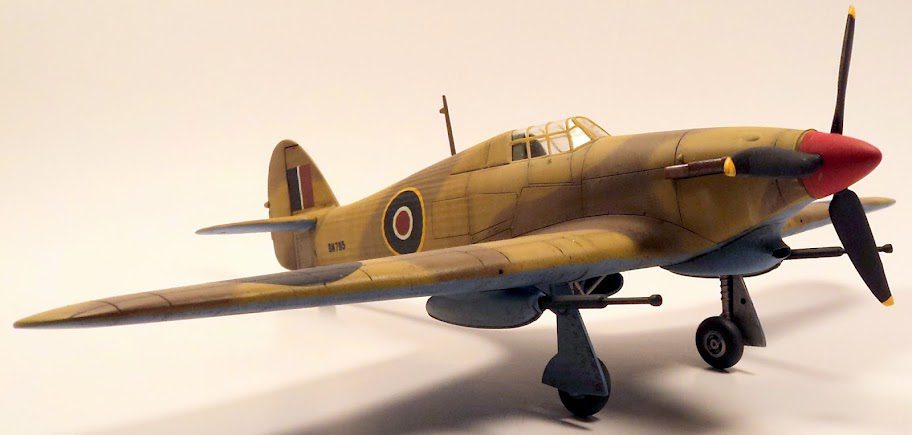
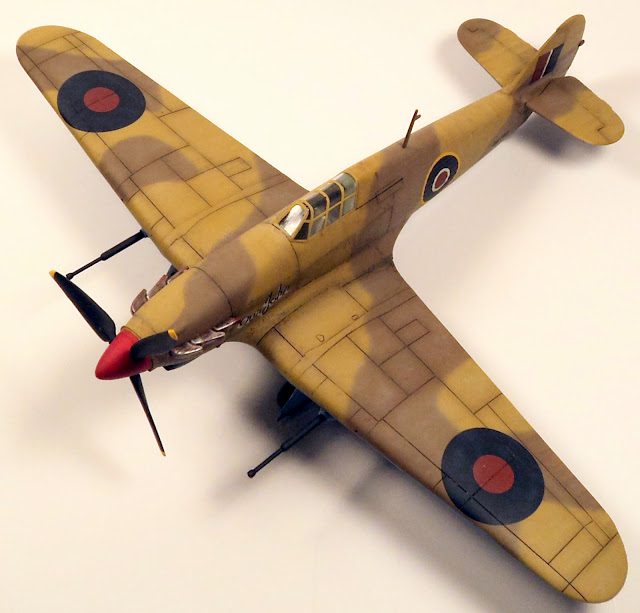
And enjoy this Hurricane build I did!
The kit comes with some photoetch to build a more detailed cockpit than the plastic parts allow for. However, the canopy is a one piece part, so I decided to forego use of the photoetch (which normally confounds me anyway) and simply use the plastic. It’s a simple cockpit, but perfectly adequate for a closed canopy version. Stick, seat, IP, pedals and some sidewall detail are all there. A bit of paints, some drybrushing and oil wash bring sout the detail nicely, most of which can’t be seen anyway once the canopy is attached. The photoetch parts would certainly make an open canopy version a possibility, although since the canopy is a bit thick, a vacform replacement might be warranted. (Not me…. have fun if you want with my archrival and nemesis, Mr. Vacform Canopy.)
The fuselage goes together with no fuss at all. Clamp it down after applying some Tamiya Extra Thin cement, scrape away the weld bead, and you are done.
The kit has parts for building the b, c and d versions of the Mk. II. Out of the box, the wings are set up for the 20mm cannon-armed c version. The create the b version, you’d need to sand down the cannon bulges, remove a few panel lines, add the appropriate gun bay covers (part of the photoetch fret), and drill in the gun ports. Not a difficult process, though the instructions only partially detail what needs to be done. For the 40mm “tank busting” d wing, the cannon blisters are removed, and a few panel lines are filled in. If you are averse to conversions of any sort, I’d say simply go with the C wing. However, with a little research, the b and the d are quite attainable without too much difficulty. (If you’d like help with the particulars for the d wing, please email me and I’ll be glad to email you the research I have that is really helpful.)
The wing fit itself is pretty good. If you’re preferred method is to attach the upper and lower wings together and then to the fuselage, you’ll have a small gap to deal with. I decided to glue the upper wing parts to the fuselage, and then add the lowers, which resulted in a small amount of sanding at the outer wing edges, a much simpler task.
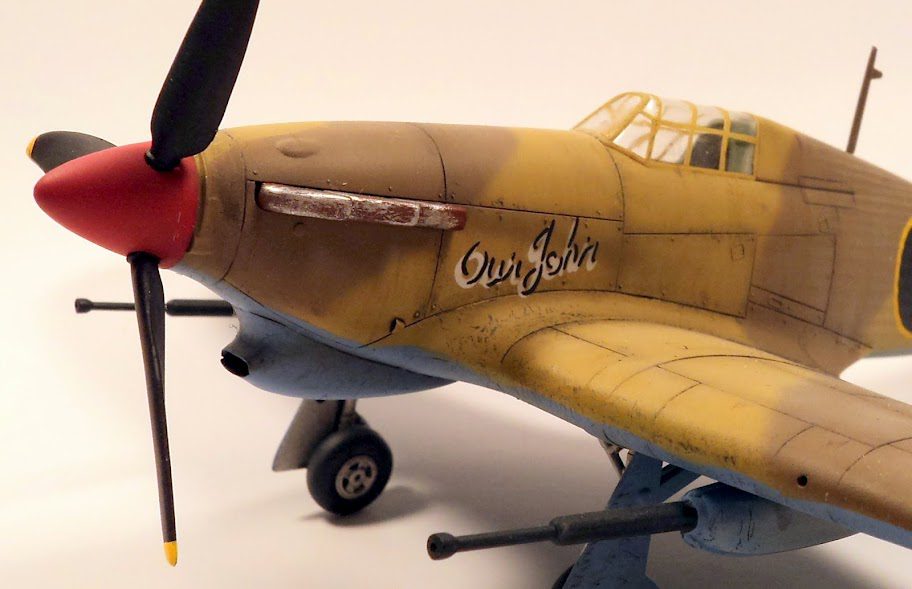
From that point on, the build is very easy and without any difficulty. The landing gear go one easy, and provide the wide-track, rugged look of the Hurricane when viewed head-on. The canopy fit is very good, and the cannons certainly look the part. You’ll probably want to cut out the shell ejection chutes- a step I forgot. (Oh well….)
The kit was painted with Xtracrylix Azure Blue on the undersides. The uppers were a Gunze acrylics in Drak Earth and Middlestone. Weathering was through a combination of Tamiya Deck Tan XF-55 airbrushed on, some oil washes, and some pencil chipping. The kit decals had a bit too much bright red in the roundels, so I used the aircraft number and “Our John” name and sourced the roundels and fin flash from spare decals. A final coat of Vallejo Matte Coat finished off the build.
All in all, the Hobbycraft Hurricane Mk. II is a very pleasant, easy build. While I’d certainly not argue that the Hasegawa Hurricane is a nicer kit in terms of accuracy, detail and engineering, don’t let the opportunity to pick up Hobbycraft’s kit pass you by if you find a bargain. (I paid $5 for this kit- a true bargain!)
I think too often modelers miss out on some really nice experiences by putting too much stock in what peope on forums say about any particular kit. This is clearly demonstrated by the sheer number of posts saying “Is kit xyz any good?”
A kit is a kit. It’s plastic. It is what you make it. Find out details, do your research, but keep in mind you will always find someone who will say “it’s junk”. And also keep in mind that there is a good chance the person saying so has never even held the plastic, let alone built it.
So far, I’ve found that when I see a kit labeled as “piece of junk” or something like that, my own build experience turns out to be quite enjoyable. Just as it was with Hobbycraft’s Hurricane. It was a lot of fun, and I recommend it!


Leave a Reply