I must admit that aside from being able to recognize a Typhoon, and knowing that it was most noted for its close air support role in World War II, I was not very knowledgeable of the type. If you would have asked me the difference between a Typhoon and Tempest, I would have not even been able to fathom a guess.
But the recent build of a Tempest Mk. II conversion sparked my interest in these two aircraft, and while I am no expert, I do feel like I can at least outline their history a bit. And be able to look at the the two and tell the difference!
With my interest firmly focused on Hawker’s post-Hurricane storms, I decided that I’d build a Typhoon as a follow up to the above mentioned Tempest. (And I’m actually working on another Tempest, the Mk. V, as I write this!)
While I had previously built Monogram’s Typhoon a few years ago, I decided to go for a more updated tooling. When Italeri’s reboxing of the Hasegawa Typhoon made itself available at a very reasonable price, I jumped right in.
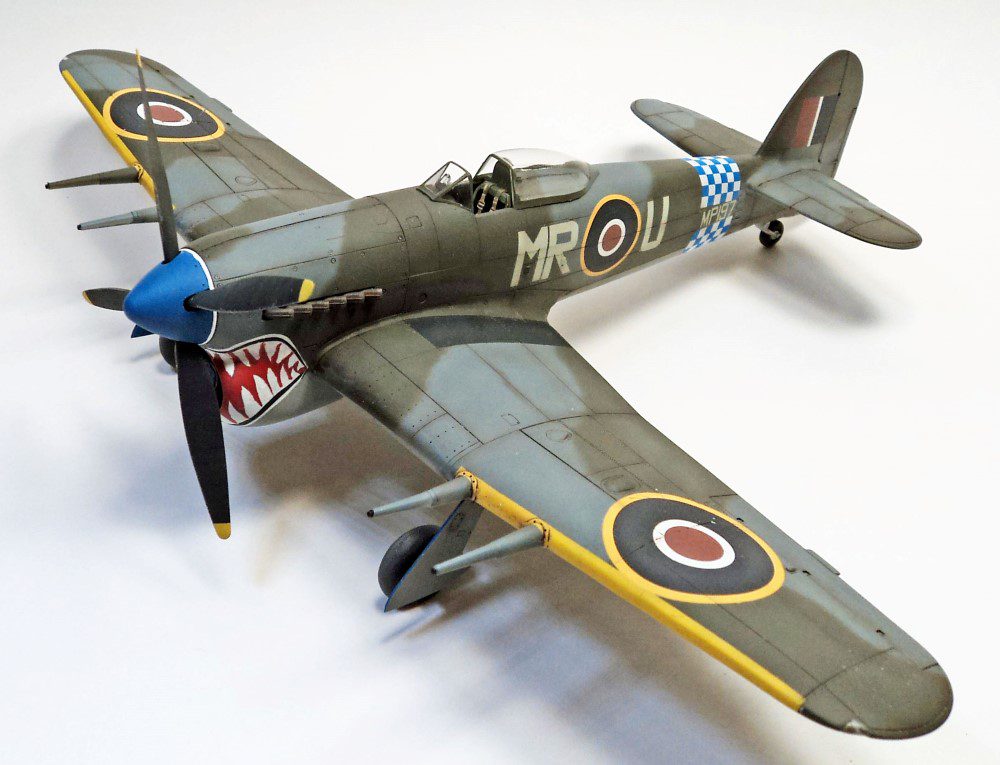
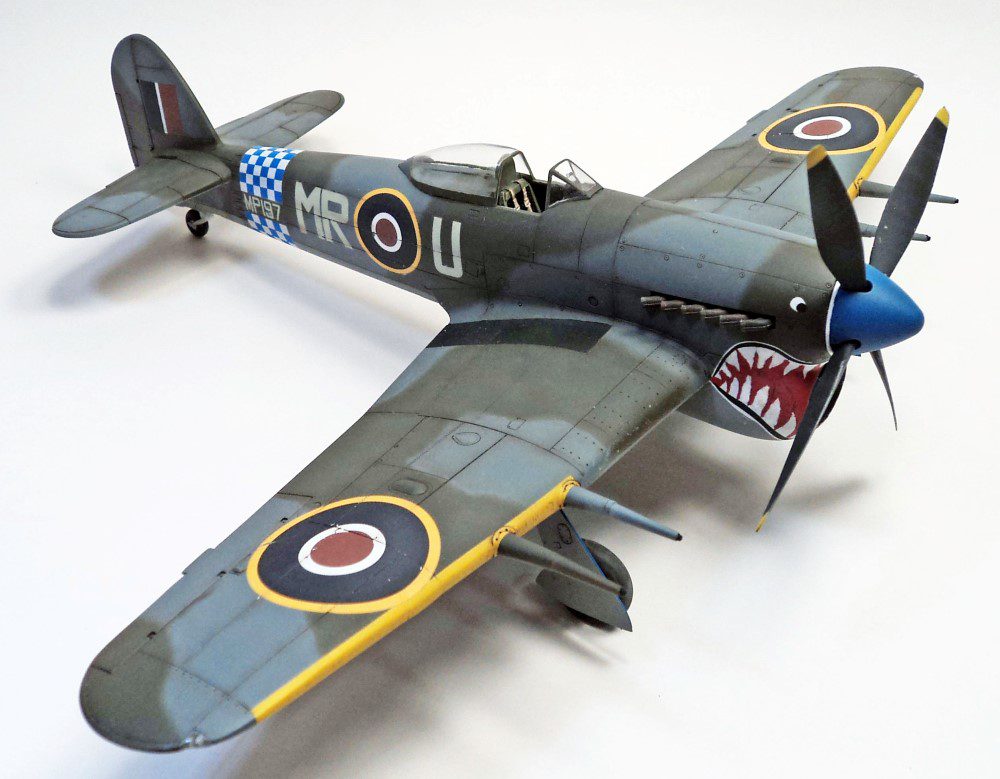
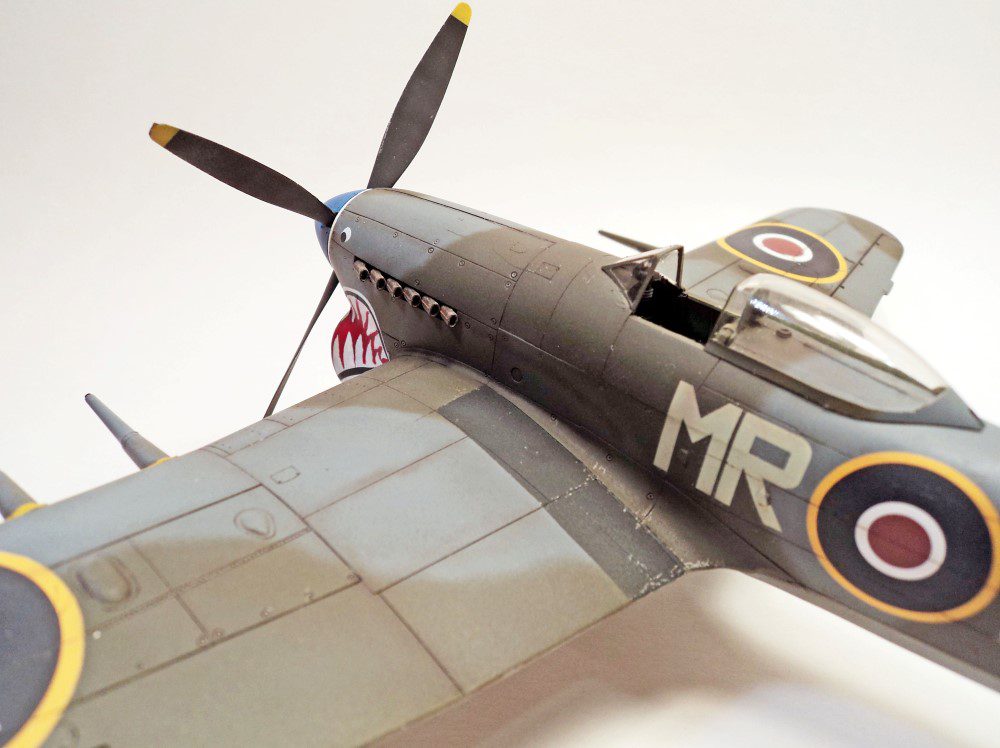
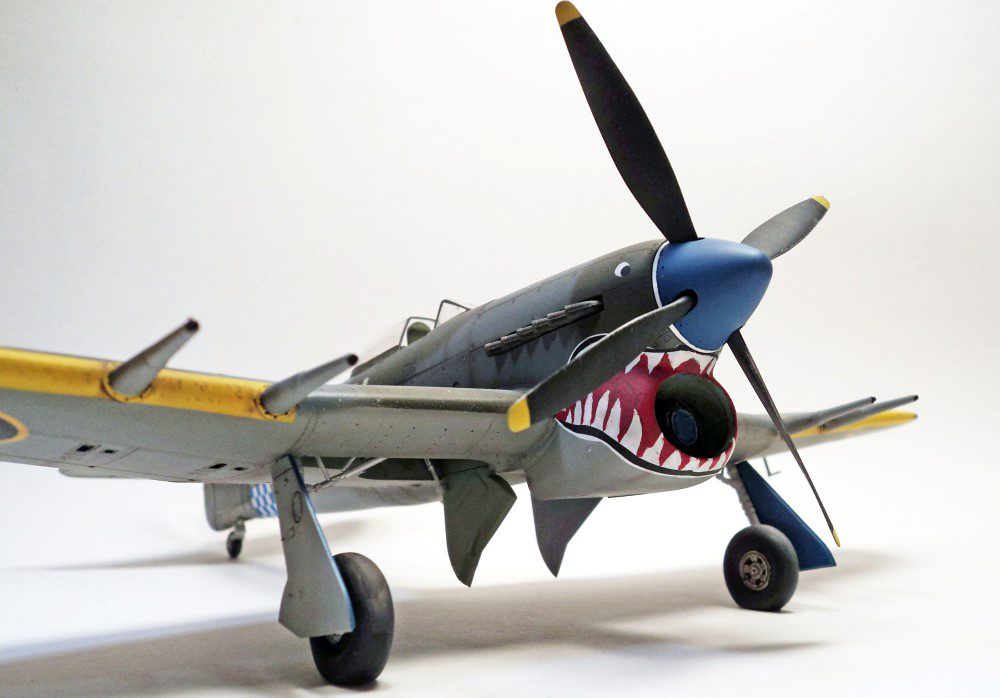
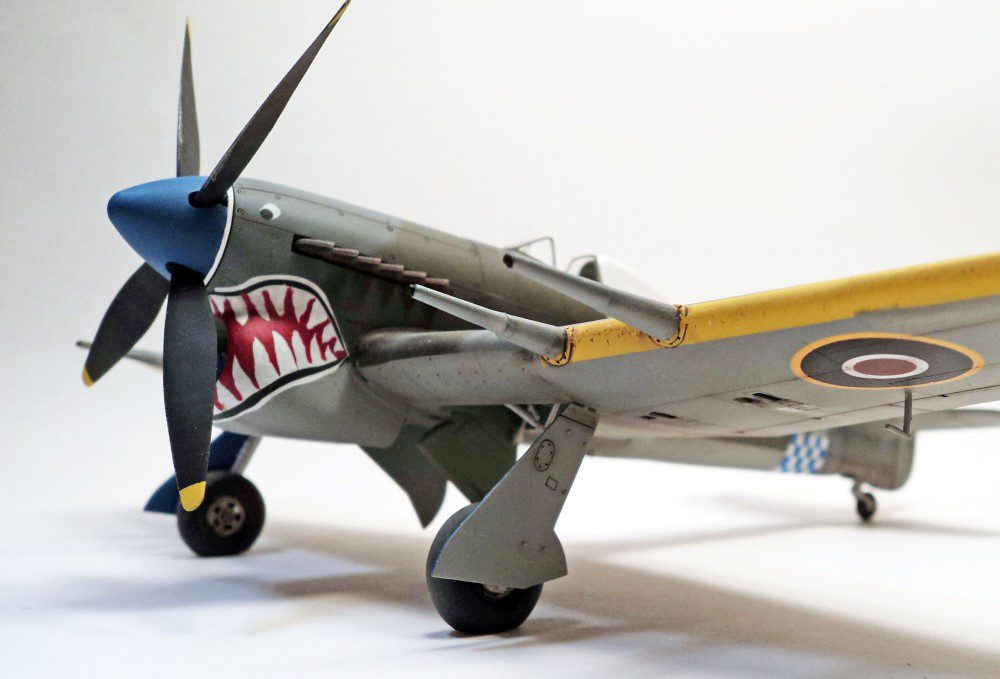
The Italeri boxing supplied a nice set of decals, as they usually do. However, I’d seen a sharp looking shark’s mouth Typhoon, and decided to build one of those. A decal set from Aviaeology, “Sharkmouth Typhoon” (AOD48003), provided the markings.
Additional research showed that the particular aircraft I’d chosen to model had a four-bladed prop, larger horizontal tailplanes, and a “cuckoo door” air intake. A quick check on Ultracast’s site showed the availability of those parts, and more, so knowing one can’t go wrong with Ultracast, I was prepared to build my Sharkmouth Typhoon.
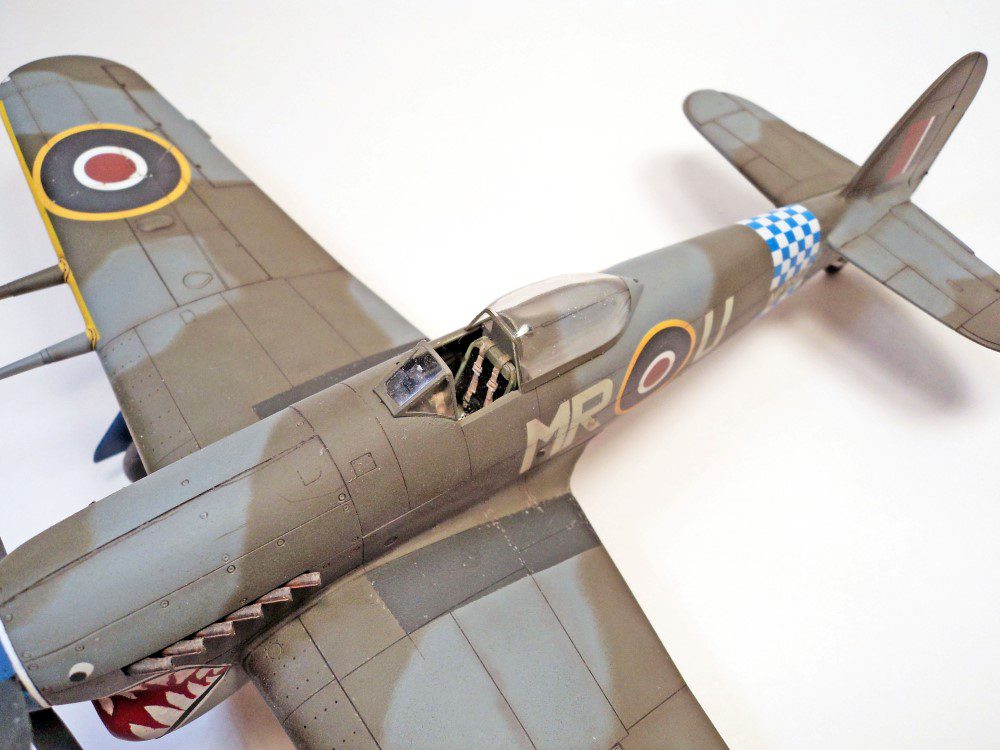
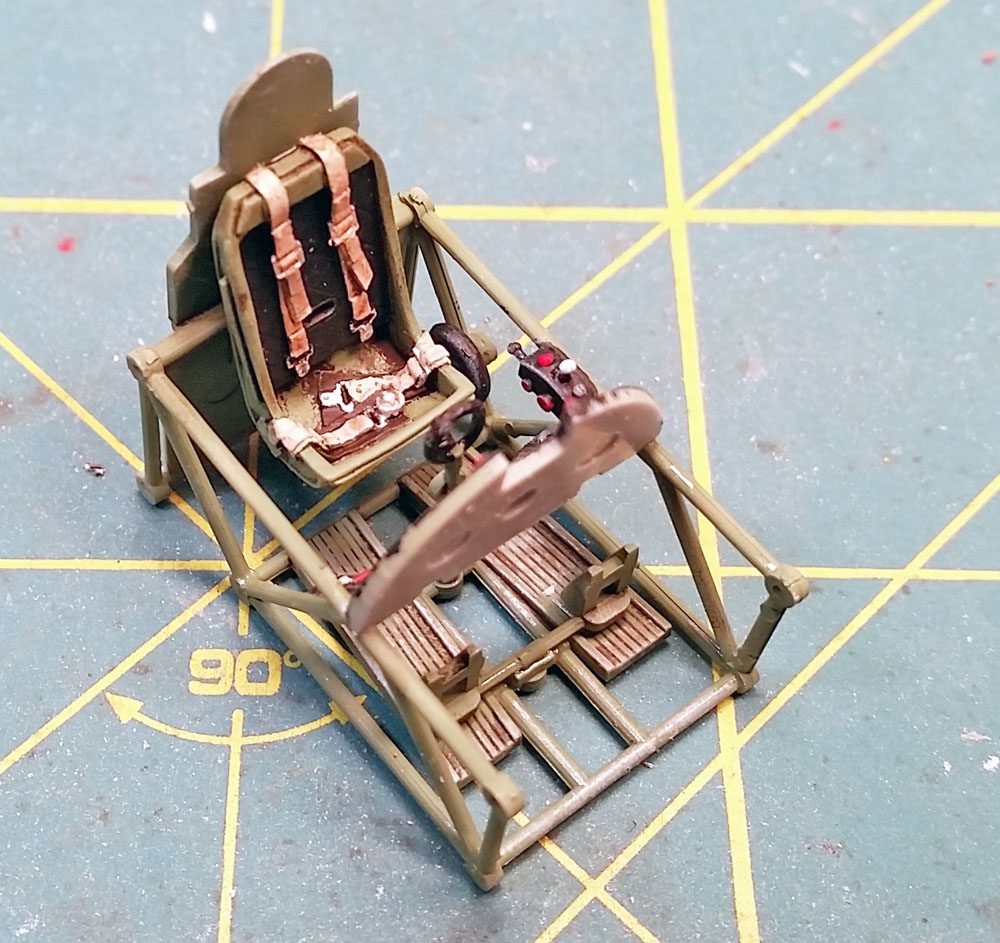
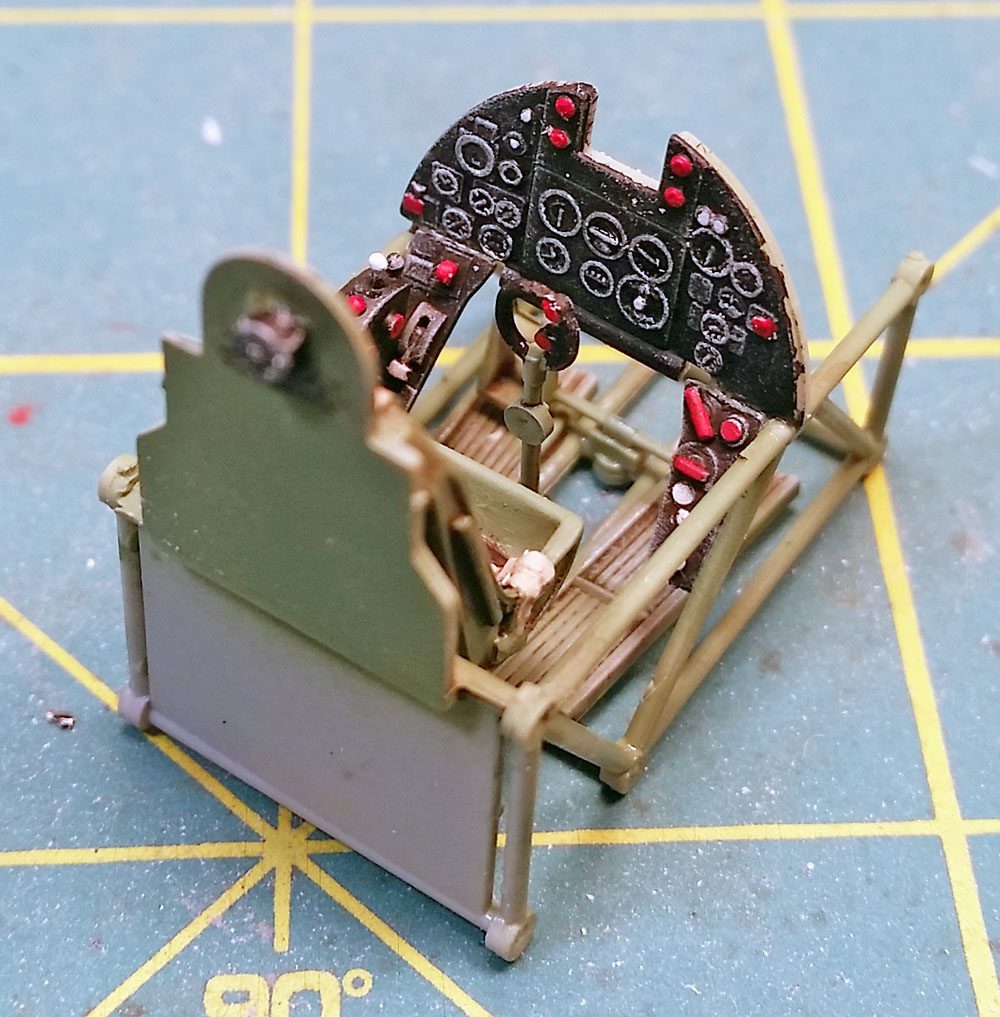
As with most Hasegawa kits, the cockpit was nicely detailed. Adding the Ultracast seat really made the whole interior shine, so to speak. (Despite the dull coat!) Some painting, dry brushing, and an oil wash really made it all stand out.
With the cockpit finished, I turned my attention to the fuselage.
I love Hasegawa kits, in general. They have great surface detailing, nice fit, and look really nice.
But those inserts have to go.
As with so many Hasegawa kits, they chose to use inserts to allow the same fuselage mold to be used for both the bubble top and car door Typhoon kits.
And I get the reasoning- it extends the usefulness of the molds. You can get more than one version out of it. But my objections to their use of inserts comes down to two points:
- If the idea of the inserts is to lower the cost of manufacture, you’d expect the cost of the kit to be lowered. But Hasegawa doesn’t seem to do it that way. They make use of the inserts AND they want to charge a lot more for it. It is possible to do- look at Eduard’s Spitfire series. Instead of the use of multiple inserts to allow for multiple types, they went with separate toolings for the variations, and still managed to sell them at a reasonable price. So it can be done, Hasegawa!
- The inserts just don’t fit. In every kit from Hasegawa that I’ve built that uses inserts- in addition to the Typhoon, the P-40 and Hurricane come to mind- the parts just don’t fit right. And they’re not cast along logical panel lines. In virtually every instance, the seam has to be completely obliterated, which often means losing some of the various nice surfacing detail that even careful rescribing can’t fully replace.
Anyway…
I added the inserts. I filled the seams. I sanded them smooth. I test fitted the fuselage together. Additional shims were needed to fill the gaps.
However, it was more of a pain than a problem, and when it was all said and done, the cockpit was nestled in the fuselage nicely, and all was well with the world.
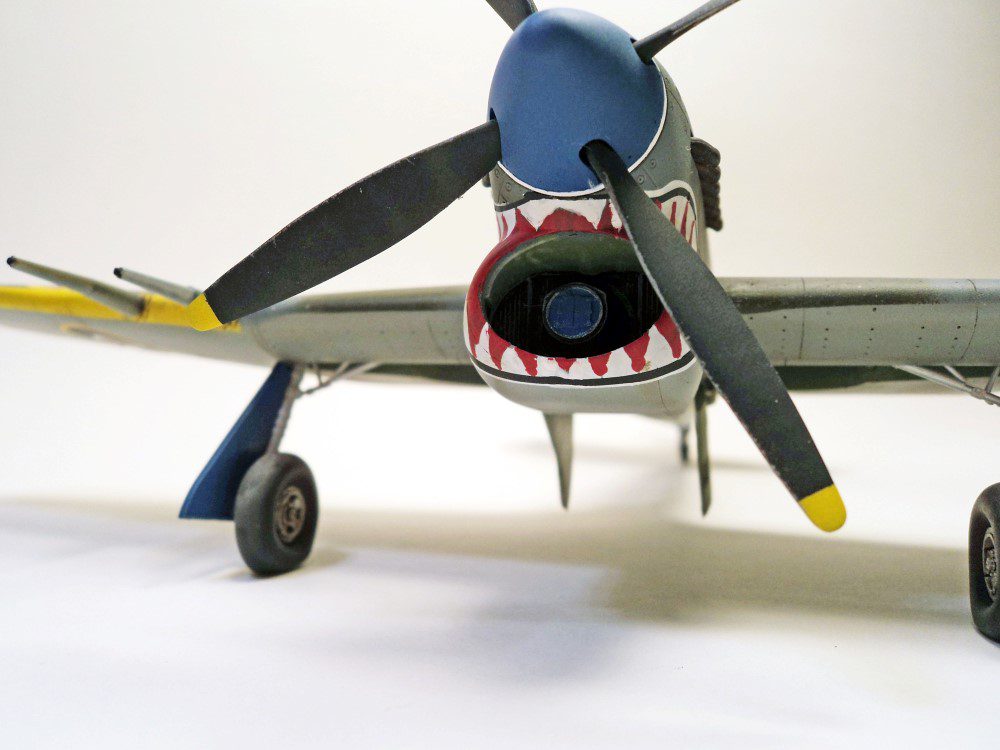
The kit has no proper tail wheel well, but Ultracast comes to the rescue with a simple drop in part. And their air intake replacement dropped in as well- no kit alteration was needed. And it looked much better than the kit part.
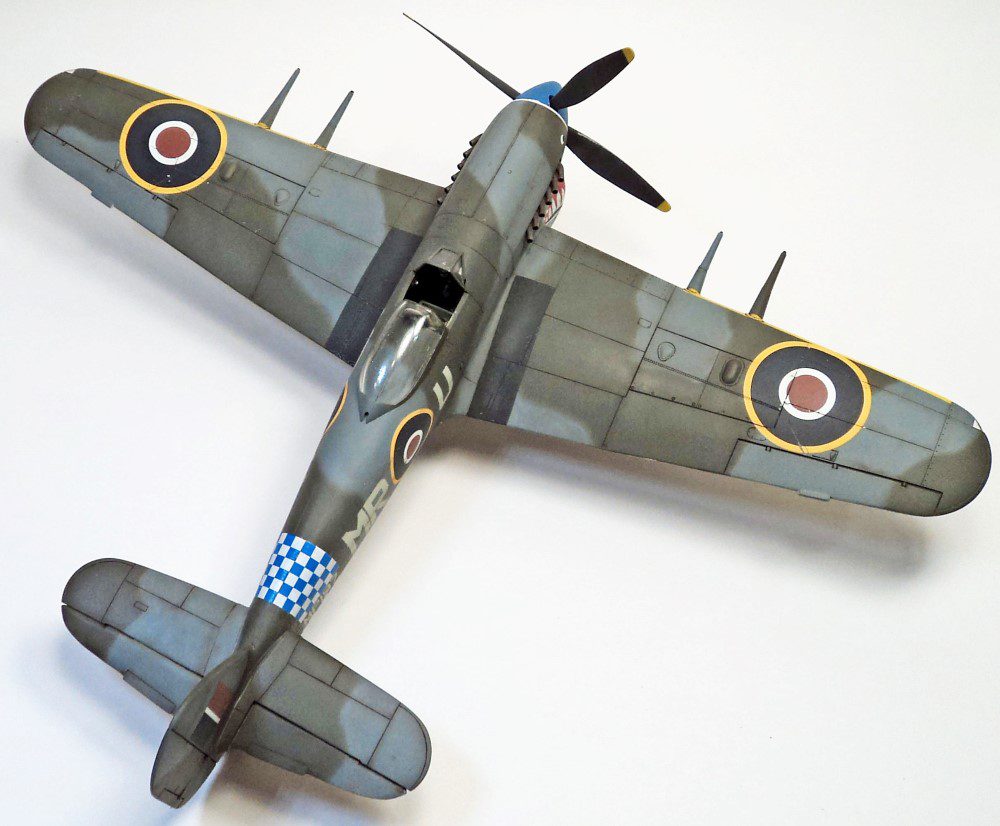
The wings went together with no issue, and fit perfectly to the fuselage. As I mentioned earlier, the aircraft I was modeling had larger, Tempest-style horizontal tailplanes. Ultracast’s answer to this was simplicity in itself. Their replacement tailplanes slipped right over the kit “stubs” with no fuss at all. I wish all resin parts were so simple.
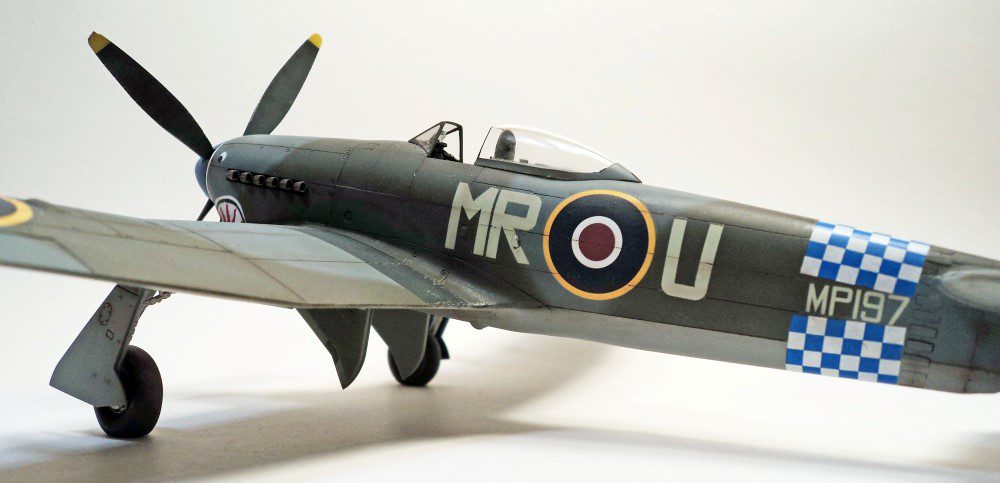
With the airframe together, I moved on to the painting. The colors were Tamiya’s RAF colors- XF-81, 82 and 83, which I go through quite quickly. With the paint on, and some light paint chipping in place thanks to a Prismacolor silver pencil, it was time to move on to the markings.
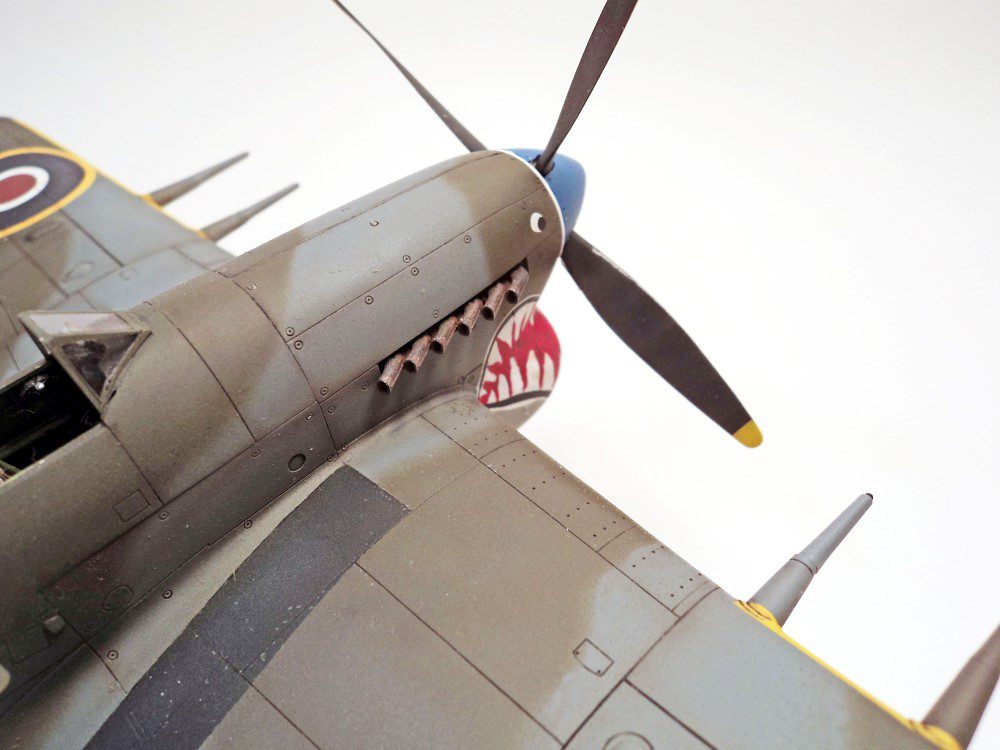
Looking at Aviaeology’s decals, they looked very well done. Very thin, glossy, and the colors appeared very good. They provided a good deal of research also, which was greatly appreciated. They noted that there are differing opinions regarding the sharkmouth. Some interpret it as having no color in the interior- just the standard camo colors- while others feel that some photos give evidence of another color, likely red. (Although I have seen it as blue in some models.) Leaving it up to the modeler, a red decal is supplied. Wanting a more colorful bird, I decided to go with the red interpretation.
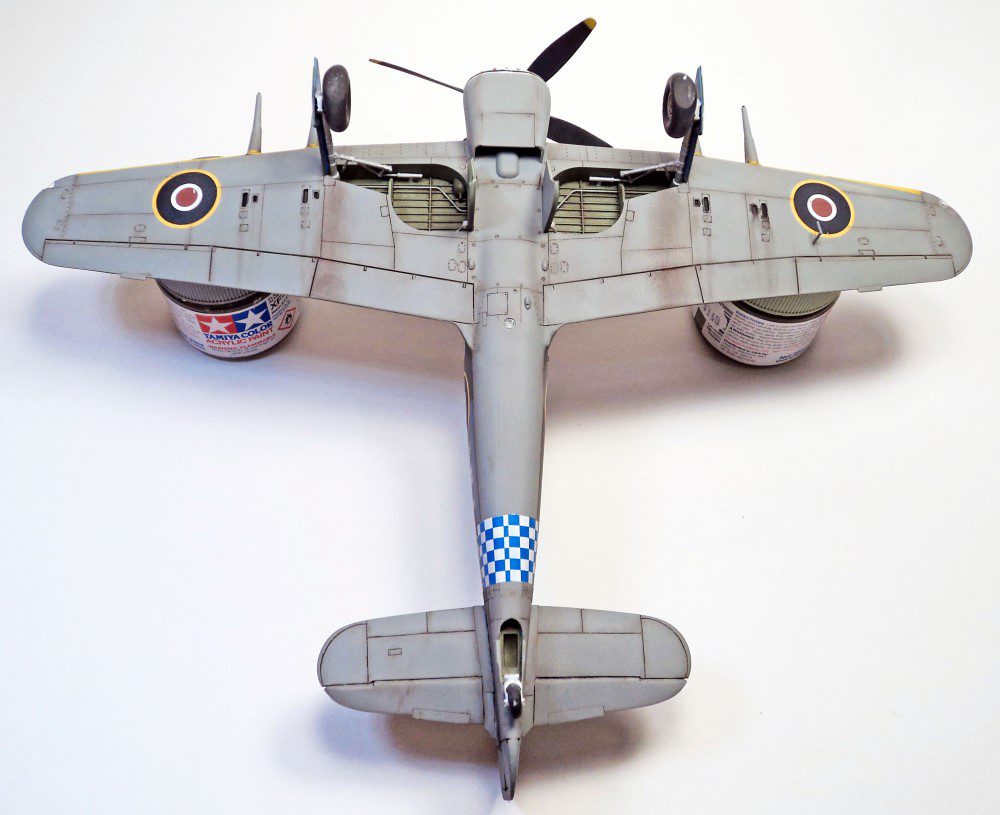
I started with the underside decals, which is normal procedure for me. This allows the decals to be tested for how well they adhere, react to setting solution, etc. If a problem aises, no worries. Who looks at the underside of an aircraft anyway?
With the first roundel in place, I thought the blue looked a bit too dark. Almost black. Comparing it to the kit decals, they certainly looked that way. But I’m stubborn. “Must be a trick of the light” I thought. So I pressed on. And promptly ran into another problem.
The upper roundels began to split. As soon as they hit the water and separated from the backing paper, cracks appeared in them. Again, being stubborn, I thought I could fix it, and continued on. Yet both the upper roundels displayed this problem.
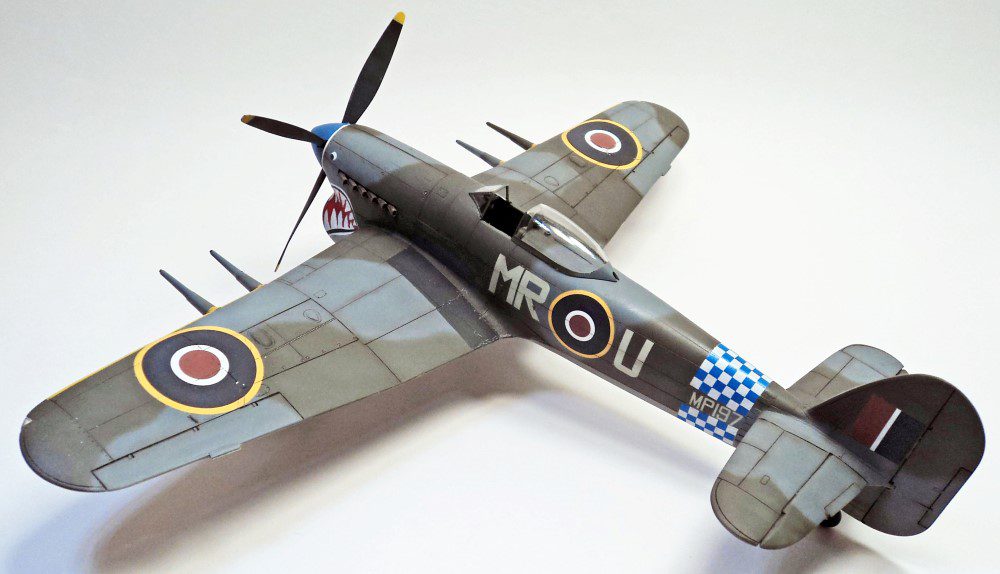
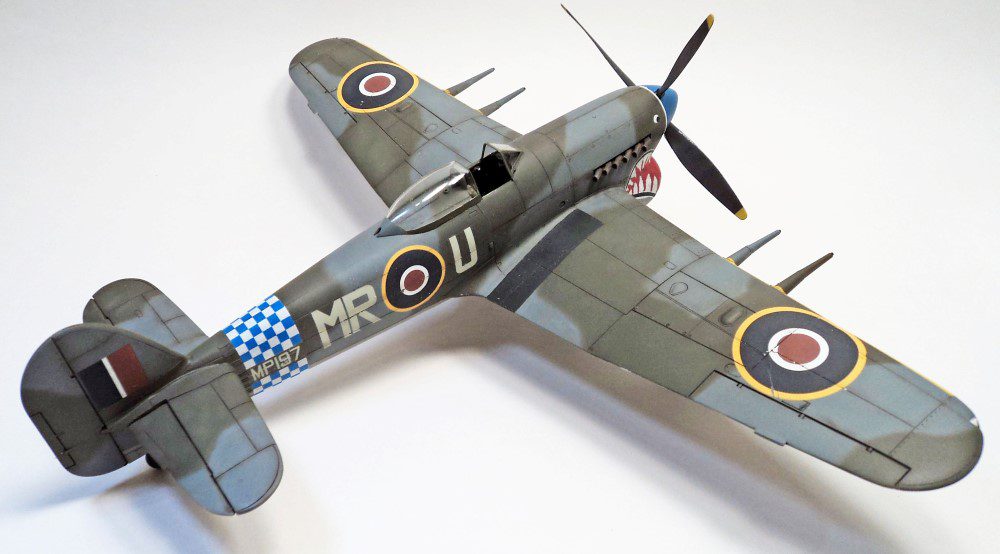
However, the side roundels, aircraft codes and checkered fuselage band went down fine, though getting the band aligned correctly was a bit difficult. I had to overlap some of the checkers on the bottom.
Next came the centerpiece of the whole build, my reason for going with these markings- the shark mouth.
Experience was shouting “cut the decal in multiple pieces”. Even the instructions suggested this. But pride said “I got this”. Well, circumstances howed my I most certainly did not.
The splitting problem creeped back up, this time in a more profound way. The red decal, which needed to go on first, pretty much exploded, and what didn’t explode folded in on itself, and was quickly unusable.
“Fine”, I thought. “We’ll go with the un-colored interpretation.”
Having seen the folly of not cutting the decal up, I did so this time with the white and black shark’s mouth. Again, though, the splitting reared its ugly head again. And worse, I could not make the decal parts fit.
No matter how I tried getting the decal parts oriented, they would not line up correctly and cover the area photos showed it should cover. I kept adding water and sliding them around, all to no avail. And of course, these attempts only served to further split and/or fold the decals.
Finally, I said “Enough!”, and proceeded to get the decals as close to how they should look as possible.
And made the decision to just say “to heck with it” and paint the rest by hand. Which I did.
From 3 feet away, it looks pretty nice. However, close examination shows the flaws, and how poor of a painter I really am when it comes to details like that.
But I finally had a sharkmouth on the Typhoon, even if it did need some braces to align everything.
The rest of the build was not nearly as dramatic. I only did some light weathering, with a bit of post-shading and fading (which actually made the roundels appear a bit more blue), and added on the final bits and pieces.
Of note was the Ultracast spinner and prop. The prop blades were so thin- just absolutely a thing of beauty. They were actually quite flexible, and not difficult to deal with. And they had a very positive stub that fit right into the spinner, setting not only the alignment but the angle very nicely. (Again- you can’t go wrong with Ultracast.)
With a final coat of Vallejo Satin Varnish to dull things down a bit, I called it finished.
Apart from the slight pain of dealing with the fuselage inserts, I can certainly give this kit a good recommendation. The overall fit and detail is very nice, and once you get the inserts on and sanded, it’s a wonderful build.
I’m not sure what to say about the Aviaeology decals. The colors appeared a bit too dark in some areas, and their tendency to shatter was disappointing. I had used some of their decals on a previous build, however, and I didn’t have the same problems. So perhaps I had simply encountered a set with some issues. But I definitely had problems with the sharkmouth decals. (Yet to be fair, I’ve never used any decals of that type that didn’t have some issue with fit and proportion.) I guess I simply will leave it up to the reader to decide for themselves.
I can, however, give an enthusiastic and unequivocal recommendation for Ultracast’s parts. I’ve used them to some degree or another on just about every build I’ve done in the last few years, and in every case they are flawless. They fit extremely well, have been perfectly cast, and look excellent. Even the placement of the casting blocks is modeler friendly and very logical. No matter what it is you are building, if Ultracast provides a resin part for it- use it. Period.
Overall, I was happy with the result of the build. Though the flaws can certainly be picked out, at a normal viewing distance, it looks pretty sharp, and I had fun researching this very interesting and important aircraft.



Leave a Reply