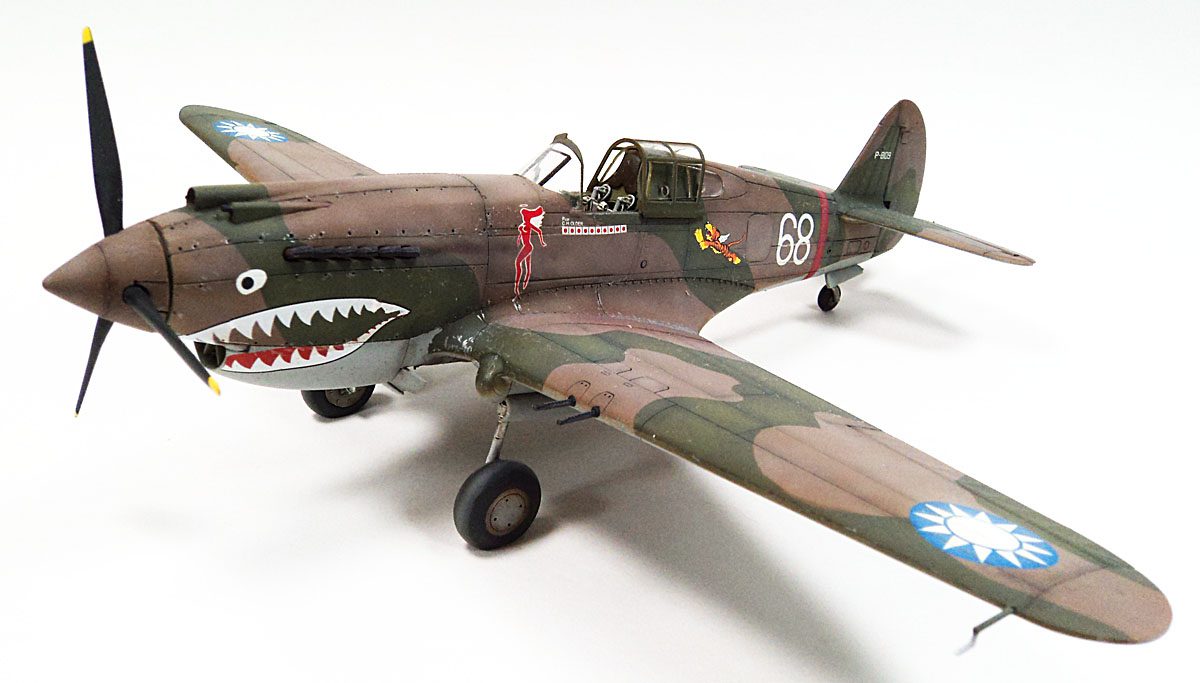
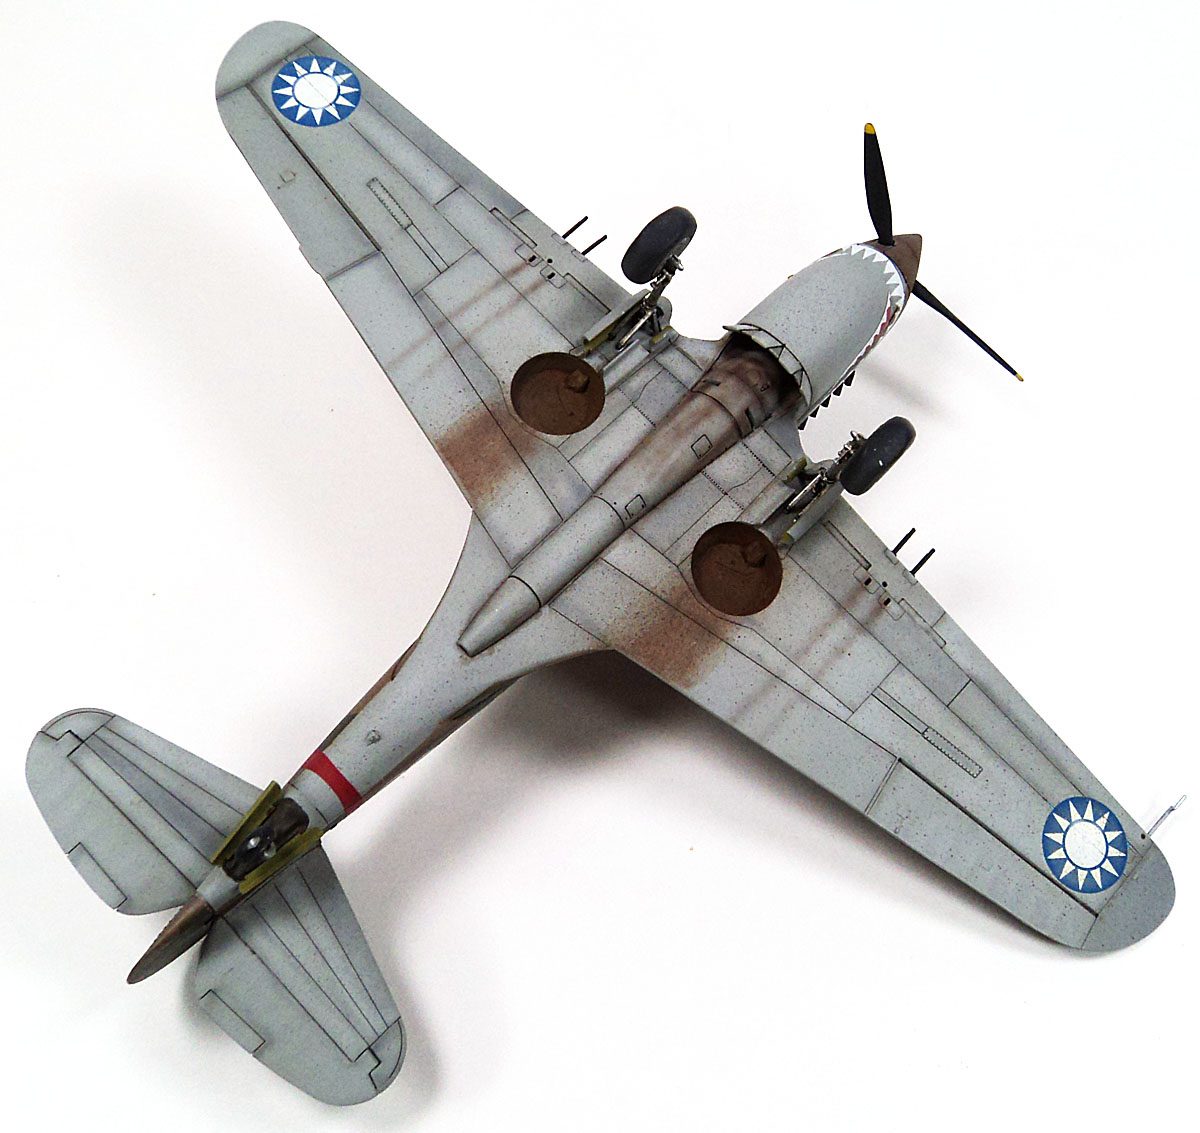
In the plastic scale modeling world, it would be hard to find a kit that has been more eagerly anticipated than a new tool P-40B. Previous efforts, while buildable and recognizable, were not entirely stellar outings. Shape and detail issues left the modeler with essentially choosing the kit that had the least number of warts for their own personal preferences.
So it was this arena that Airfix chose to step into in when they announced the kit in late 2015.
Some rejoiced, some began to dismiss the efforts without ever having seen the plastic. Some initial photos did warrant concern- most notably an obvious misplacement of the tail wheel opening.
But Airfix responded, correcting the issue, and released the kit into the wild that is scale modelers. (Which would be mostly middle aged, slightly balding, slightly overweight, generally out of shape, and needing to visit the bathroom at least once per night…. but who am I to generalize? 😉 )
Of course, the release of the kit only compounded the furor of a few, centering on something I’d previously never even heard of- the so called “nun’s hat”, which is a small area on the underside just aft of the cowl flaps.
To which I say “humbug”.
This is a great kit. Buy it, Enjoy it. Don’t make a habit of listening to the red line brigade. After all- we’re talking about a plastic toy.
Anyway…..
The kit is broken down fairly conventionally. Airfix had this kit produced int he UK, and the improvement of the tooling and plastic over previous efforts is immediately noticeable. While still not quite as crisp as an Eduard or Tamiya kit, the improvement is so significant that I can say quite honestly I was mildly stunned.
The cockpit is built up as a small unit all of its own, with detailed sidewalls, a nice IP, nicely detailed floor, and a choice of round or squareback seats. While the molding is just a tad bit soft around the edges, it’s still very good. I consider it one of the better efforts I’ve ever seen, in terms of detail, for a kit at this price point.
I did choose to use an Ultracast seat, as I prefer the look of the cast-in belts. And you can’t go wrong with their seats. The cockpit was painted in a homemade mix of Tamiya XF-4 and XF-69, which produces a nice “zinc chromate green”. Details were picked out with various Vallejo colors, and the thoughtfully supplied cockpit stencils were a nice final touch- bravo to Airfix for including these.
Assembly of the fuselage was straightforward. At most, a good sanding was needed along the seams to eliminate the glue join marks.
The wings were equally well fitting, with again nothing more than a good sanding with a medium sanding stick needed to smooth out the glue joins, and just a bit of Mr. Surfacer at the aft wing-to-fuselage join.
The one area I did have concerns about initially was the use of separate wing filet parts where the fuselage and wing assembly joins. My previous experience with these on other kits had not been good. However, Airfix did their homework, and the parts fit almost perfectly. On one side I did “blob” in a bit of Mr. Surfacer, and having let that dry, used a cotton swab dipped in alcohol to smooth the area out. It wasn’t a really too bad to begin with, but I saw that a simple fix would yield a much smoother transition. Many modelers would likely pay no mind to it at all- it really was trivial in terms of its appearance.
With that sorted out, and the tail planes added, I began to paint. The lowers were painted with a light gray, Tamiya XF-80, and various shading and fading was done with white and dark gray. A similar process was used on the uppers, using XF-72 as a close cousin for dark earth, and XF-81 for dark green. (For a detailed look at that process, please visit my personal blog.)
With the paint on, I began to the decal process.
The kit decals, while very good in print quality, have one drawback with the Chinese Air Force roundels- they’re missing a “point” to the star. Plus, I wanted to do something other than white 47, which was the AVG marking included with the kit. I decided to use some aftermarket decals from Sky Models decals, specifically Curtiss P-40 Part I, #48-047. While the decals were of very high quality, the CAF roundels were a horrible- almost a sea foam green color. Of course, I had convinced myself that once on the model they would look fine, a line of thought that proved to be false. Utterly false. They looked awful. So out came the clear packing tape, and I pulled them off, and searched through the spares box until a suitable set was found, though their origin is unknown.
I did use the shark’s mouth decal from the kit markings, a I hoped the kit option would fit the curves of the aircraft better.
Nope.
Now, I don’t really blame Airfix. I’ve built A LOT of those shark mouthed P-40s, and used decals from a variety of sources. None of which fit easily. They all require some give and take, some slicing apart, some additional hand painting to correct mistakes, and generally a great dose of patience.
But with all the markings in place, from the variety of sources I chose, it did look the part.
Washes were done with various Ammo of Mig Panel Line Washes, which I’ve recently started using. And you could not get me to part with them. Excellent product….
The landing gear were added, and I thought Airfix did an especially good job capturing the various bits that make up the P-40s legs. They also did a great job on the shape of the small gear door.
I also made use of Ultracast exhausts. While the kit exhausts were certainly good, the Ultracast replacements were simply better looking all around, and I highly recommend them.
With all the various dangly bits added, the kit was given a coat of Vallejo Satin Varnish, canopy masks were removed, and I was able to admire Airfix’s P-40B kit in its final state.
Great job Airfix!
All of the red lines and detail nitpicking aside, this is the best P-40B kit you can buy. It presents no troubles to assemble, fits nicely, and captures the look of the P-40B extremely well. I hope Airfix sells these in gobs, as it will further encourage them to take on interesting kits, and execute them to a high level of precision.
And it can be had for under $25. That is truly remarkable.


Leave a Reply