I can’t recall precisely when I started doing “weekend builds”. Or even why I started doing them.
At some point a few years ago, I had a long weekend off from work- three or four days. The idea struck me: “I wonder if I can build a kit over the long weekend?” So I grabbed a relatively simply kit, went to work, and a few days later- within the time frame I targeted- I finished.
It didn’t look bad. It wasn’t my greatest work ever, certainly. But it pushed me, and I enjoyed seeing how quickly I could solve problems and get things done.
Since that initial time, I’ve made it a sort of “tradition” to do this type of build for fun on holiday weekends. I’ve done a 72nd scale Chinese J-10, and a 48th scale Hawk 200, over recent long weekends. I took a little longer on Thanksgiving break to build a 72nd scale F-20. I even pulled off a 72nd scale F-5E in one day on New Year’s Day 2017… that was a stretch.
Yet in every case, the kit I chose was picked because it was a simple, no frills, no fuss build.
So as Memorial Day 2017 approached, I began to consider what kit I wanted to attempt. Taking a vacation day on Friday, and having Monday off as the holiday, would mean I had four (mostly) full days to work with. Being on a bit of a US Navy early/mid Cold War kick, I began to look at possible candidates. The Hobbyboss FJ-4 Fury certainly looked good, as their kits are generally no fuss at all. I considered a Hasegawa A-4, too. Several others were Googled, looking for a good option. But then a thought crept into my head, one that I wondered if later I’d regret…
Why make it easy?
Famous Last Words?
I mean, there is a certain “wow” factor when you can say “Yeah, I finished that in a day/two days/etc”. (Well…. a “wow” among middle aged, overweight, balding, diabetic men who play with plastic toys…. 😉 ) But there’s always an asterisk… “Well, it is a simple kit.”
Could I build a not-so-simple kit in a long weekend?

That’s when my search for a subject turned up the KittyHawk 1/48 F2H Banshee.
I read a few reviews, and it did sound like a challenge. Everyone agreed it could be built. Plenty of examples of that. But the general takeaway was, in essence, “this is no weekend kit.”
In fact, based on what I read, it was as if the motto for KittyHawk was “All the research of HobbyBoss, all the engineering of Special Hobby.”
Huh….
So being a (former) paratrooper, I did what comes naturally to me. I (figuratively) threw caution to the wind and jumped out of a perfectly good airplane. And I hoped my parachute would work.
The Prep Work

Of course, I have learned from previous efforts that some prior planning before a weekend build makes the experience much more enjoyable. A little intel work pays off greatly, and allows the focus to be on the build- not figuring out how to build it.
I spent a few days prior examining the parts, the instructions, build reports, and photos of the actual aircraft. The result was a “production list” that essentially modified the instructions to account for the challenges previous modelers had noted- all the time knowing full well I’d probably run into a few more.
A weekend build also means making some decisions about accuracy, detail, and finish. Generally, major corrections of engineering mistakes simply can’t be done. A few minor adjustments here and there, yes, but issues of shape are mostly thrown out the window. And the use of aftermarket parts, except for true drop fit types, must be ignored. And it helps to pick a color scheme that doesn’t require a lot of color variation.
Thus, I decided to simply ignore the accuracy issues, minimize the use of corrections, confine aftermarket parts to seat belts (pre-painted to save time, thanks to Mr. Eduard!), and stick with kit markings- and an overall blue finish.
When Friday morning rolled around, I got up at my usual 4:00 AM and began work.
Diving In
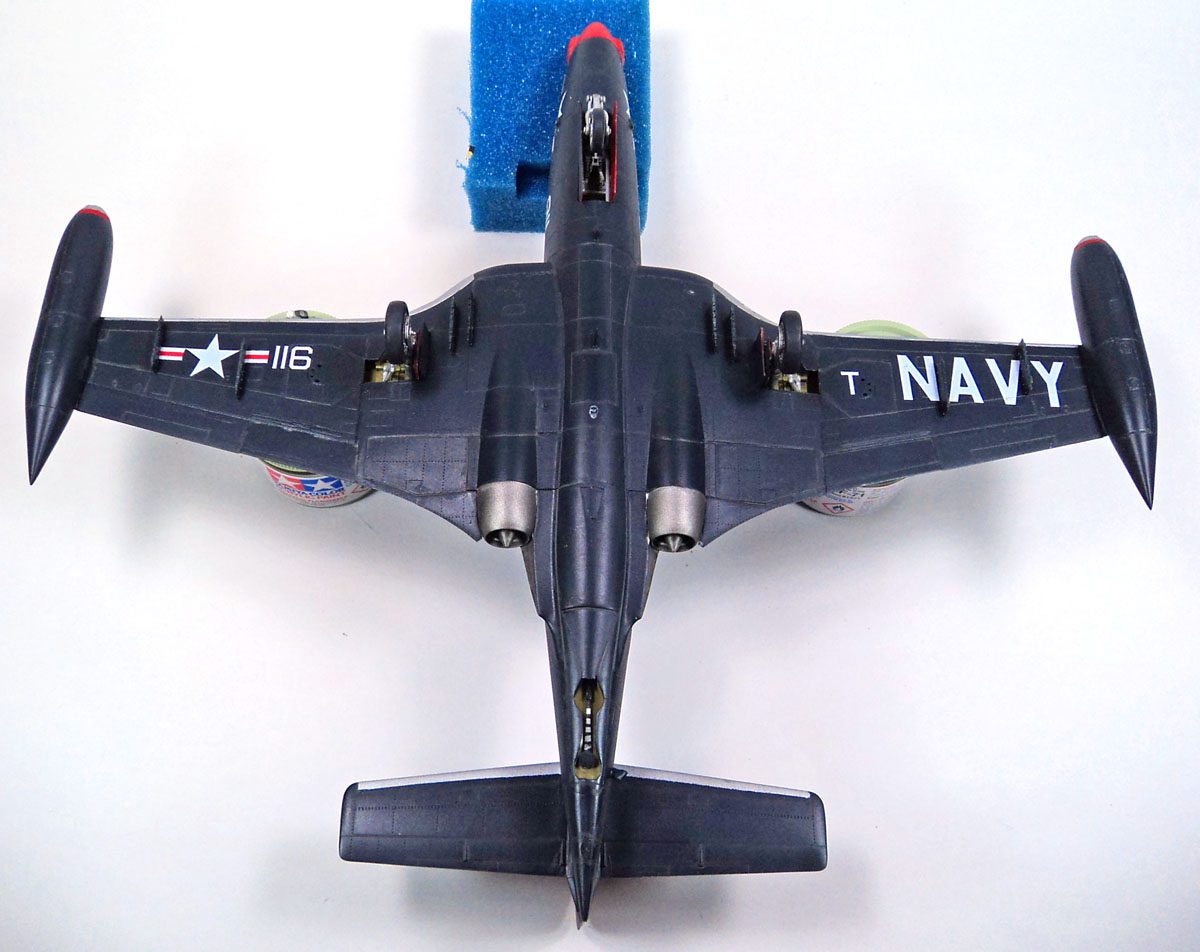
I started with just gluing together some sub-assemblies. Engine halves, gun covers into the nose, and parts cleanup. I moved on pretty quickly to basic paint work- painting all the gear door interiors red, landing gear bay parts interior green, cockpit black, and gear struts silver.
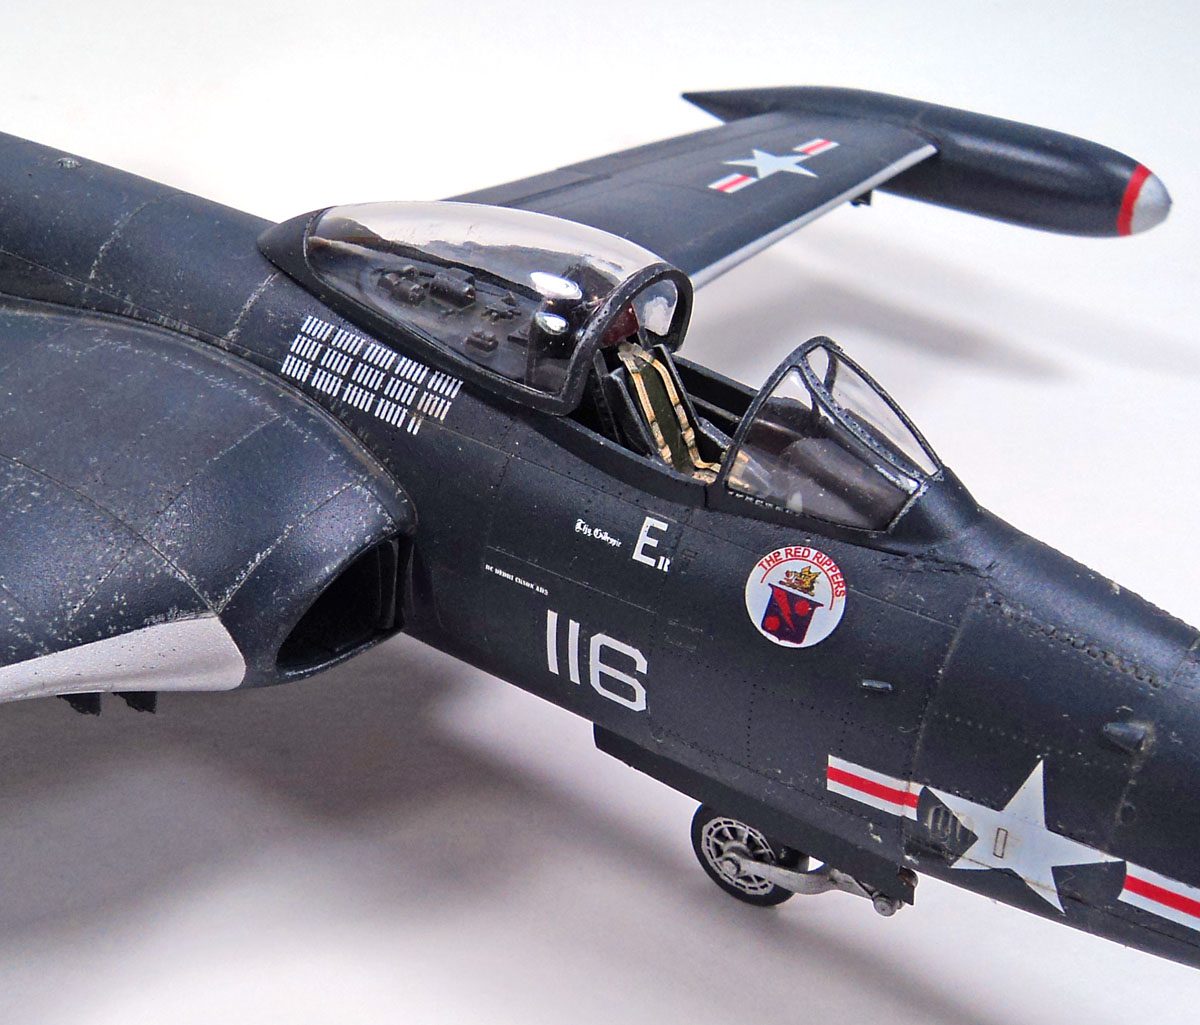
Next I painted the details and assembled the cockpit parts. I found the seat to be a decent little assembly. It’s not quite accurate, but it does the part. I added Eduard seatbelts to complete that. I wasn’t real happy with the control column that came with the kit, so I nabbed one from Monogram’s F-101B Voodoo kit. (They’re both McDonnell aircraft, right?)
Prior to gluing the sidewalls and back on the cockpit floor, I did a little test fitting. I’d read this was a problem area so I wanted to approach it carefully. However, taping the parts together showed no problem and a test fit into the fuselage was dead on. The only deviation from the instructions I made was to leave off the rear deck area as that would be simple enough to add after fuselage assembly.
The First Hurdle
Next up was the nose gear bay and assembly. I’d read this particular part was atrocious, and more than a few reviewers called it horribly over engineered. So I approached it carefully. As I mulled over the instructions, and did some test fitting, I realized I must be doing something wrong.
Because it made perfect sense why it was engineered the way it was. And it fit. Perfectly.
The Banshee’s nose gear a pretty complicated assembly. In early models, it was actually designed to “kneel” down, allowing the tail to rise up, giving extra room for more aircraft to be parked. While this was abandoned by the -2 model, the nose gear assembly stayed. I’m not sure how I would have engineered the kit part differently to make it look right.
I looked at the parts, and though I found I could have left off adding the fork that holds the nose gear, and its associated supports, until the end, I decided to do it all as one unit. Then, just as the instructions showed, I glued the fore and aft gear bay parts to the “ceiling”, then the left sidewall. The small piece of tubing was added, then the nose gear was placed into the left sidewall. There are two pins per side, and those mount into the sidewall in small “U” shaped receptacles. I left the landing gear assembly tilted just a bit, added the right sidewall, and used the tip of my x-acto knife to push it into place. A touch more glue to make sure it all held, and I set it aside.
Now, I don’t doubt people who said they had trouble. I just don’t know why they had trouble. Apart from mounting the wheel (which I left off until the end), I simply followed the instructions, looked at the parts, tested it, and glued it together. (I also left off the small mounting tabs for the gear doors, knowing I’d knock them off otherwise.
With the cockpit and nose gear done, I decided to test fit the assemblies into the fuselage. So I mounted them both in the tabs to assist alignment on one fuselage side, carefully added the other fuselage side, and….
Perfect fit. So good that I went ahead and glued it. Well, the forward half. I left the aft part unglued, and carefully positioned the arresting gear “trough” in place and once there, I glued it in, as well as a small air scoop recess, and finished gluing the fuselage. Again – perfect fit.
The Next Hurdles
Apart from some sanding of the seams to smooth things out, that was set aside to focus on the wings.
Most of the chagrin I’d noted from fellow builders had to do with the wings – the difficulty installing the intake parts, the fitting of the outer wings to the inner (if doing them spread and not folded), and the fitting of the airbrakes in the closed position.
The small airbrake parts were easy enough to deal with – glue them in ahead of time and back them with a sheet of styrene. That problem was solved.
Virtually all reviewers noted the difficulty of aligning the air intake parts into the upper and lower wing “shells”. I’d deliberately left those parts off the engines, going against the instructions sequence of adding them as part of the engine assembly.
With only the engines themselves assembled, I test fitted them into the lower wing half. With those in place, I then added the intake parts, leaving them unglued so I could adjust. With those in place but unglued, I tested the fit of the upper wing part over it.
It was virtually a perfect fit.
I realized that the most likely problem others had run into was following the kit instructions, and gluing the intake parts to the engines ahead of time. This would leave no room for adjustment. By waiting to add those parts, I could focus on aligning them to the inner “lip” of the wing part, which is where it really needed to fit. It mattered little if the join to the engine face was perfect – what was seen was the intake lip. Glue that first, and all was good.
With that issue bypassed successfully, I moved on to the problem of joining the inner wing/intake assembly to the outer wings.
The Last Big Hurdle?
In this area, I saw why people had problems. If you build the kit with wings folded, great- no issues. But with the wings extended, there is really no mechanism to join the outer wing pieces to the inner wing pieces.
I’d read Michael Benolkin’s “bare build” at Cyber Modeler, and in that build he’d assembled the kit just as the instructions suggested. I contacted him to see if he thought pre-assembling the inner and outer pieces would help address the situation. He replied in the affirmative, and suggested the use of plastic “spars” to reinforce the join.
I did various test fittings, and found that the best solution was to use Evergreen 1 x 1.5 mm strips as reinforcement on the upper wing join. Doing this would allow for a firm base to hold things together, and allowed for the dihedral to be set. I made sure to do some test fitting to ensure clearance around the outer gear bay parts. I glued the strips to the outer upper wing part, then glued that to the inner part, and then added glue along along the wing fold line. I looked at it head on and made some adjustments to the dihedral. The aft Evergreen strip could be glued to the inner part immediately, but I let it all set for a bit before clamping down the forward strip, as it had a bit of curvature to deal with. With that set, I then reinforced the fold line with a small piece of sheet plastic, and set the upper wing parts aside to dry.
When those were full set, I finished assembling the wings. Because I’d set the wings to have a bit of dihedral, when I added the lower outer wing, there was a small gap between the outer and inner parts on the lower wing. That illustrated why people had so many problems- if you assemble the outer wings and then try to glue them on so both upper and lower pieces fit, you will have anhedral- or a big gap, and nothing to affix it all to except a butt join.
To correct the small gap, I simply stretched some sprue, applied it in the gap with copious amounts of Tamiya Extra Thin Cement, and once dry, I sanded it down and rescribed lost detail. I could have filled it with putty but it needed some structure to strengthen it, so sprue worked nicely.
With the wings completed, I did a test fit to the fuselage… which required a good bit of force to get it in place. I had to angle the forward part down, slide the aft part in, and then rotate the forward part up. The upper wings and fuselage have a really sweet tab and groove arrangement that made for a perfect fit – no gap at all. The underside wasn’t so good though. The join fore and aft left a pretty decent gap- more stretched sprue to the rescue, and I sanded that down.
I added the tailplanes, and then the flaps (in the closed position), and had a mostly complete airframe. While there were a few challenges, none of it was outside of the scope of a modeler with a few builds. And quite frankly, it wasn’t near as bad off as I’d believed from reading what others said.
All of the seams – flaps, airbrakes, tailplanes, etc., etc., needed a covering of Mr. Surfacer and a wipe down with a Q-tip and alcohol to get rid of hairlines seams. I needed to do surprisingly little sanding.
Droopy The Tank
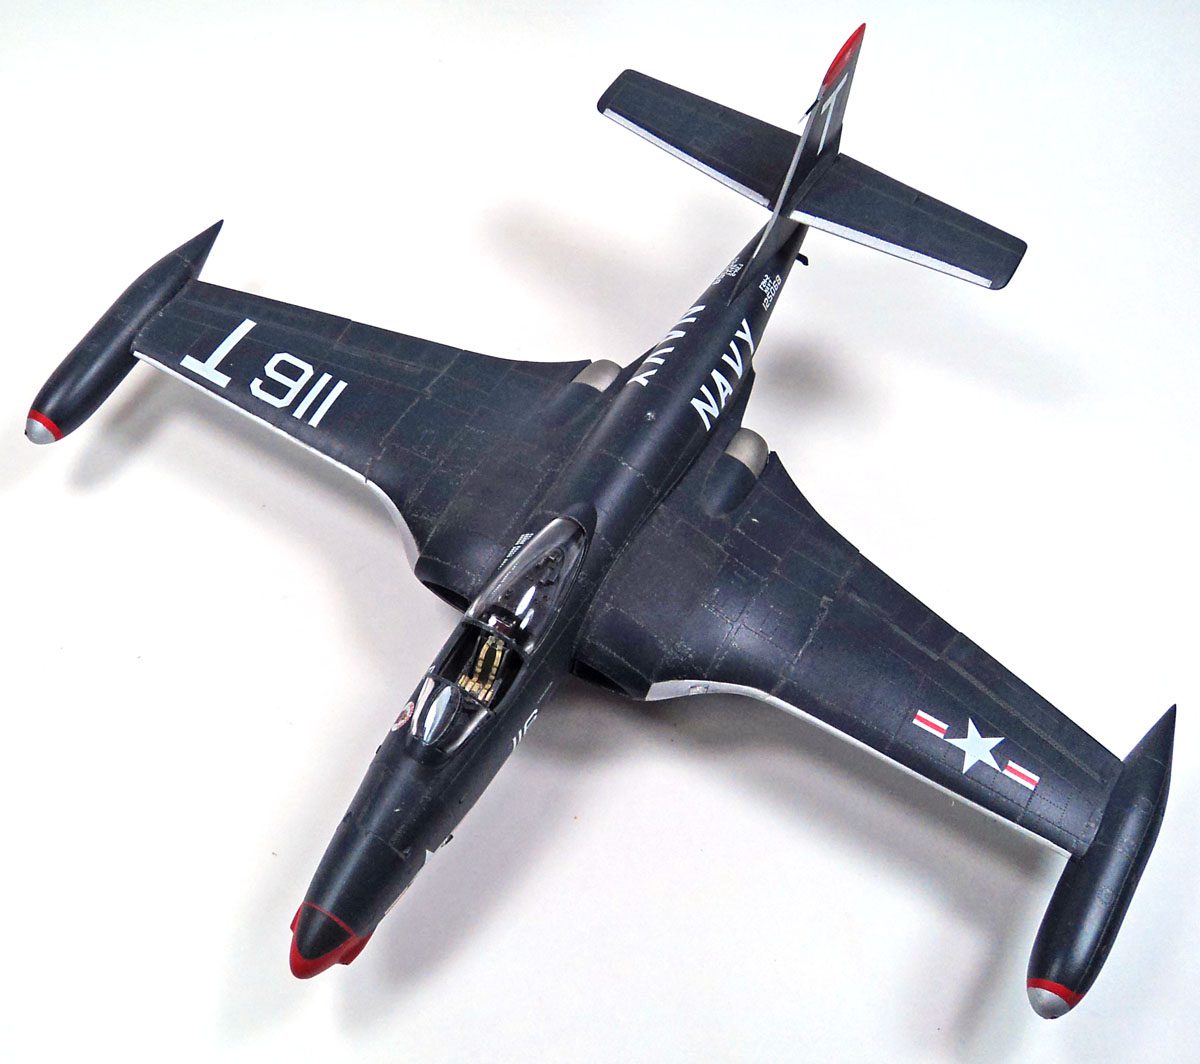
The last thing I did before starting to paint was add the wing tip tanks.
This was another area that people mentioned having problems with. It appears most folks- logically, I suppose- tried to center the tanks on the wing tip, when viewed from the front. But that’s not how the Banshee’s tanks worked. They had some droop. In fact, about the exact same droop you ended up with if you slid the tanks on the wingtips and rotated them down a bit.
Research also showed the tanks on the real airplane were designed to be interchangeable, so be sure and paint red AND green lights on both tanks- just reversed.
With the tanks in place, it looked like a Banshee.
On To The Paint
I normally use Tamiya paint, or Vallejo. Having decided on this build too late to order the correct shades from those manufacturers, I did what I swore I’d never do again- I purchased a bottle of Model Master Acryl.
Briefly, the “why I hate Acryl”- bad tip dry, no adhesion, gums up the airbrush, replaced Pollyscale. (You killed the wrong line Testors!)
Anyway… knowing I could not mask over the top of the Acryl, because it is to the paint world what Special Hobby is to the plastic world (they suck), I knew I’d have to paint everything else first, and then mask it all off, and blow over the top with Acryl.
So out came the Tamiya paints for the silver, red, and black, and then came the Tamiya tape for some overly complicated masking. Finally, a coat of primer brought it all back to gray, and out came the Acryl.
It was…. not horrible. I thinned it with Vallejo Airbrush Thinner, and added some Vallejo Retarder Medium. It went on the model nice and smooth, and though the tip dry was bad, it was only on the tip of the needle, no clogs. Of course, cleaning was a monster. That acryl will gum up anything. But it looked good.
I did have to touch up a few places with more Acryl. My fingernail literally brushed against one of the wings, and the paint peeled off like an onion.
Did I mention I despise Acryl?
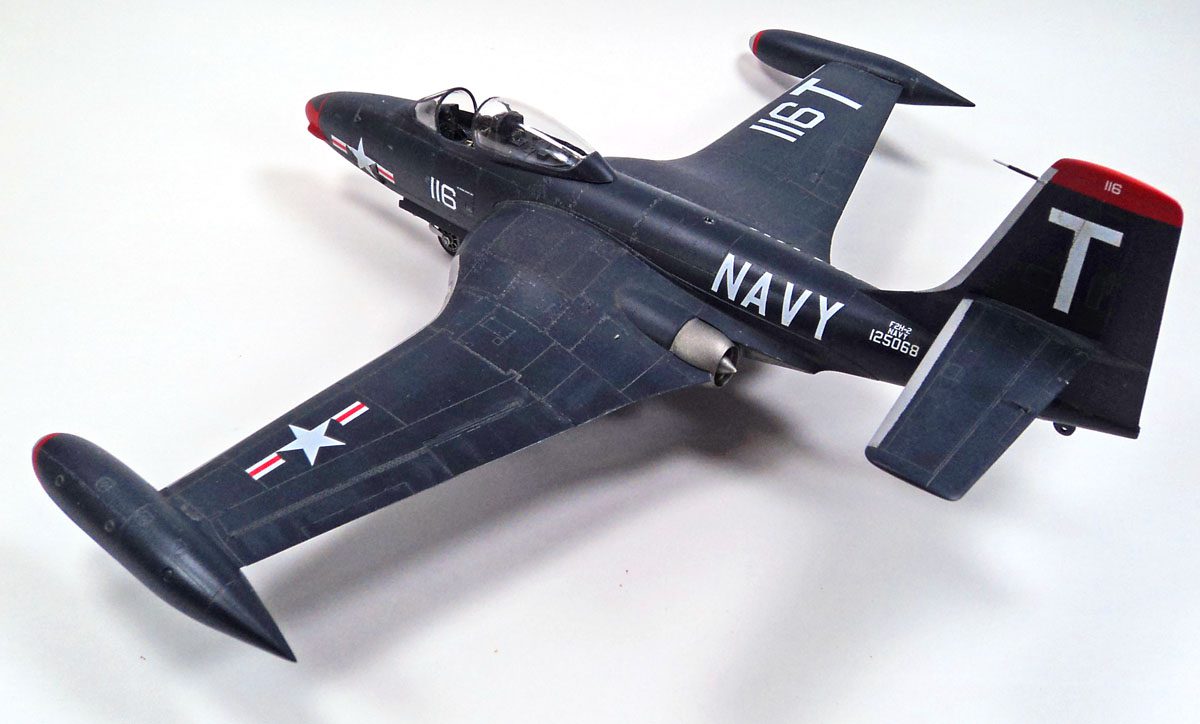
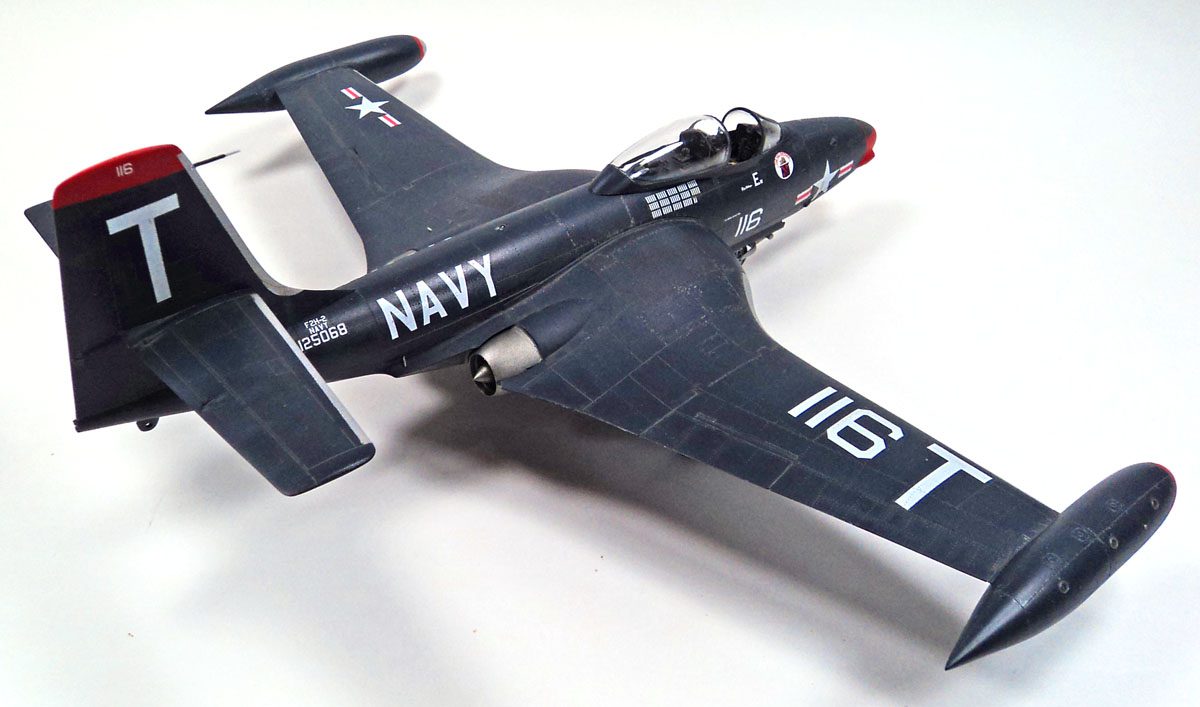
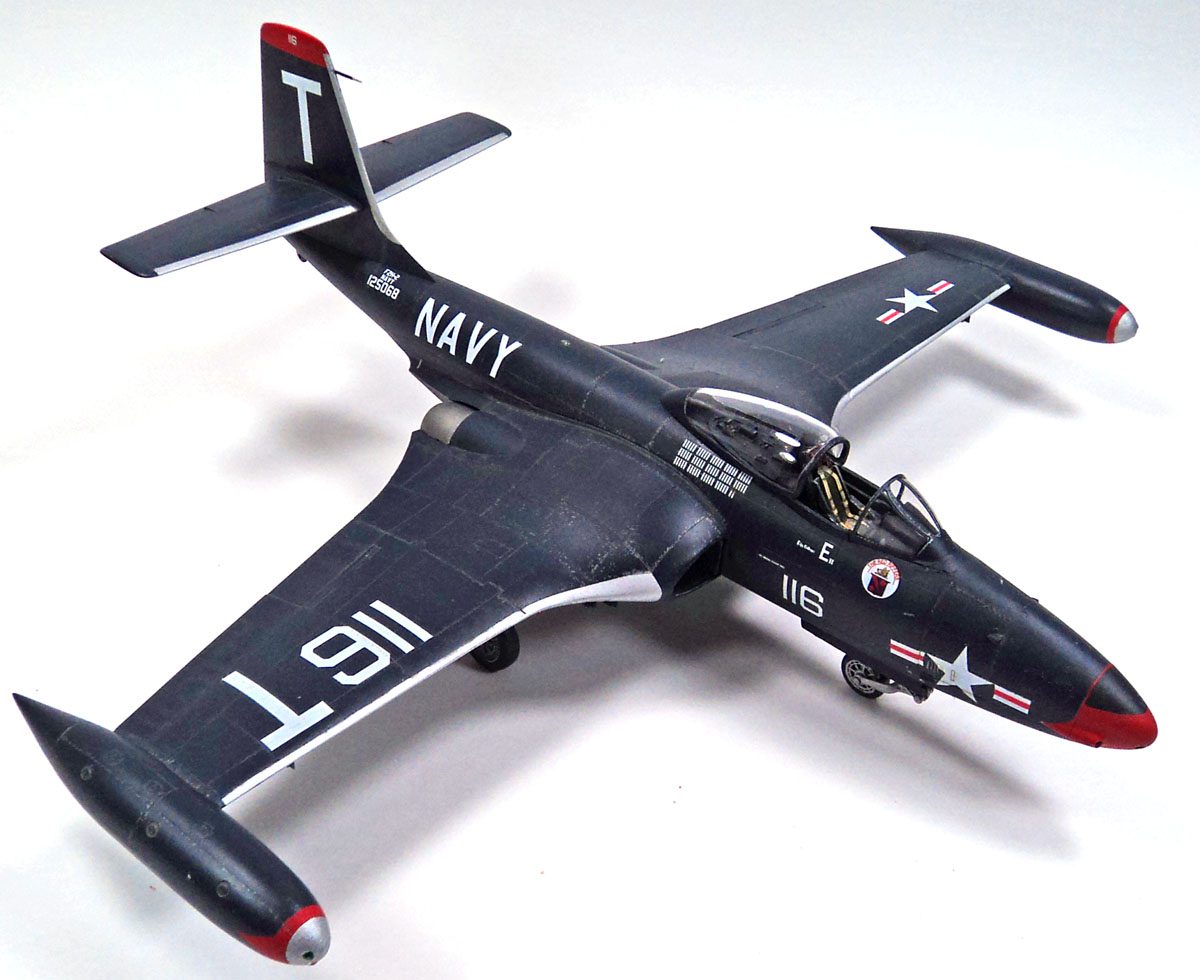
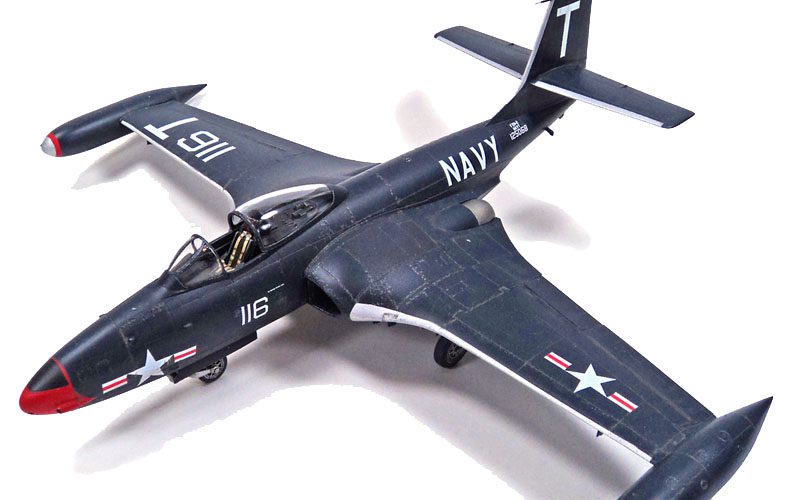
Off came the masking, and with the exception of a few places that needed touch ups, it looked pretty decent. I did some initial weathering, gave it a coat of Future, and pulled out the decals.
Tripped Up When I Least Expected It
Up until now, I had been pretty forgiving towards the kit. Yes, it had been a minor pain in a few areas, but nothing that was overly difficult to solve with a little research and logic.
But those decals… they went on, but they were really bad. The only comparison I can make is to a few brands of Eastern European/Russian aftermarket sets that I’ve used. Very thin, but the white color was full of bubbles, the finish very matte, and fighting silvering was a constant battle. They’re not ICM bad, but they’re not much better either.
Through it all, the only time I really wanted to send the little Banshee flying across the room was dealing with the decals.
But I finished.
Wouldn’t You Know It

And I happened to check Facebook… literally right after finishing the decal process. Furball Aero-Design had just announced an upcoming set called “Sea Blue Banshees”, especially for the KittyHawk kit.
But of course…. that is how my luck goes.
I applied another gloss coat, and then a wash of Ammo of Mig Panel Line Wash. The main gear struts were added, as well as all the gear doors, wheels, and other assorted bits. The whole airframe received a coat of Vallejo Satin, and then some areas were streaked with Vallejo Flat. I added the seat, the canopy, and called her done.
A Bit Of A Puzzle
This kit has left me seriously scratching my head. It certainly was not what I’d expected by reading reviews.
I liked it, a conclusion I didn’t expect. And I certainly didn’t think I’d finish by my self-imposed deadline. But I actually finished a few hours before when I thought I would.
I’ve read a lot of bad build reviews of KittyHawk kits. (And some good, to be fair…) I was expecting something on the order of the Special Hobby Il-10, a kit which actually drove me from the hobby for a 3 month sabbatical.
And while this one took some thought, and a bit of model engineering, it wasn’t hard at all. Unlike Special Hobby kits, when all of the burrs and flash were sanded away from the Banshee parts, things actually lined up.
The only real criticism I can level at it, when compared with other kits of similar quality, is the outer wing should have included something to make mounting them a little easier, and… those decals. Just… no. Get Furball to do them next time. But the stuff in the kit… no. If you build this model, toss them and go with aftermarket.
I don’t know if this one is representative of other KittyHawk kits, but if it is, I’m going to be building a lot more of their models.
I can recommend this kit, without hesitation, to any modeler who has just a little experience with basic problem solving. You’ll end up with a really cool McDonnell Spook when you’re finish!



Leave a Reply