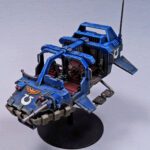
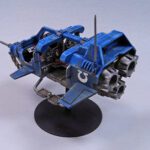
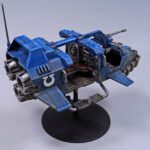
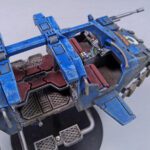
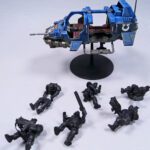
I’m not sure exactly what stage of completion I’m at with my Games Workshop Space Marine Land Speeder Storm. The kit consists of the vehicle, and six figures. The Land Speeder Storm is completed, but the figures are simply primed, waiting for paint. So I can’t decide if I’m halfway complete, using a standard of weight and volume, or if I should go strictly by the elements of the kit, at which point I’d only be 1/7th complete. I never was very good at the maths though, so I may be wrong on the numbers anyway.
However the numbers shake out, I can say I really, really, REALLY enjoyed putting this vehicle together. It’s not overly complicated, the parts count is in the “very low” range, and it all just fit. Not Bandai fit, but darn close.
First, everything was primed with Badger’s Stynylrez Black Primer. I did not have any of the Citadel primer, but I did spray it chaotically, so hopefully that counts.
I started by building just the interior sections, and painting them in various Citadel colors. The primary drawback I saw to the kit was what seemed like an extraordinary dearth of instructions. Coming from an aircraft background, I was looking for color call outs and detailed shots of assembly. But the instructions are pretty much “stick this generally here”. However, I realized that like a Gunpla, it’s almost impossible to assemble this thing wrong. If you’re not sure where something fits, try the logical options. Only one will work.
I also began to embrace the simple fact that this was not a real object. Paint it like you want. I suppose in the gaming world, the key is “does it have correct overall color? Macragge Blue? Ah, you must be Ultramarines.” The rest is pretty much up to you. I realized I liked the implied freedom.
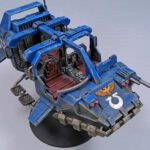
The interior was heavily drybrushed with Leadbelcher, then given a wash of Nuln oil, and then highlighted with Runefang Steel. Seat pads were painted first with Rhinox Hide, then shaded with Agrax Earthshade. (If you have the Citadel Paint App I bet you can guess the next two… 😉 ) Areas were highlighted with Doombull Brown, and then edge highlighted with Tuskgor Fur. (All properly thinned and, well, applied in two thin coats, per Duncan’s instructions. Naturally.)
Various knobs and buttons and lights and things that go “whirrrr” were painted with reds, yellows, greens, and white. All was then given a wash of Nuln oil, and then parts were highlighted and drybrushed to bring out edges.
Moving on the outer shell, everything minus the front bumper and the dangly bits on the bottom were attached. A few areas received a bit of sanding to smooth things down.
The exterior painting started with Macragge Blue, thinned properly and in two thin coats, of course. Everything was shaded with Nuln Oil, then followed up with a general drybrush of Calgar Blue. A lighter drybrush, concentrated on just the edges of parts, was done with… c’mon… guess it… you know it…. Fenrisian Grey! (Canon I am…)
The big old eagle on the hood was painted with Retributor Armor, given a shade of Agrax Earthshade (I’d run out of money and didn’t buy Reikland Fleshade), and highlighted with Auric Armor Gold. A gloss coat was applied, and just a few decals were added, these being horseshoes. I guess they’re Colts fans or something. 🙂
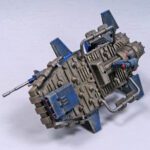
With everything painted, I started the weathering. First, I went back over all the recesses with Nuln Oil, and then did a general edge highlight with more Fenrisian Gray. Using the edge of a small, flat brush, I then applied various chips and scrapes with the same color, and then added a few two color scrapes using Ammo of Mig’s Chipping color. (Shhh… don’t tell Duncan…. it was pre-thinned…)
I then went to work with Ammo of Mig weathering enamels, using both Streaking Grime and Streaking for DAK colors. I did it rather randomly… apply some, streak it with a small brush, add more in another place, splatter some on in another place. I continued in this fashion until it reaches TLAR staus. (That Looks About Right). I allowed that to dry overnight, and then went in with some Tamiya weathering powders, using a few shades of brown. A final coat of Ultra Matt Varnish was applied, and I called it done. Well, 50% done. (Or 1/7th. Check local regulations.)
It will probably be a few weeks before I get to the figures, and will be able to call this 100% complete, errrr…. 7/7th. Whatever. But I am really, really enjoying this! The kit is fun, it’s all made up nonsense, so you can do what you want, and I LOVED using the Citadel app to pick colors. I like the GW method. Yes, I know, it’s designed to get you to buy more paint. But I like the way it looks, and it brush paints like a dream. (Properly thinned and in two thin coats, of course.)
If you’ve not tried one of these Warhammer 40K kits, give it a shot!


Leave a Reply