
I’d read several build reports that indicated the Moebius Viper Mk. I had a few fit issues, so I went into the project forewarned, and prepared to take steps to mitigate any issues. In building models over the years, I’ve found that when a kit is initially ill-fitting, it will fall into one of two categories. It will either be a kit with initial engineering problems, which are far harder to correct (I’m pointing a finger at you Special Hobby), or the kit will suffer from less than precise production, which is generally far easier to correct. I was happy to find that the Moebius Viper Mk. I seemed to be the latter, with most of the issues being associated with production.
The kit is broken down into two major sections, the forward fuselage from the nose to just aft of the cockpit, and the rear section, comprised of the engine housings and wing surfaces. I first focused on the forward section.
After completing the cockpit, I test fitted it into the fuselage halves. While the fit was not bad, there were some small gaps along the forward part of the nose, on the top and bottom. I’ve learned that the first place to look when dealing with issues like this is a careful examination of the mating surfaces, using my optivisor to get right up close.
Moebius did a nice job of designing a bit of a “tongue in groove” to ensure good alignment, a sign of good engineering. However, a close look at the mating surfaces showed an almost wavy like surface, just enough to affect the fit. Taking a light metal file, I carefully sanded down the mating surfaces along the length of the fuselage, allowing the file to rest on the upper and lower edges as I worked to make sure it remained flat. After working the length of the fuselage, another test fit showed a marked improvement.
As I’d forgotten to add the nose gear well, I set that in for another test fit, and this showed another problem. While the part itself fit nicely in terms of what showed in the fuselage opening, the locating tabs were a bit too wide and/or thick. I clipped these down to the barest minimum needed to fit, and that problem was resolved.
While there would still be a bit of a seam line to fill, the surfaces touched together nicely along the length of the fuselage, so I knew a good application of Mr. Surfacer would do the trick. Gluing the halves together with Tamiya Extra Thin cement, I set that aside to allow it to dry overnight. A good application of Mr. Surfacer 500 the next morning was enough to cover the lines.
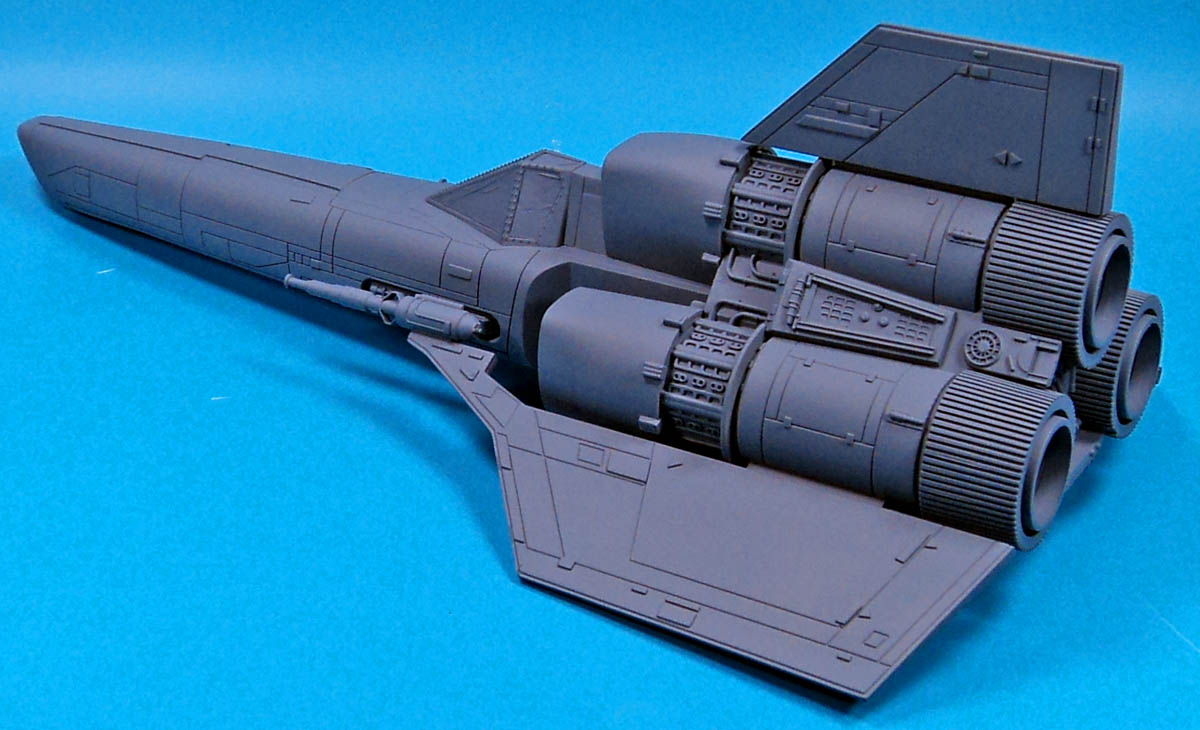
Working on the rear section showed a similar need for filing edges as on the forward. The main engine housings are three pieces that form a sort of triangle. These fit close enough, but sanding the edges, and trimming a few locating tabs, helped make the fit near perfect. After gluing, only a few hairline cracks showed, easily filled with Mr. Surfacer.
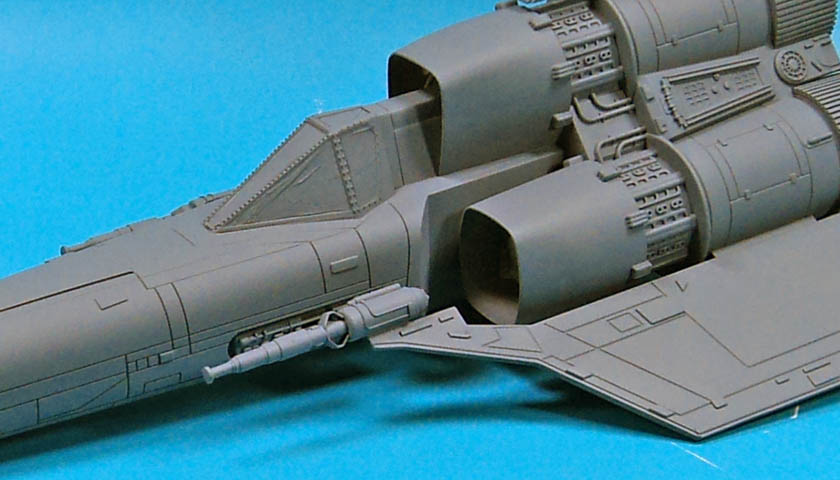
The engine intakes are a large single piece with all three intake trunks on the one part. Pieces that represent the fan faces slip in from the back. Wanting to keep a distinct line of separation for those, I primed the fan faces and intake trunks separately, and then painted the fan faces with Citadel’s Lead Blecher, and applied a heavy coat of Nuln Oil. The intake trunks were painted in a light gray color. I then joined the pieces up, which resulted in a nice sharp color separation.
The rear engine nozzles are also a single piece, with a clear piece inserted from behind representing the exhausts and their interior detail. If you’re going to light the kit, these are perfect. But as I was not taking that step, I planned to paint over the clear parts. There are a number of ejector “crowns” that project up which must be cleaned to get a good fit, but once all mating edges are cleaned, the forward intake and rear exhaust sections fit so nicely that no Mr. Surfacer was needed.
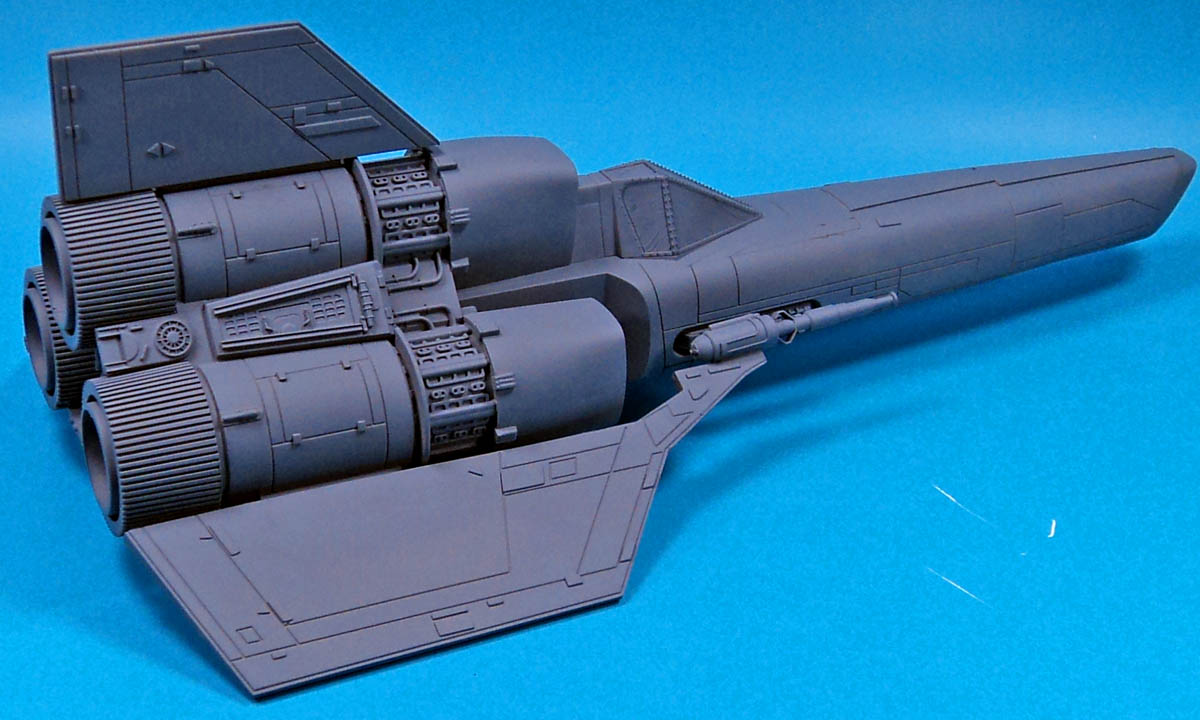
The wings surfaces were attached to the rear section, and all of the previously mentioned caveats of mating surface preparation applied. Test fit and adjust thoroughly, and you’ll be rewarded with a good fit. I added a line of Mr. Surfacer along the edges of each fin, sanding those down smooth.
In the past, I’ve had trouble with Mr. Surfacer contracting, and showing “ghost seams”. I found that by giving it 24 hours to dry, this can be generally avoided. So with a good amount of time allowed for that process, I next sanded the fuselage seams down, and they looked very smooth and organic.
Mating the forward and aft sections of the model was almost anticlimactic. The one note I can pass along is be sure to reduce the size of the small locating tab on the lower rear of the forward fuselage. It fits into a slot in the rear section. Slimming down the tab insures that the two pieces slot together without a problem. There is also a section that is part of the aft assembly that fits underneath the forward assembly. I actually waited until the glue joins had dried a bit along the main join of the two sections before gluing and clamping that.
With the fuselage assembly completed, I fitted the pilot in the cockpit, and added the canopy. The canopy fit perfectly. (I’d masked and painted it the inner cockpit color prior to adding it to the fuselage.) I ran a bit of Tamiya Extra Thin along the join- carefully of course- and clamped it down a bit.
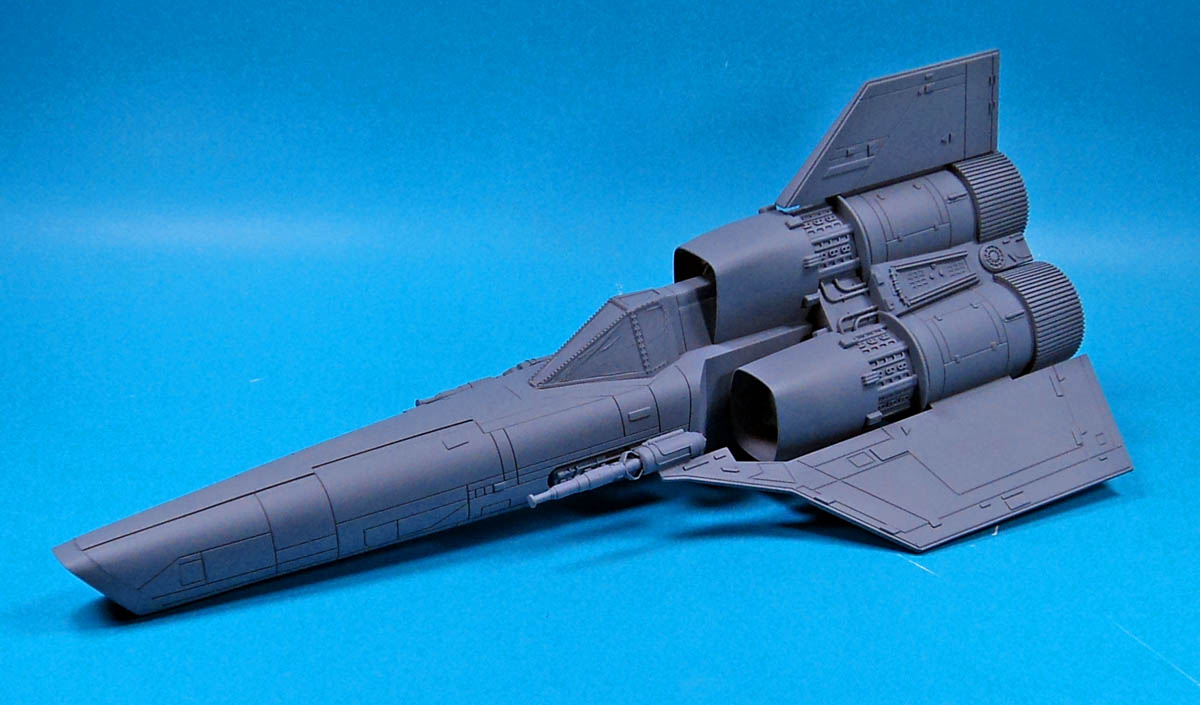
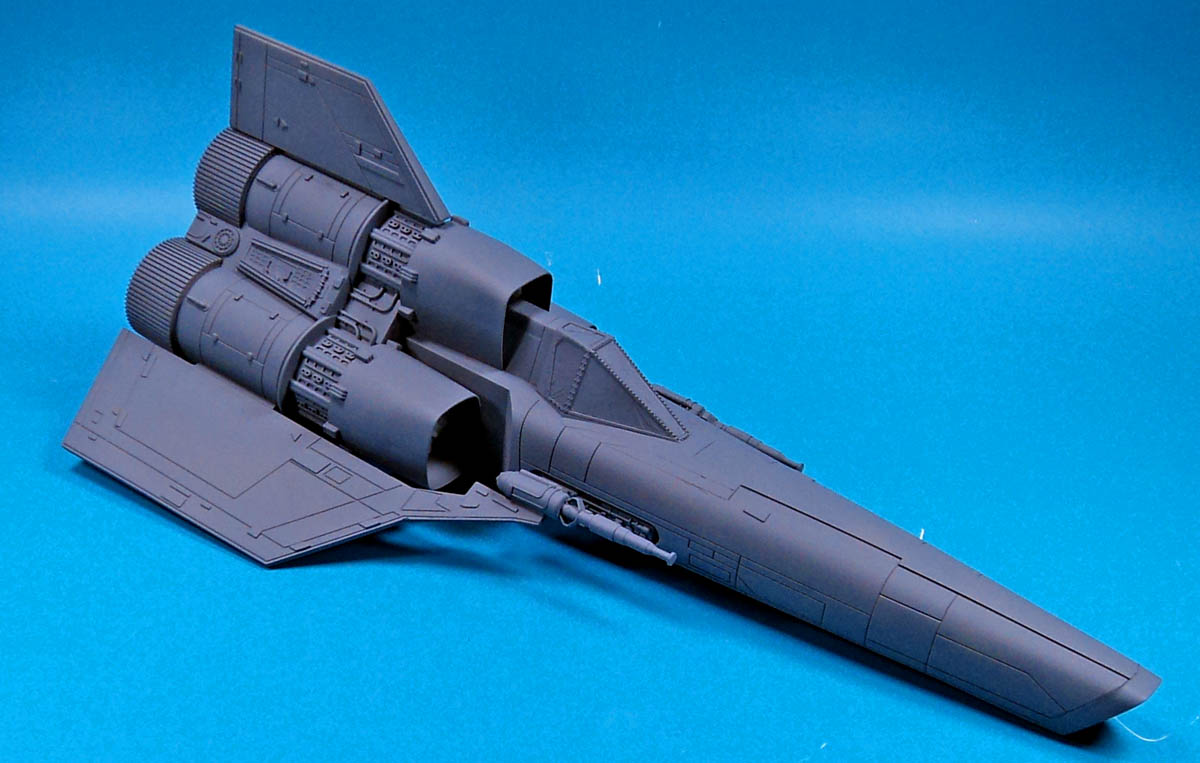
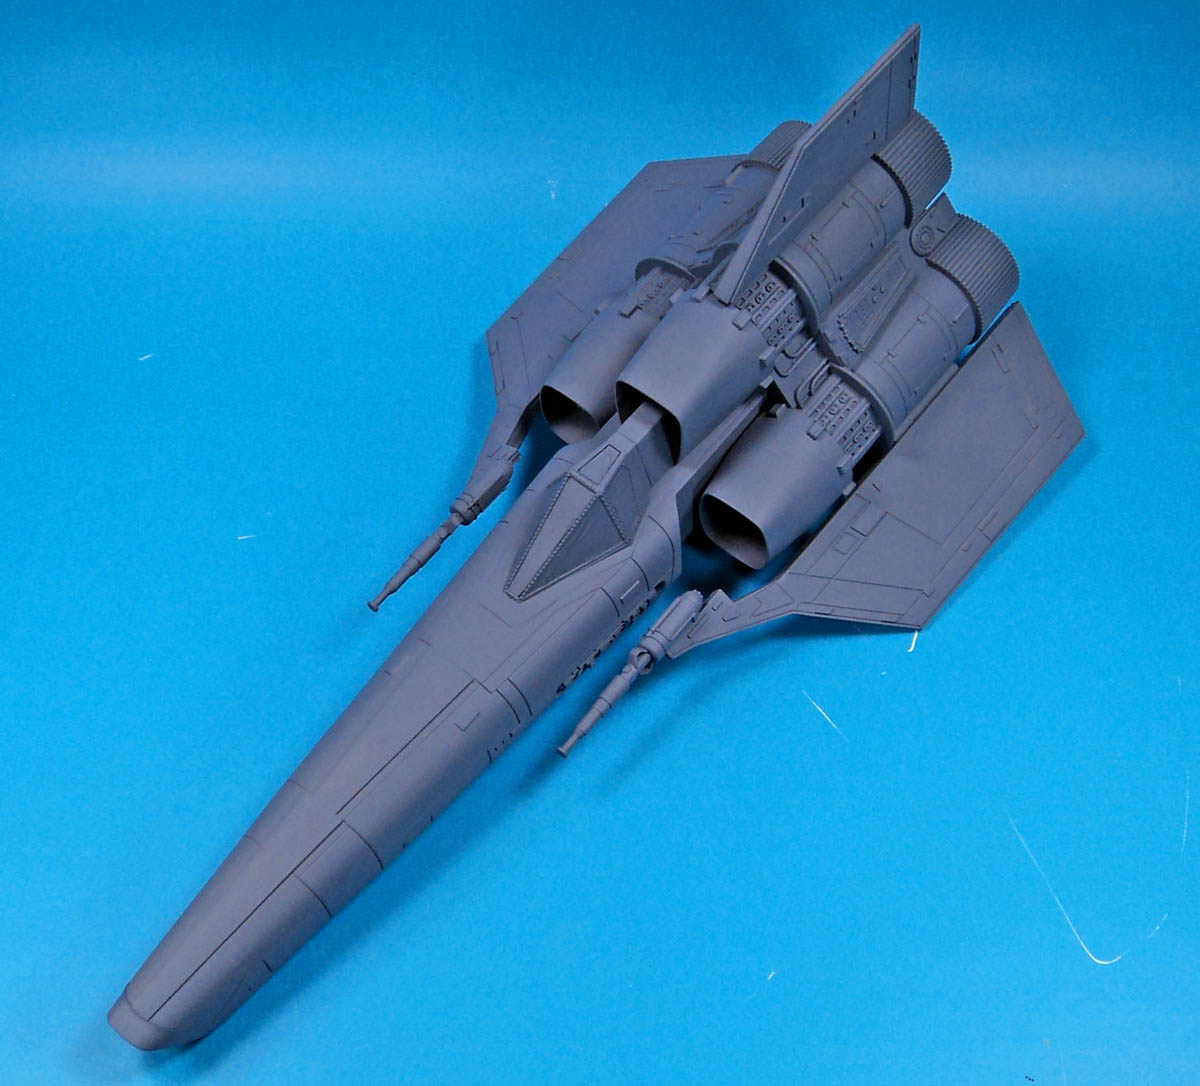
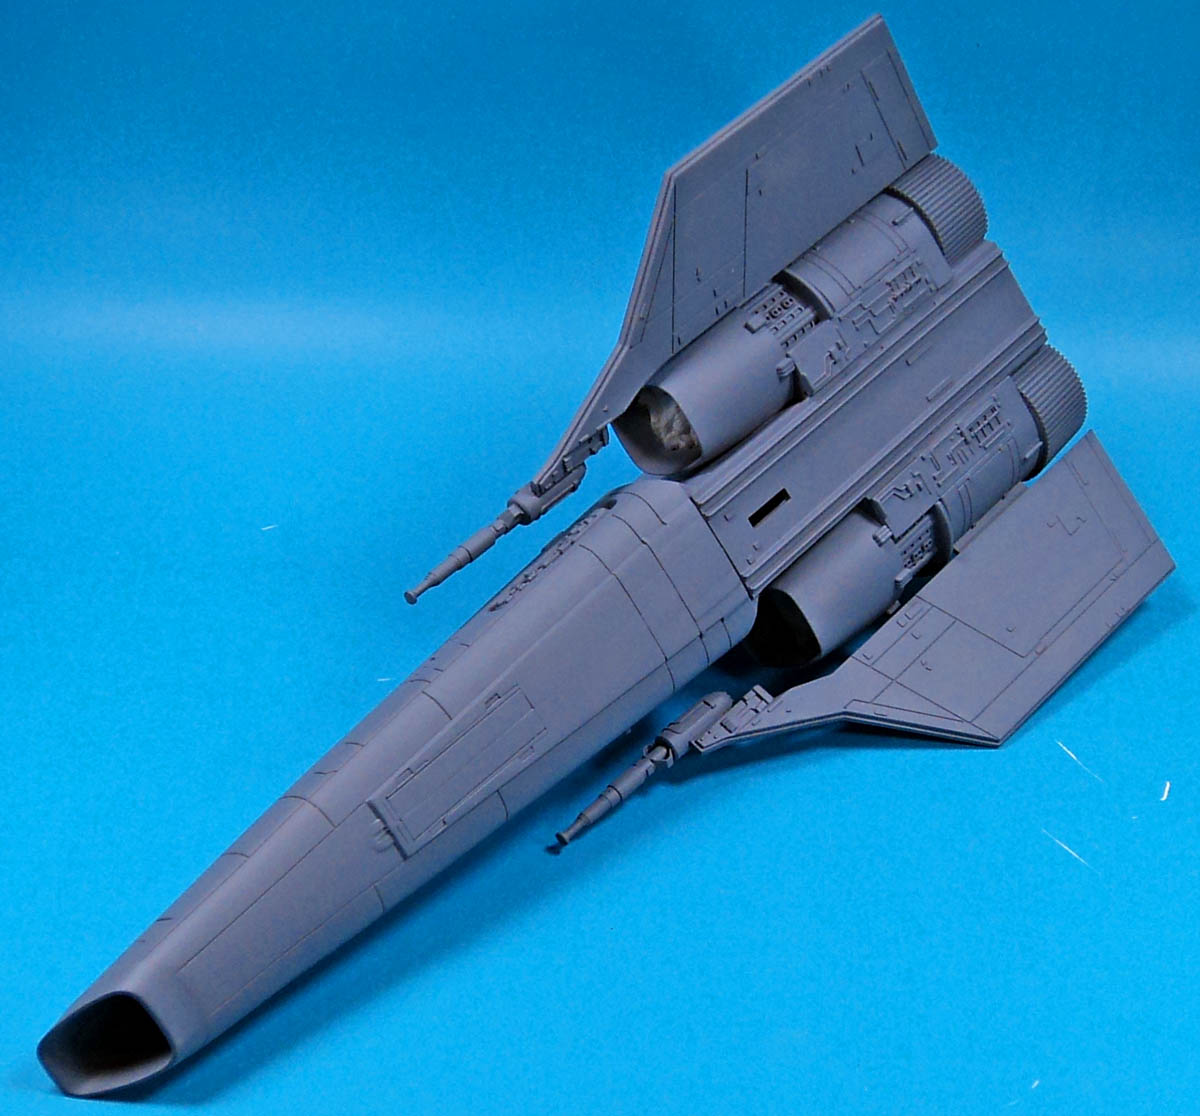
Just prior to priming, I added small bits of paper towel into the air intakes to protect the fan faces from later paint steps. The entire model was then primed with Badger’s Stynylrez Gray primer. I chose gray for several reasons. First, as the model will be finished in a light gray, I wanted a color that was not so difficult to cover. Second, having the gray primer would allow for a bit of pre-shading that was not too stark. And finally, it would be a good base for the metallic engine parts. As always, the Stynylrez primer went down very smooth with just a slight satin finish.
With the Viper assembled and primed, I set it aside to cure for a few days. I’ll check it after that time to see if any ghost seams popped up. If so, I’ll simply add a bit more Mr. Surfacer, sand, and prime again. If one looks particularly egregious, I’ll use CA filler instead.
This kit is a great example of how careful test fitting, sanding, and basically following a logical process results in a virtually perfect final assembly. The basic rule of thumb to follow is “if something doesn’t ft, something is in the way.”
Next up will be getting the base paint on, masking of and painting the stripes, and then the weathering! (That’s that part I’m really looking forward to!)
Leave a Reply