
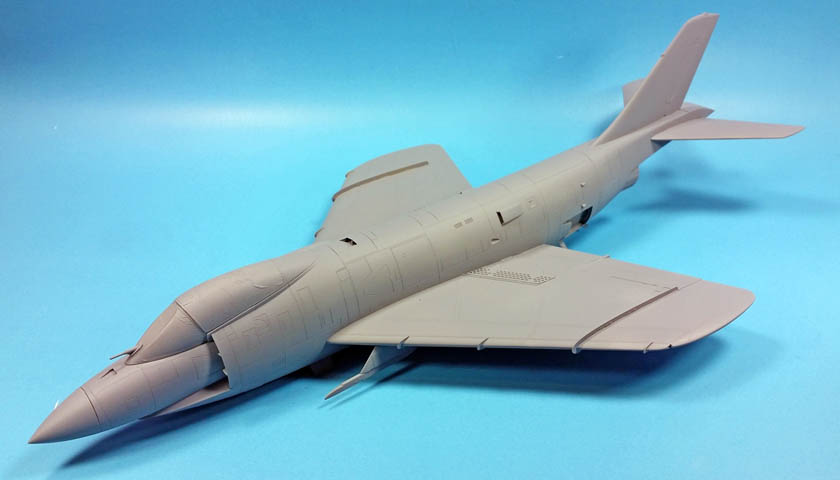
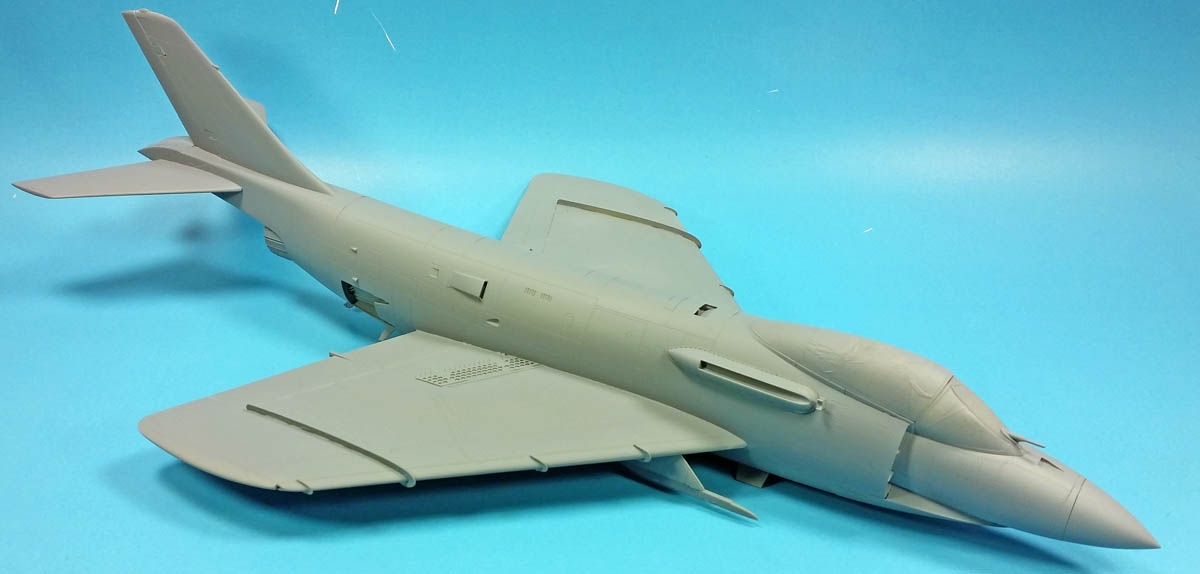
The airframe for Hobbyboss’ Demon is assembled and primed.
It’s not a difficult assembly by any stretch. The parts fit together generally well, providing you take appropriate steps to test fit and address any areas that aren’t quite up to par before gluing. Still, even with due diligence, some seam work was needed. And I did have a minor run-in with the photoetches.
The fuselage is divided into a front half, containing the cockpit, and the rear half, with the engine and a few other sections. The breakdown means that a good portion of the forward half must be nestled between the aft halves, the air intakes being the primary visible divide.
Test fitting the cockpit into the forward section showed a few adjustments were needed to allow for a good fit, primarily sanding down the cockpit tub sides to make sure there were no obstructions. Care is needed in placing the forward wheel well. While it seemed to be lined up nicely in the forward section, a later test fit into the aft section showed it needed to be angled down slightly more so that it mates with the edges of the opening better in the aft section.
I used a bit of Mr. Surfacer 500 on the nose seam, not so much to close gaps but to simply remove any hint of the join. Once that section was sanded, rescribed, and declared finished, I began to test fit it into the rear fuselage section.
(Note: at this point, I did not add the nose cone, as I wanted to add nose weight later to make sure I had enough the avoid tail sit.)
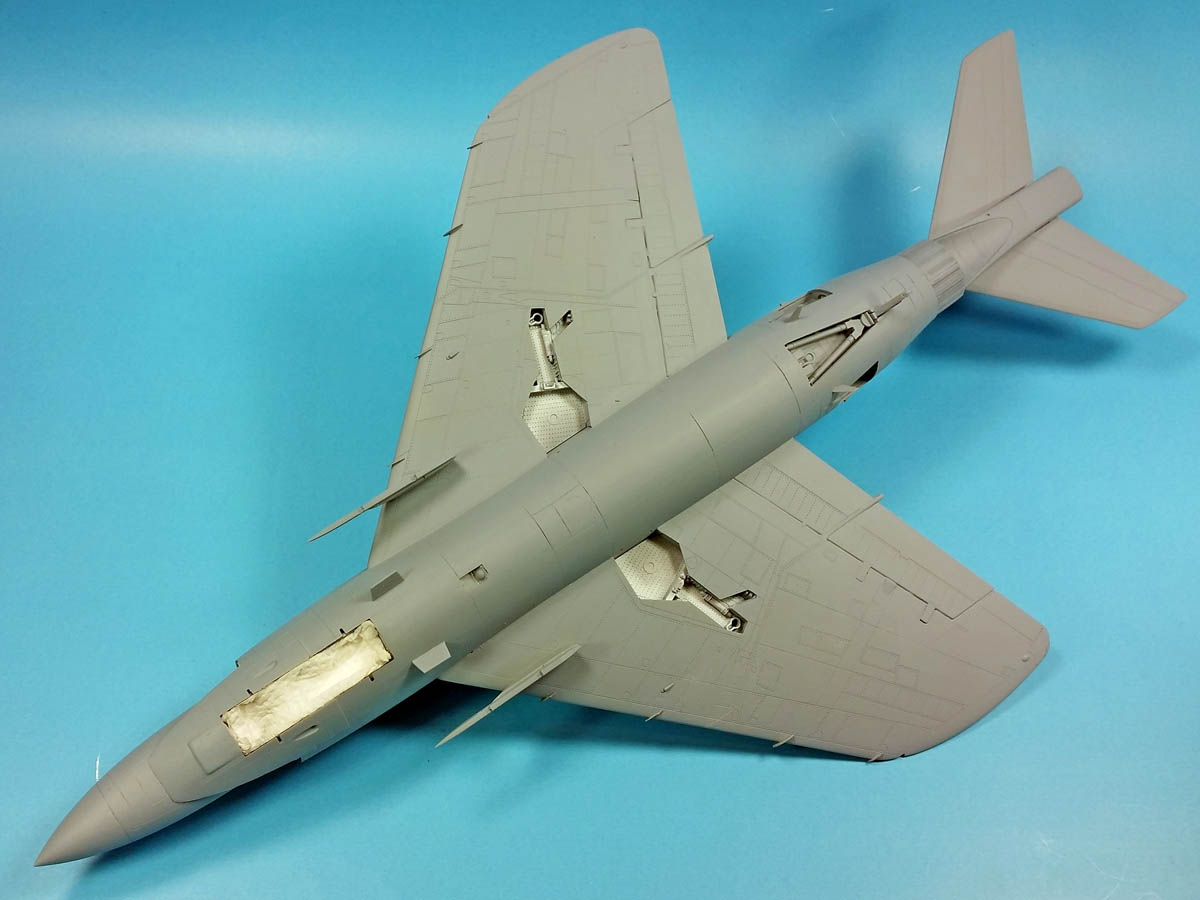
Aside from the forward nose section, the aft fuselage contains two inner bays for the speed brakes, the arrestor hook assembly, and the engine exhaust. Because the forward section is slotted into the aft via large tabs on the interior, it’s not feasible to add it later. (At least it’s not practical, IMO.) Test fitting all of those parts in showed a good result, with only a bit of material sanded away from the tabs on the sides forward fuselage half to make sure they provided no obstruction to closing the main fuselage section.
With the test fitting showing a satisfactory result, I applied some Testor’s cement to the inner joins (to take advantage of its slower working time), and once all was joined together, I used Tamiya Extra Thin Cement along the joins. All fit together reasonably well, though the alignment was not perfect enough to avoid the use of some Mr. Surfacer and a bit of sanding.
One “trick” to pass along… I’ve found that before sanding fuselage seams, I liked to deepen any panel lines that cross the seam before starting the sanding. If estimated correctly, you’ll finish up the sanding, and still have a workable panel line. It may need some enhancement, but it’s visible. Also, if there is a complex shape- a circle, a square, etc., I’ll mark the fuselage with a Sharpie (away from the area to be sanded, of course) to indicate where the feature should be placed. If it’s a circle, oval, square, etc., I’ll simply note the size, and later use my scribing template to replace it. If it is a more complex shape, I’ll put a piece of Tamiya Tape over it, cut out the shape with my hobby knife, and place the tape section down the fuselage side. Later, after the seam has been dealt with, I can place that tape section where it needs to be, and use it as a scribing guide.
For the Demon, after the main fuselage was assembled, I added the wings, tailplanes, and the two pieces that go just under the cockpit and form the final part of the forward wheel well. The wings fit nicely along the upper edge, but did have a small gap in places on the lower join. Mr. Surfacer handled these nicely.
My initial plan was to glue the speed brakes in place, and not have them open as the kit instructions recommend. However, the parts consisted on an inner plastic part, with a layer of photoetch over it. As the doors have approximately ALL the little holes available drilled in them, I thought I’d give the photoetch a try, despite my concern that it would not work.
Of course, given that it was photoetch, I was not disappointed, and it did not fit nicely. (Which reinforces my belief that photoetch is never the best answer to an engineering problem. But I digress… 🙂 )
I tried it the Hobbyboss way- add the photoetch layer to the plastic part, and it doesn’t fit well. The photoetch stands proud of the surface. I’ve hesitated to try and sand things down, as that may ruin the plastic part. For now- I’ve simply set them aside, as I ponder my options. (There is a resin set available, but I’m not much of a resin fan, either.)
More photoetch was needed for the upper wings. Two parts- the spoilers placed directly on the wing top- worked well. They were installed this way on the actual aircraft, so the parts worked fine.
The other photoetch parts- the wing “fences”, were a bit of a pain. While the smaller ones fit OK, wrangling the larger ones into place was a bit of a problem. It was a bit like a Three Stooges episode. Get the front lined up, and the back was off. Get the back lined up, now the front was off. Get them all lined up, and the “instant” glue decided it wasn’t instant. It took quite a bit of work to get them on in somewhat reasonable fashion. Eventually I decided, for the sake of my sanity, that I would live with “close enough”.
Again- these reinforced my dislike for all things photoetch to solve an engineering problem.
With those infernal parts in place, I added the forward windscreen, and temporarily tacked the sliding canopy portion in place using Future. I also added the inboard missile pylons, as those will be the only ones I make use of. (When I get to the final build article for this model, I’ll cover “Everything You Wanted To Know About Hobbyboss’ F3H-2 Demon But Were Afraid To Ask”, because there are some serious issues to be aware of, even for the most forgiving rivet estimator.)
All parts in place, the next step was easy… blast it with a good coat of Badger’s Stynylrez Gray primer.
I won’t say the airframe build for this kit was trouble free, but on the scale of 1 to 10 (or Special Hobby to Tamiya), I’d give this a solid 7… maybe an 8. If you’re new to modelIng, it will present a few frustrations. If you’ve got a few kits under your belt, and are reasonably comfortable with addressing minor seam line and fit issues, you won’t have any problems.
Next up- the paint!


Leave a Reply