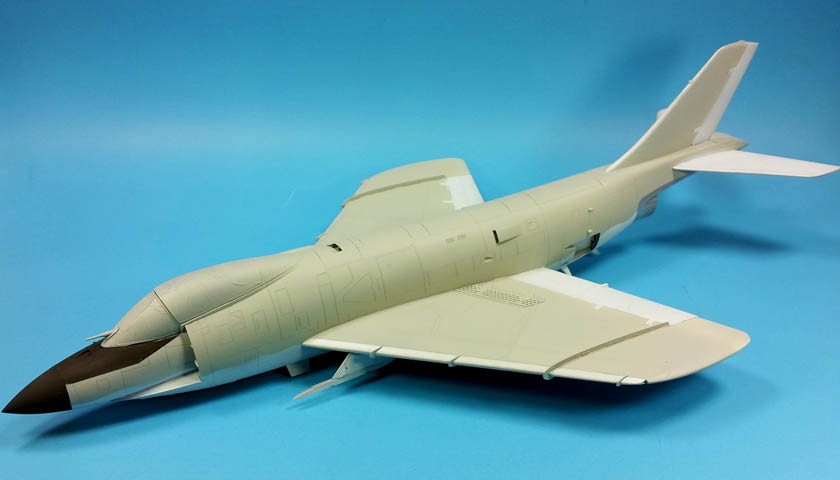
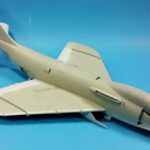
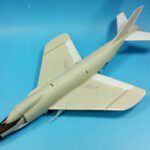
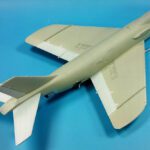
I’ve applied the basic colors to the F3H-2, so it’s no longer primer gray, but rather gull gray, kinda white, sorta black, and mostly silver in a few places.
Despite how bland the basic colors of these early Cold War US Navy jets were, I really have a fondness for them. These very simple colors are a perfect palette for the very colorful markings to come. I’m not sure what the thinking was at the time- painting a tactical fighter aircraft in generally low visibility colors, and then adorning them in large swathes of primary colors. Whatever the logic, it does make for some very interesting and colorful models today.
I first painted the metallic areas around the exhaust, using Vallejo Metal Color Aluminum (77.701). This included not only the underside of the fuselage aft of the exhaust, but also the inner section of the horizontal tailplanes, I really like this Vallejo Metal Color line, as it applies nicely, and I can actually get it to work. (Unlike Alclad II… don’t ask me why I can’t get that too work. I have no idea.)
Masking that off, I moved on to the undersides, using Vallejo Mecha Color Off White (69.003). I like using a less-than-pure white because it offers the ability to follow up with pure white highlights later, which can then make the overall finish “pop”. If you lead with pure white, you have nowhere else to take it. And as I’ve said many times before, these Vallejo Mecha Colors are my absolute favorite water based acrylics. They brush nicely, airbrush brilliantly, and dry to a very nice satin finish.
Allowing that to dry for 24 hours… well…. 27, to be precise…. I masked off the rest of the undersides. For the nose cone and anti glare panel, I applied Tamiya NATO Black (XF-69). This color is not pure black, but rather a very dark gray. As with the undersides, the logic is to make sure there is “space” for later shadowing using pure black. Careful masking was applied to that area to make way for the final major color.
The upper surfaces of Cold War US Navy aircraft were painted Light Gull Gray. I’ve tried several variants of this color, looking for one that felt about right. The Gunze version that I used on an S2F Tracker seemed far too warm, almost a reddish brown color. The photos I took don’t show it like the model appeared in “real space”. But I was not too fond of it. So for this build, I decided to try out a Vallejo Model Air Light Gull Gray (71.121). I immediately liked the look of this paint, and as I prefer the behaviour of Vallejo far more than Gunze anyway, I was quite happy with the choice.
The last step was to add the Coroguard. According to a great article on the Tailhook Topics blog, Coroguard “was required by the Navy on the forward facing edges of inlets, wings, and empennages of some airplanes beginning in the mid 1950s. It was a clear epoxy paint that provided an additional degree of erosion and corrosion protection to those surfaces. The Navy specified that it be “aluminized” by the addition of aluminum power.”
I’d seen many people present this on a model as essentially bare metal. But as the article discusses- and is supported by many other sources- Coroguard was clear, and aluminum powder was added. In viewing various photos, of F3Hs and other types at the time, I saw some variation, from a dull gray up to an almost bright aluminum. I wanted to make sure that the Coroguard areas did not look like plain old bare metal, but rather (hopefully) conveyed something of what really was applied. A mix of two parts Vallejo Model Color Sky Gray (70.989) to one part Vallejo Model Color Silver (70.997) sounded about right. I was pleasantly surprised- it was exactly the color I was looking for. It had a grayish appearance, yet possessed a somewhat metallic sheen. (The photos show it shinier than it actually is.)
Though the “normal” operation would have been to mask the areas off and airbrush them, my growing arrogance confidence in my brush painting skills led me to give that a try. Frankly, I was surprised by how quick, easy, and painless the process was. Far easier than the half hour of making it would have taken for two minutes of airbrushing. I simply thinned my paints with water, put down a nice thin coat, let it dry, applied a second coat, and it was done. The panel lines defined the areas nicely and made painting simple. A few areas needed a touch up, but my overall painting time was less than 10 minutes- well worth the effort.
Now, I know at some point going forward, I’ll likely do something to wreck the finish on this classic jet, but at this stage, I’m quite pleased with how it’s sorting itself out. The Vallejo Gull Gray is exactly the look I was wanting from that color, and the Coroguard areas look good and were very easy.
Next step is to give the whole thing a gloss coat of Future, and then begin applying the very colorful decals.
(And yes- I somehow forgot to take a photo of the undersides… {facepalm}. But it looks OK. Trust me. 😉 )

Leave a Reply