Have you ever gotten a song stuck in your head, and it just won’t seem to go away? It can be maddening, even if it’s a cool song. (And it is even worse if it’s not.)
I’d first seen Citadel’s Deathwatch Corvus Blackstar in a Warhammer TV video, where Duncan Rhodes thoroughly covered painting the model, in multiple thin coats of course. I thought it really looked cool, and decided I needed to give this one a whirl.
Trouble was, a few days later, I could not for the life of me remember it’s name. What kept sticking in my head was “Highway Star“, the epic, awesome, completely cool song by Deep Purple. Of course, looking for “Citadel Highway Star” was not the most fruitful search.
Thankfully, a quick perusal of my internet search history reminded me of the correct name. With that in hand, a trip to the Amazons of shopping resulted in a Corvus Blackstar being dispatched my way. (Probably along the Highway Star I-95.)
What really appealed to me about the model is the tough, purposeful, aggressive look. It’s a dropship, designed to battle through loads of grim, dark, angry dudes, in order to deliver other grim, dark, angry dudes “right into the thick of battle” as Duncan says in the video. I suppose once there, they make angry faces and growl and other such fearsome stuff…
The model is…. errr… a model of simplicity. (Kit of simplicity? Thing of simplicity? Where’s Andy when you need him…?) No interior, no fiddly bits, just cut the parts from the sprue, glue them on, and get to painting. I did keep a few parts off so that the eventual (hopefully) buyer can customize the look of it, Otherwise, I assembled it fully.
Working with black as a color can be a bit tricky. If you’re into using light and shadow and contrast, pure black completely robs that ability. There’s nowhere to go in terms of shadow. So I went into the initial painting with a plan to account for that.
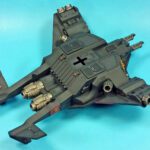
I started by priming the model in Badger Stynylrez Black. (I did do so chaotically, though…) Make sure if you’re building this kit to prime the little jet nozzles on the wing tips, and then rotate them a bit to prime the part that was covered up the first time. I also left off the lower rear rocket launchers to make sure that area was fully primed.
For the next layer of paint, I applied a coat of Tamiya’s XF-69 NATO Black. I use this quite a bit on aircraft modeling, as it seems to impart a “scale effect” to black. When alongside other colors, it looks black. However, it’s actually a very dark, charcoal-like gray, just enough to be able to add shadow later.
After that was applied, I began adding some exaggerated panel fading using highly thinned Tamiya XF-63 German Gray. I wanted to lighten up the center of the panels just a bit in order to make way for later shadows. I then sprayed the panel lines with thinned Tamiya XF-1 Flat Black, which really showed the contrast between the pure black and NATO Black.
At this point, it was actually looking quite horrible. However, that was by design. The next coat would, hopefully, bring it all together.
I grabbed my bottle of Tamiya XF-85 Rubber Black, a dark but slightly bluish color. The slightly bluish tint of this color allows the finish to catch a bit of light at the right angle, and not just absorb everything in the spectrum. (OK, that sounds like a good reason, right? 😉 )I heavily thinned the color, and began misting coats on to “blend” in all of the previous patchwork of colors that had been applied. The trick in doing this is twofold- you must get the initial colors laid down with enough contrast to be distinct, yet subtle enough that when the “blend coat” is applied, the gradients don’t disappear.
As I progressed in applying the Rubber Black, I realized I had missed the mark on that latter point. In order to blend the German Gray in, I had to add more Rubber Black, to the point that I lost some of the distinction between the NATO Black and Flat Black.
I didn’t get to worried about it though, as I had learned from experience that some of the contrast can be brought back in later painting stages, through careful airbrush work.
With that paint on. I bagan to add the “bling”.
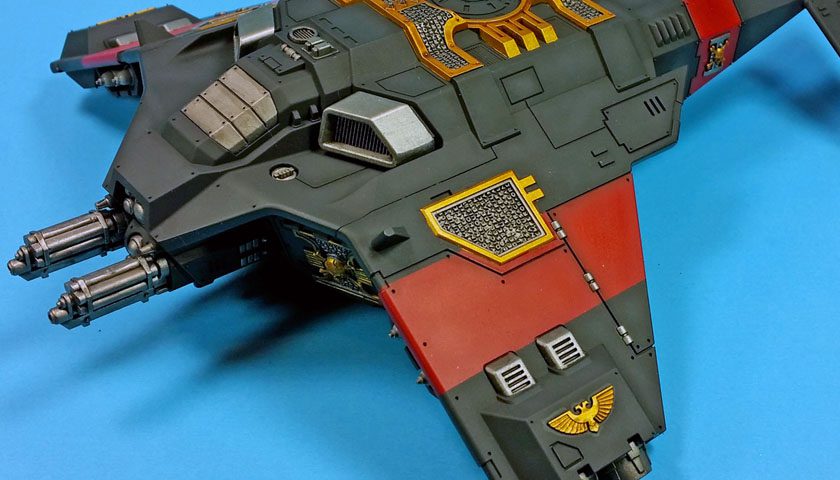
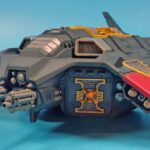
For the initial layers of gold and silver, Citadel’s Retributor Armor and Leadbelcher were used as the bases. These are both fantastic colors in my opinion. I applied this via brush, using – you guessed it – multiple thin coats. I did get a bit “outside of the lines” here and there. The really egregious mistakes were neatened up with a bit of thinned Rubber Black. Other areas will be blended when later shades are applied.
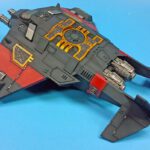
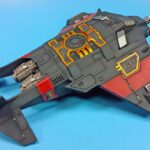
Shades were applied to the red, silver, and gold colors next. Citadel’s Nuln Oil (for the red and silver), and Agrax Earthshade (for the gold), were added in a double coating, just to make sure it gave a good intense color.
At this point in the build, I am really happy with how it’s turning out. The next steps will be all of the edge highlighting… all of it. Probably 97 miles of it. I’ll then do some paint chipping, various streaks and smoke effects, and who knows what else.
But I can already picture this dropship, gliding swiftly into battle. And of course, Deep Purple is being blasted out through it’s sound system to the angry space marine dudes inside. I can hear them now… “Everyone, sing! ‘Alright, hold tight, I’m a highway staaaaaaar’”!
🙂


Leave a Reply