Part of building any model is deciding how “in” you will be on it. Is the build going to be super detailed, with every bell and whistle? Or will it be just the basics – paint it, build it, and move on? Or somewhere in between?
When initially considering how to build this model, I’d thought about going all in. Scouring episodes of the shows to pick up every little cockpit detail. Adding bits that I thought might fill in areas that weren’t shown. I’d even entertained the thought of treating it as though it were a real object that had existed in time, and detailing it with that thought in mind.
Yet as I looked at the simple cockpit layout – three seats, one “couch”, an instrument panel, and some control yokes, several thoughts struck me.
First – how would I have built this as a kid? I realized that had this model been presented to me in 1978, I’d have most likely built it as quickly as possible so I could enjoy playing with it. And while my model building goal now is not to head off into the backyard for hours of imagining that I’m dispatching monsters with extreme prejudice, I do like to give some acknowledgement that part of my motivation is for the kid still in me. While 10-year-old Jon would have loved a super detailed model, he also would have never embarked on such a journey. Especially not with this kit.
Second, I am a bit of a realist. I’ve learned that initial enthusiasm for a planned build does not always carry through to the end. That excitement first felt doesn’t do much for me when I’m 2 weeks in and thinking “I just want to finish this and move on. Why did I ever think adding xyz was a good idea?”
Finally, I do evaluate “can this be seen?” While I get the notion of “no, but I know it’s there”, sometimes I realize that me knowing it’s there really isn’t a big deal. Not always… but certainly often enough that I do consider it.
With all of these thoughts swirling in my head, plus a healthy dose of wondering if I’d have the patience to mask off all the stripes on this thing’s exterior, I decided to go with the simple approach: paint what is there.
The 10-year-old Jon approved. So we’re all good. 🙂
In the show, the cockpit was pretty simple. The interior walls were a cream color, the ceiling a lighter green, and the door at the rear was a slightly darker shade of green. I found a few photos to use for reference, and I did watch *every* episode of Ultraman (again…) as part of my “research”. (It was tough, but I managed to do it.)
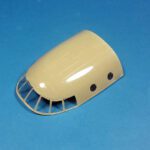
One of the first items I had to sort out was the large clear piece that goes over the entire cockpit. While only a few small windows actually remain clear, the piece itself was very large. And I knew that much of it would not be seen once in place. I was concerned that if I only painted the outside of the part, the ceiling of the cockpit would look unnaturally glossy. I decided to mask the windows and portholes on the interior, and airbrush it the cockpit color.
The exterior of the clear parts has nicely delineated lines for the windows to make masking easy. But the interior is perfectly smooth. And I did not trust my hand to place tape inside and cut with any accuracy. Remembering a “trick” I’d used on other builds, I decided to use the exterior framing as templates.
Of course, just placing the tape on the exterior, and using the resulting mask on the inside of the same window would not work properly. Flipping it around and trying to use it on the inside would result in a mismatched shape. They would be mirror opposites.
However, if I used the tape mask from one exterior side for its twin on the opposite inside, the orientation would be just right, and all would be good.
I applied a small strip of Tamiya tape to the outside of a window, working one at a time to avoid confusion. Once that mask was cut, I removed it, and placed it carefully on the interior of the opposite side. Because there were no guides on the inside, I had to be very precise in placement. I worked through each window in this fashion, and within half an hour had it sorted out and ready for paint.
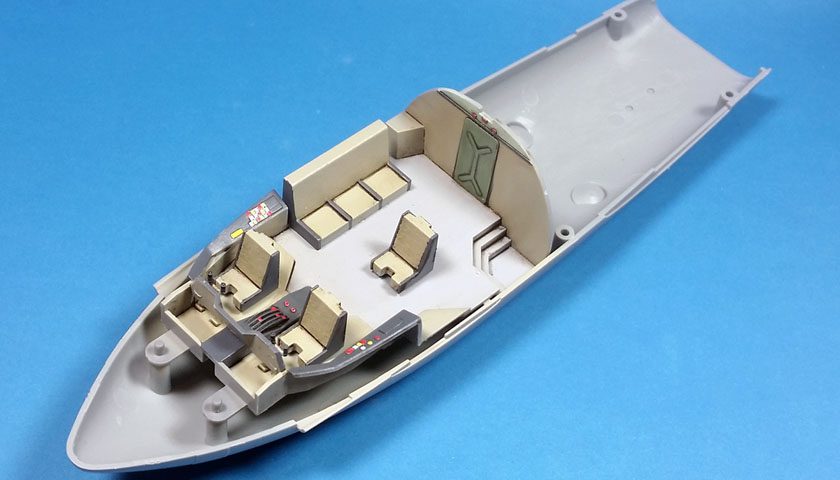
I started by priming everything (except the clear part) in Badger’s Stynlyrez Gray Primer. I followed that up with a coat of Tamiya XF-55 Buff over everything, including the interior of the clear part. (I had also masked off the exterior, just to prevent any overspray from messing things up.) Once the Buff color was dry, Tamiya’s Curve tape was used to mark off where the light green roof color was painted, Tamiya’s XF-21 Sky used for that. I also sprayed along a bit of that color along the very top of the rear bulkhead, just above the door.
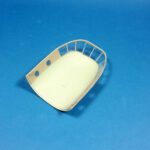
The part of the cockpit floor aft of the command seats was brush painted with Vallejo’s Sky Gray, and the seat frames, control panel instrument consoles, and the flight yoke handles were brush painted with Vallejo’s Basalt Gray. The kit supplied instrument panel decal was used, though it would take quite a viewing angle and some really focused lighting to even see it. On the side consoles, which will be a bit more visible, I opted for white, red, and yellow colors, as I thought the contrast and brightness could actually be seen from the outside.
Initially I gave the various panel lines and angles a coat of enamel panel line wash, but it just wasn’t strong enough for my tastes. While I did not want to go to in-depth on the detailing of the cockpit, I did want some contrast. After allowing the enamels to sufficiently dry, I re-applied Citadel’s Nuln Oil to the same areas. While this does leave some slight “tide” marks, once in the fuselage and closed up, this will work perfectly. The Nuln Oil has more “body” to it, and thus provides more contrast. When viewed from the outside, the desired effect is achieved: some distinct contrast, but the minor tide marks disappear.
A final step was to remove the masking from the interior of the large “greenhouse” canopy part. I then looked through each window, to find where I could see paint extending beyond the exterior canopy framing. The tip of a toothpick was used to scrape away any errant paint marks.
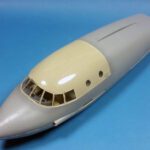
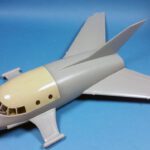
With the simple cockpit sorted out, I set it into the lower fuselage, added the upper fuselage half, and set the canopy in place, all dry fitted of course. My efforts did exactly what I’d hoped – a nice representation of the cockpit as seen on the show. While extra detail would have been fun, from a visual standpoint, it would have been for naught.
A further dry fit of the wings, vertical stabilizer, and foreplanes showed that only minimal seam cleanup should be needed.
While the overall effort for the interior was fairly basic, I’m happy with how it turned out. I think it conveys the original in decent fashion, and will look good when viewed once the model is complete.
The best part for me though was having fun doing this. It’s a treat for my 51-year-old self to build the things that my 10-year-old self could not – and do so in a way that the young fellow from 1977 would have enjoyed.
In the final analysis, I think that is what is so enjoyable about this hobby. Simply having fun.
(We’ll see if that sentiment holds true after all the maskings and stripes on the exterior! 🙂 )

Leave a Reply