Part of the challenge of building any scale model, in any genre, is achieving a believable look. Whether it is an aircraft that actually existed in time, or a pure work of imagination in the scifi realm, the quest that eludes and drives us is that of replicating a credible, plausible object.
Of course, the rub is in making that happen. Transforming a small-scale “toy” (we must be realistic!) into something that resembles a full-sized object demands that many techniques be utilized to invite the viewers mind to suspend their disbelief, if only momentarily, and step into the miniature world. (A notion I wrote about in another blog entry several years ago.)
As I continue to learn the art and craft of scale modeling, I’ve realized that part of the key to this elusive pursuit is to achieve what I have heard described as “depth of finish”.
When I first heard that term, I of course understood it on the surface. It’s basic meaning is not veiled. Yet the more I build, the more I paint and weather and varnish, the greater the realization that the notion goes far deeper than the words themselves.
It’s even fully hard for me to define. In many ways, it can be one of those situations where one can say “I can’t define it, but I know it when I see it.” It is about imparting a depth and dimension to our work, yet it is more than that. But it cannot be so simply boiled down into a notion of “many layers of weathering”. While that is certainly a part of the physical execution of the notion, even that does not fully define the goal.
So What Is It Mr. Philosophy Man?
In part, I find it often helps to define some things by what they are not. As previously mentioned, it’s not just light and shadow that produce depth, or layers upon layers of technique. All of those things are components, yet they are only ingredients in the whole dish.
Stating what it is may also be so obvious as to not really be helpful on the surface. We of course strive to impart the look of the real thing… the paint, the grime, the gloss, the dirt, the contours, the light refraction, the weight… all of those things.
I can go look at any object, whether it is an airplane, a car, a fence post, a metal sign, or even a person’s face, and see depth of finish. The processes of wind and rain, heat and light, the very entropy inherent in the universe, is manifestly evident.
(You gotta admit… that last sentence right there sounds pretty legit, right? 😉 )
Sorry… onward, Jon.
So we see that, and we try to mimic that. Yet always confounding us to some degree is the difficulty of scale.
What To Do Then?
Part of the solution lies in continually expanding our tool bag of “tricks”. I’m firmly convinced that if you want to grow as a modeler, you’ll find that the hobby is less a pursuit of perfection, and more a pursuit of new techniques.
These techniques give the modeler the ability to replicate natural effects in what are essentially unnatural ways. (Stop it! Stop it! Minds out of the gutter please… :p ) Often, the application may not even resemble the order in which things happen on the real object. Instead, we combine them one upon the other so that in the end, the viewer’s mind is “tricked” into accepting that this small object is real.
Suspension of disbelief.
Good Grief, Man, Get On With The Model!
Can do!
On this Spitfire, I wanted to convey the look of an aircraft operating in the southwest Pacific area. The elements in that theater were (and still are, I’d presume) quite severe. Even regular maintenance cannot stay ahead of the elements.
Thus, a convincing look can only come through the judicious use of weathering techniques.
In the previous look I’d given of this model, various oils were used to apply the “dot filter” technique. This, on top of the basic camo colors, provided the foundation for all the other techniques to follow. That layer imparted a sense of tonal change, and even of some movement to pull the eye, so that subsequent layers would be more effective.
For this stage of the build, I wanted to continue the process of “distressing” the paint finish, but now in a way to replicate the fading affects the sun and heat impart, and to begin the grimy effects that permeate the various panel joins.
Of course, on the real object, this not only happens to the paint itself, but to any markings applied. So the first step was to apply a good gloss coat of Future. Once the gloss coat was fully cured, I began applying decals.
The markings for this airframe come from the kit. The model is part of the “Aussie VIII” boxing from Eduard. It contains two plastic kits, some photoetch and resin bits, and an absolutely massive set of decals- 30+ marking options being provided. The decals are printed by Cartograph, so I don’t think it is going out on a limb to say they are the finest in the world.
The decals were applied, and given a good treatment of Solvaset. While they conform nicely as they are, Solvaset takes it the extra mile, really pulling things down into the recesses.
After allowing that to dry for several hours, I used a new blade in my hobby knife to slice through each decal where panel lines were underneath. A second coating of Solvaset then pulled everything fully into the panel lines, and gave the decals a look that is as close to painted on as I think a modeler can achieve short of actually painting them on.
And Now We Actually Get To The Point Of The Article
The next step was to begin “fading and shading”. Fading is simply that – making various parts of the surface look faded. And shading is (mostly) equally obvious – imparting depth and a bit of grime to the recessed areas.
For the fading, I tend to shy away from the traditional “quilt” approach of making the center of panels look faded. On a real object, the whole thing fades – but not always in equal amounts. I can look at the hood of my car (it’s very old) and see multiple areas of tonal variation across that one panel.
To do this, I employ a method that I certainly did not invent, one referred to as “scribbling”.
I first heard this term used in Airfix Model World. The author described how he’d weathered a model, likening it to the scribbling motion one sees a child do with a crayon on paper. It’s not total chaos, but it is random and varied.
I began by considering what colors needed to be used. For the brown color, I wanted something light, but not pure white. I also wanted to impart a bit of warmth to the underlying color, but not too much. I decided on a mix of Tamiya White and Deck Tan.
The application also needed to be very thin, very transparent. The goal is not to add loads of color, but rather to very slowly build it up. The best way I’ve found to do this is using isopropyl alcohol as my thinner. When sprayed on, it evaporates very quickly, allowing ares to be thoroughly worked over without much fear of “spidering” the paint.
I filled my color cup on my trusty Badger Patriot with the alcohol, and added a small brush load of white and deck tan in, stirring them in the color cup. I gave a few test shots on a piece of paper to make sure my flow was good, and then I began to work. (If you want to pin me down on a ratio, I’d roughly guess 10 parts thinner to one part paint.)
Here, the “scribbling” idea mentioned earlier really defines how the paint is applied. I never let me hand rest in any one area, but continually moved around the brown areas of the camos, without too much worry if it strayed into the green occasionally. Not only did I vary the pattern quickly, but even the distance I held the airbrush from the model. I simply scribbled and scribbled, looking for a moment that I thought “Oh, that’s a bit too much”. (Why that’s important I’ll explain later.) If a few areas had a bit more color than others, I left it as is. I wanted randomness. This whole process was done without regard to panel lines, only the camo pattern itself defined the limits of my wanderings.
I used this color also to overspray the decals, as I wanted to fade them a bit too. One of the most frequent ways I see modelers kill the whole “suspension of disbelief” idea is to apply clean decals over weathered paint.
Once the brown areas were treated, I switched to a mix of Tamiya White and Yellow for the green areas. I thought the green areas would look better with this mix. Because green is made up of yellow and blue, the use of yellow helps fade the green without creating too much of a grayish color shift. The same process was followed, “scribbling” the thinned paint across all the green parts. And as with the brown areas, the goal was hitting the “bit too much stage” before stopping.
Finally, I used a color I call “Wauchop Brown” for my shading. I first saw this used by modeler Chris Wauchop. Chris is one of those modelers who both confound and inspire me at the same time. Their mastery of the full range of techniques, and the application thereof, is wonderful. Several years ago, Chris described a mix he uses for a variety of shading effect, where he used (if I recall correctly) two parts Tamiya NATO Black and one part Hull Red. I tried this out, and liked it so much I now have a bottle dedicated to mixing this color I have dubbed “Wauchop Brown”.
I mixed it up as I did the other colors. With this one though, you really want to make sure it is thin enough that it takes 6-8 passes to start getting a color build up. I did deliberately exaggerate some areas that will later receive additional oil and grime stains, and I also wanted to factor in that later weathering would again fade this step somewhat.
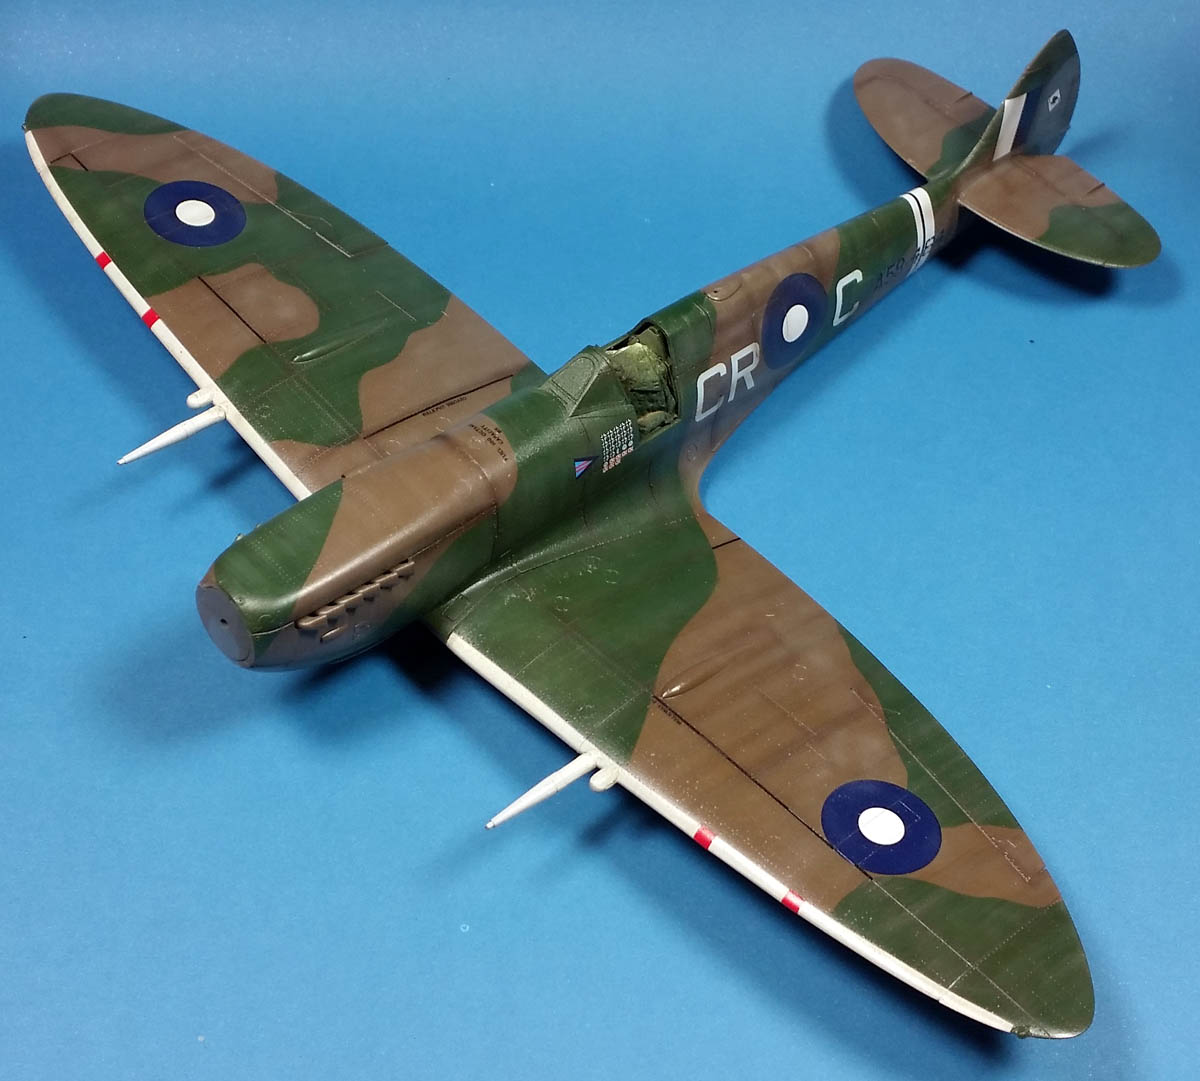
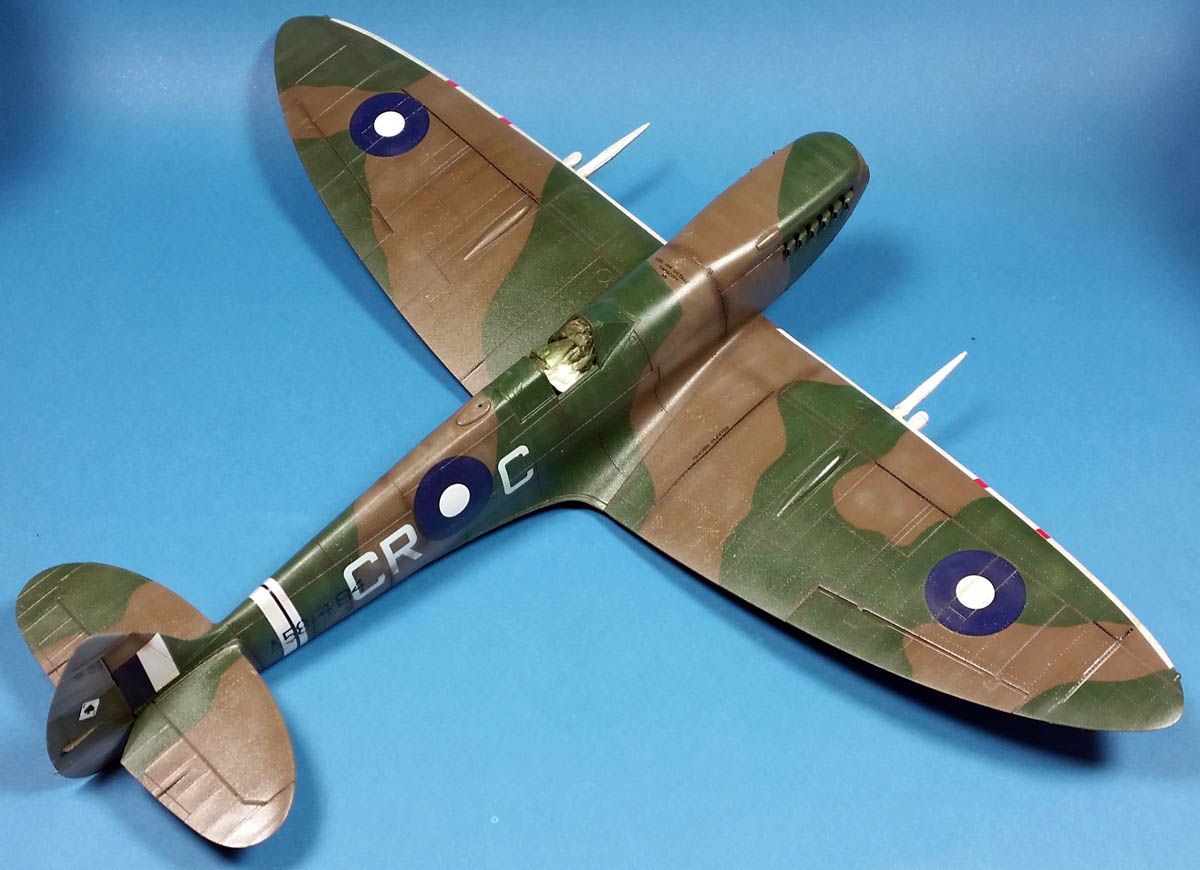
With all of that applied, everything was a bit over the top, as the photos below show. But there was a method to my madness.
And Now The Conclusion!
I used to do all the fading and shading as one of my last steps. One time, I got ahead of myself, and did it right after the initial paint. After I sat there staring at the model wondering “why did I just do that?”, I decided to just move forward as usual. When I got to the end, I realized that applying more than one fade/shade layer really helped the final finish.
Additionally, I like to apply my panel line washes after decals. But if I did the washes right after decals, then applied multiple fade/shade coats, most of the wash would be lost. But doing the washes last might be too stark. So I’ve settled on a “fade/wash sandwich”. Do a fade/shade coat, apply washes, then another fade/shade coat.
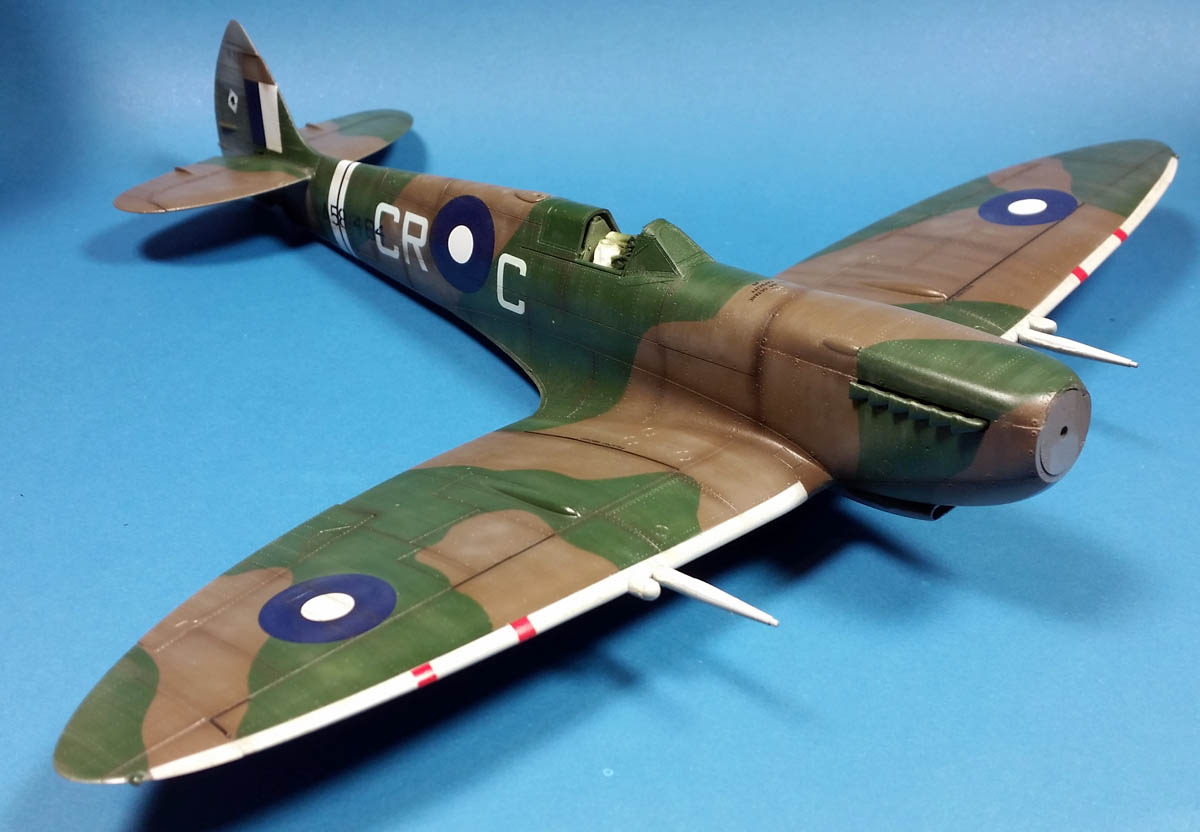
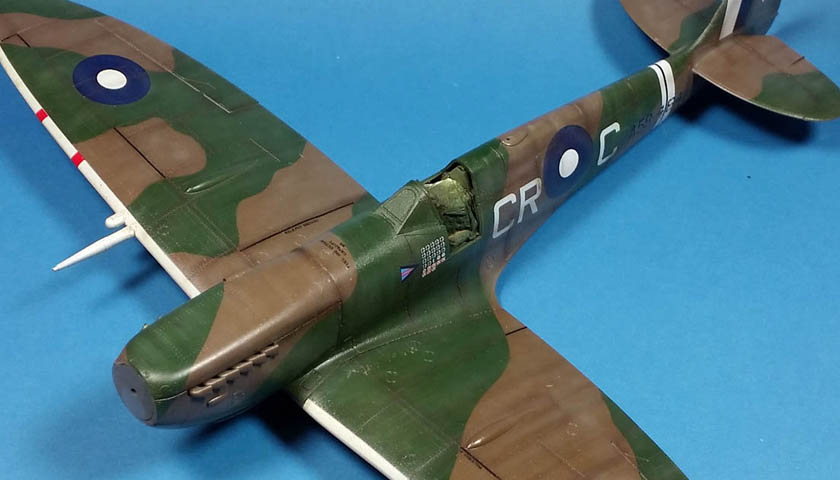
And of course, to do a proper panel line wash, the model must be glossy. Yet when a gloss coat is applied to a newly faded and shaded surface, it tends to enhance the shading, and subdue the fading. So I make sure in that initial fading layer to really go a bit overboard. If you look at the photos below, prior to the gloss coat, you can see the difference compared to the post-gloss finish.
Again reaching for the Future, I gave everything a thorough gloss coat, bringing the overly exaggerated fading under control, yet boosting the shading in the areas I wanted that to happen. All of this will coordinate (hopefully) with later applications of other layers.
Unfortunately, there is no magical formula for this. In fact, I’m quite convinced that in order to make good use of this application order, it requires a few attempts that don’t quite go as planned. It’s only in seeing how much is too little, or too much, that I found to get to what I thought was “just right”.
The next step will be some panel line washes, then more fading and shading, oil and exhaust staining, and of course paint chipping of various sorts.
So while there is a way to go. I am quite happy with the foundation so far.
Pre-gloss
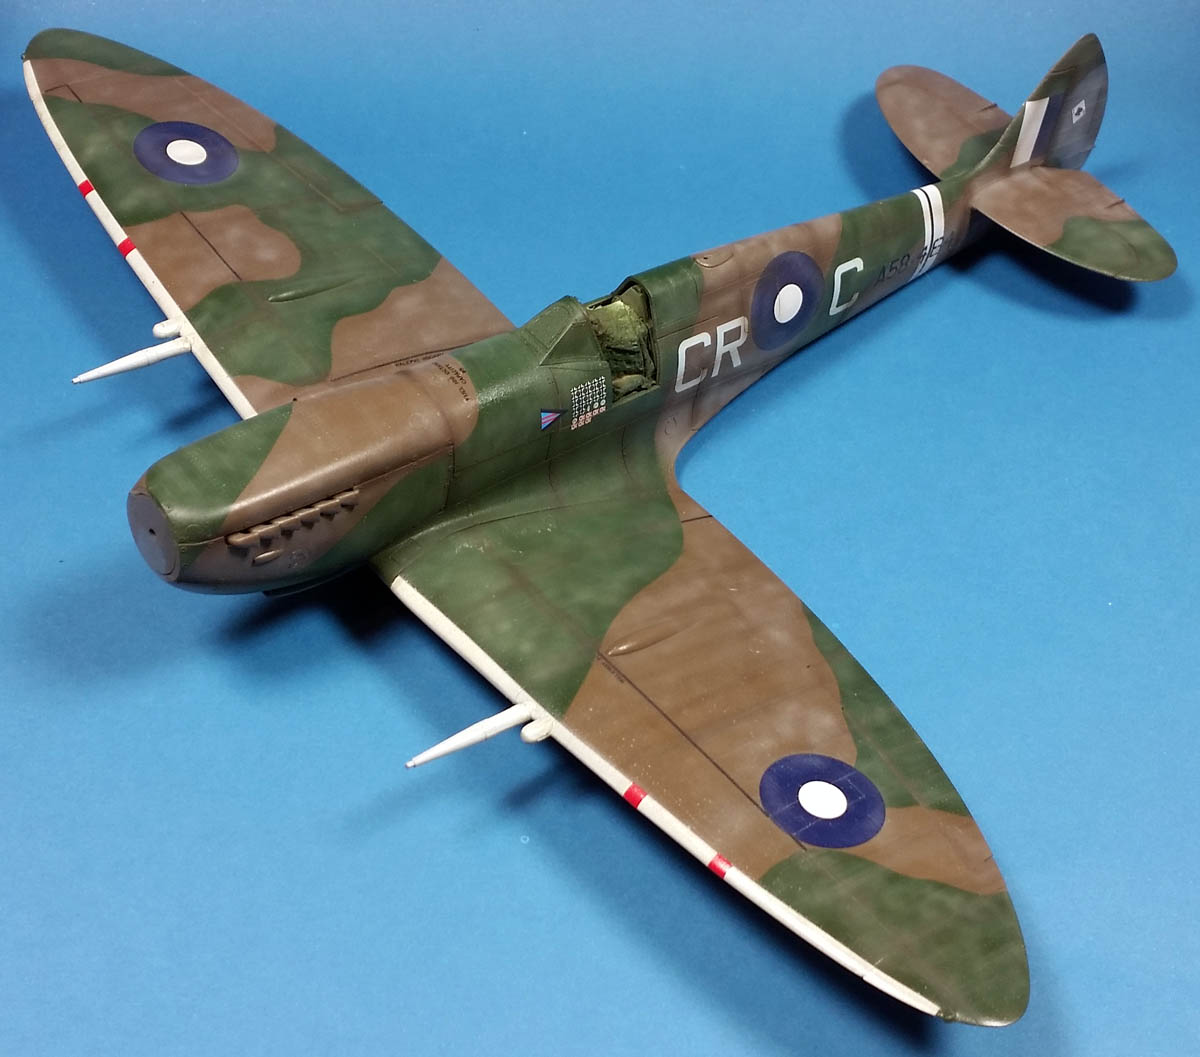
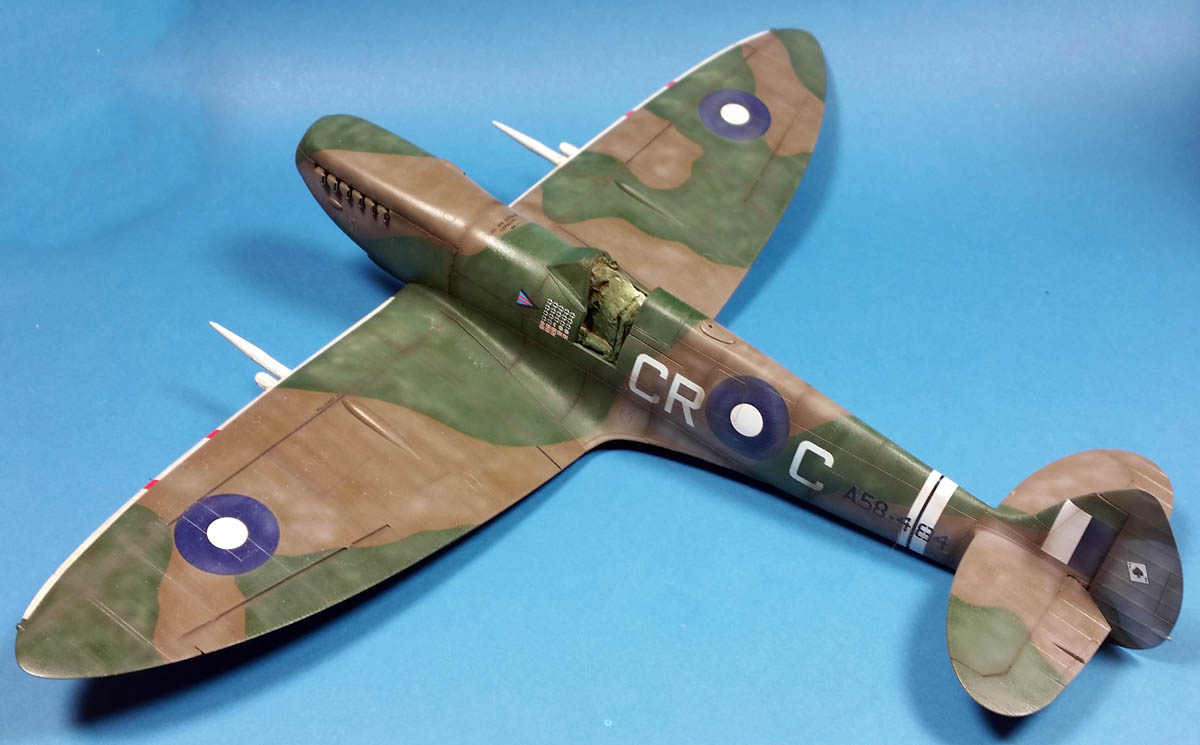
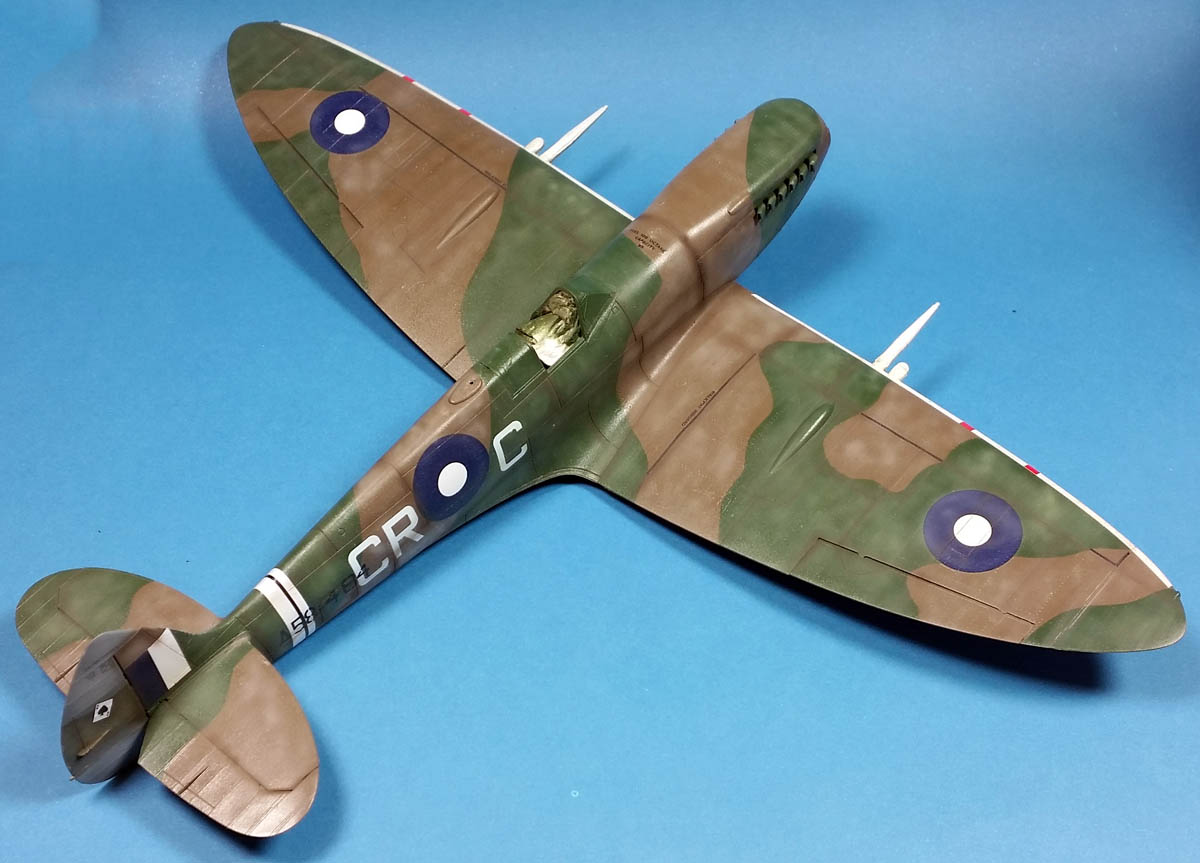
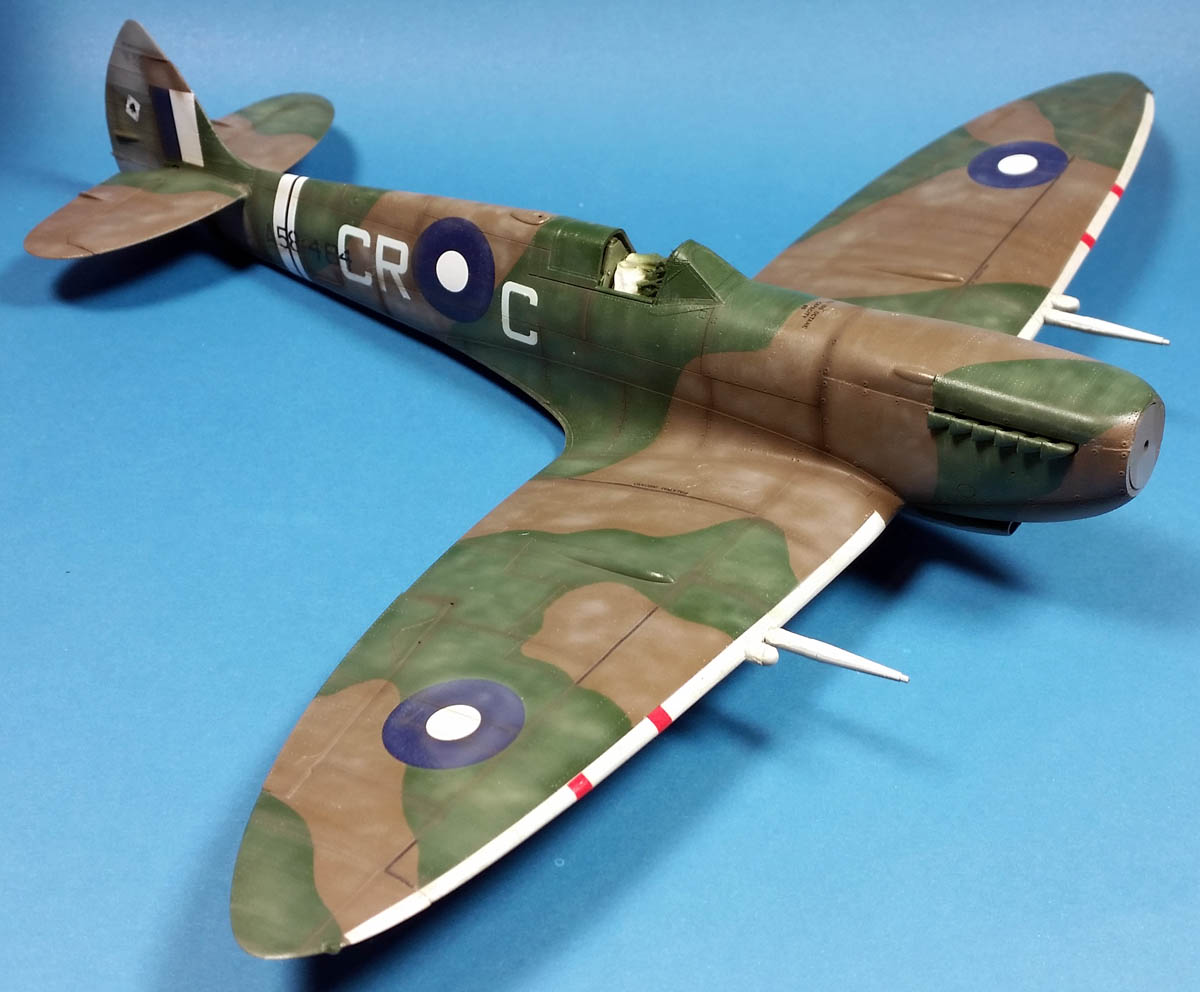

Post-gloss



Leave a Reply