As a kid, I liked to build “forts”. My friends and I would play Army for days on end, running through the woods, crawling through ditches, climbing in the trees. We’d have all manner of gear on – some of it ad hoc and made up, others might be plastic toys. I was one of the lucky ones… I had my dad’s old Army equipment – belts, ammo pouches, boots, a helmet liner for a GI steel pot.
The usual order of business would be to divide in teams, and each team would build a fort, and then we’d “attack” and “defend”. And by “attack”, I mean running at the other fort making shooting noises, all the while shouting “I got you! I got you!” And the “defender” would make his own shooting noises, shouting “No you didn’t! No you didn’t!” It was great fun. 🙂
Building the forts was interesting. While sometimes it would be built in a tree, and resemble more of a tree house, eventually we began to dig holes for our forts. And they became fairly elaborate. Digging down several feet into the ground, we’d pile up dirt around the perimeter of the fort, and then using old logs and scrap lumber, build up walls and even a roof. It wasn’t lost on us that on very hot days, our freshly constructed bunkers actually remained fairly cool.
I think that one of the reasons I loved those days, so long ago, was because deep down, I like to solve engineering problems essentially. Building a fort that could be climbed on, crawled through, slept in, and remain in place for days or weeks at a time was not a trivial task for a 10-year-old. So coming up with clever ways to make all of those things work was essential.
Nice Nostalgia Trip… What About The Model?
If you recall from our last exciting installment of this Valkyrie build, I’d completed painting the interior. Once painted, the various parts assembled into what is essentially a plastic box. The kit gives the option of having the side doors open or closed. If they’re closed, later painting is easy enough. But if you want them open, it presents a bit of a challenge.
Of course, before I could tackle that, I had to paint the figures. Citadel figures are great – exaggerated detail, plenty of raised relief, deep recesses to help with washes. The sculpting on them is great. However…
I’m a real novice at painting figures.
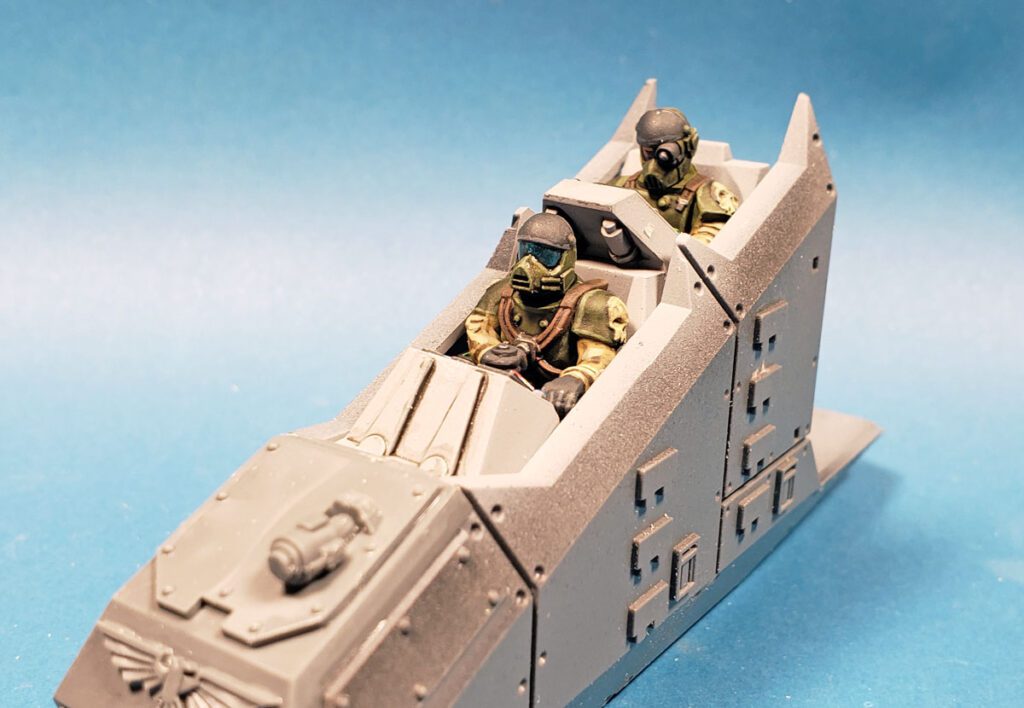
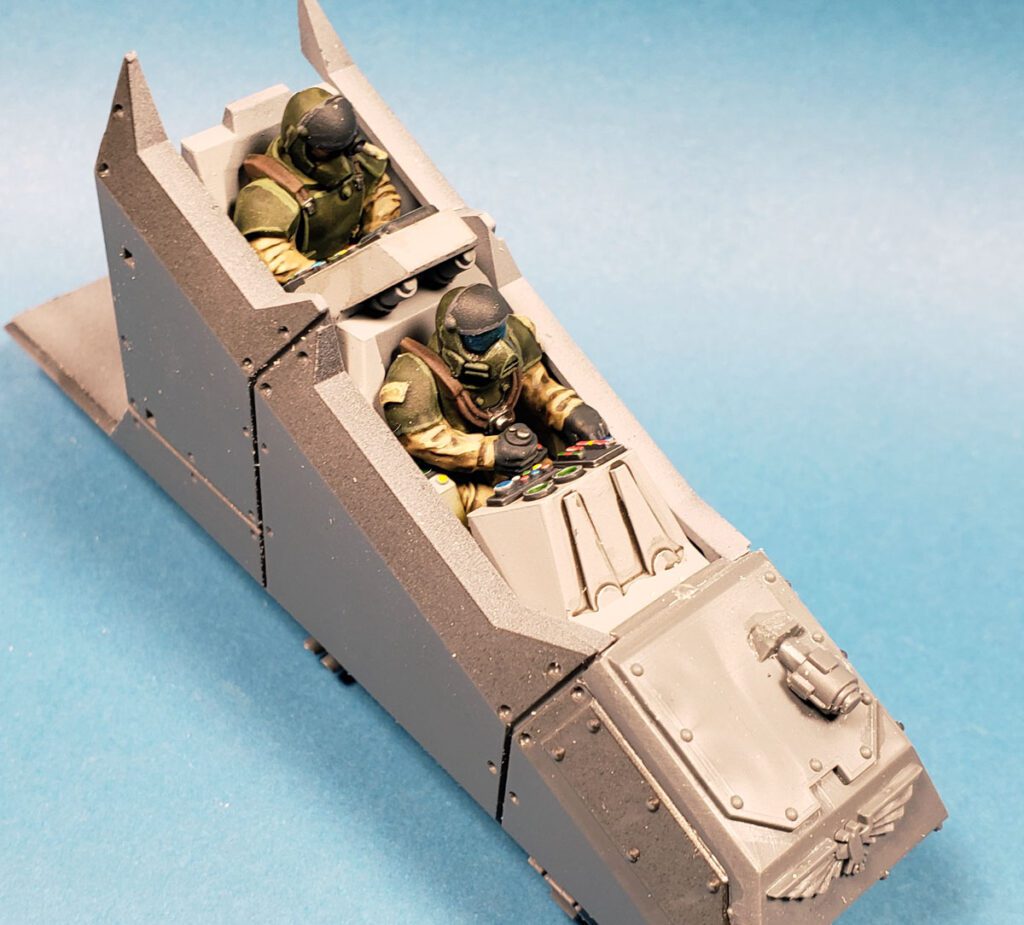
I tackled them the simplest way I knew how, following the Games Workshop style so well documented on Youtube at Warhammer TV. I primed them first, then gave them a base coat of Citadel’s Zandri Dust. Armor pieces were painted Castellan Green, and other bits picked out with black and gray. The faces were given a base of Cadian Fleshtone, also from Citadel.

Normally the next step would be wash, typically of Agrax Earthshade, a darker, reddish-brown color. However, because these figures would be inside the aircraft, I wanted to have the recesses appear a bit more stark, so I used Nuln Oil as my shade, which is a very dark, almost black color. Once dry, highlights of various lighter shades were added, both by simply painting color on the figure, or very discreet dry brushing in other areas. For the pilot figure, I painted his visor with a shiny chrome color, and then went over that with a thin metallic blue from Ammo of Mig.
While I’d never hold these figures out as anything to write home about, I was fairly happy with the results given the very basic steps used in painting them. I have a long way to go, for sure… but these will do.
Assembling The Airframe
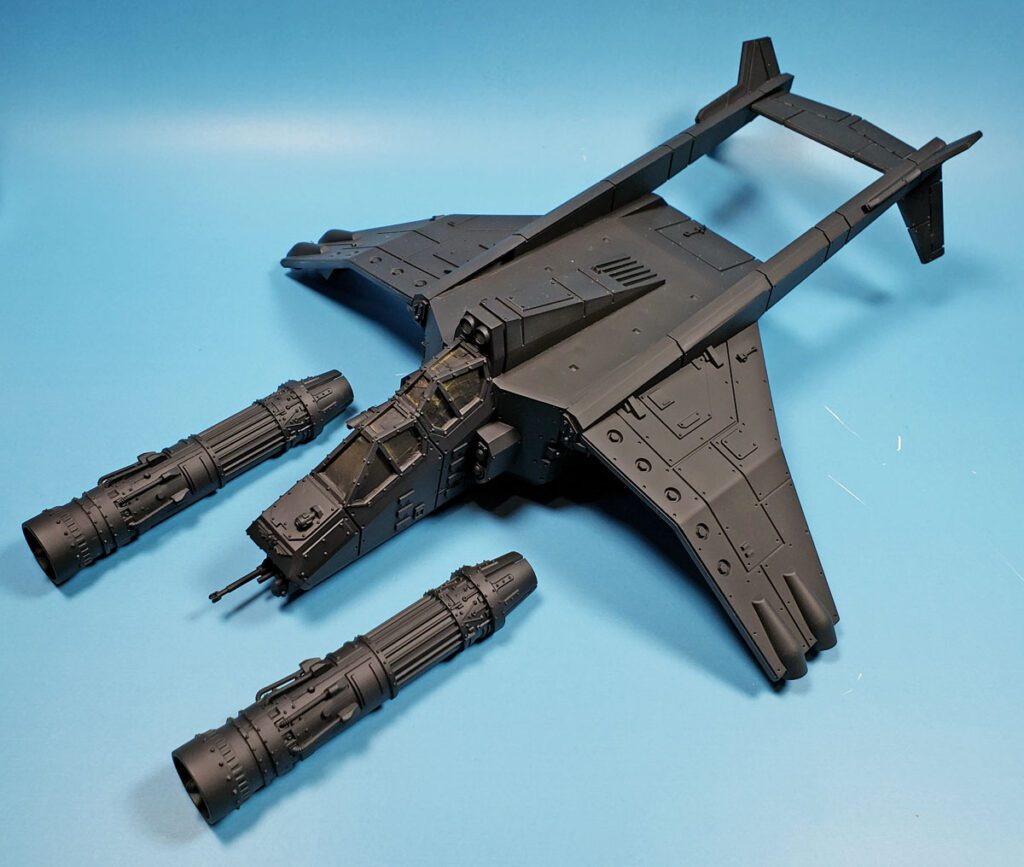
Assembly of the forward cockpit area was easy enough. Like the larger, aft cargo compartment, it was built up from various pieces. Two sidewall bits, a lower panel, control assemblies and seat sections, all came together to form a single forward section module. I thought it looked OK. Once the clear parts and separate canopy framing were on, it achieved exactly what I wanted – you can look in the cockpit and see a few interesting (hopefully!) bits.
The next step I had to tackle was assembly of the cargo area. As I’d mentioned, if you choose to leave the doors closed, it presents no problems. Build the box, glue the other stuff on, easy.
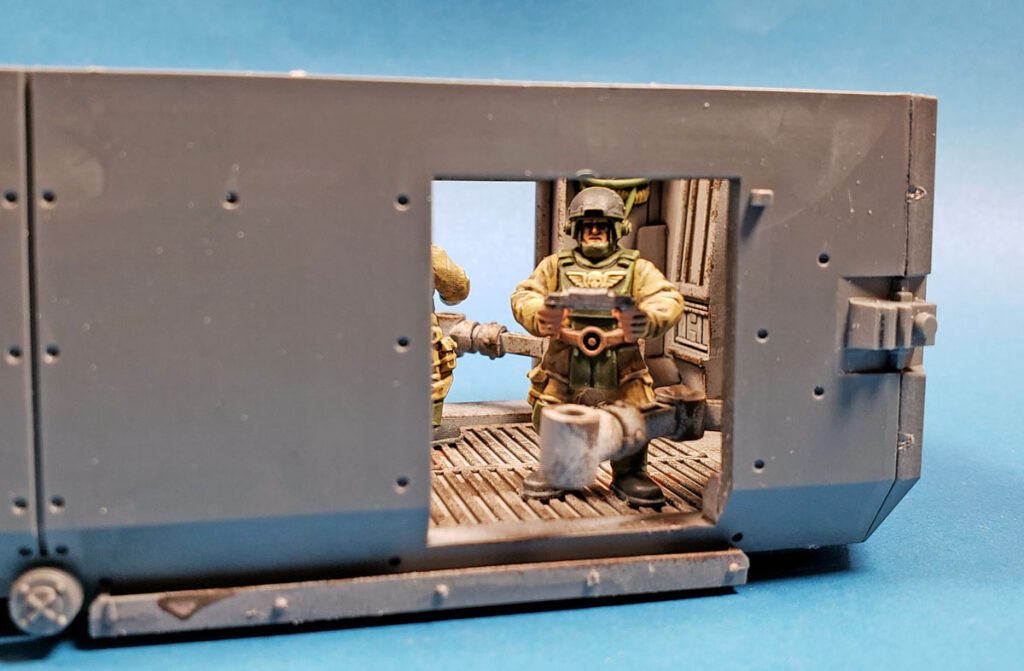
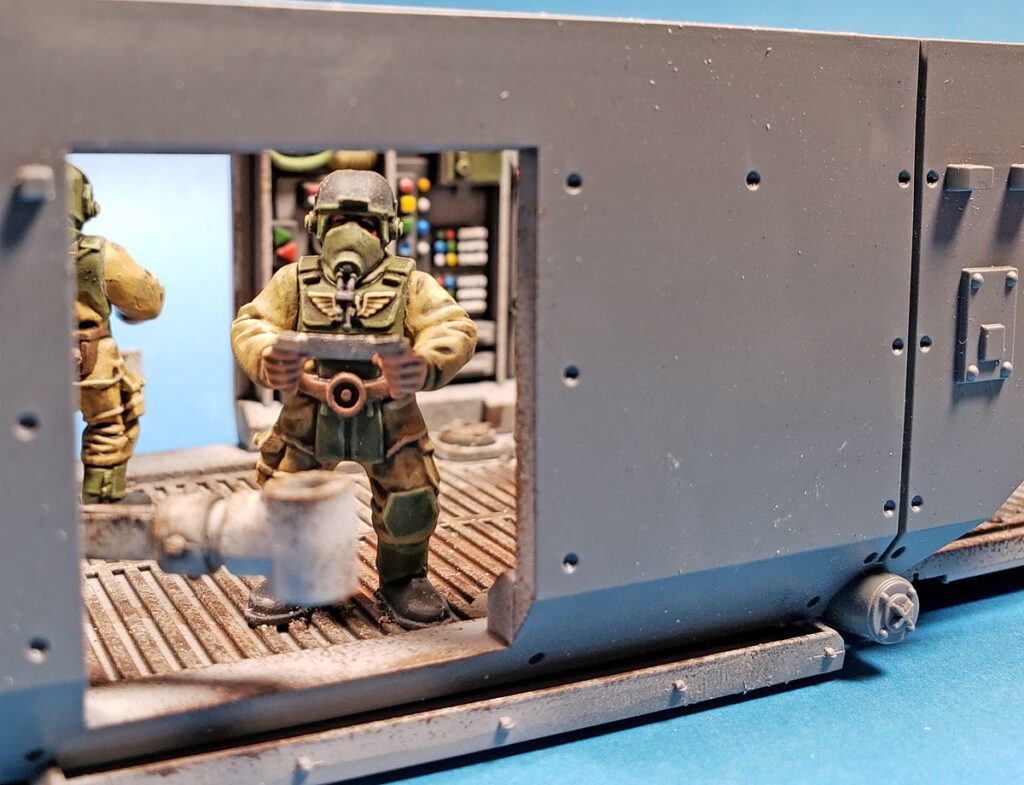
I wanted the doors open, however. And the door guns poking out. It’s easy enough to build, of course. It all fits perfectly. But test fitting showed that trying to insert the door gunner figures, the gun mounting pedestal, and the guns after painting would be just about impossible. The gun mounts partially connected to the inside wall of the cargo area, just inside the leading edge of the doors. So those would have to be glued in from the inside before things were closed up. Of course, with those in place, it meant the figures had to be mounted also before closing up the cargo area, as they would be behind the gun mounts.
I briefly considered cutting off part of the gun mount, adding some brass rod to make reconnection easier, and simply gluing them on later. Still, this presented two problems. First, I needed the figures to be glued in firmly for later shipping of the model. And I do NOT trust CA glue for that task. It will hold things nicely in generally, but when sheer force or shock is encountered, all bets are off. (And I speak from experience there, having shipped a load of models!) The figures needed a good, solid plastic melting model glue join. The second issue was simply that I always try to avoid cutting and modifying much of anything because I STINK at it.
I then started examining how the figures and the guns worked together. The arms for each figure were a single piece, joined by what looked like a TV game controller. That “game controller” mounted into the back of the door gun, acting as a handle. This presented another option – mount the gunner minus his arms, then the gun mount, and later, after painting, add the gun with the arms attached to it, and simply align with the figure. This too had a problem, though. While the mounting process worked, I was not really happy with how the arms aligned with the figure. I could foresee that the probability of misalignment, or gaps at the shoulder, was very high.
So I did as any good Pooh Bear would do, and I tapped my head and said “think, think, think…”
And I thunked up a solution…
…mount the figures with the arms, then the gun mounts, minus their pintles. Then later, after painting, I could set the pintles in place, add the gun, and set the gun to align with the “game controller” the gunner was holding. Test fitting showed this would work well. I did make one small modification, however. The guns have a slot that the “game controller” is supposed to slide into. However, I felt that might prove difficult given the tight confines, and would not let me have as much flexibility for setting the angle. So I simply clipped off the lower rear section of the gun that formed the bottom of the slot for the gun controller. A final test fit proved this method would work well. Only a small portion of the gun mount was left protruding, and that would be easy to mask off.
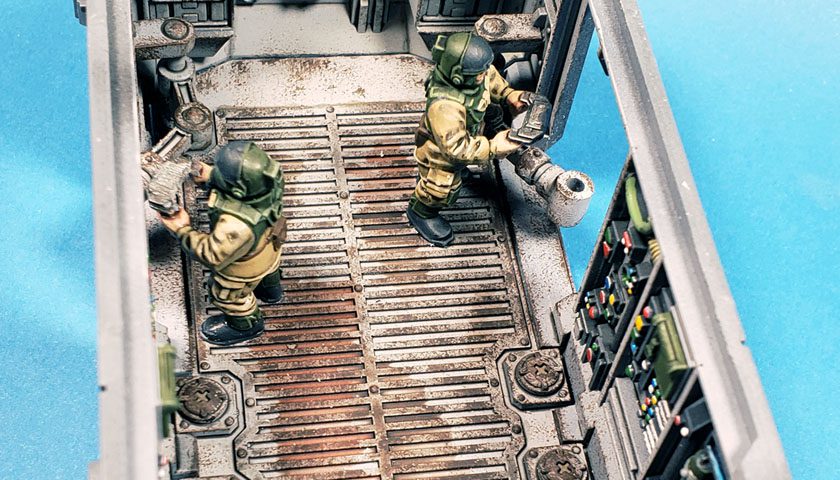
I knew I needed a good model glue join to make sure the figures were in place solidly. I scraped all of the paint from the bottom of their boots first. Of course, I needed to do so on the floor where they’d be mounted too. Tamiya Extra Thin Cement is great stuff, but it works best with a plastic-to-plastic join. Going back into Pooh Bear think mode, I recalled how on some visits to the dentist, they’d use a blue colored paper for me to bite down on. This would show them where my teeth touched. Borrowing from that theory, I simply applied some glue to the gunner’s feet, set him in place, then pulled him away. Where I saw glue was where I needed to scrape away paint.
With the paint scraped away, I glued them both in place, slightly offset to make it look as if they’re watching different angles for the bad guys. I used a fair amount of glue, and pushed them down a bit to make sure the plastic melted and bonded. I allowed them to dry overnight, and the next morning I thumped my finger against them rather roughly – and they held firm. Good to go.
The rest of the assembly was fairly straight forward. I did make sure to clean up all nub marks, and to sand away and bits of flash, before making any glue joins. The fit was very good. I went over all seams with some Mr. Surfacer 500, cleaning up with cotton buds soaked in alcohol. This made sure any hairline cracks were sealed up.
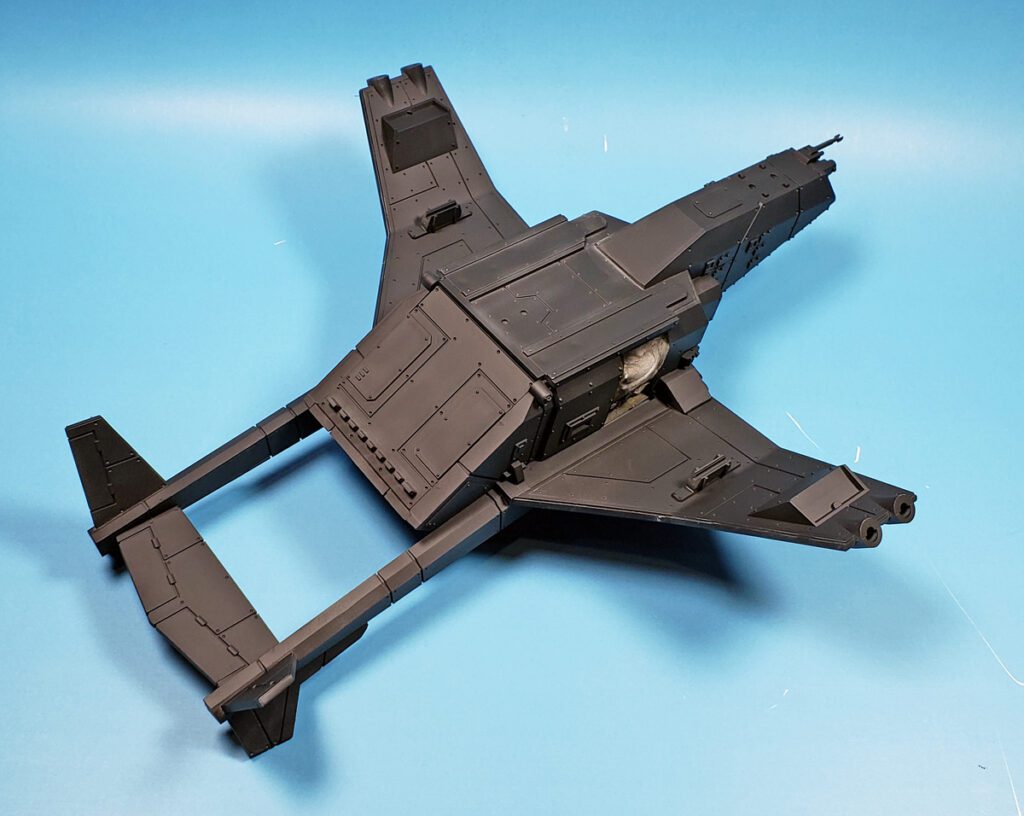
The canopy parts consist of two clear greenhouse sections over each crew member, and then separate framing sections for each side of the canopies. A fairly significant gap was left between the forward and rear canopy when set in place, and test fitting the frames showed it would still be wide open. I grabbed some spare bits of rectangular plastic rod, and cutting bits into shape, filled the area, trying to make it look as if it were part of the structure. It won’t bear up under close scrutiny, but from even a foot away it looks fine to me. I masked off the canopy with Tamiya tape. The cargo door openings were edge masked with Tamiya tape, and then stuff with tissue. I did choose to leave the engines off, as I thought painting and weathering would be much easier with those separate.
Everything was then primed in Badger Stynylrez Black. To be honest, I didn’t choose that color for any fancy reason, like black basing or thoughts of tonality. I simply think that models look really cool when primed in Badger’s satiny black primer. 🙂
With that done, I set it aside to let it dry for a few days, and to push ahead on other projects.
I’m really liking the look of this model. It has a look that is almost close enough to reality to be believable, yet far enough out there to evoke sort of a futuristic scifi/steampunk look. I do plan to weather this one to an almost impossibly silly level. I mean, what about Warhammer 40K is subtle anyway? 😉
The best part of this project so far though has to be the satisfaction that my 10-year-old fort building self derived from solving a simple problem. I think that’s one of the aspects that draws me to this hobby – figuring things out. It adds to the joy of the process.
So the next time you are perplexed in a build, go into Pooh Bear mode.
Think, think, think.
You’ll likely find you’ve thunked your way right through it in no time!






Leave a Reply