Growing up in the 1970s, everyone I knew built models. Some built a few, some built many. But everyone built models. A few guys I knew had older brothers who also built models. Those kids always seemed to do much better work. No surprise, really… they had someone to show how to do things that were more advanced.
One friend in particular named Curtis had a brother who built models that to my 10-year-old self seemed the absolute peak of the hobby. His camo patterns were precise and sharp, pilots looked like tiny people, decals were placed perfectly, looking almost painted on. I’m sure if I went back in time, they might appear a bit different to me today. But in my memory, his work was the highest level of modeling I’d ever seen up to that point in my life.
That Annoying Friend
Unfortunately, I was the kid brother’s goofy friend, so the most interaction I recall having with him was admonitions to stay out of his room and not touch the models. Then one magical day, he gave me one of his models. The fog of time has clouded the “why”, so I’m not sure why such an honor was bestowed upon me. If I had to guess, it was likely to make room for other models, and perhaps handing it off to me might slow down my efforts to peer into the inner sanctum of modeling goodness.
I took the model home to examine it. It was a 1/72 F-4E Phantom, resplendent in SEA camo, with the awesome looking shark teeth on the nose. It was built gear up, with only the Sparrow missiles slung under the fuselage. I studied that model for hours, amazed at the precision of the paint, how smooth it was, how every seam line was closed up.
Over the coming weeks, I tried my best to replicate his work. And though I did make some improvements, I became quite frustrated. Though I had the example in my hand, I did not know the techniques, and more importantly the application of them, to even begin to mimic his results.
Getting From Here To There
Scale modeling, at its core, is not difficult. Buy a kit, and some glue, a few paints, and follow the instructions. The beauty of the hobby is anyone can do it. All that is really required is a pulse. (And if you’ve been to a few IPMS-US meetings, even that at times seems negotiable… 😉 ) However, the desire to do more than just the bare basics emerges. The urge to go a step further becomes strong.
To build – to paint. To paint – perchance to weather: ay, there’s the rub
That’s a paraphrase of course… 😉
As in any pursuit, while a certain amount of personal talent helps, ultimately growth comes primarily from imitation. It is the rare few who come up with something truly new. Most modelers simply imitate, synthesize, and refine the works of others, and sometimes even become part of the process of contributing to the process.
And while I feel that I’d be classified as an experienced modeller, I know that I can never stop learning or growing. There is always improvement to be had.
Resources Aplenty
Thankfully, the scale modeller today doesn’t have to rely on the graces of your friend’s big brother. There are literally thousands of how-to resources available, both written and multimedia. Additionally, forums and social media groups foster discussion that is of great benefit for the scale modeller. (Especially if you like memes… 😉 )
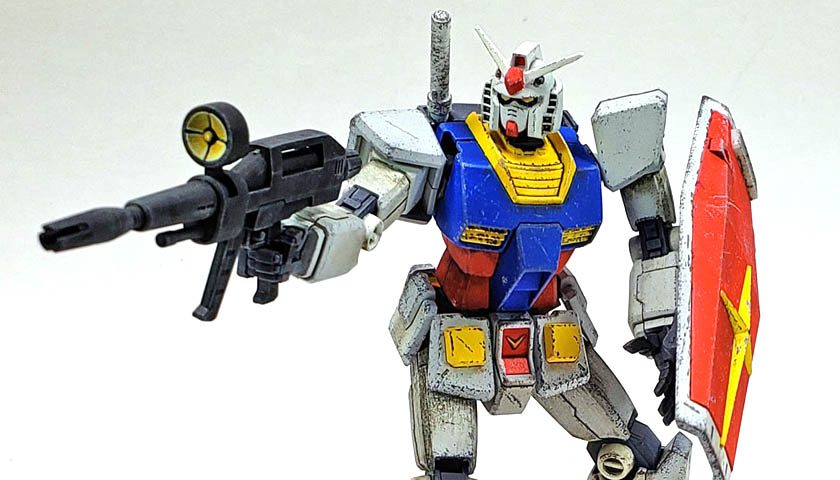
On previous Gunpla kits, I’ve been rather freeform in my approach to weathering. I’ve simply taken the knowledge I’ve gained through building aircraft, added in bits and pieces that I’ve read and discussed about Gunpla specifically, and simply threw it all in the pot to see what stewed up. And generally I’ve been happy with it.
But not entirely…
So for this build, I decided to take a very deliberate approach to the weathering. And by “deliberate” I mean “shamelessly copy”.
Target: Mig

Of course, the focus of my “copying” was designed for that purpose. I decided to grab my copy of Ammo of Mig’s “In Combat: Painting Mechas“, and follow the example shown in the book for an RX-78-2. And that model was built and weathered by Mig Jimenez himself.
I’d read through the book many times before, so it was all familiar ground. And I understood all of the techniques outlined in the book, having used them many times in the past on a variety of projects. However, this time I planned to pursue the process differently.
While not unhappy with my previous Gunpla weathering, I knew without a doubt it was not where I wanted it to be. Each build was marked with some successes and failures. And while people told me “looks good” – which I do greatly appreciate – deep down I felt that I needed to simply do better. And I knew I could do better.
But just as when I’d stared at that F-4E so many years ago, I knew I needed to know more about the actual process.
Hatching A Plan
My plan was simple. Go step-by-step, by the book, replicating as closely as I could what Mig demonstrated in his build. Certainly there would be some variation. He’d built a 1/100th scale kit, and I was working on a smaller 1/144th scale kit. He had access to every product in Ammo’s extensive line. Budgetary constraints forced me to stick with what was at hand.While I had most of what was needed, some improvisation was called for here and there.
The model had already been built and painted in the base colors, which you can take a look at in this previous blog entry. I spent an evening reading through the book in deliberate fashion. While I’d read it several times before, I made sure to really dig into it on this go around, studying things carefully photo by photo. I made notes, detailing for my own process the order in which things were applied, and carefully observing the manner of application, and the general density and distribution of them.
While I was not planning to duplicate precisely every chip and stain, I did want to follow as closely as I could to how Mig’s build was illustrated in the book. I knew from past experience that this very process of duplication would lead to growth.
So with book open on my model desk, and my notes taped up before me, I started in.
Getting Down To Business
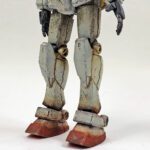
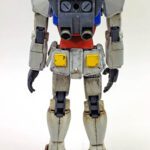
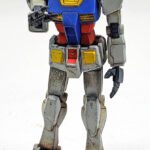
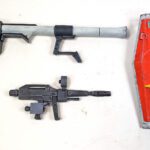
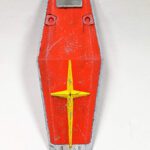
One of the first steps was paint chipping. I chose to primarily use the sponge application method, as I felt that for the scale, it would yield better results. Using a small bit of sponge held with tweezers, I loaded up a bit of paint, dabbed it on a paper towel to remove the excess,and begin to apply it to the model. I’d made close note of how he applied his chipping… not just the technique, but the size, shape, location, and density.
Letting the book inform those decisions for me really helped. While I’d always felt I overdid the chipping a bit, by carefully following the example, I was immediately aware of the level of restraint required to rein in my natural tendencies. After doing a leg and an arm, I sat back, looked at it, and was struck by a comforting thought.
I just grew a bit more as a modeller.
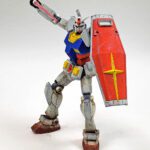
More steps followed… adding enamel washes to bring out shadows, more enamels and oils for stains and streaks, And weathering powders were added too. What emerged was how very multi-layered his approach was. While I’ve always tried to pursue depth of finish in my builds, I was surprised by how many layers Mig actually used that seemingly did the same thing. Yet slight shifts in color, and building up of layers, really did make a difference. And again, I truly felt a sense of growth. Not so much learning new techniques, as everything I was doing in term of material and application was well within my comfort zone. The growth was not so much in the how as it was in the why and where – a distinction that is critical.
A few times I had the urge to zoom off into my own line of weathering, but each time I resisted the urge. I realized in past efforts that I may have missed a good learning experience by deciding too soon that “I got this”. So right up to the end, I stuck to the book.
Drawing Some Conclusions
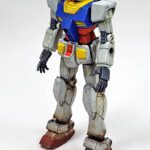
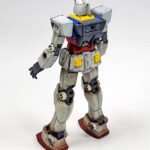
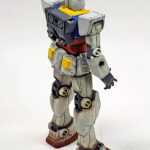
When it was all said and done, I was quite pleased with the results. While there is still plenty of room for improvement, I felt that the overall weathering on this Gunpla was the most refined I’ve been able to achieve to date. I definitely got a sense of how to adjust my own habits and techniques in order to realize the goal.
Something else I also learned that I think is important to not lose sight. Mig’s work is really good. I’m sure the fellow started with raw talent that is likely beyond the ordinary. Maybe not. But his experience, careful application, and observation bring a level of refinement I am still pursuing. But it is absolutely achievable. Anyone can do this, with practice. And it’s not just him. There are so many modelers today that can always provide example, illustration, and motivation.
I’d initially gone into this exercise, frankly, from a content standpoint. I’d thought it would be interesting to document the process. It’s not that I didn’t think I would learn anything, but I was surprised at how much I did learn. While I always try to learn and grow, this build has given me a fresh outlook on the simple benefit of doing something they told us NOT to do in school – copying.
Moving Forward
Of course, the goal is to not fall into a rut of only copying. It’s rather to take what is done in imitation, and to then add to it, refine it. We then merge other techniques and processes and ideas, eventually arriving at something that has a bit of our own touch to it. And past modelIng history has taught me that process never really ends.
No matter what level you are as a builder, examine an aspect of your modeling that you’d like to improve. Identify an area you haven’t done before, or are not comfortable with, and try the “copy” method. It can be through a book, a video, or even sitting down with a friend who can demonstrate a process.
I often wish I could see those models that Curtis’ brother built, one more time. More than that though, I’d like to simply thank him. His work produced in me a sense of always asking “how can I do better?”
That truly makes the hobby fun – to learn, to grow, to improve.








Leave a Reply