I’ve always been a fan of simplifying things. Whether it’s yard work, tasks at my job, driving routes, or in my hobby, finding ways to save time – yet still get good results – has always appealed to me.
In some cases, it’s not just a time saver, though. Quite often, I’ll see a technique that a modeler uses, and for the life of me I simply can’t replicate it. However, by breaking things down to their component parts, I can usually arrive at a very basic set of tasks. This then allows me to achieve similar results, despite less than stellar skills in many areas.
When I’d first returned to building scale models, I was immediately drawn to the notion of paint chipping. As my initial forays into the hobby were via World War II aircraft, adding areas where paint had chipped off was quite common. In my youth, my go-to method was to simply slather the model in Testors Silver paint… you recall it right? In the little square bottle. Horrid stuff. Never dried it seemed. Yet it was what I knew.
Upon re-entering the hobby as an adult, I went back to that. Yet when I compared my results to the photos of the real aircraft, and what I saw in modeling magazines, it was immediately apparent something else was needed.
Enter The Pencil
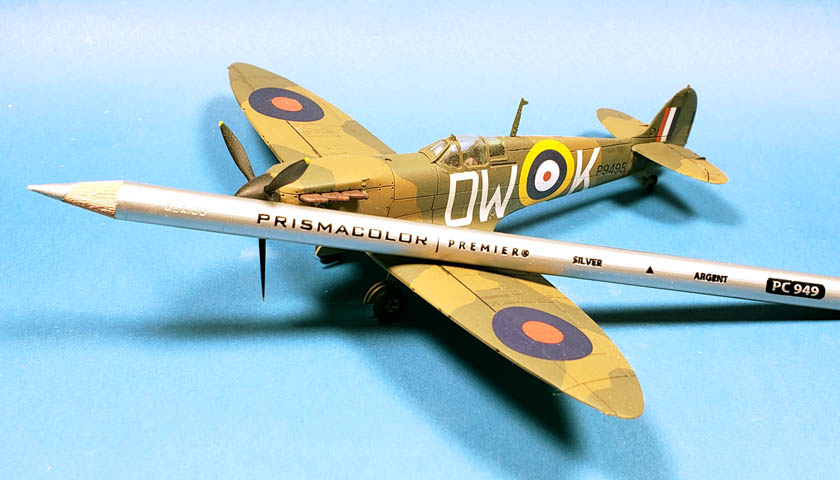
 I saw in several magazines, and was also told by a few friends, that a simple way to get those types of paint chips was through the use of a silver pencil. In all cases, a specific brand was mentioned – Prismacolor. I checked at my art supply store, and found exactly the right pencil.
One of the first things I learned about this pencil is what it is not – watercolor. While Prismacolor makes several types of art pencil, the ones that seem to work best in my modeling use are the Premier® Soft Core Colored Pencils, which come in many colors. (According to their website 150!)
As best as I can tell, the pencil deposits color that is oil based. I say that because I’ve noticed that it reacts with odorless enamel/turpenoid thinners, as any oil or enamel would. While water can affect it in some tests I’ve done, the hotter thinners will take it right off.
A Note On This Demo
I’m using a Silver Prismacolor Pencil for this demo, and applying it to a very old Spitfire model that has sat on the shelf for years. Because most of the models I build now are fully weathered, I wanted to find something that was “clean”… which meant grabbing an old build from the top shelf. So please forgive the state of the model. 🙂
It’s also important to note that this technique is not just for aircraft, and can make use of any color. The same methods I describe here can be used on a Gunpla’s white armor with a dark brown pencil, a Star Wars kit’s red panels with a white pencil, or any other combination of genre and color you can think of.
And because of the wide selection of pencil colors available, many more advanced application methods, such as two color chipping, can be applied to your model. When it comes to the color choice and type of chipping pattern to apply, it’s really no different than using a sponge or a brush.
The Technique’s Benefits
What does matter the most, in my mind, is the incredible control and precision this method gives a modeler. As the pencil can be sharpened to a very fine point, color can be applied in a remarkably precise way, yet under great control, because all that is being done, in its most basic form, is writing.
While there is certainly good reason to use painted on chips, that technique does have its limitations at times. Paint flow can sometimes be difficult to get just right, and many modeler’s hand control is just not up to the task. The sponge application method is also very useful, but it’s not appropriate in every case. Quite often it can be a bit to heavy handed.
Of course, I’d strongly advocate being well versed in all of these methods. Ultimately they are tools in your toolbox, and can be applied individually, or together, to create some really remarkable effects.
Still, the pencil technique, in my experience, allows for far greater precision and control, especially around small detail, and adjusts well to any scale, far more than other methods I’ve used.
The Tools
 The two primary tools needed are your handy dandy pencil, and a pencil sharpener. I prefer to use the manual type, rather than the crank or electric type. I found that the latter two can grind away too much pencil too fast. The small manual sharpener is handy because I can get a very fine point with only a few twists.
I normally sharpen my pencil to a point that is as fine as I can possibly get it. Because of the material, an ultra-sharp point quite often breaks off. But a very sharp, fine point that is quite workable is easily achieved. After sharpening, you may need to wipe away any excess shavings from the pencils tip, just to avoid them falling on the models surface and possibly creating smears. (The colors can be smeared – quite useful at times!)
Getting Started
 The most basic application technique is the humble and simple dot. Much of the time when I am using pencils for chipping, I’m making loads and loads of small dots. Some may be applied quite precisely, as in the small chips I’ve added around the cowl fasteners shown in the photo. The pencil’s benefit here is obvious – the control that chipping can be applied with is quite remarkable. It can literally be fractions of a millimeter.
(I actually had a quite difficult time photographing this… I had to go back and increase the size of the chipping just to get it to show up in the photo.)

The dots can be applied in two ways. For more precise application, I like to use the point straight on, with the pencil perpendicular to the model’s surface. This allows for the most precise of dots. For areas where greater chip size is desired, yet still with precision, I hold the pencil at about a 45 degree angle to the surface being chipped. While still applying the color in a “dot” fashion, it’s also easy enough to allow a small bit of “scrape” to be introduced, creating nice micro scratches and dots.
In a few instances, I even have held the pencil close to the end away from the colored point, and literally “drummed” the pencil against the surface. This method will introduce a very random, haphazard pattern, especially if the model is held in the other hand and moved around a bit in the process. When I use that technique, my goal is not to fully fill in any particular area, but rather to create interesting patterns, and then later go back in and fill in areas using a more precise application techniques to fill out the area.
Chipping Larger Areas
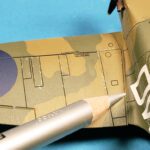
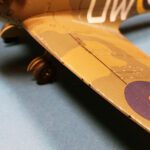
For a large area, such as a wing root on an aircraft, the pencil is quite fast and yet realistic.
I like to start by defining the area being chipped. For the wing root, I colored in the panel line where the wing and wing root filet join. I then defined a simple triangle, with the wider area near the trailing edge, where the pilot and crew would step most frequently. Filling in the area is simply a matter of coloring things in as one would with a pencil on paper.
Next, a bit of randomness was introduced by lightly drawing the pencil back and forth along the edge of the silver area. I didn’t try to be particularly neat… I just sort of scribbled back and forth in short, quick motions. This was done along the length of the area on both sides.
The final step is to add various dots, both right at the edge, and slightly away from the already chipped areas. This helps convey the look of paint being rubbed off – more towards the center, and less as you work out away from it. The result can be quite convincing.
Bonus Tips: A separate pencil can be used to represent the primer color underneath, to allow a bit of that to poke through. Additionally, a pencil, or paint, matching the colored base coat, can be then used to apply some spots of color back into the silver area- allowing for an even more realistic look.
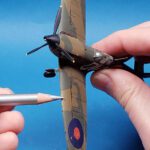
For edges of various model parts, such as the wing’s leading edge, I like to use the side of the pencil. I’ll generally draw a single colored line along the length of the edge (or most of it, depending on how heavy I want it chipped). Once that is set, I then begin what is best described as a “sawing” motion, varying the angle of the pencil as I go to introduce varying degrees of chipping further back from the edge. I will often also go back and apply various dots and scratches, trying to be as random as possible, to further the effect. This also works very well for chipping prop blades.
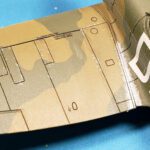
 Another way the silver pencil can be quite useful is to apply spot colors to defined areas. There may be a panel or other area of a model that needs to be a solid color. Masking for airbrushing can be a bit tedious in some cases. And brush painting, if you’re not steady of hand (that would be me – Mr. Shaky-Shaky Hands! 🙂 ), can lead to stray marks. The pencil can be easily applied in these cases to quickly color in areas with great precision. I picked out a small panel on the model’s wing to demonstrate this. However, it can work well in cockpits, hoses, tubes and wires, and any other area where a clean, straight line is desired.
Wrapping Up
When it comes to the use of colored pencils, I’ve only… scratched the surface, as it were. 🙂 The number of ways that I have seen people using them over the years has been enormous. There are a few things I’d suggest may be helpful to consider in their use:
- Because this particular type is affected by odorless enamel/turpenoid thinners, plan your application accordingly. Overcoating them with a gloss coat (I use Future) will seal them against later weathering applications.
- The brand I use is from Prismacolor, but I am sure there are equivalents throughout the world. And while water-based pencils can also be used, I find that these Prismacolor type pencils give a very rich, opaque color.
- They can be applied over a gloss surface, but in my usage, a satin or (better yet) matte coat works best. It gives the color something to “grip” when applied.
- I generally apply pencil paint chipping on my aircraft last – even after the final matte coat. While you can do it earlier in the weathering, later techniques, such as oils, stains, and powders, can greatly change the look of it. While exposed metal certainly would have dirt and oil on it, it was often chipped because of constant wear, so areas would often be somewhat clean. Explore a hybrid approach – doing it early in the weathering, and then touching it up later. Depending on the look you are going for, that can work well.
- If you apply a matte coat over the silver pencil, it gives it a nice dull, metallic look.
Experiment with colored pencils! They make a great addition to any modelers “bag of tricks”, and work nicely on models of any genre. They’re relatively cheap to acquire, and readily available too.
Best of all – they’re drop dead simple!





Leave a Reply