In the late 70’s, my family and I moved into a new house. It was a good-sized house, with a very large yard, and three bedrooms. Trouble was, there were six of us in the family. So mom and dad decided to build an addition on to the house. For several weeks, our yard was a construction zone.
Part of that construction required some destruction. The carport was being converted into a master bedroom, and then a new carport would be built off of that. This required extending the driveway out a bit, and also pulling up some of the concrete that led to the existing carport. The workers piled up the chunks of concrete off to one side of the driveway. At some point, they poured some concrete over it. Not enough to completely cover all the chunks, but just enough to bind it together.
Why they did this, I do not know. But that event was one of the greatest things to happen in my childhood. (Poor kid musta had a pretty deprived childhood… 😉 )
The chunk of rock that was left was about 3 feet long, 2 feet high, and about 2 feet wide. Because they’d piled the driveway chunks up haphazardly, they were at all sorts of angles. When they’d poured the concrete over it, much of the gaps had been filled in, but areas of overhang were left alone. While it sat right next to the driveway, the other side – where all the nooks and crannies were – was a nice, open grass area.
I immediately saw the possibilities
That chunk of rock became Mount Suribachi. Monte Cassino. Pork Chop Hill. Navarone. You name it. I would spend hours setting up my plastic soldiers in and around that chunk of concrete. In a few places, I carved out areas for gun emplacements, and areas where soldiers could be set up. Trenches were dug in front of it. Though I started with the standard green plastic army soldiers, the kind that were literally sold in every store imaginable, I eventually graduated to Airfix HO scale sets.
And my goodness did I collect more than a few of those. I had soldiers from every Army of World War II… multiples of some. British Eighth Army, Afrika Korps, American paratroopers, British paratroopers, Russian infantry. All told I had nearly a thousand of the little plastic men, dutifully organized into fishing tackle boxes.
Of course, there were vehicles, too. Tanks, half-tracks, trucks with towed artillery, landing craft, scout cars, and so much more. And the sky was filled with aircraft. Spitfires, Hurricanes, Mustangs, Thunderbolts. My favorite was a Monogram 1/48 Dauntless dive bomber. It actually had a working bomb drop mechanism that worked… sort of.
My setup was not haphazard, either. I was a bit OCD about it all. Each unit was divided up into squads and platoons, and I used the knowledge I gained from reading volumes on infantry combat to set up some pretty complicated formations. Years later, when I was actually a real soldier, I looked back with fondness on those days, realizing how tactically sound much of my plastic doctrine was even at 10 years old.
My friends would often come over to play, but rarely did they hang around long. I wasn’t interested in blowing my armies up with firecrackers for the most part. I wanted to tediously go through and imagine the battles, deciding who would live and who would die – and who would win. (Hint: the Nazis never, ever won.)
Satisfying The Inner Child
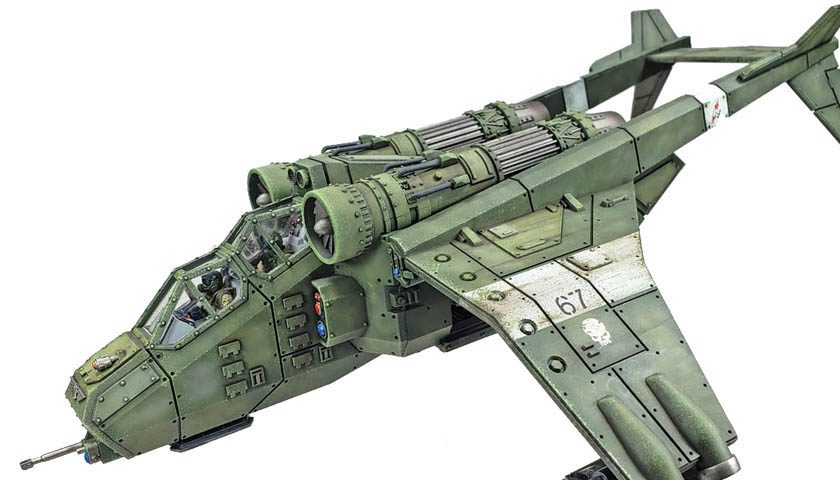
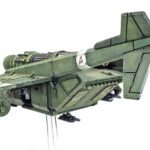
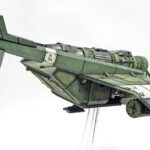
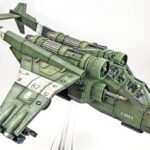
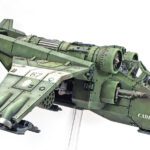
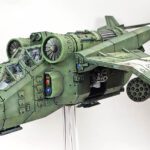
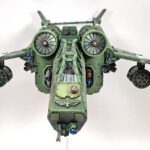
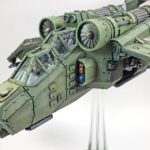
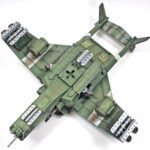
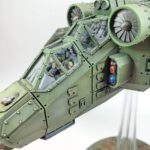
While most build reports end with the conclusion, I’m just going to get straight to the point on this one. Building Citadel’s Astra Militarum Valkyrie has been one of the most fun modeling experiences I’ve had since returning to the hobby 12+ years ago. It represents completed model #292 in that period, and I seriously am having trouble thinking of more than a handful whose enjoyment exceeded this one.
And the 10-year-old still in me was practically salivating at the thought of what it would have been like to have this baby at the old concrete block battlefield.
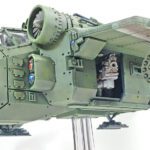
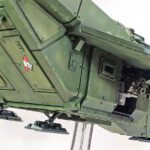
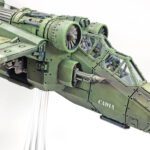
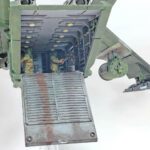
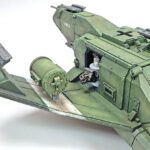
The fit of the parts is superb. The sheer amount of detail packed into every inch of it is astounding. The cockpit has a simple but fun interior, and the rear crew area can almost count as a model unto itself. (You can see details of that portion of the build here.) The exterior of the model simply begs to have every weathering technique known thrown at it.
During the construction, I came up with a slightly over complicated – but workable – method to allow me to add the side guns in after painting, which made masking the open gun doors easier. I also left the two engine assemblies off for the bulk of the painting and weathering, which made the process much easier.
After applying the base colors, some initial shading and fading, and some sporty white stripes, a gloss coat was added, and the few decals placed on the model. You can check out that full process in this blog post. in summary, the model was based coated in Citadel’s Castellan Green with my trusty Badger 105 Patriot airbrush. Additional fading was through successively lighter mixes of Tamiya XF-81 RAF Dark Green 2, and XF-4 Yellow Green. The striped areas were then masked off and painted with Vallejo Mecha Color Off White.
With the basic work done, the weathering could start.
And Now For The Fun Part
I love weathering models. While I won’t make claim to be particularly good at it, I will stand up and lay hold of the title off “Goofball Who Has The Most Fun” when it comes to the process. For some reason it just clicks with me. Every aspect of building a model has some appeal to me, but it’s all focused on one goal – getting to the weathering.
And Warhammer 40K kits just beg to be weathered. it’s almost impossible to go “over the top”. It’s made-up stuff, all from an imaginary world that is all about war, blood, bullets, and squat men who make angry faces and growl a lot. (Referring to the figures… not the players, of course. Mostly… 🙂 ) No one can say ” that Valkyrie would not have looked that way”, simply because it’s completely made up, imaginary fun. Weather away.
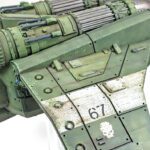
I began with paint chipping, using the sponge method for the bulk of that work. Starting on the white areas, sponge chipping was added with the base Castellan Green color. This was done to achieve a look that made it seem as if the stripes had been applied at the unit level, so they’d have been added over the base green. Chipping white is quite fun – it shows up so well.
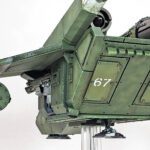
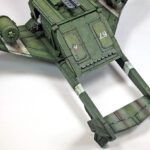
With that finished, I started in on the green areas, using the lighter Citadel Straken Green for those sections. Once again, the sponge method was applied. I went around the model fairly randomly, building up as I went, and simply let the weathering itself dictate how much and where I applied it. At first it appeared disjointed and haphazard , but as it progressed, I was quite happy with it. A few areas were refined and/or enhanced with some brush painting, but 95% of the chipping was through the sponge technique.
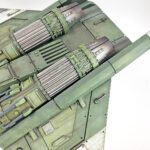
A few areas along the wing leading edges, and on the underside of the horizontal stabilizer, were further chipped using Citadel’s Leadbelcher. I wanted those parts to look as if the paint had worn right down to the bare metal. The wing leading edges for obvious reasons, and the underside of the tailplane due to the exhaust from the engines.
Panel lines were given a thorough treatment of Citadel’s Nuln Oil to help build contrast and make the detail pop. Several colors of enamel products were used to further gunk up the edges around details, and to add streaking all over the model. As with the chipping, it was applied in a random fashion, and only after being built up around the whole model did I start looking for areas to refine. While I know we want weathering to be random, I’ve realized we are human. (Can you believe it?) Humans like patterns. I certainly know this human does. So instead of sweating the process and trying to avoid a pattern, I just keep moving the model around, applying weathering at various points, and then looking for the patterns that emerge. Even random, real world weathering takes on patterns of its own, so why not go with that? As I examined the model, I could then add more weathering in places I knew needed it, and also add to areas that had serendipitously appeared. (How’s that for a $64 word?)
By the end of the process, I was quite happy with the result so far – and yet a bit sad it was coming to and end.
Some final fading was done with heavily thinned Tamiya XF-55 Deck Tan, randomly applied through the airbrush in a patchy pattern. I built up a few of the raised panels with the color, just to add a bit of modulation. This color was also used to add some exhaust staining from the engine. A 2-1 mix of heavily thinned XF-69 NATO Black, and XF-9 Hull Red, was then applied to finish off the various exhaust stains, and add a few more random streaks around the model.
I’d considered adding some additional grunge with pastel chalks, but at this stage, I decided I liked how it looked, and did not want to go further. Part of the secret to weathering is to know when to stop. While it’s hard to go overboard on a 40K model, I think there is a point when you can realize it’s “just right”, and anything beyond that may not be helpful. (Your mileage may vary, of course!)
Reverting To My Childhood
With the weathering finished, I added on the last bits of the various dangly pieces, gave it all a good coat of Vallejo Mecha Color Matte Varnish, and after removing the canopy masks, called it done.
I try to temper my pride by reminding myself that there is always more that could be done. Every inch of any model could have been more refined, more precise, and better executed. I know without a doubt that every model I build has more than enough flaws. None is perfect. So to help keep my hubris in check, I rarely allow the luxury of the thought “this one is good” to enter my head.
But now and again… when the model just seems to come together, the steps all work in conjunction, and I simply have fun through the whole thing, I will step back, set it on the desk, and smile.
This one is good.
I think what resonates most with me though is realizing that a model like this would have been exactly what I’d have used as the centerpiece for my plastic armies so many years ago. Never mind that it was not real. The pure coolness factor alone would have pushed any thought of that aside. It looks tough. It says “I’m here to kick ass and chew bubblegum… and I’m all out of bubblegum.”
I guess, in the final analysis, that is the appeal of building Warhammer models. Though I do not have any desire to play the tabletop game, they seem to be a logical extension of my childhood love of playing with plastic armies. Moving soldiers on the battlefield. Flying over the top of them with airpower.
Most of all… they connect me to those days, many years ago, when I was starting to shed childhood, and move into the teen years. It wasn’t too long after that I discovered girls weren’t icky, sports were fun, guitars were gloriously loud, and my car could get me to many places. (A few I probably should have avoided… :O )
The old concrete block was forgotten.
My folks moved away from the house in 1988, and I would have to imagine the new owners would have looked at that block and wondered “why on Earth would anyone leave this here?” It’s as long gone as those days are for me.
And right now, I miss that old block. And those soldiers.
But that’s also why I love model building. I can sit at my model desk, look at the things I build – like this Valkyrie – and be transported one again, back to those days.
Now if you’ll excuse me, I think I’m going to dig an old dusty box out from under my bed. It’s full of plastic soldiers. I think they’ll be interested to see their new air support.

Leave a Reply