
I think that one of the most enjoyable parts of model making for me is weathering a kit. Streaks, grime, paint chips, fuel leaks, exhaust stains… they are all great fun to apply. Those added elements are what really brings a model to life, transforming it from looking more like a toy into something realistic.
The methods for applying the various “mistreatments” are vast and varied. Show any modeler a technique, and before long they’ll have added their own twists to it, resulting in something suited specifically to their tastes.
A part I find quite fun is adding paint chips. Any vehicle, or piece of equipment, will eventually get some sort of scrape or ding, and that will show as a scuff, scratch, or other indignity on the surface of the object. Whether it be the car you so lovingly care for, a desert based World War II fighter plane, or something out of scifi, the presence of a few – or a lot – of paint chips helps tell the story the maker is trying to convey.
Of course, how much is purely a matter of taste. Some modelers prefer a very minimal amount, while others want a quantity of chips that would make the wait staff at my favorite Mexican restaurant blush. (‘Cause I eat a lot of chips… 🙂 )
Despite the fact that I’ve added paint chips literally hundreds of times to scale models, I am never really quite happy with the result. The line between “not enough” and “oh my, someone stop him” is often quite difficult for me to dance. And though I’ve tried many methods, I’m still not fully satisfied with any single application technique.
One method that I do like employing, especially on models where I want to have more chipping, is a method I heard Lincoln Wright of Paint on Plastic refer to as “spongering” – the use of small pieces of sponge, dabbed in paint, to apply tiny bit of paint to the model.
Picking Your Colors
The first step I take when embarking on a quest for chippy goodness is to pick my colors. While certainly the use of one color works just fine – I do that quite often myself – adding additional colors can really add more life to your model. The theory behind this is simple – when a piece of equipment is scraped, it doesn’t always leave just one color. (See this blog entry for proof! 🙂 ) The top layer of paint – which may have changed in color due to exposure to the elements, will look different from the underlying paint that has not been exposed. Under that may be a coat of primer, which could be an entirely different color. And beneath it all is whatever the part is made of – metal, wood, composite, or super-secret-future-space-alloy-thingy.
I generally like to pick between two and four colors, depending on the model. For a real world aircraft, I may go with three – a color lighter than the surface, a primer color, and the underlying metal. For models that I want to make it simpler, yet still eye-catching, I’ll opt for two colors that contrast highly. For example, if the model is a forest green color, I may opt for initial chip colors using a very light green/yellow color. This gives plenty of contrast with the overall green. Then a second color will represent the underlying material, and be a high contrast to the initial chips, so perhaps a darker brown will be used.
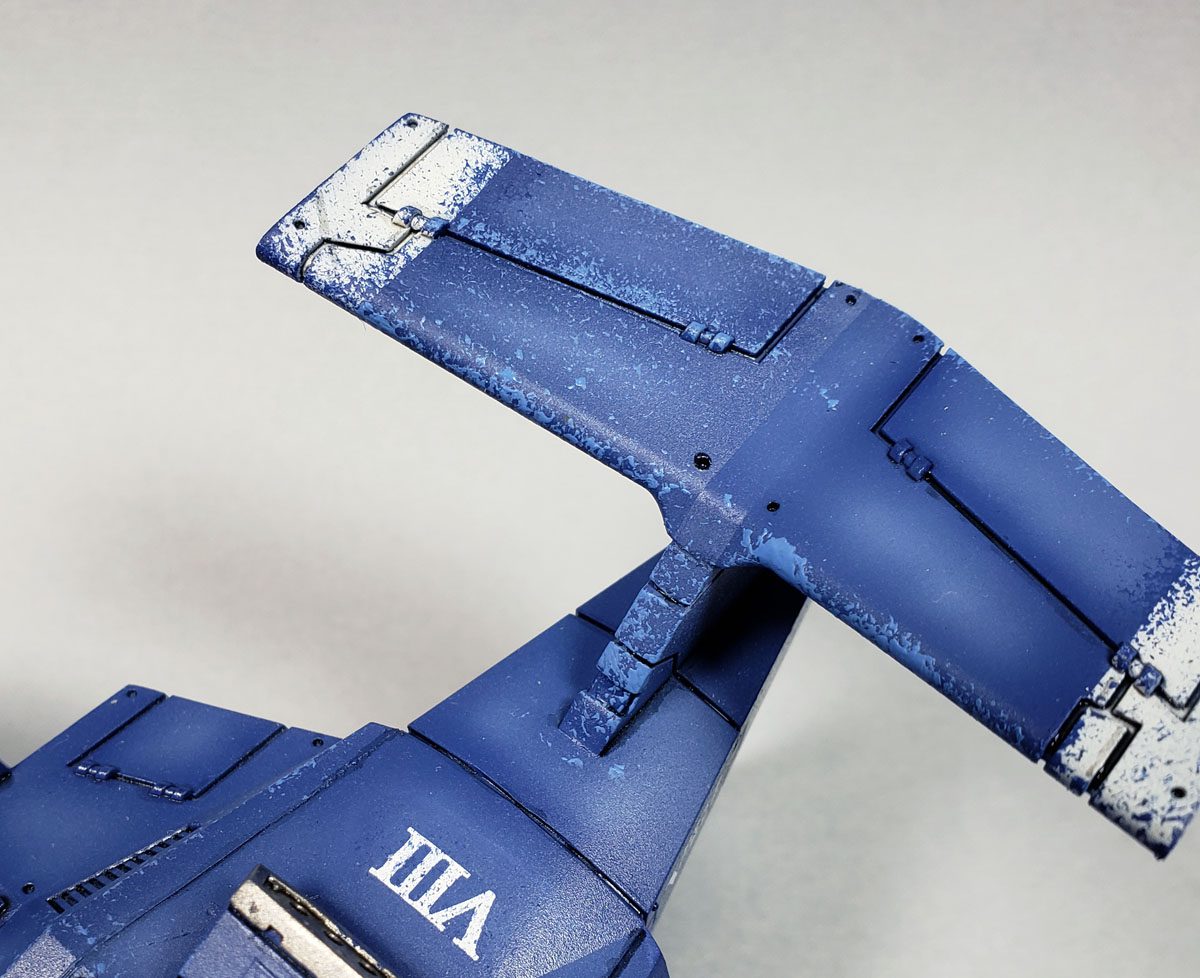
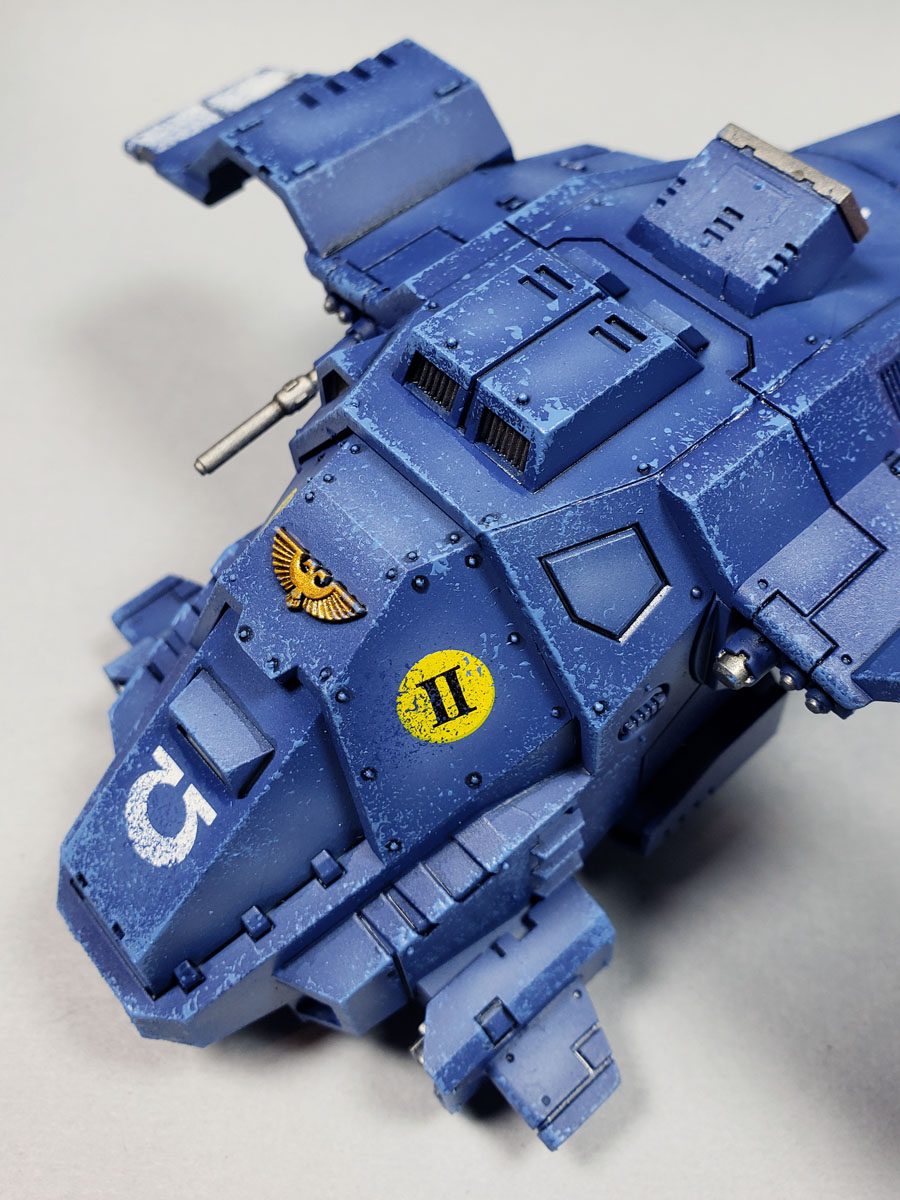
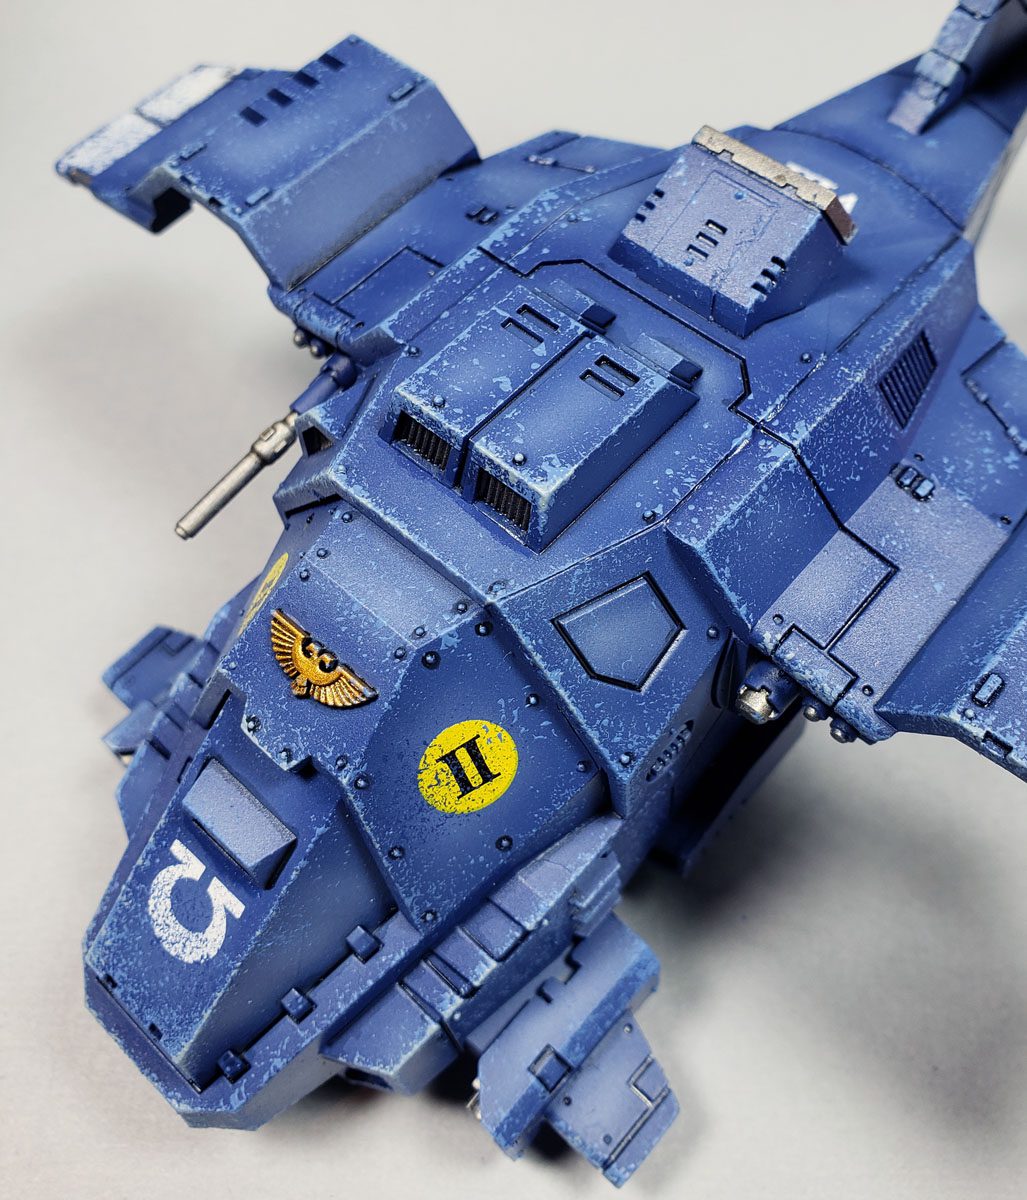
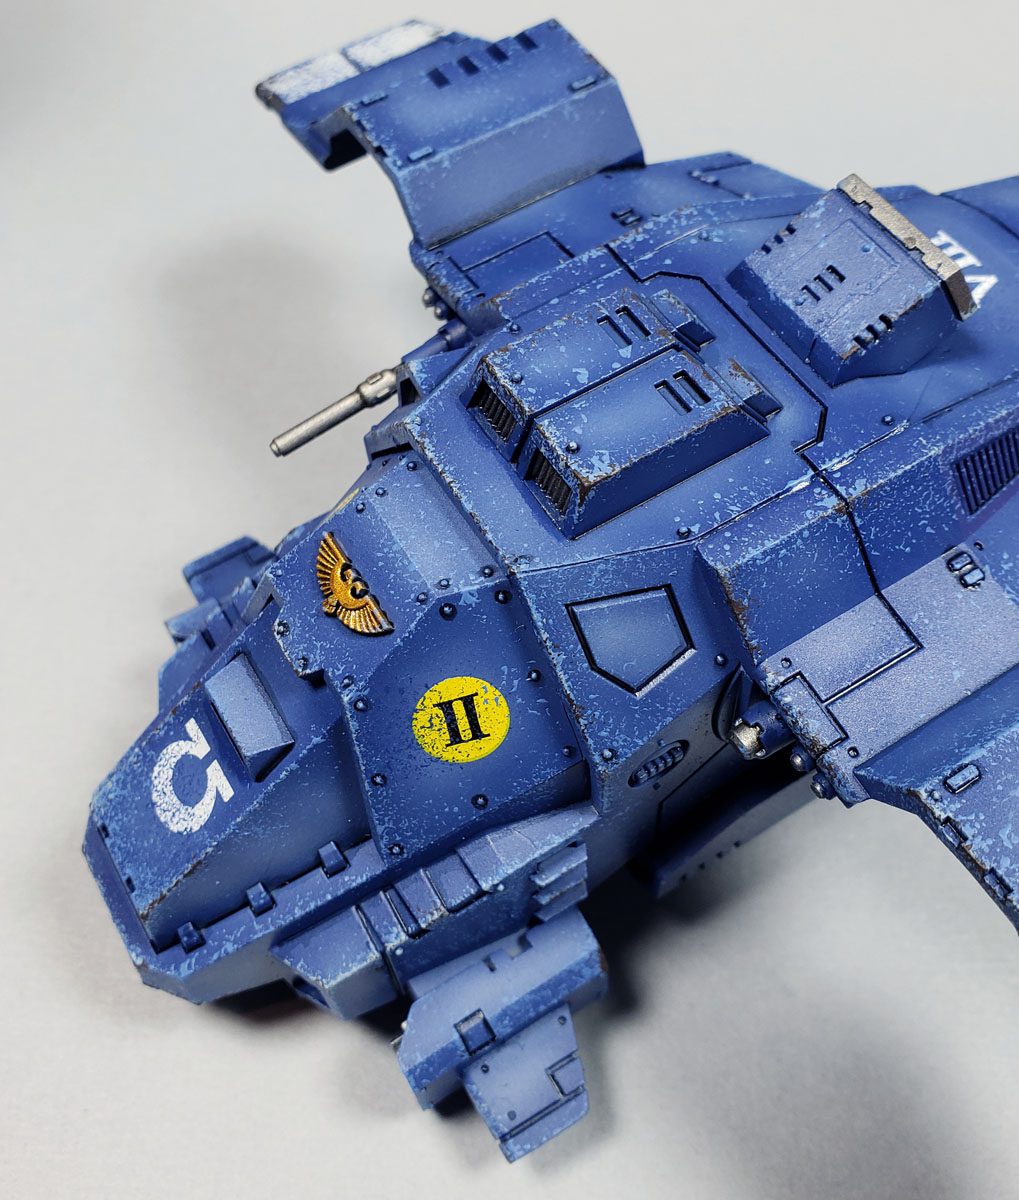
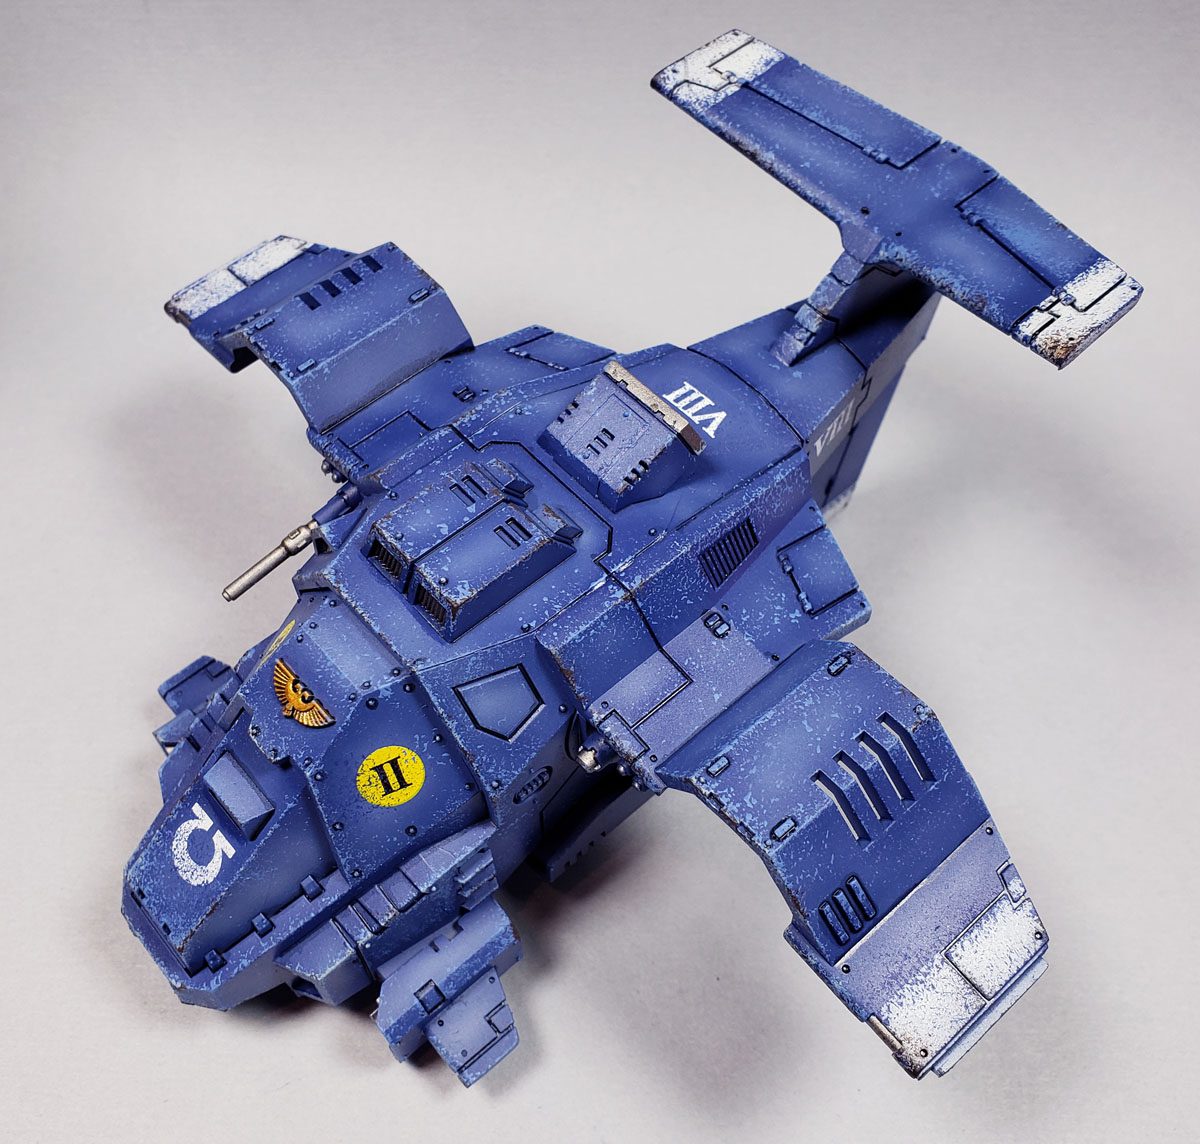
In the case of this Warhammer 40K Stormhawk (Precipitation Pigeon, eh? 😉 ), I wanted a more dramatic look. Warhammer is not subtle… it’s grim and dark and everyone yells a lot and has angry looks. And things get really, really chipped. At least in my mind. So I decided on four colors.
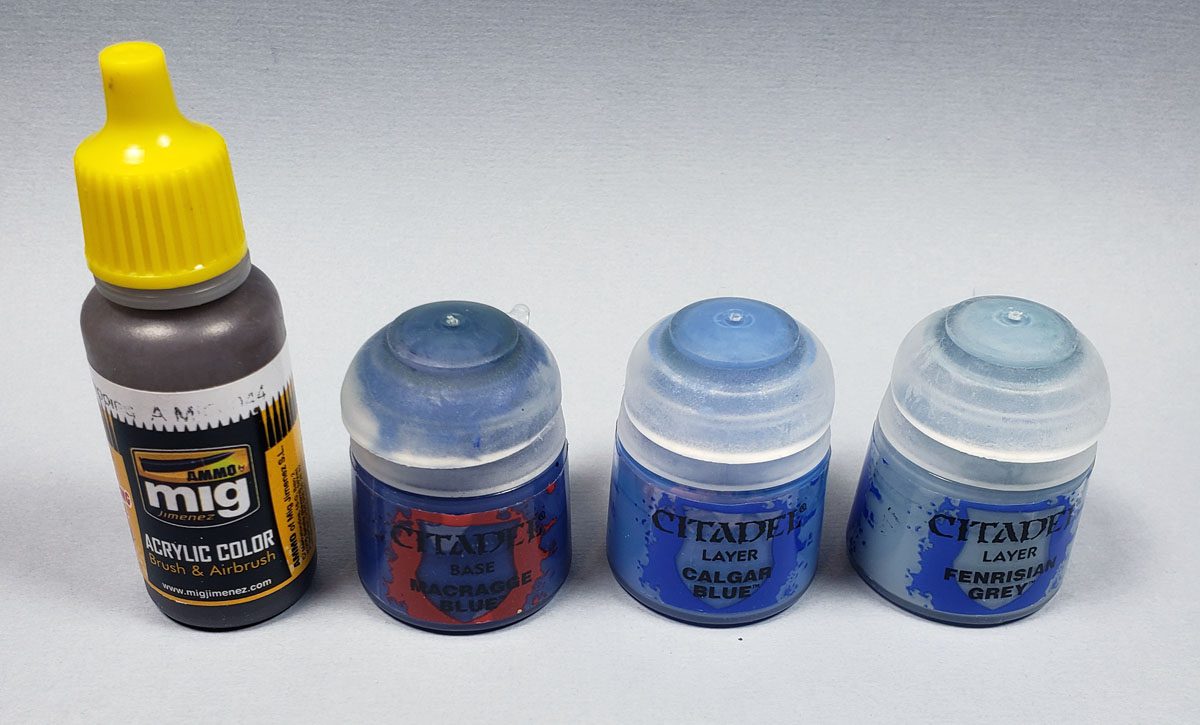
First, the initial base coat color of blue was selected. This would be used to chip the white stripes, and the various decals. The idea here was to simulate the stripes and markings being chipped down to just the original surface color. Next, two lighter shades of blue were chosen. The darker of the two would make up the majority of the chips, representing the scuffs, scrapes, and dings that went just below the top layer of paint. The lighter of the two would be used more selectively to simulate areas that had deeper scratches and abuse. Finally, a darker brown color was used to imply that the scrape had gone all the way through to the underlying super-space-composite-stuff, which is obviously brown. (It’s grim and dark… and kinda brown in the future.)
Choose Your Sponge
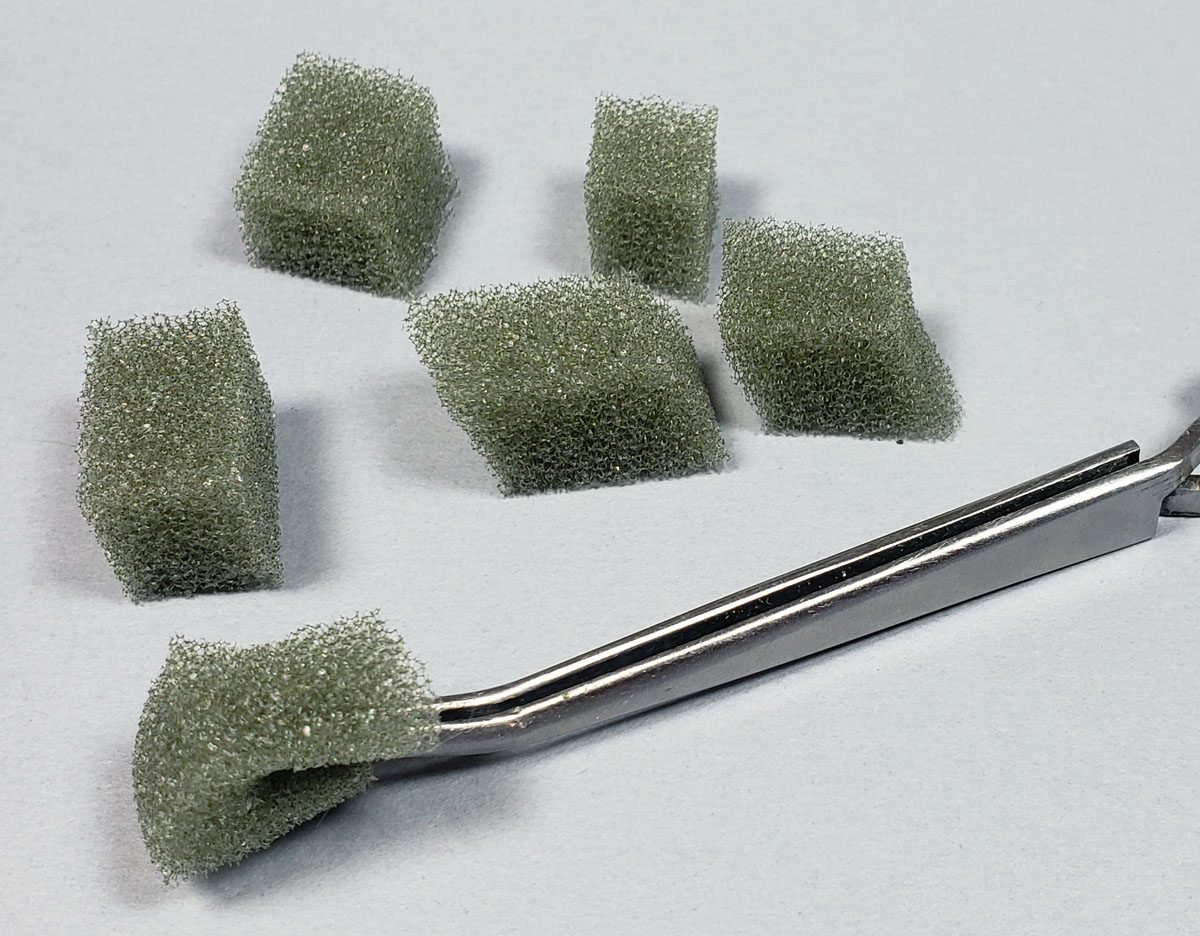
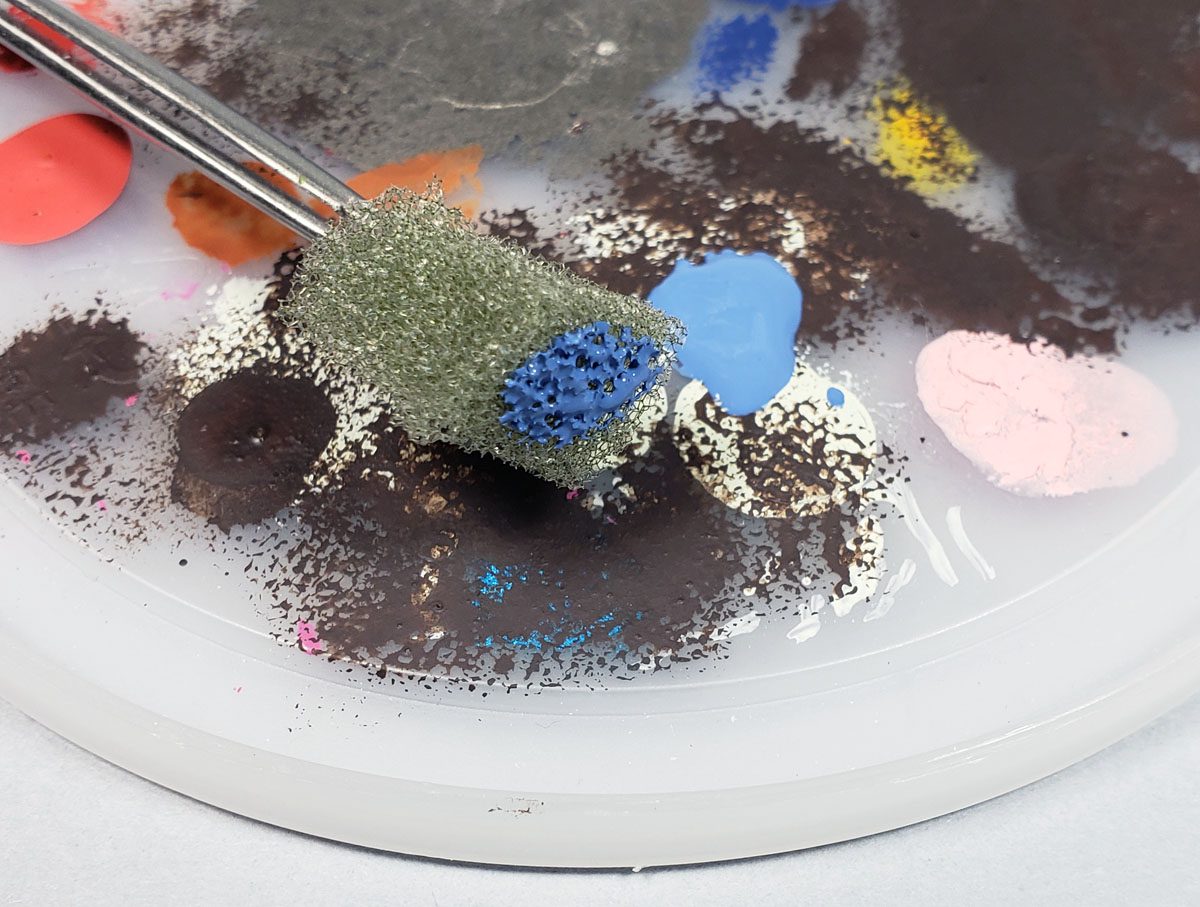
For applying the chips, I grabbed a section of sponge that had been used for padding in a box of fruit my wife had received as a gift. I prefer foam that is not too dense or loose. Of course, you may opt for something different, or to even use multiple types. I’ve seen folks use pieces of kitchen sponge, florist’s foam, and even steel wool.
I generally cut my sponge pieces into blocks roughly half an inch on each size. It doesn’t have to be precise, really. That’s just the size I like to use.
I’ve seen quite a few folks that like to “hassle” the sponge on the end to be used… making small cuts and slices and so forth to try to randomize it. I’ve tried it that way, and without, and honestly didn’t see much difference. Being as I’m a lazy sort, I go with the “unhassled” version. ‘Cause it’s less hassle. 😀
Bringing Paint And Sponge Together…
You can hold the sponge between your fingers, with tweezers, with alligator clips, or a set of tweezer clamps. (Or anything else you choose…) I like to use a set of tweezer clamps. They have small tips, but I can set the sponge in place, and not have to grip it together for the entire chipping session. You can also fold the sponge into various shapes, which can help get into corners and other hard to reach areas.
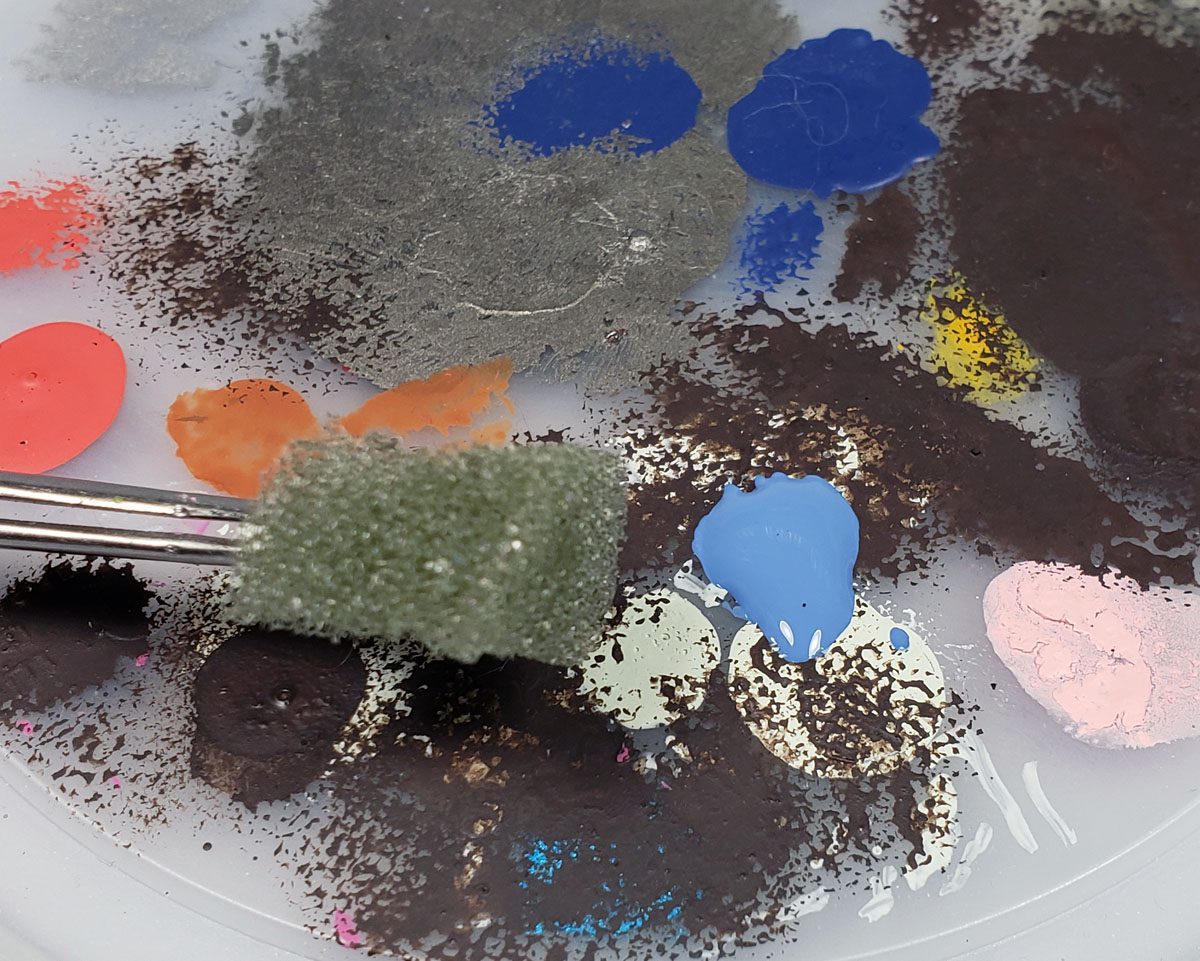
For the paint, I apply a small blob to my trusty plastic palette. I have tried thinning the paint to varying degrees, and using it straight from the pot. For my own tastes, I like thicker paint, unthinned. This allows for fairly opaque chips that stick well. (Although it does leave a slight texture.) Thinner paints can be used, and if you’re looking for a more subtle, slightly translucent effect, this works nicely. It can be especially good for building up layers of very fine, subtle chips such as would be seen on a real world piece of equipment when in use for a long period.
I start by dabbing the sponge lightly in the paint, just enough to get a small spot. I then tap it lightly on the palette next to the “main” paint blob. This does two things. First, it unloads excess paint from the sponge. Second, it gives me a small, secondary puddle to go back to when I need to reload the sponge. This helps stretch the paint out a bit.
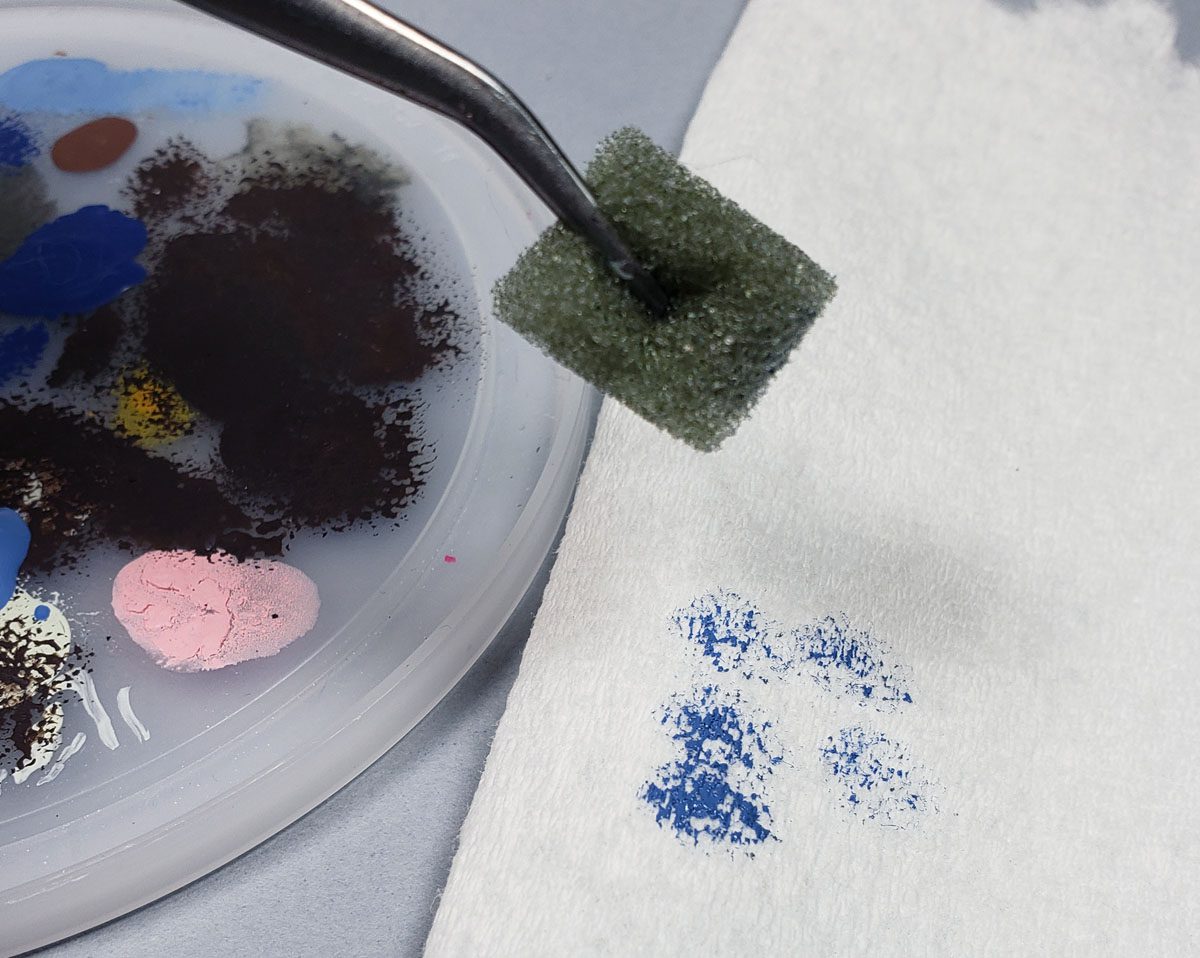
I then dab the sponge on to a piece of paper towel. What I look for here is to see a pattern that fits what I want to apply. When I’m happy with that, it’s the model’s tun to get chipped.

Time To Ruin Chip The Model
The next step is simple – apply it to the model. But in that simplicity, there are some fine nuances to be aware.
- When you initially start spongering, apply it in areas where you want the heaviest chipping. The idea behind this is simple – you have the most paint on the sponge at this stage, so apply it where you want the most dramatic effect.
- DAB it on… don’t smear, don’t drybrush. Dab it on, and lightly at that. Straight into the model, right back out. If it’s your first time, experiment a bit with pressure, and speed, as both will relate to the heaviness of the chips.
- The hardest part… density and distribution. While you certainly want your chipping to be random, there is something to be said for balance. One half of the model heavily chipped, while the other is not, just looks odd. Unless you can introduce other weathering or diorama elements to explain the why, go for a somewhat even balance.
- Having said that, I also like to look for “featured” areas, such as an area that the crew might walk on, or where a part of the armor scraped against an object. Adding standout variation can help mask the way our brain will want to make things balanced.
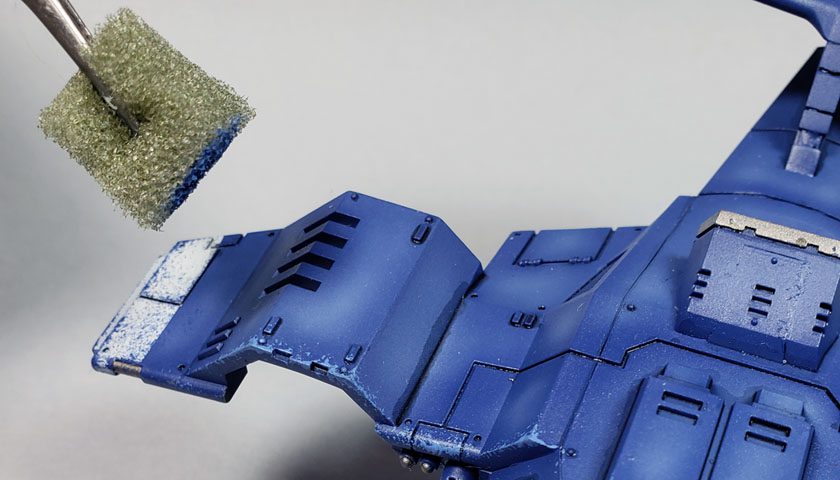
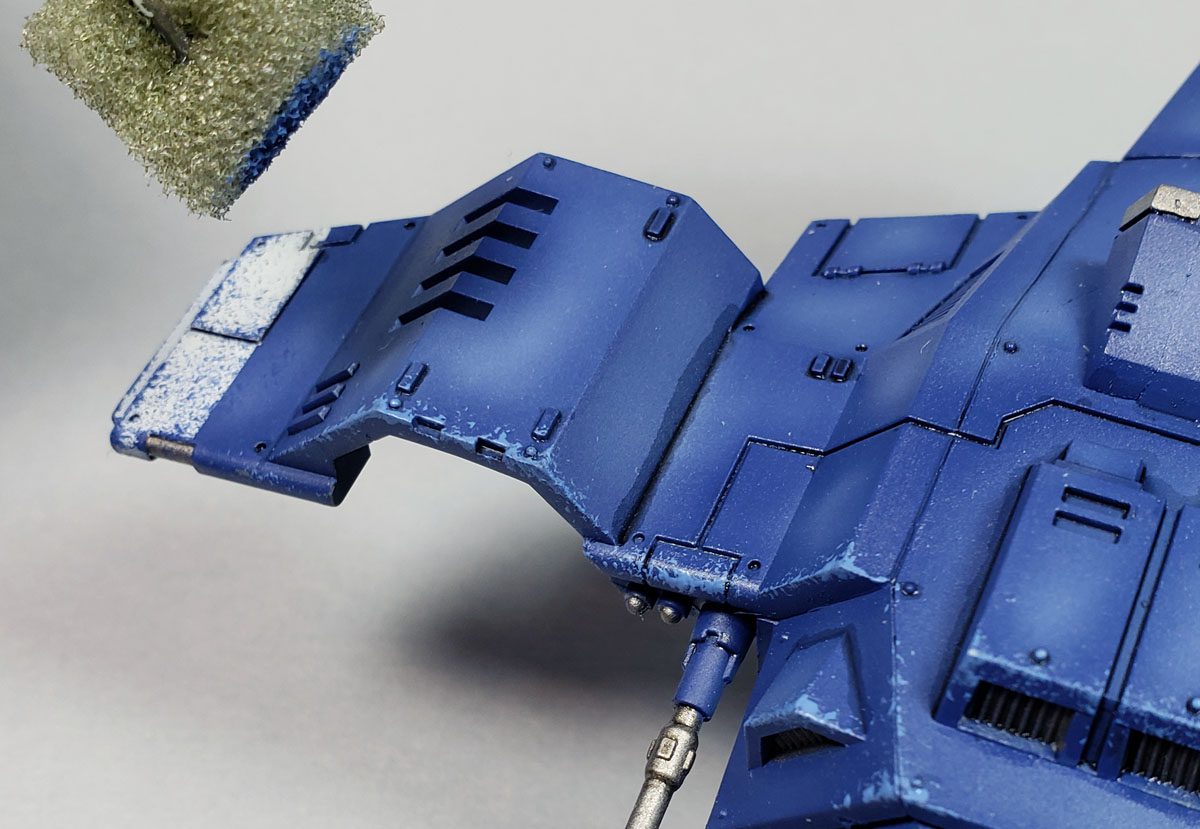
For this model, Citadel’s Space Marine Stormhawk, I had already used the dark blue to chip the decals and white stripes. (And promptly forgot to photograph the process… {sigh}) So, the next color I wanted to apply was the darker of the two light blues. Loading my sponge up as described previously, I started dabbing the paint onto the leading edge of the wings, and other leading edge surfaces. These would be the most likely to receive some form of scrapes and dings as they flew through debris, etc.
Now – the amount of chipping is 100%, completely, and totally up to you. Yes, if you are modeling a real world object, you may use reference photos. But ultimately, it is what you, the builder, thinks is cool. Not what the guy int he nacho line at the IPMS-US Nationals tell you is “correct”. You get to decide. If it looks cool to you, and you are having fun, chip the snot out of that puppy. Or not.
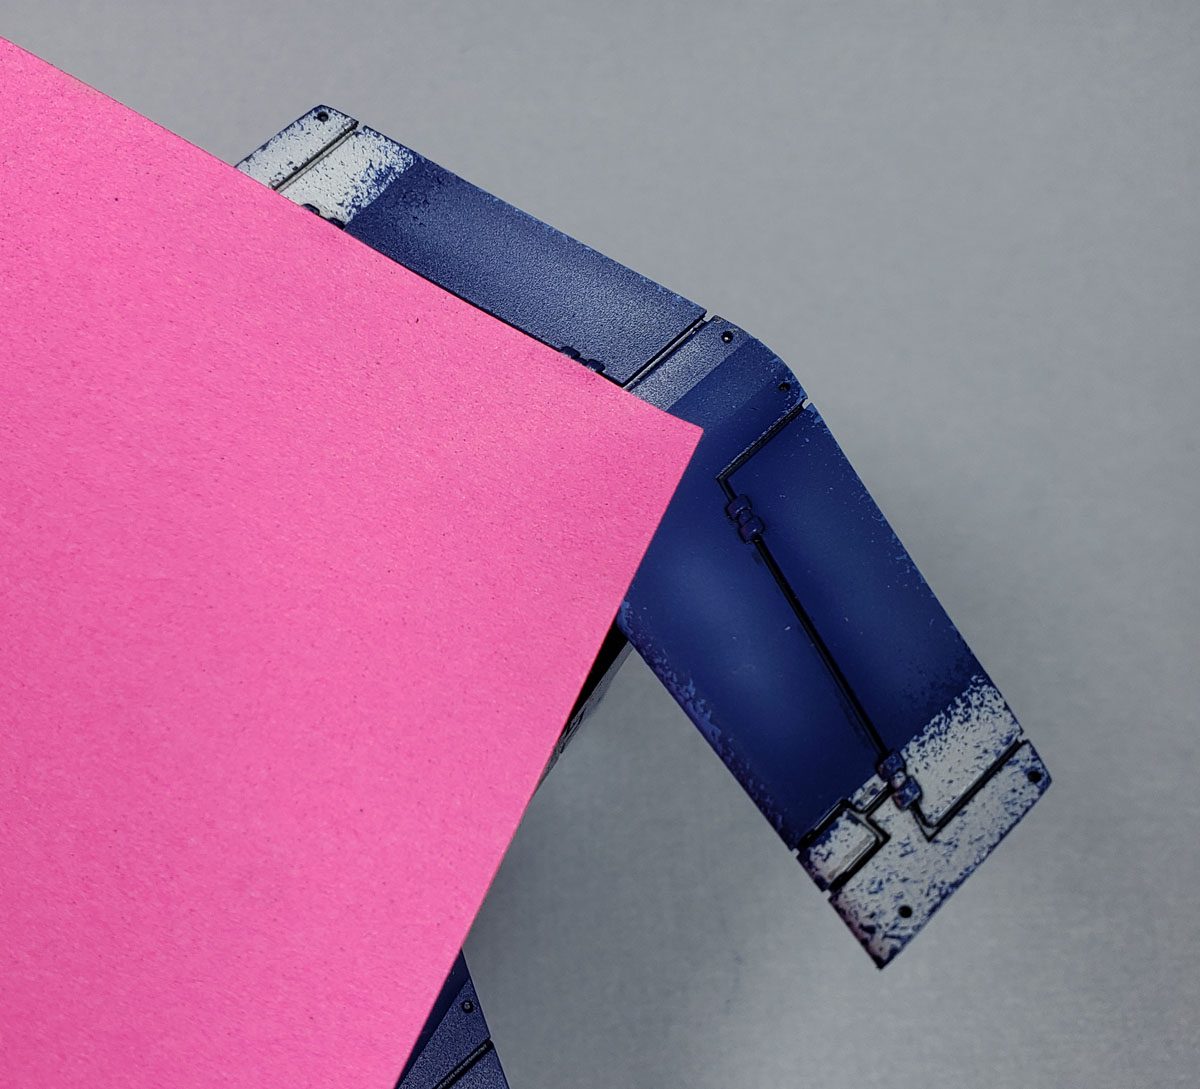
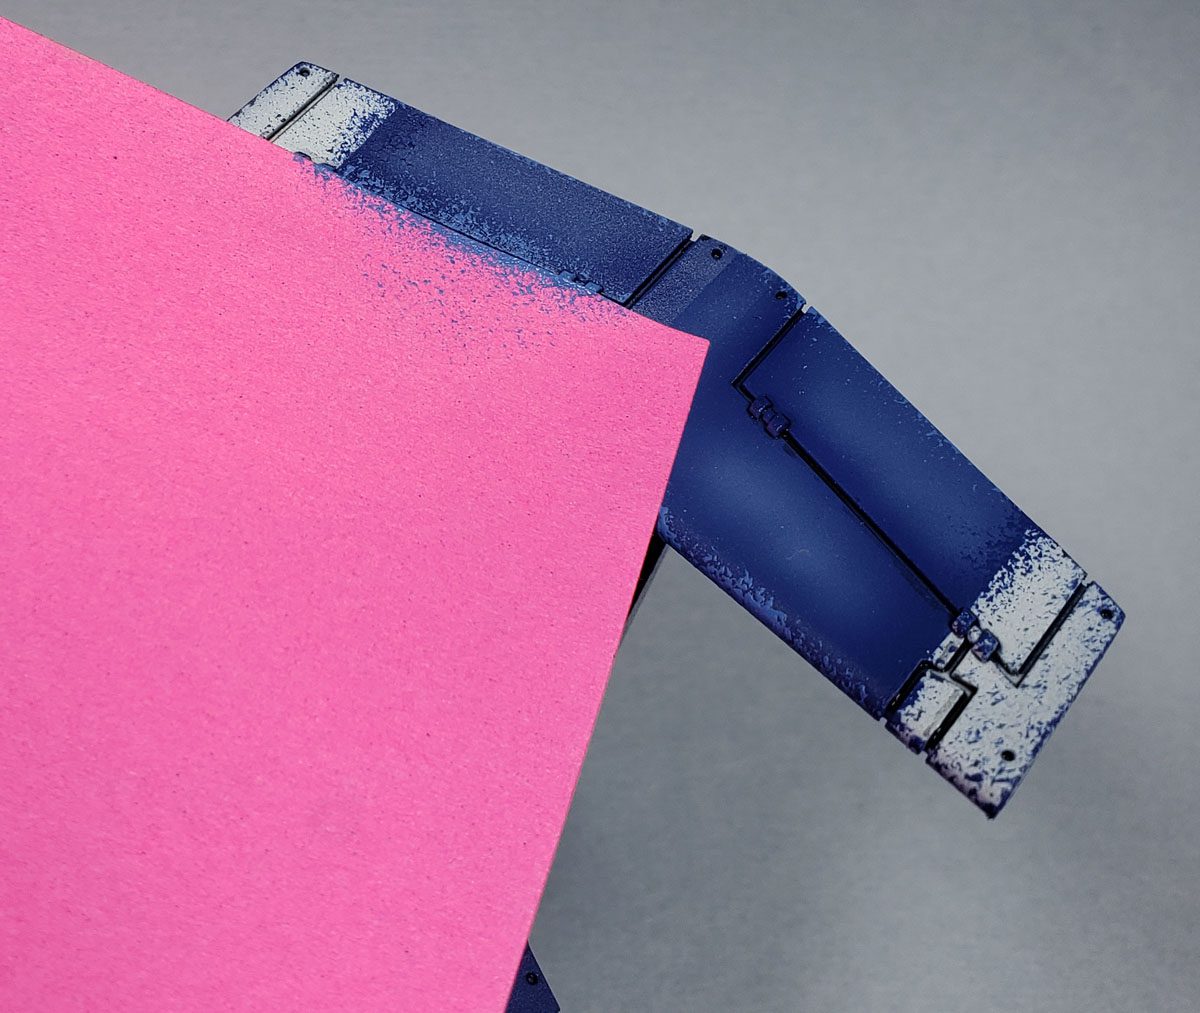
A fun thing I like to do in some areas is focus chipping on one side of a panel line, such as where two parts might scrape. An example is what I suppose is the “elevator” portion of the model’s flight control surfaces. I start by masking off one side with a simple sticky note. (Color of sticky note is optional. 😉 ) I then heavily chipped right along the sticky note. When it is removed, it leaves a nice chipping effect on one side. Depending on the effect you are going for, this can be left as is, or more chips added. (I chose the latter.) This can be applied anywhere – door and panel edges, flight control surfaces, leading edges of panels in the airflow… wherever. Again – you make the call.
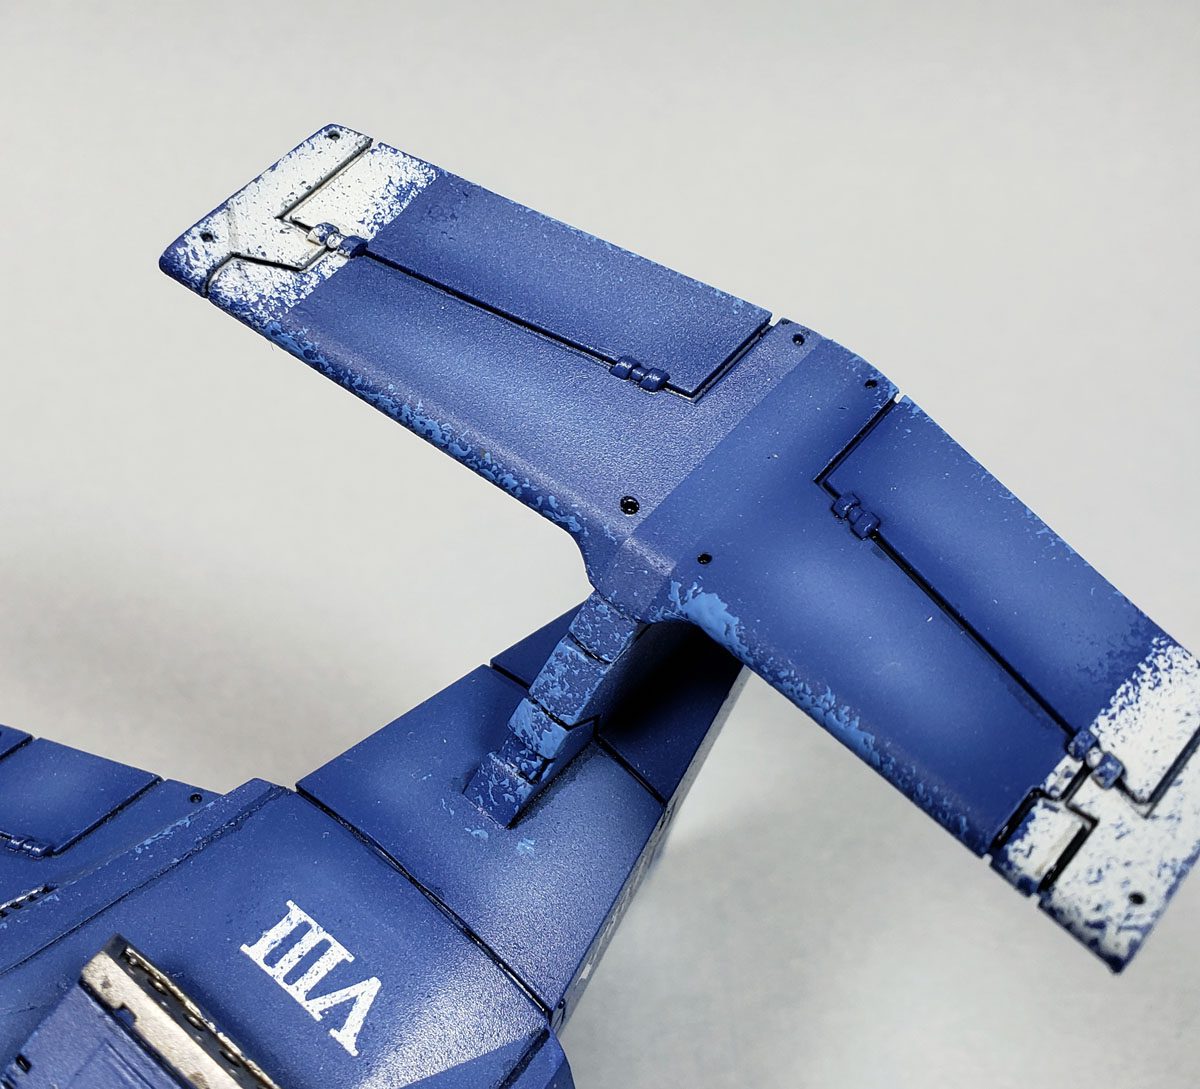
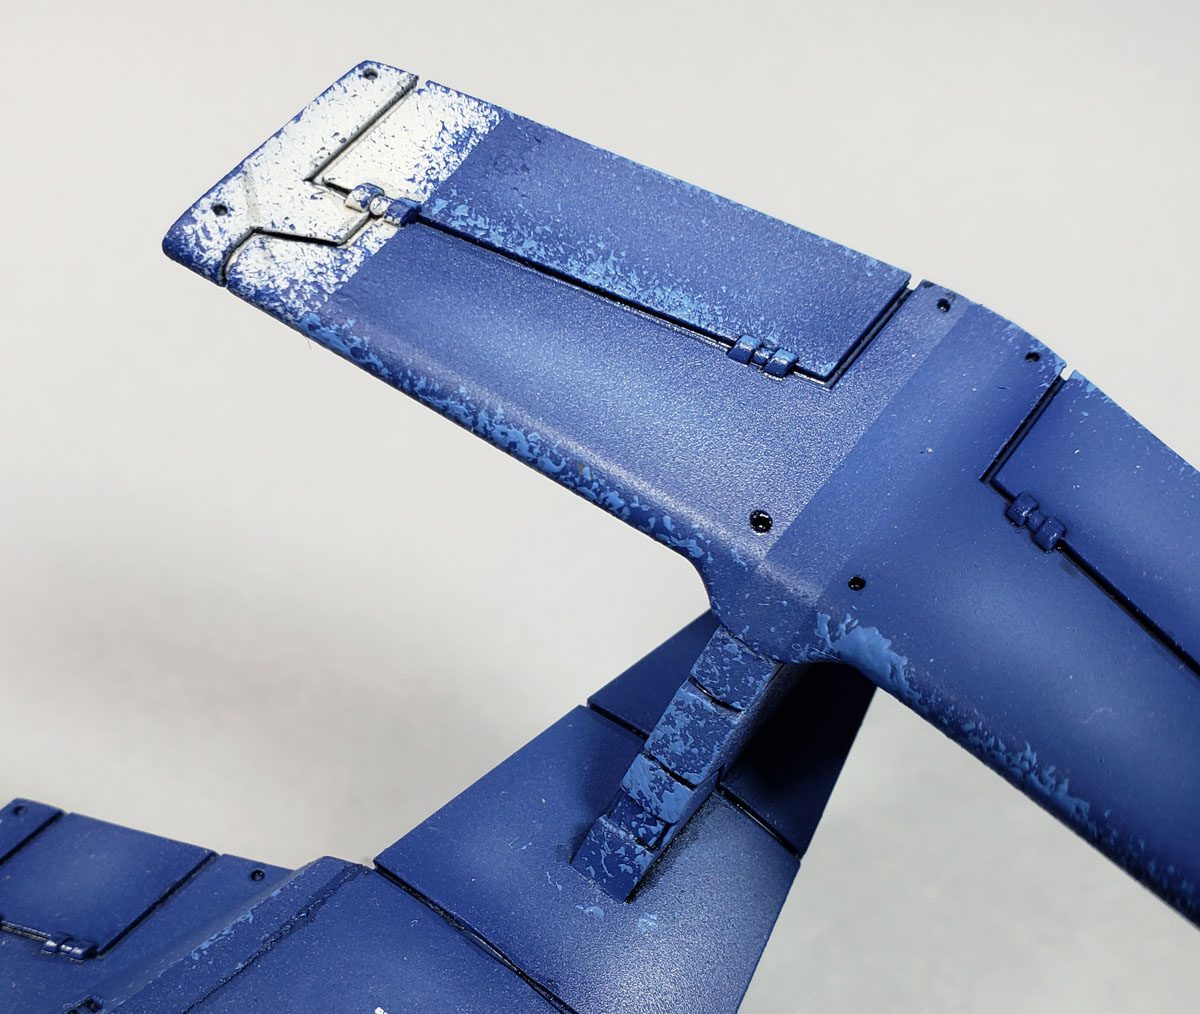
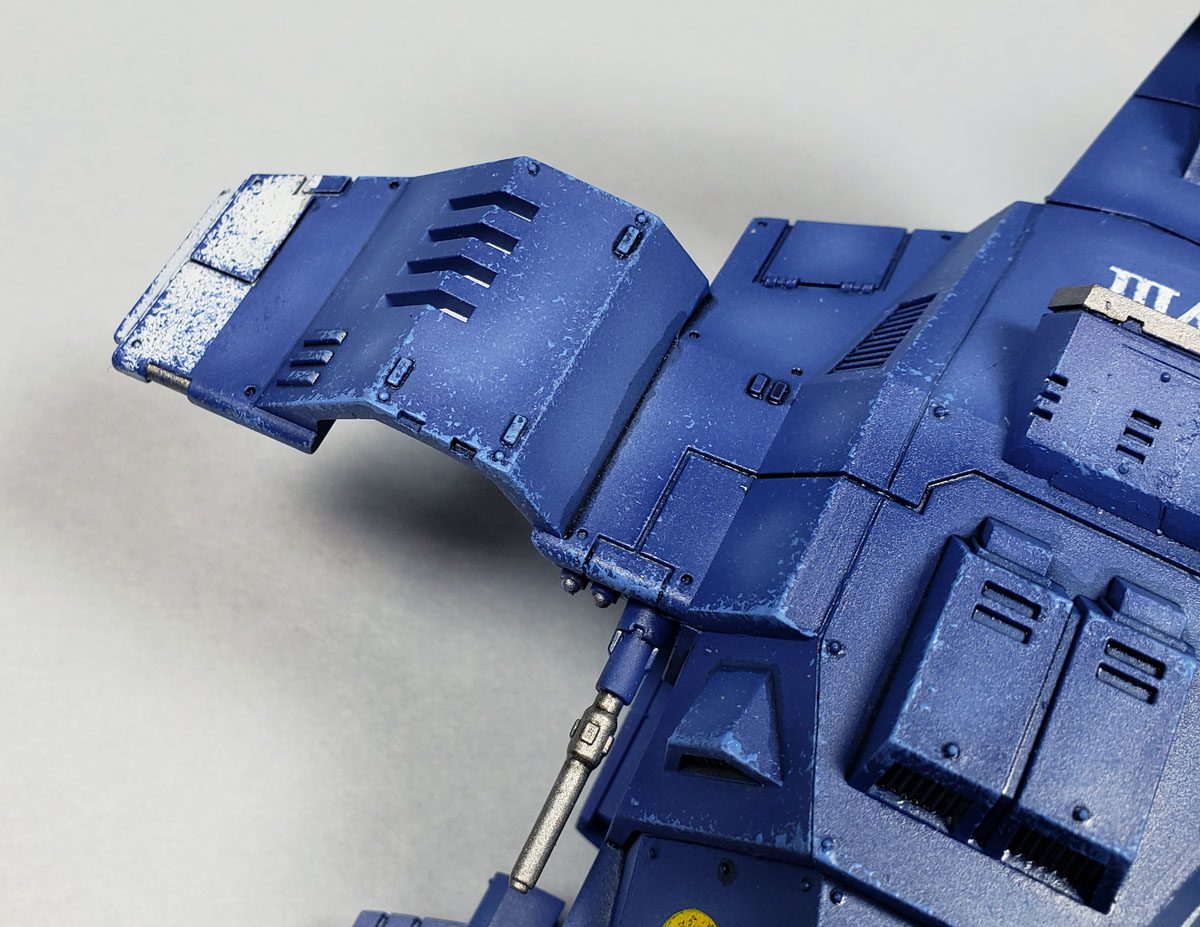
With the initial color of chipping applied, I then went back and used my lighter blue color. This was more selectively applied, mostly to areas already heavily chipped with the first light blue color. Of course, the lighter of the two blues can be applied in areas without the other color, as this can represent chips of different age.
Finally, I went back in again, this time with the dark color, to show areas that had been chipped right down to the underlying surface, in this case a super-secret-futuristic- composite made of space stuff.
This process is continued across the entire model, as much as you decide is correct.
The benefit of the sponge method is that it is fairly fast. I did this entire model in about half an hour. Because I wanted a highly chipped look, working fast was not a problem. I was pretty happy with the end result.
Some final thoughts:
- If you’re new to this, focus on the basic technique. Add a few chips, see how it looks. Vary the amount of paint, the pressure you apply it with, and the pattern you do it in. I like to work a section at a time, but quite often I’ll switch it up and just bounce all around the model.
- As you become more confident in application, further experiments may be beneficial. Multiple colors and varying degrees of opacity produce interesting effects. Scraping motion during application can make some cool looking patterns.
- To avoid the “potato stamp” look, vary the way each dab is applied. I continually twist the tweezers, and vary the angle, as I apply the paint.
- This method can be used with enamels and oils too, though the drying time can vary. Still, the flexibility of slow drying can allow for very interesting effects to be produced.
- Spongering does not have to be the only chip method used! Combining this with other methods, such as salt chipping, masking fluid, hairspray/commercial chipping fluid, and hand painted chips will yield great results that add loads of depth to the finish.
Ultimately, sponge chipping is simply another tool in the modeler’s toolbox. Whether you decide to ignore, it, use it exclusively, or in conjunction with other methods is of course completely up to you. Its beauty is speed and simplicity of application, balanced with very good results.
And as always… I like it because it is a fun art of the hobby. No matter what else you do – enjoy it!
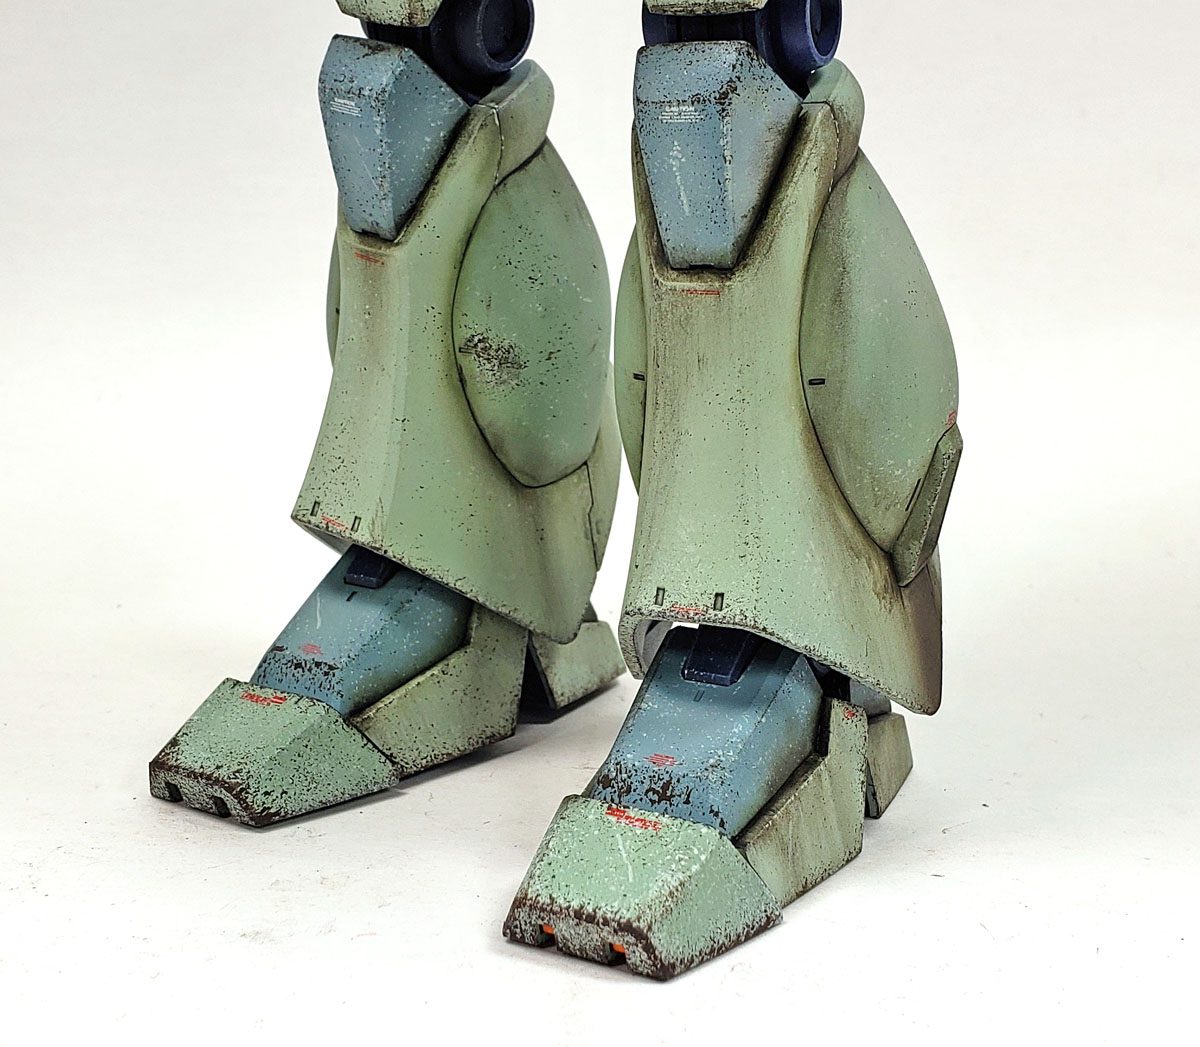
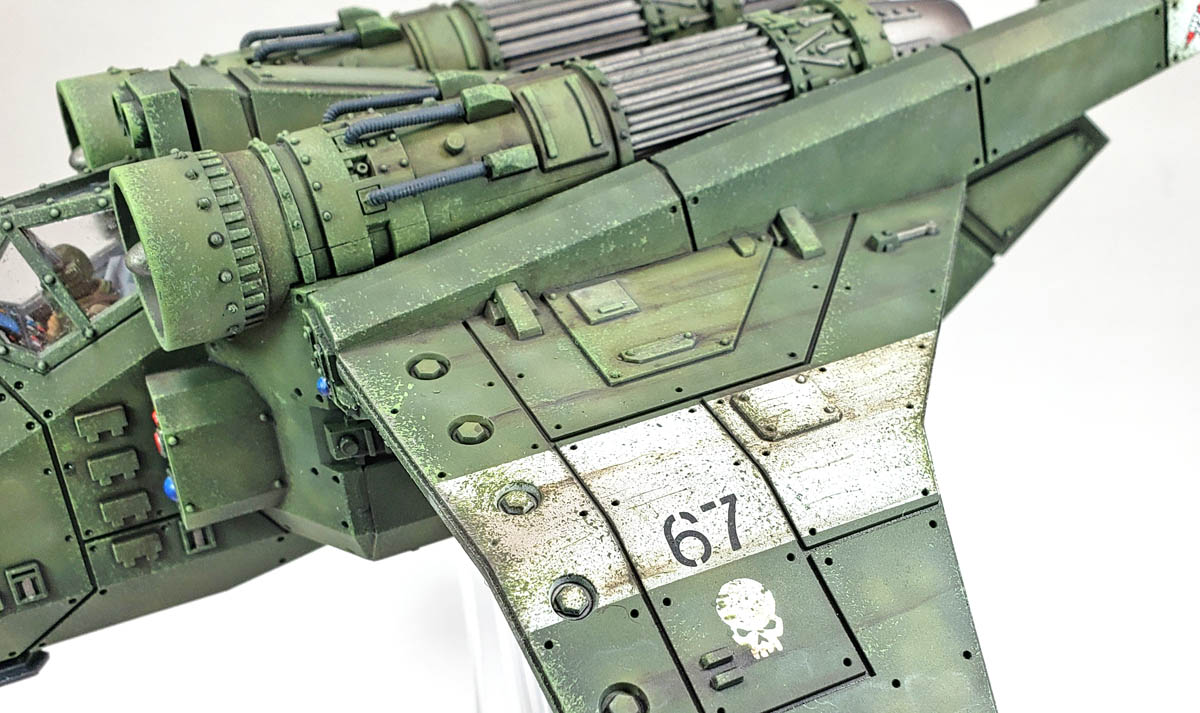
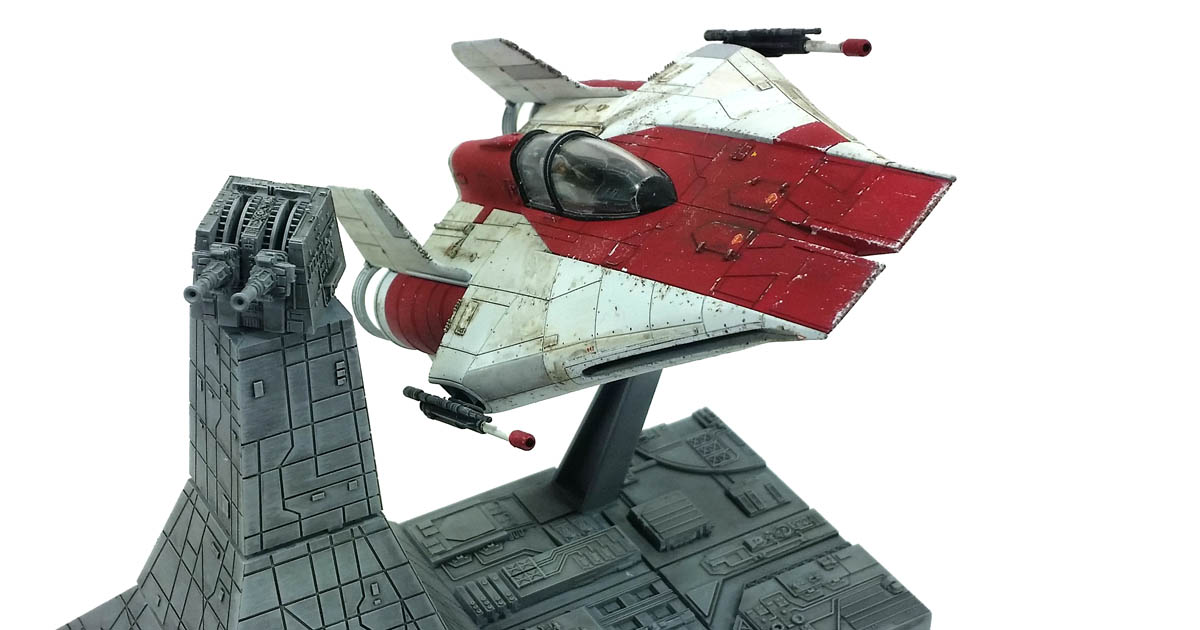
Here are a few more examples from recently completed models:
Leave a Reply