Jon. JON. JON! WAKE UP!
I sat straight up. One of those wake ups where you have no idea who you are, where you are, and what time it was confronted me. I looked down. A puddle of drool was on my desk. The teacher stood in front of me, hands on hips.
Ah… geometry class. I’d been caught napping. Again.
It wasn’t that I was a bad student, really. I just found geometry so… boring. Square, even. And the teacher… she was one of those slightly nagging mom types. She cared enough about my progress that I knew she had my best interests in mind. But her insistence on me being awake… that was getting a bit old.
Plus, my antics made the little blue-eyed blonde girl next to me giggle. When you’re in 10th grade, that’s good enough.
But insist I stay awake she did.
I finally made a deal with her. If I aced the first test of the semester… something about the Quaddrostic Equator or something… I could sleep all I wanted. Staring at me briefly, she nodded.
OK. But you must make 100%.
Easy peasy.
I listened in class for a day or two more, staying mostly awake. I read my book, and did a few practice problems. I even appealed to the cute little blonde to help me out a bit with the work. Bonus. 😀
The day of the test came. She slid it on my desk, eyebrows raised. Without a word, she turned away. I began to work.
Now, what she didn’t know was that while we’d only gotten into the first parts of this hellish formula, I’d gone to the end of the book, and realized that even if you didn’t know why it worked, as long as you knew the formula, plugging in numbers to the Quadsnotic Equimatrix would give all the answers. It was like cheating without cheating. I could not lose. I flew through the test.
Standing up dramatically, I winked at the little blonde girl (who affirmed my cleverness with an eye roll), and took the paper to the front. Setting it on her desk, I stood back, folded my arms, and smiled.
I knew it was right. It could not be wrong.
She began to grade it. One eyebrow arched up, then another. If she’d had a third eyebrow, it would have reached new heights. Her face reddened. She began to notice that I’d even shown my work, demonstrating that I had figured out this whole Quadratic Equation on my own… which was supposed to be one semester of our coursework. She finished her grading, and looked up.
Well, Mr. Bius. It appears you have made 100% on the test. To be honest, I am quite surprised. I did not expect this. However, our deal is off. There is no way I will let you sleep in class.
I’d been had. The inequalities inherent in the system had conspired to repress me. Specifically, my ability to sleep through Geometry class. A groan went up from the class. Or a laugh. It may have been a laugh.
So I went back to my seat, defeated. Well, mostly.
We did come to a sort of compromise. I continued to sleep in class. She continued to nag me to wake up. I continued to make 100% on the tests. And the little blonde girl continued to be enthralled by it all. Her eye rolls and head shakes affirmed this.
Ultimately, I was not too worried. It was Geometry Class, right? Who needs that? I was a guitar player, a budding rock star. The next Van Halen.
When would I ever need to know geometry? Shapes and angles and measurements?
Step Up
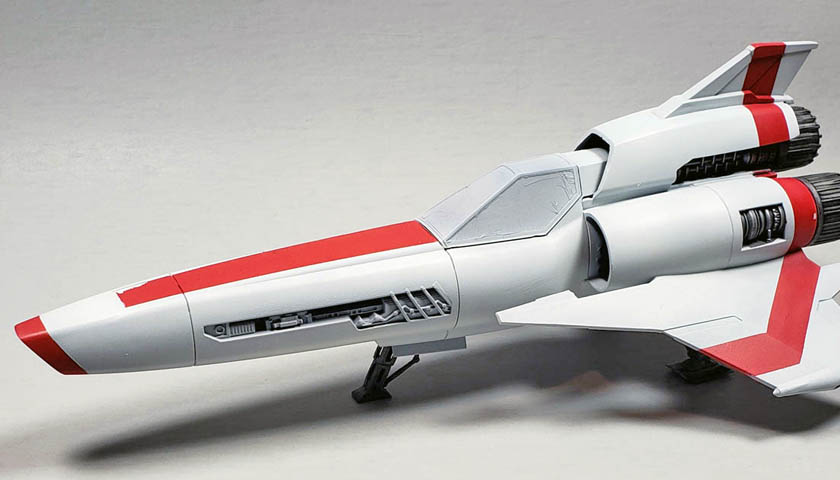
Assembly of the fuselage was… well, a bit challenging. It wasn’t so much that the parts did not fit, as they lined up fairly nicely. But as is often the case with brands not entirely in the mainstream of technology, there was a lack of precision. The solution was simple enough though – glue it all together, and sand things down. The plastic is very thick, and quite durable, so loads of sanding did not create any issues.
And the sanding was not filling gaps. I was impressed with how well all the parts closed up. The sanding was needed to reduce steps between the left and right fuselage halves. Most areas were able to be smoothed out using sanding sticks alone. A few areas, particularly the forward nose area, did require some putty. As the step in that areas was a bit drastic, I built up the low side with a few dabs of Tamiya Basic Putty, and after it cured, sanded the area flat.
I certainly don’t want to overstate the case here. The sanding of the fuselage, apart from the curing time for the putty, only took 15-20 minutes at the most. So it’s not a showstopper by any means.
The rest of the fuselage assembled nicely, though all joins were treated to some Mr. Surfacer and a rub down with alcohol and cotton buds to seal any hairline cracks.
Sorting The Build Details
I did have some decisions to make about a few of the parts. I’d previously watched Modelmaking Guru’s video series of his Viper Mk. II build. He’d waited until near the end of the build to insert the engine parts that show just aft of the cockpit, to ease painting. While my plan had initially been to follow that course, the more I test fitted it, I realized I’d strike off on my own… well… I followed the directions. His method certainly works – he ably demonstrated that! However, I was concerned that I would flub things up – I am an expert at that – so I decided to just build the whole assembly, paint it first, and mask it off.
I’d also decided to do a gear down build. While I preferred a gear up build, showing the Viper in flight, I was seriously disappointed with the pilot figure. It was a bit…. blobbish. Given that the cockpit was actually reasonably detailed, I decided on a gear down, open canopy configuration instead.
As the landing gear was designed to be installed prior to the fuselage being fully assembled, I began to look for ways to install it afterwards, as per UN Scale Model Building Charter. 🙂 While I found a few methods that would have likely worked, the lazy in me jumped up and shouted “just glue them in and mask it all off already!” So after spending a bit too much time looking for a clever engineering solution, I went along (once again) with the instructions. I painted the interior up a bit, and the gear, installed it all in place, and masked it off. In the end, I spent less time actually doing the work than I did trying to devise a clever way around it.
More masking was placed around the engine parts, jet nozzles, and a few other bits. I also temporarily tacked the canopy in place using Future. For the open areas along the sides of the forward fuselage, I decided to NOT mask those off. Their shape was such that I felt masking and painting them after the white and red had been applied would work. We’ll see if reality and theory coincide, of course… 😉
Two Colors, Many Stripes
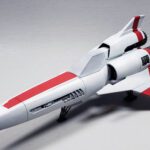
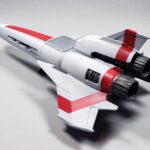
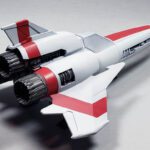
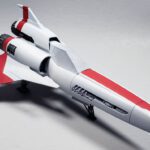
The painting of the Viper Mk. II is simple – it’s white. With red stripes. The kit comes with a full decal set for the red stripes. However, I had two concerns.
For one, I’ve never been impressed with Moebius decals. They’re not bad, really… not like older ICM decals… but they’re not the best. The ones that go on flat surfaces would be OK to wrestle into place. But those stripes…. they have to go around various curves, and need to adhere well. I’d used the stripe decals on the Viper Mk. I build, and they were OK, but not optimal. So I decided to try masking.
The typical method would have been to paint the model white (well, off-white), mask off the white, and paint the red stripes. I felt there were to problems with this.
One, there were a few areas that masking the white to later add the red seemed way complicated. Second, when spraying red, it goes everywhere, and tints everything. every single square inch of the model not needing to be red would need to be masked. And if any color did bleed through, it would show up like a… well, a host of sayings come to mind, none printable. Essentially – it would show up in a mighty way. 😉
However, if I started with red, the masking would be easier. But… painting the white afterwards would make it difficult to cover over the red that peeked out from the eventual masking. I realized though that if I added more primer after the red had been masked off, it would “reset” the surface to be painted back to the primer color. Problem solved.
Adding Primer And Paint. And Primer And Paint. Again.
I started by priming the whole model in a light gray color. I mixed 3 parts Badger Stynylrez White with 1 part of the same maker’s gray primer. Why not prime in white, you ask?
First, when I prime in white, I have a hard time seeing where the actual white paint goes. And even though I planned to use Vallejo Mecha Color Off White, the difference would be so subtle that it would be hard to detect. (My eyesight is not the best… :/ ) Second, when I paint white, I always do so in two coats. Staring at white for a while gives a sort of “snow blind” effect. My eyes get so blown out by staring at white that it makes everything look much whiter than it actually is. By having a light gray primer underneath, I could add a coat of white, and then when I came back later, the areas that weren’t as well covered with paint would be very obvious to my “reset” eyes. Plus, as I was going to paint the red first, the lighter primer color helped that red stay bright.
With the primer on, I mixed my red color. I tried to get a reasonably close match to the decal color, but I wasn’t too worried about it being perfect. I tested a few mixes, and found I liked the color that resulted from mixing 3 parts Vallejo Mecha Color SZ Red with 1 part Dark Red from the same paint line. Loading that in my airbrush, I roughly painted in all the areas that needed to have red stripes, and set it aside to dry.
Masking Theory 101 – Back To Geometry
Turns out that scale modeling does call for geometry from time to time. That must be why I often drift off to sleep at my work desk.
In choosing to mask the stripes rather than use decals, I knew I’d have to face a simple fact – I stink at masking. If it is a straight line, I’ll still find a way to mess it up. As shapes become more complicated, the more frustrated I become. So I knew I’d be up against it, to a certain extent. The Viper’s stripes aren’t too complicated, but there are some angles and shapes to deal with.
I started with the stripe down the nose, a feature which I thought looked pretty cool. The stripe is narrower at the nose than at the cockpit where it starts, so I needed to find a simple way to account for the various angles.
I started by cutting off a strip of Tamiya yellow tape, and squaring off the edges. Setting it on my cutting matt, I made slices with a new #11 hobby blade, as show below. (Numbers shown are for later reference.)

When masking various angles, cutting a single piece of tape to fit can often be a problem. Measuring angles and shoes is… well, boring.
By cutting a strip of tape with the angles as shown above, I could apply them in stages, accounting for the angles perfectly, without a lot of fuss.
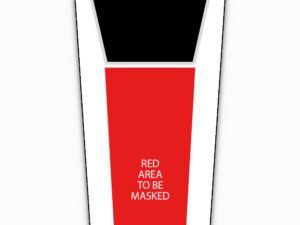
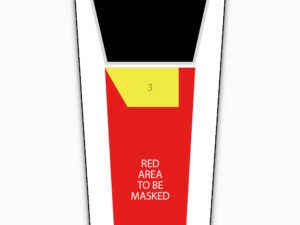
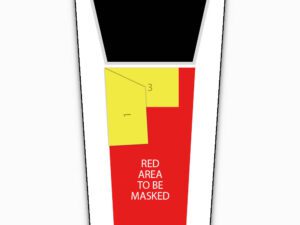
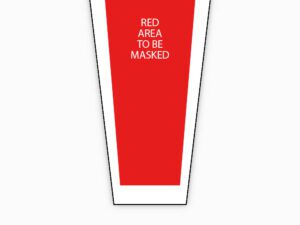
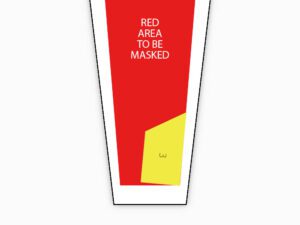
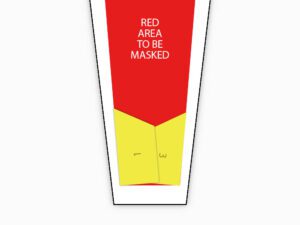
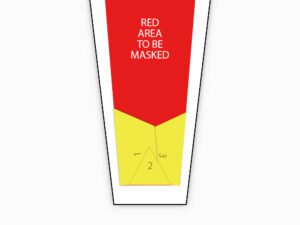
So for the area just forward of the cockpit, the tape sequence went as shown in these images:
Tape section #3 was aligned to the canopy, and set in place first. Then section #1 could be aligned along the outer edge of the red stripe. All I had to do was align the “pointy” tip of section #1 with the same area of #3. The result was a perfect mask of the angle, with just a few simple swipes of the hobby knife. The procedure was duplicated for the other side, effectively masking off one end of the red stripe.
For the forward end, I used the same pattern of tape cut, but applied them a bit differently:
In this area, I started with one edge, aligning the long end of the tape with the outer edge. The other side was applied, in like fashion. Then tape section #2 entered the picture, and closed the gap. All that was left to do was use a single piece of tape per side to connect the forward and aft masked sections, and the red stripe on the nose was finished, and 99% symmetrical. 🙂
I followed a similar pattern of masking for the other stripes, and it worked particularly well to make the angled stripe along the wings. The nose was taped off with Tamiya Curve Tape, simply following the contour of the nose itself.
Reset
With the red stripes masked, I reprimed everything in my light gray primer mix, which nicely covered up any red left poking out from under the tape masks. A coat of Vallejo Mecha Color Offwhite was applied, and after allowing it to sit for an hour – and for my eyes to “reset”, I went back in for another coat. Sure enough, areas that had previously looked fully painted now showed up plainly, and I was able to get those covered easily.
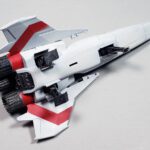
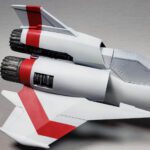
Removing all that masking went well – mostly. I did have one chunk of red lift at the front part of the nose, and another spot on the left aft engine. As I plan to heavily chip the red anyway, I was not too worried about these errors. By the time all the chipping, weathering, and staining are applied, it will (hopefully) look quite natural.
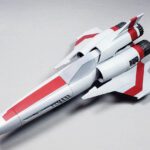
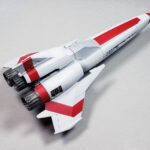
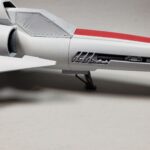
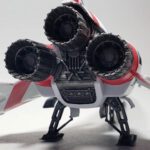
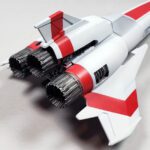
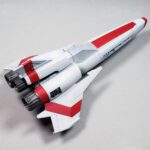
I was quite happy with how it all turned out. Apart from the two areas of lift, the stripes came out pretty nice. I am glad I decided to paint these stripes, rather than masking them, as it looks much cleaner in my opinion.
And it was a fun exercise in geometry. Cutting the various paint masks using variations of the methods shown made the process very easy. Experiment with multiple tape widths, and cut shapes, and you’ll be able to mask off some really complicated areas, without the need to resort to tape gymnastics and geometry to get it all looking right.
The next step in this Viper Mk. II build will be a gloss coat and decals. Then – loads of weathering!
Dedicated to the memory of that little blonde girl. You left us far too soon.

Leave a Reply