My sixth grade year was quite the time for me. We’d just moved from a somewhat rural, small town home to a larger, more suburban area. New friends, a new school… it was all a bit difficult to adjust to. Where I’d come from, 6th grade was the top grade in elementary school, and I’d been anticipating being at the top of the proverbial food chain.
My new town had a different method. The 6th grade year was not in elementary school, but rather was the first year of something called “Middle School”. So instead of being at the top of the pile… I was at the bottom.
Making friends and finding my way proved to be a bit difficult.
One of the biggest shocks to me was gym class. Gone were the days of playgrounds and kickball and swings. Suddenly there were locker rooms and gym uniforms and actually changing clothes in front of other people. The horror…. the horror…
I’d just begun to get adjusted to that, and a much more rigid program of “physical education”, when the PhysEd teacher announced the most horrible news.
For the week, we’d be doing something different. Learning to dance.
Yeah, I know… that sounds awful in and of itself. But that’s not the worst part. No, no, no, no, no….
We had to dance with girls.
Actual girls.
A gasp went up.
Of course, things only got worse. The PE teacher instructed each of us to pair up with someone opposite us in the chromosome realm. Being new, unknown, with a horrible haircut, and a quite rural fashion of dress… I was left out in the cold.
People who were “dating” paired off immediately. Then friends with friends. Stragglers with stragglers. Finally there was a group of us who just sort of stood there, looking awkward. The PE teacher started pointing. “You, with her. You, with him.” On down the line. Finally she got to me. I was paired up with a little curly-haired girl. Looking back, I realize she was a cute girl. At the time, I thought all girls were icky, so I didn’t feel that way then. We couldn’t really make eye contact. I shuffled over, and stood about 4 feet from her… close enough, I thought.
The first lesson was in disco dancing. (It was 1978, so….) Some overly enthusiastic lady I’d never seen came in and began to show us something called “The Hustle”, and then after a few attempts to try to get 30 6th graders moving in unison, she turned on the music. And then the day got much, much worse.
“Grab your partner’s hands!”
The little curly-haired girl reached out… I looked down.
Warts.
Three of them. Two on one side, one on the other. I was horrified.
Still… not wanting to be a complete creep, I grabbed her hands. And I felt really ill. Of course, it was all childish fears. I was more worried about my non-existent friends finding out I was dancing with a girl with wart hands than anything. but I was horrified.
I went home, feeling scarred for life. I confessed my fears to my mom. I’d get warts. I’d be laughed at. Worst… we’d been told that on the last day of the dance instruction, we’d have a real dance. Attendance was mandatory. Dress up was required.
Mom was sympathetic, but did point out the little curly-haired girl had feelings too. And that I might find she was a nice person. She asked what my biggest fear was in all of this. “I don’t want to get warts.” She laughed…
“Son, you have played with frogs your whole life. They have warts. Did you get warts from them?” I had to confess, after a brief check of my hands for affirmation, that I had not. “No ma’am.“
“Of course not. What you need to do is just enjoy the dancing, be nice to the young lady, and stop complaining about things that aren’t really important. You’ll go to the dance, and I bet if you just quit worrying about it, you’ll have a good time.“
So we danced the week away. And like a spectre in the distance… the final dress up dance loomed.
Is There A Kit Involved In This Painful Rambling?
The kit is typical Trumpeter. The casting is very nice, with gorgeous surface detail. Fit of the parts is pretty close to Tamiya standard. However, the actual detail? Always suspect with Trumpeter. But if you buy Trumpeter, and you’ve been in the scale modeling community for more than a few days, you know what you’re getting.
I like to build them because the pluses outweigh the minuses, in my estimation. Every Trumpeter (and Hobbyboss) kit I’ve built ends up looking like the thing it is supposed to. I gave up the quest for absolute accuracy when it occurred to me that no company has ever achieved it, especially in the eyes of the “experts”.
And for the most part, they are trouble-free builds, especially their newer kits.
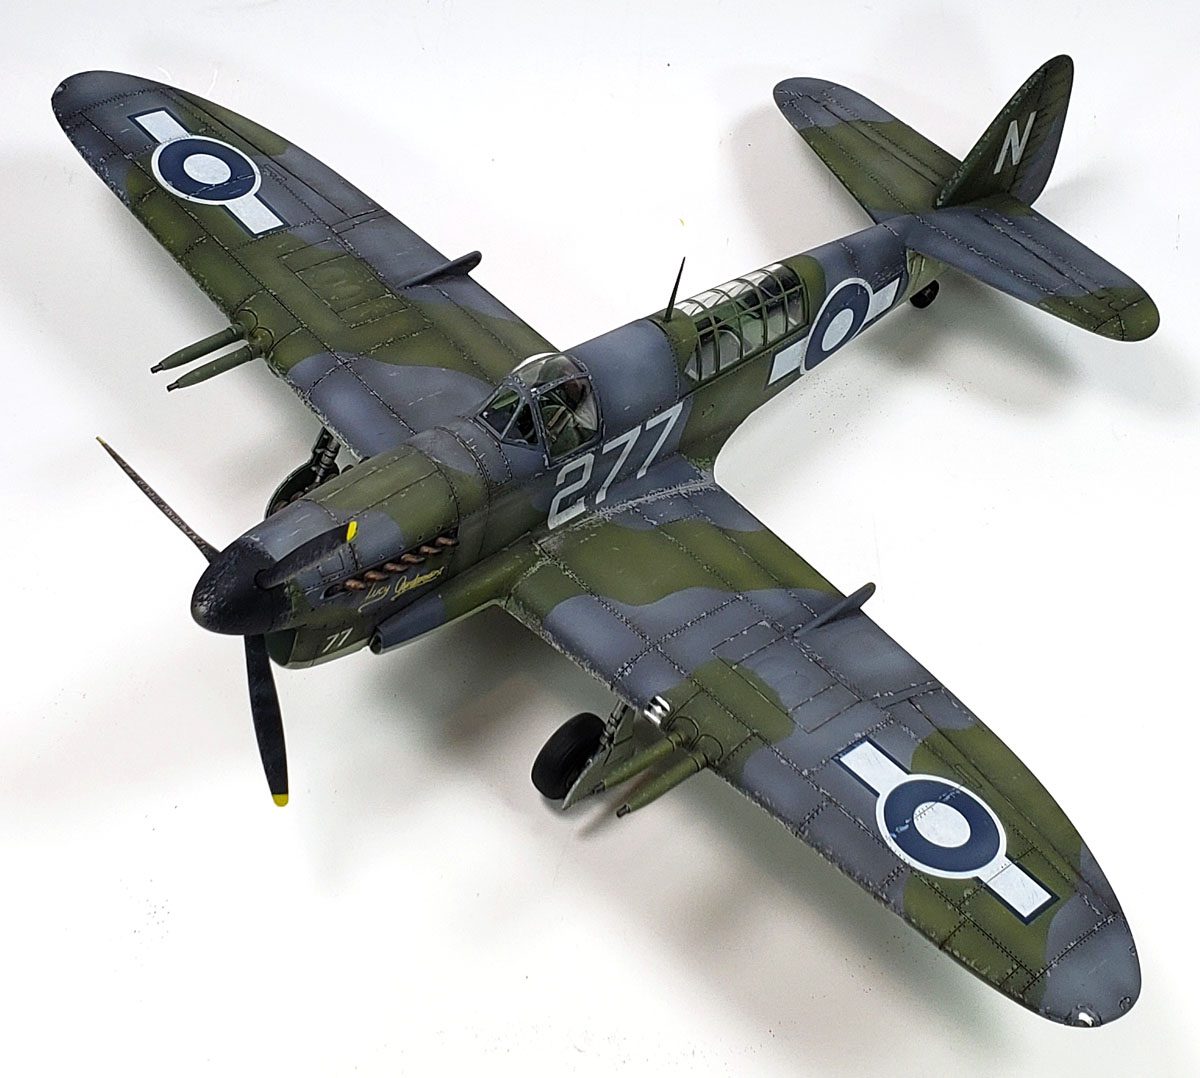
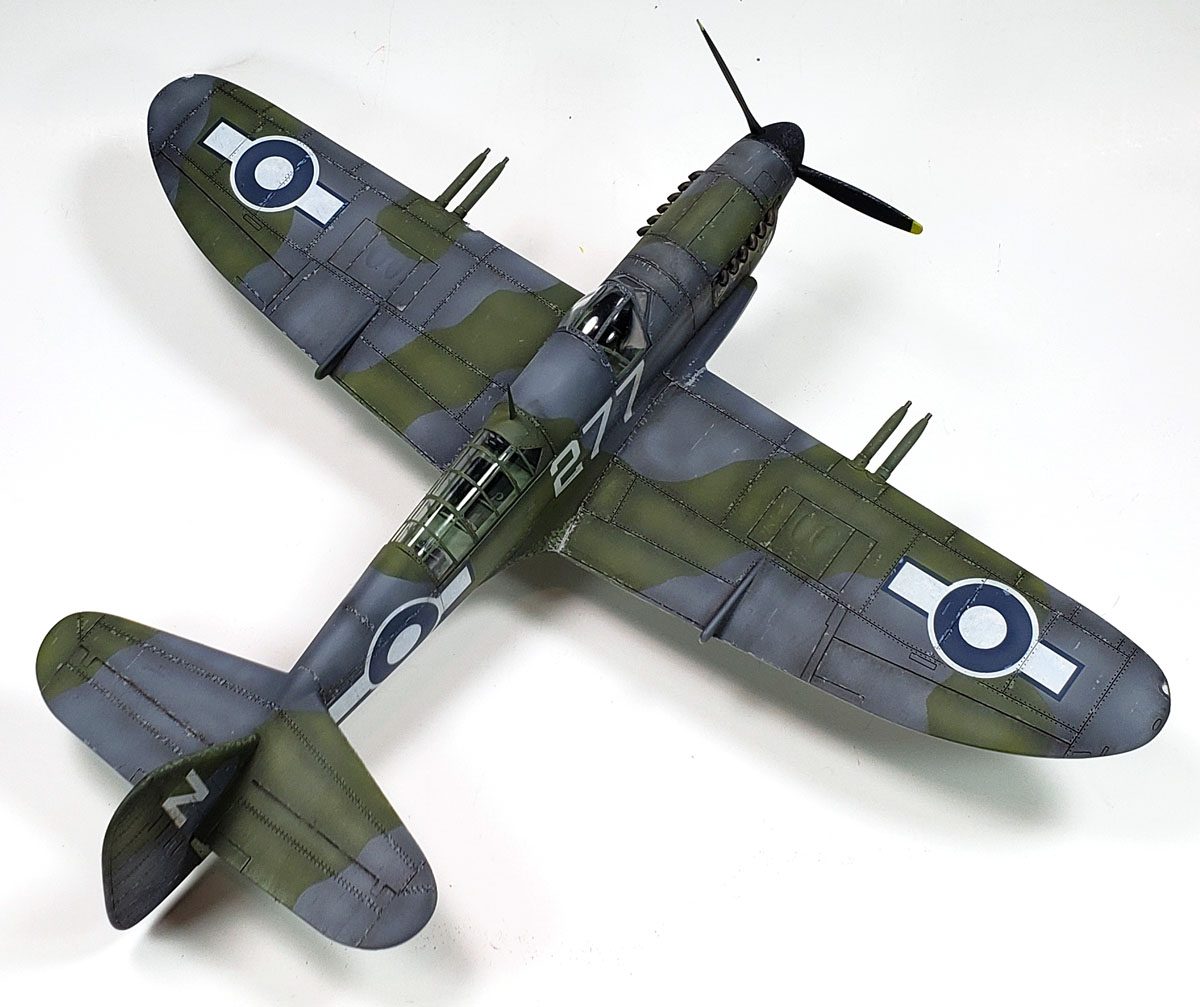
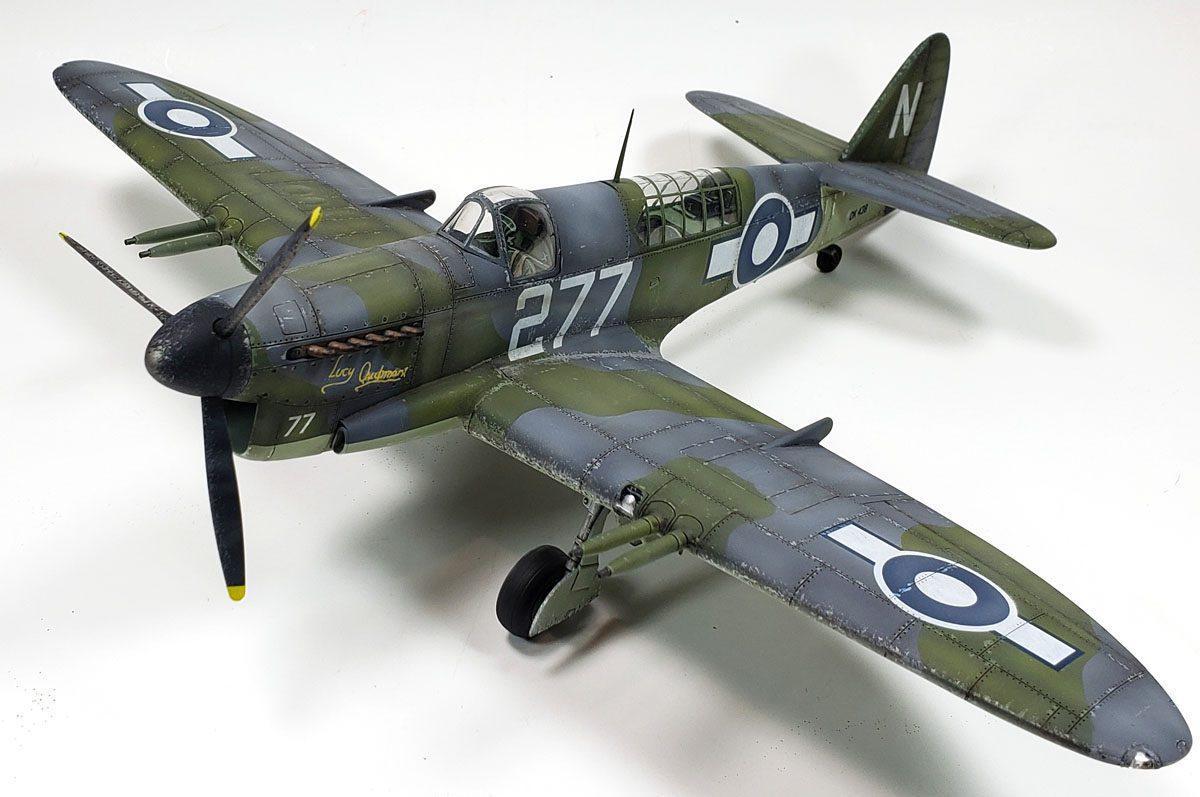
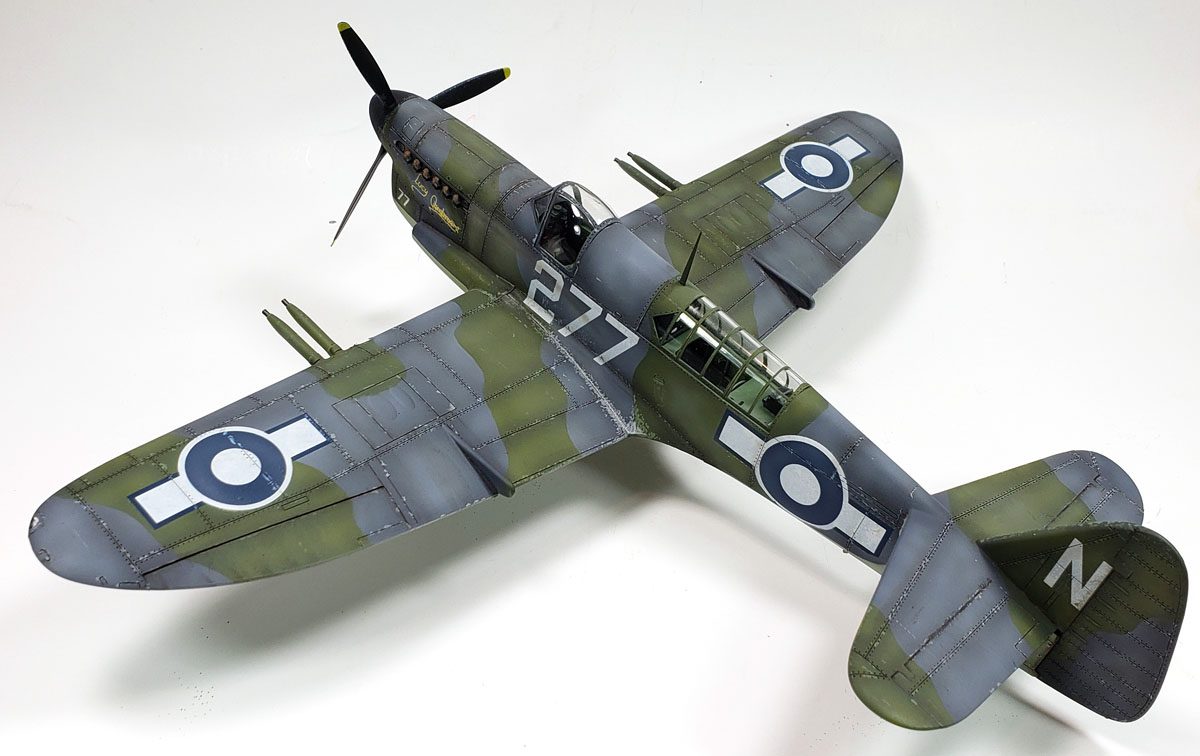
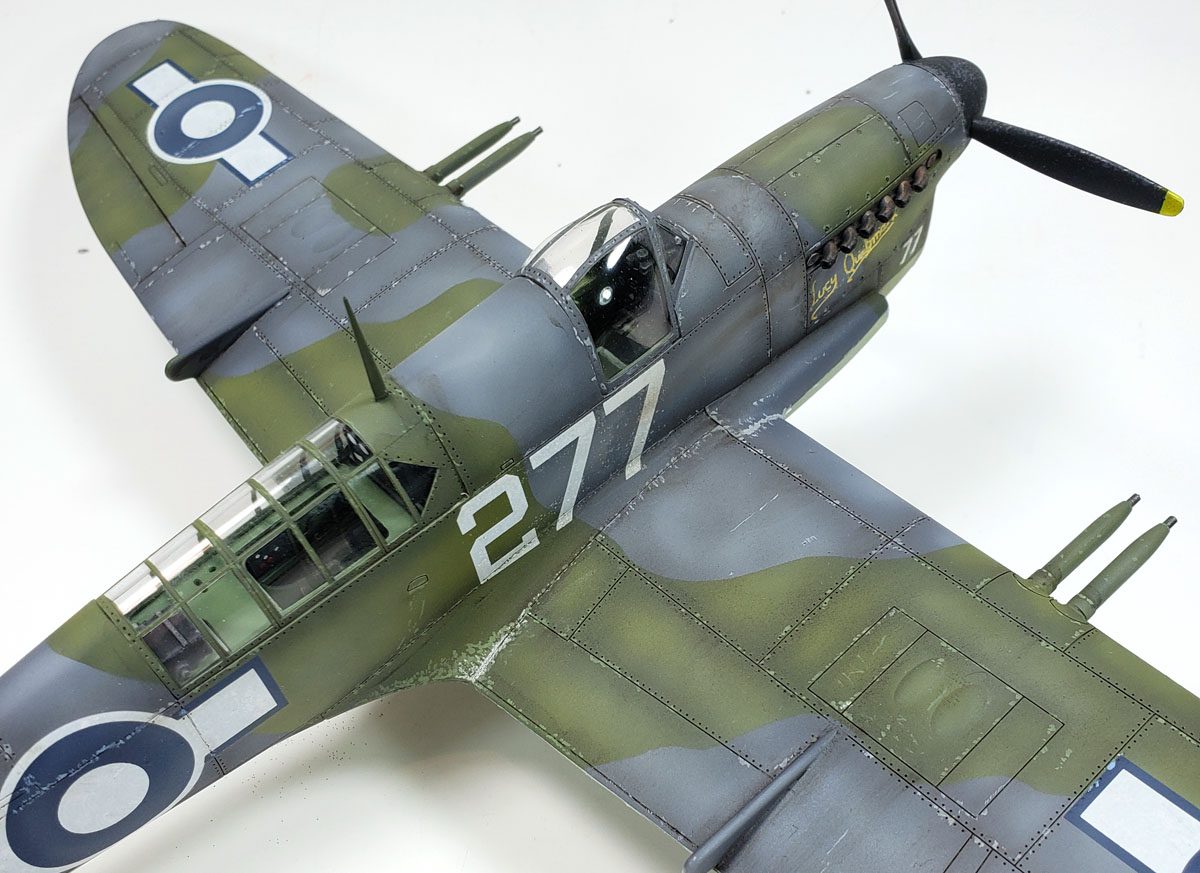
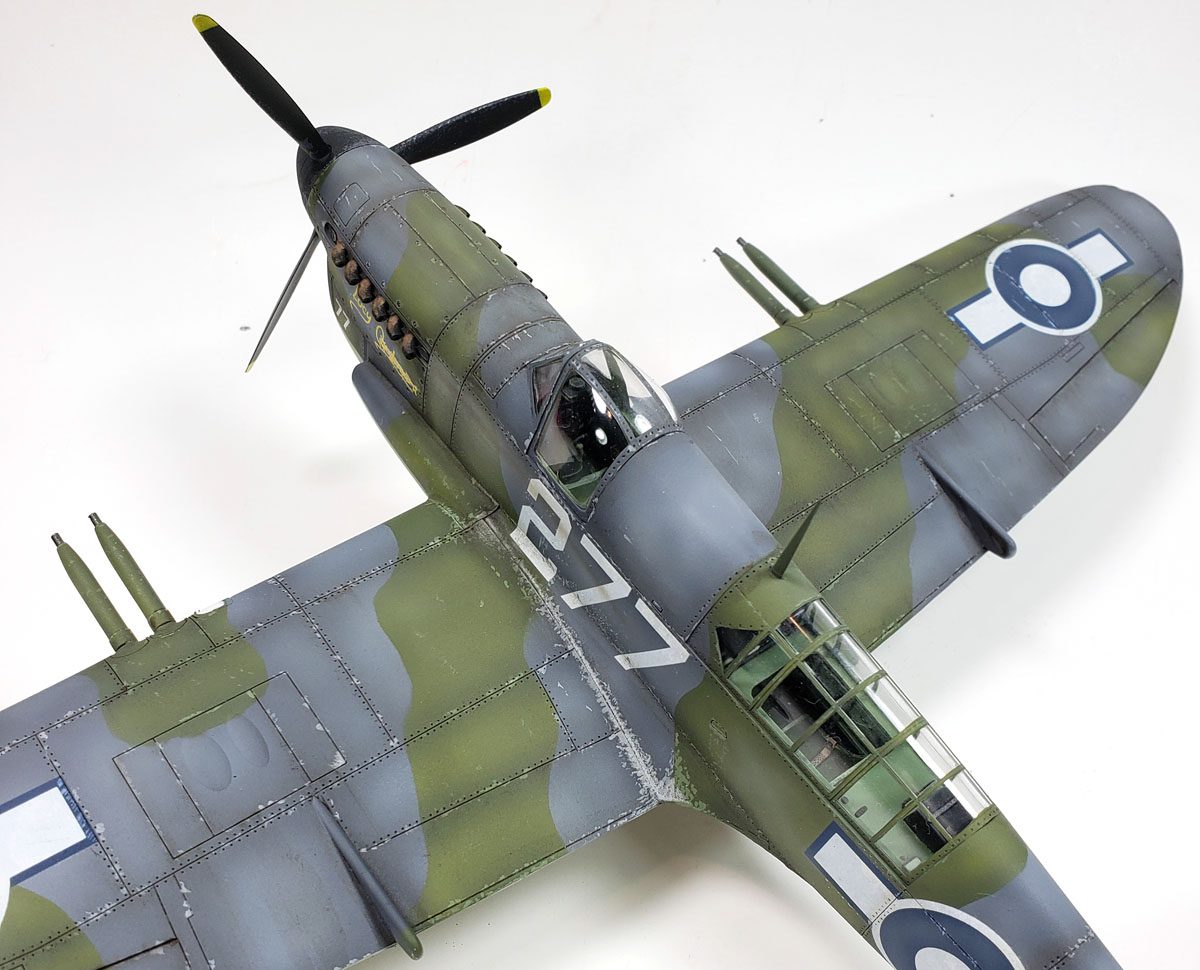
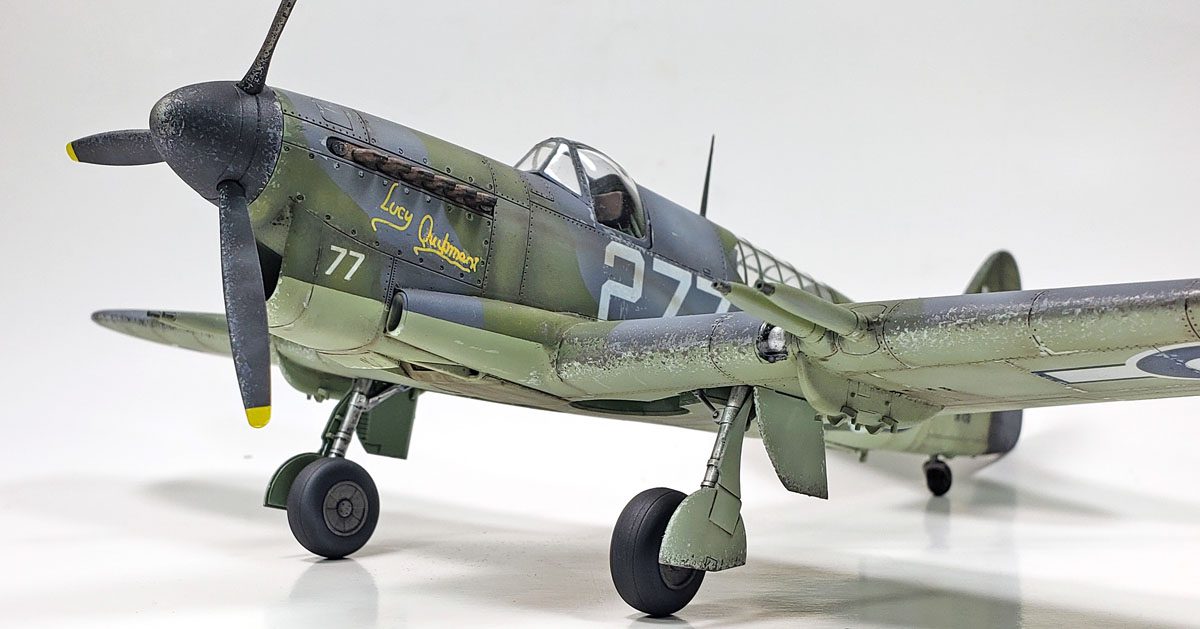
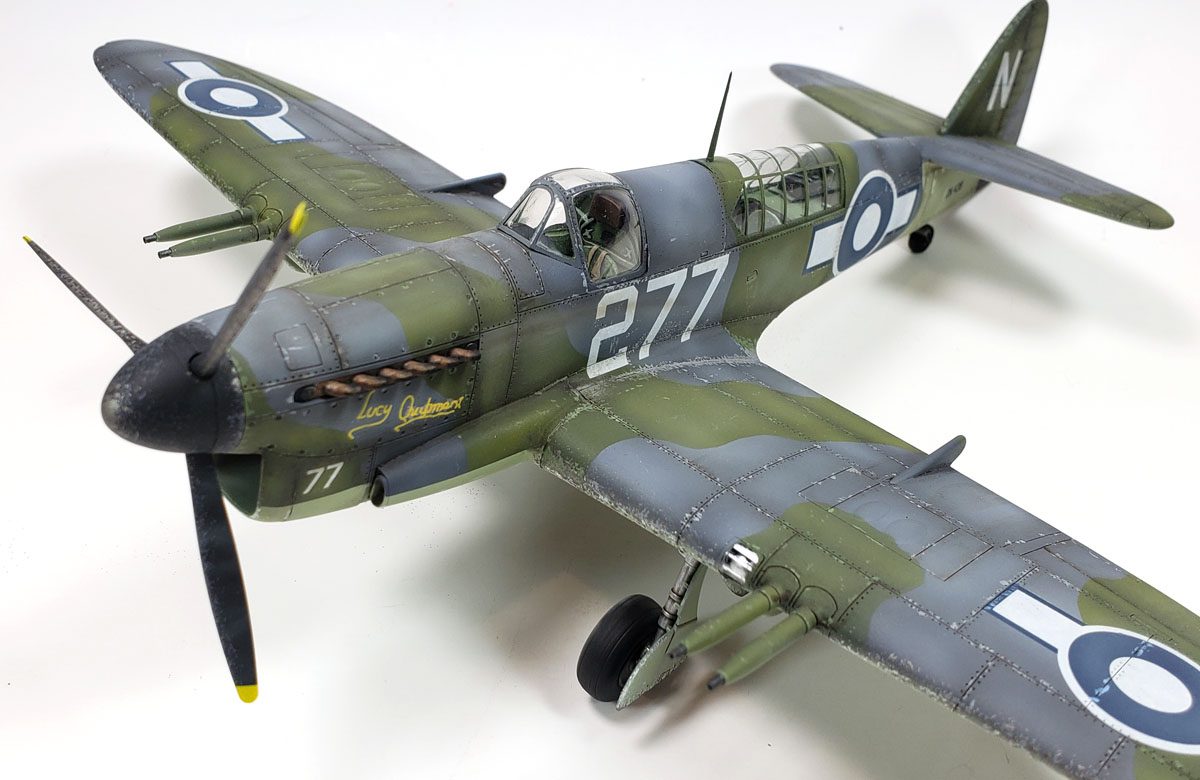
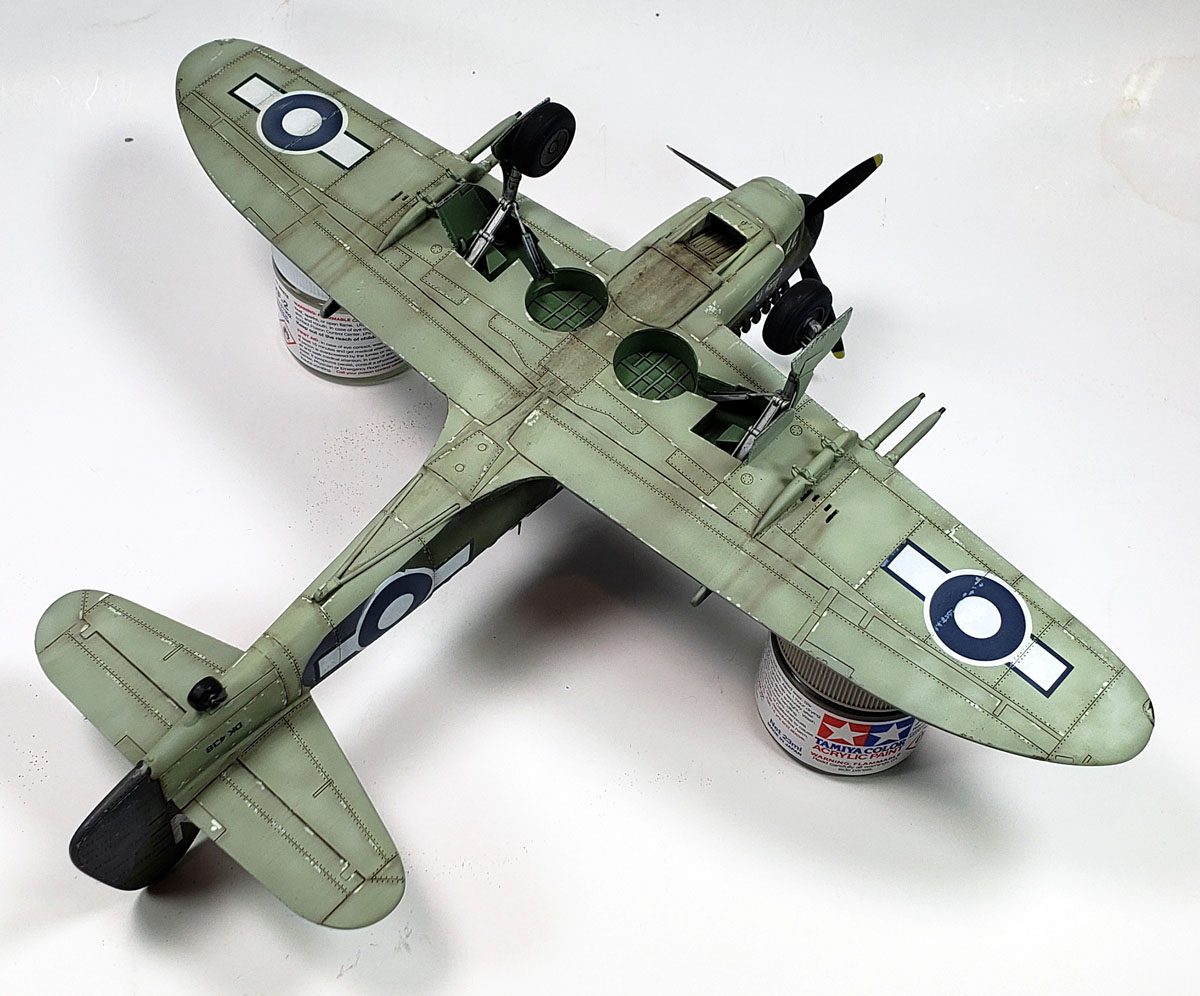
After building and painting the cockpit, assembling and priming the airframe, and applying a faded two color camo, the decals and weathering the things were all that remained.
Applying Decals
Trumpeter decals are good… but as with everything else from that manufacturer, there are caveats. First, they are incredibly thin, and will fold up on themselves in a heartbeat during application. Handle with care.
Second – Trumpeter research comes into play again. Colors may be way off, especially the red on RAF markings. And in some cases, the markings may not even be correct for the aircraft in the box. (Hobbyboss’ F3H-2 Demon kits were bitten by that bug.)
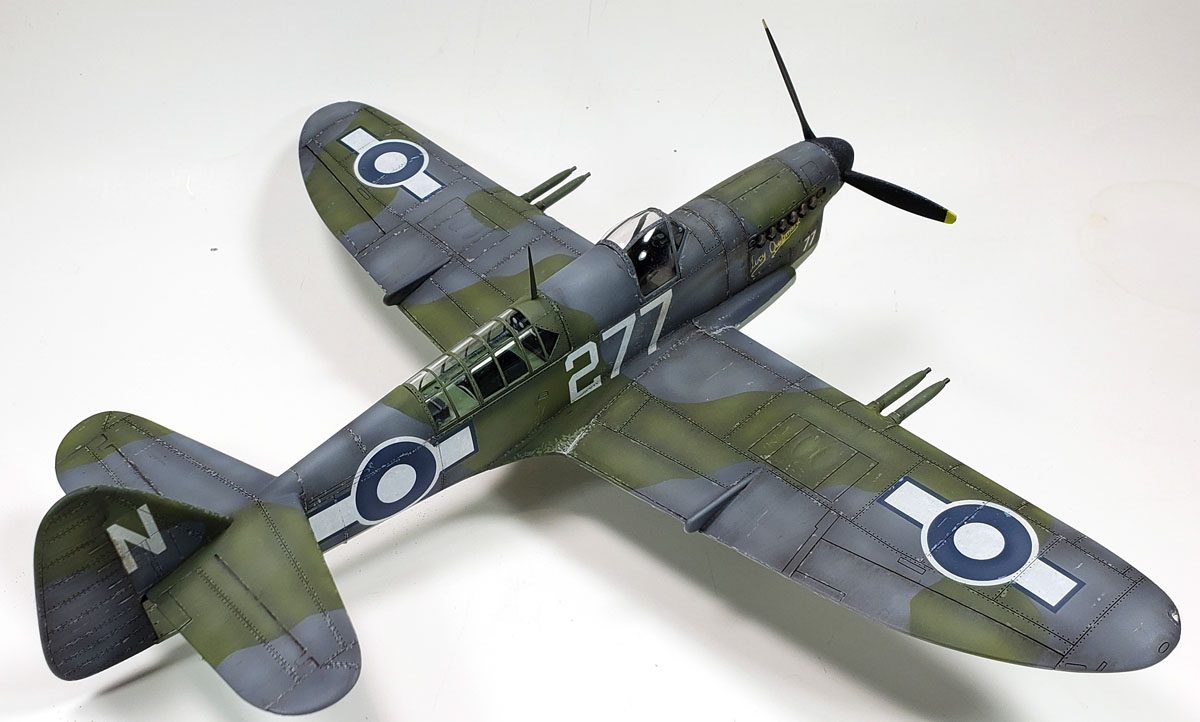
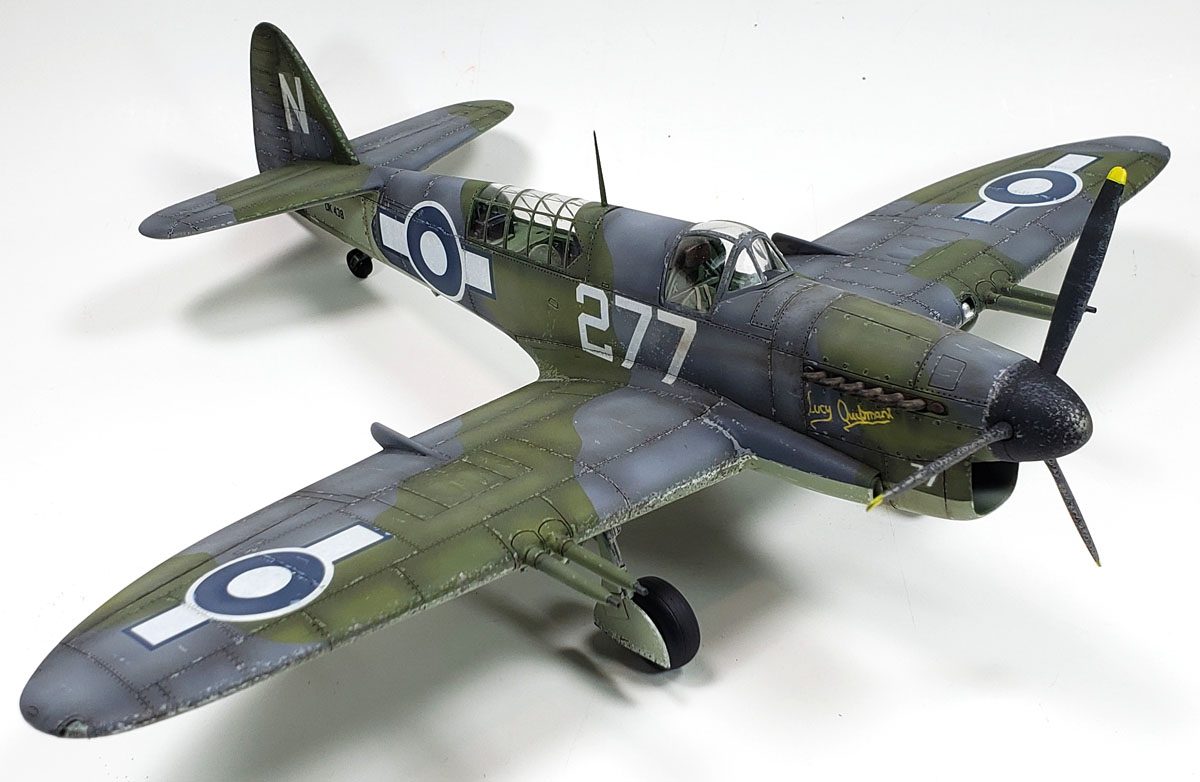
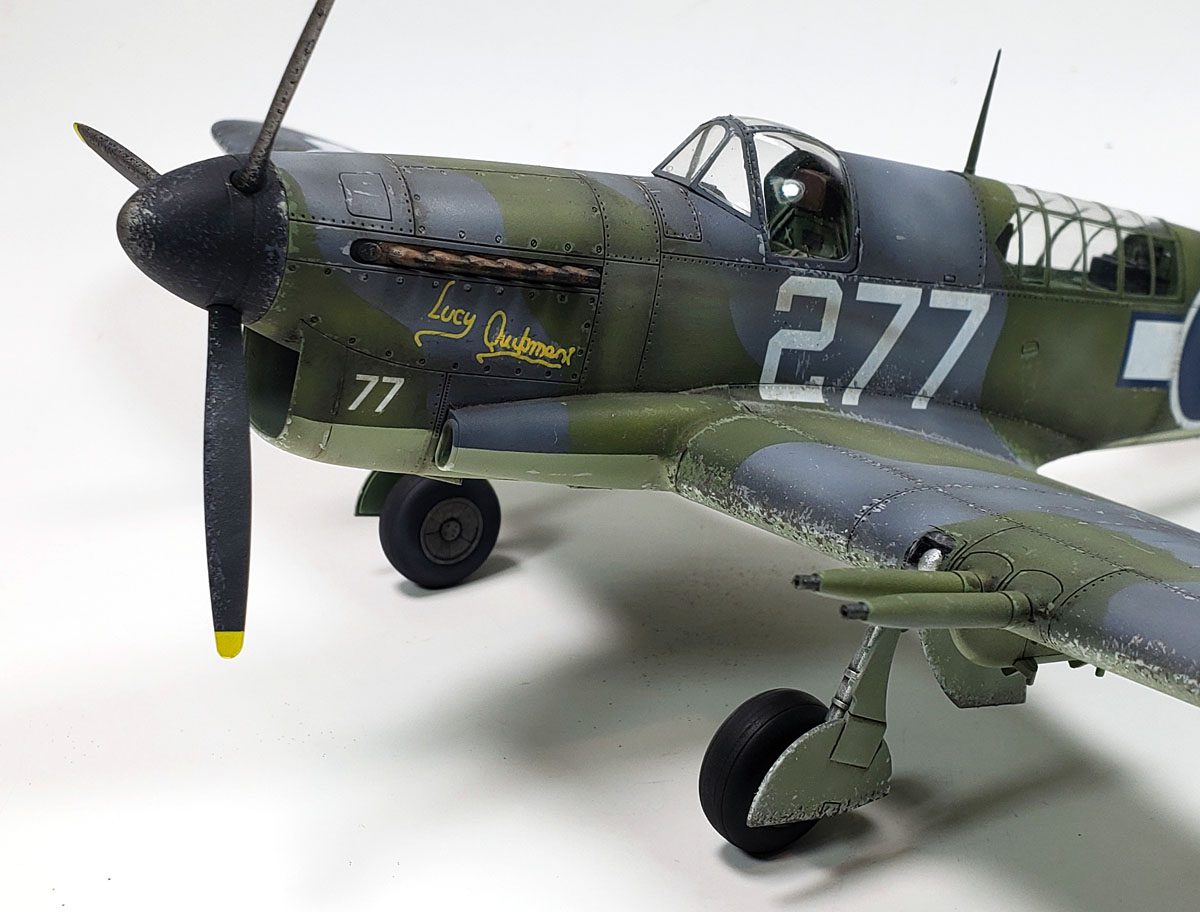
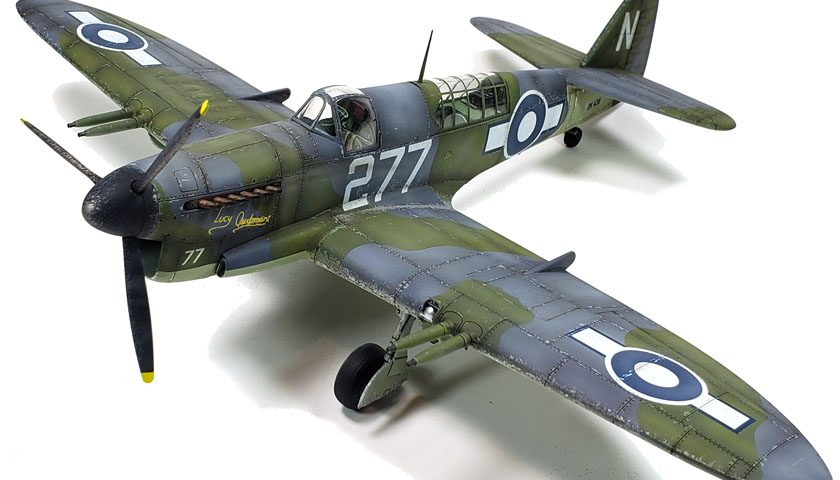
Fortunately, for the aircraft I was depicting, the national markings were the Fleet Air Arm Pacific adaptations used in that theater of war, which closely resembled US markings – all blue with the white bars sticking out. As far as the aircraft numbers and nose adornment, I didn’t even bother researching that. I had no intention of buying an aftermarket set if they weren’t right, so in this case… ignorance is bliss.
I applied the decals over a gloss coat of Future. I’ve read criticism in various modeling groups about the use of Future. Most center on the fact that it is not a “proper” modeling gloss, or that it will yellow.
And Here He Goes Off Topic…
The first charge I think is a bit disingenuous. Modelers use many products that aren’t “proper” modeling products, and have for decades. I’d venture to say a great number of modeling products that are specific to our hobby were simply adaptations of something modelers were already using. (Sanding sticks, anyone? 😉 ) Future is not useful if you want a shiny, super smooth car finish, for example. But its use as a utility gloss coat – added to a model on the way to something else – is very practical and economical.
As to the yellowing… I don’t get that. I have a few models sitting on the shelf from the first year I started building again as an adult, back in 2006. There is no yellowing, no color shift… nothing. I could see if it sat in a sunlit area that it might happen, though in that scenario, paint would fade also, decals too.
In my use, on nearly 300 models as of this writing, Future has been a stellar performer. It is about the toughest acrylic product you can put on a model. Its uses go far beyond a simple gloss coat, too. Decal setting solution, canopy adhesive, clear part dip, you name it. I haven’t tried adding any to my coffee, but I’m quite sure it would make it shiny and extra special. (Warning: If you’re under 18, please have your parents supervise all modeling-product-to-coffee additions.)
So… give Future a try as an economical, utility gloss coat. Nothing to fear. If you need a truly gloss finish, like for a car, or a shiny Gunpla – use a “real” modeling gloss.
And We’re Back…
The kit decals worked fairly well. While I did have a few fold over, I place the blame squarely on my shoulders. I know how the Trumpy decals work, and yet I got in a hurry and let it happen anyway. So the occasional paratrooper verbiage was directed more at myself than anything.
On the large aircraft numbers, I probably should have cut the markings out individually to reduce the amount of backing film, but I got a bit lazy. Which resulted in a bit of silvering. No worries though… a pinhole here, a small slice there, some Solvaset applied, and it all worked out.
With the decals applied, another coat of the aforementioned non-modelIng yellowing substance was applied to seal them in. 😀
The next step was filling in all those panel lines. While I’ve been very happy with my experiments with Citadel’s Gloss Nuln Oil over a gloss coat, I didn’t feel it would work as well for the petite panel lines on an aircraft. I switched to my “traditional” method, Ammo of Mig Panel Line Washes.
Enamel washes bring several critical benefits. For one, they do not react with the underlying acrylic varnish, so they can be applied with peace of mind. (At least in my experience.) They flow very easily over a glossy coat, thus panel lines are filled fairly quickly. When compared with oils, they generally are more opaque, and when dry, don’t leave “clumps” as oils can do if not thinned properly. The excess can be cleaned up easily with odorless turpenoid, leaving no tide marks. (Oils work this way too, acrylics not so much.) The primary benefit in my mind though is drying time. While acrylics dry fast for this type of use, they will leave tide marks that can be difficult to erase. Oils work well also, but may often take much more drying time. With enamels, I’ve had very satisfactory results on many, many builds with giving them as little as 12 hours drying time before adding additional weathering over the top of them.
Your mileage may vary, of course. The basic point though is that I believe enamels provide a good balance of ease of application, cleanup, opacity, and drying time, which make them my go-to product with traditional genres.
With the panel line wash applied, the next step up was adding the chips.
So, Yeah… You’re Looking At The Chips
As I’d just finished writing a blog entry about multicolored chipping, I decided I’d better put my money where my mouth is and do it on this build. 🙂
While that article had focused on sponge application, and a previous one on pencil application, I decided to use the brush applied method for this one. My grand plan was to not only squeeze this final build article out of the Firefly, but also a How-To on applying chipping via paint brush.
{sigh}
The problem is, of course, that while I know how to do it reasonably well, the chipping on this one turned out… let’s call it “less than desirable.” So to avoid having to title the How-To article “Applying Paints Chips With A Brush So They Look Like Hammered Dog Turd“, I decided to wait until a more opportune time to write that article. (Stay tuned…)
It’s not that they look bad, per se… but they’re nothing to write home about. Still… the logic is (I think) sound, and the method should work… unless you’re an inconsistent goofball like me. 😉
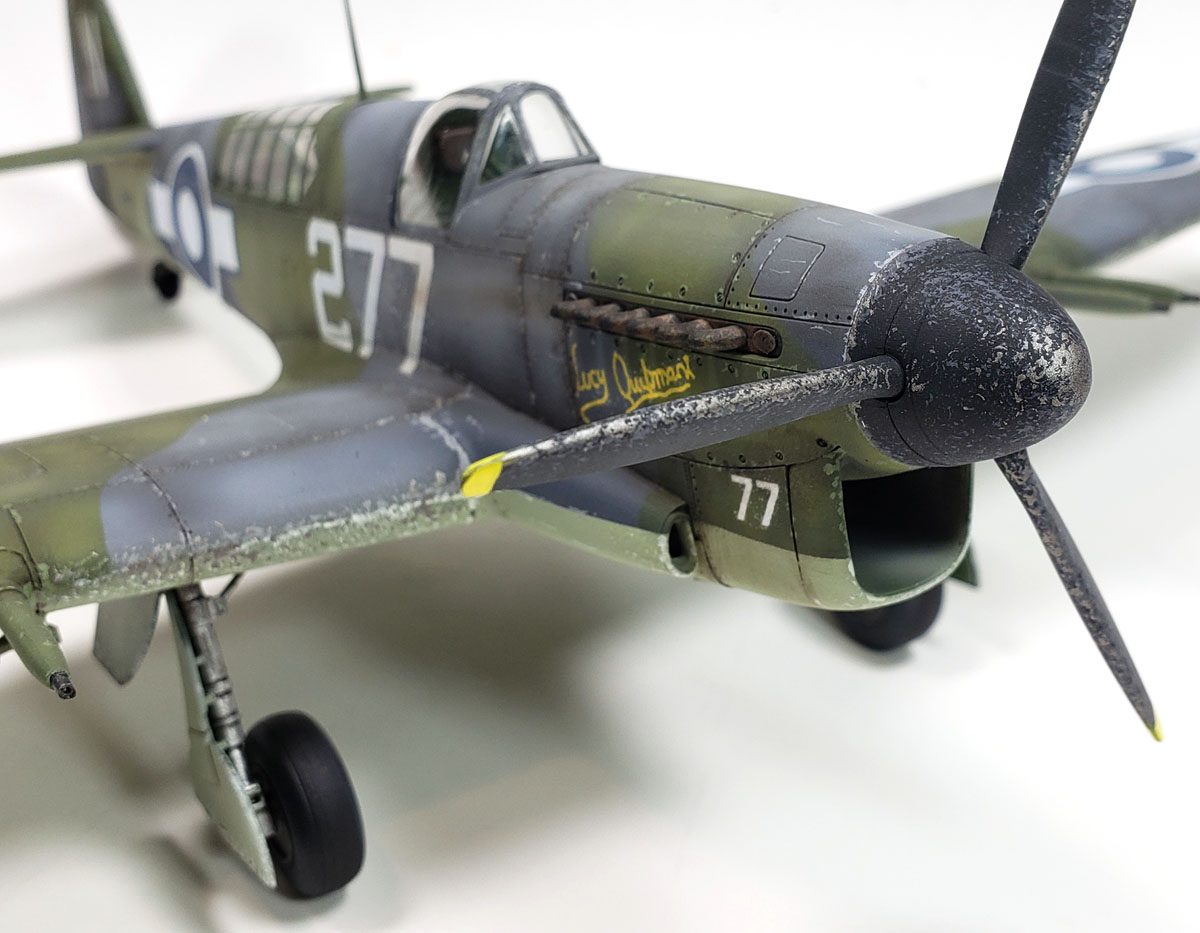
I wanted to essentially use two colors of chips – a lighter version of the base color for each respective camo color, and then a silver color for deeper chipping. The idea was to do as I’d described in the “spongering” article – simulate chips that only partially went through the paint, and then some that went all the way down to the bare metal.
Each color was applied with a #0 liner brush. I experimented with both “neat” (unthinned paint), and thinner paints (Ammo of Mig “Spanish Water” 🙂 ). I found that I had more control, and better opacity, using the thicker paints. Of course, the trick in this process is not just color and paint thickness choice, but precision of application, and density and distribution.
Those latter elements were a struggle for some reason. The chips painted on to the darker green color worked well, so initially I was happy with the result. As I moved to the gray areas, I began to have trouble. As odd as it may sound, I think it was “tiring” me out. Not in a physical sense so much, but I noticed the longer I went, the sloppier my work looked. I’d say “mentally tired”, but that implies the presence of a “mental” to tire out, and I’m not entirely sure that I possess a “mental”.
Of course, being a standard issue male of the human type, I kept going anyway.
By the time I got to the underside color, I was getting quite frustrated, and the chips were looking worse. Obviously the smart thing to do would have been to stop.
Smart I are not. 😛
Finish this task I would.
Switch to Yoda speak I did. Why I know not.
Anyway…
I finished it up, and while it looks OK from 3 feet away, maybe even 2… close examination is not recommended.
Still – growth does not come from always taking the safe, tried, and true route. Growth comes from trying the difficult thing. To seek out new techniques. To boldly go where no one has gone before. Not because it is easy, but because it is hard.
Something like that.
With the chipping finished, I began closing out the build with a few enamel streaks applied here and there. That was followed with a highly thinned fade coat, randomly applied with my airbrush. Tamiya’s XF-55 Deck Tan was used for this. Post-shading was also applied with the airbrush, using a heavily thinned mix of 2 parts Tamiya XF-69 NATO Black, and 1 part XF-9 Hull Red. These colors were also used for exhaust staining, with the XF-55 applied first, the black/hull red mix applied in the center of it afterwards. All of this was then sealed in with Vallejo Mecha Color Matt Varnish.
Overall, I’m happy with the final result. Sure, I’d like to get a re-do on the chipping. But I am a strong advocate of a simple notion – in order to be successful in modeling, you must be willing to fail in modeling. Painting milk jugs and cardboard and spoons all have a place in the process, but eventually you’ve got to be willing to have a less than perfect model in order to get to a closer to perfect model. So when viewed in that perspective, I feel like this one was a success.
(Whatever lets you sleep at night, Sparky… 😉 )
The Dance
I ended up following my mom’s advice, and went to the dance. I walked into the now decorated gym, looking for my… dare I say it… date. {Gulp.} She came up behind me. “Jon?” She sounded surprised as she looked me over.
The little curly-haired girl complimented my suit, a really sharp polyester black suit, complete with a red wide collared shirt, covered in black and white paisley patterns. Opened halfway down my chest of course… because disco. She noted that I’d even combed my hair, and had used cologne. (Old Spice, of course… courtesy my dad) She was dressed up in a frilly yellow dress… and actually looked quite pretty. And then I saw them.
Dainty white gloves. I don’t know if she just wore them because they were pretty, or if she’d sensed my discomfort with her warts all week. I never asked.
To be honest, I felt a bit ashamed of how I’d acted all week as the evening went on. We had a wonderful time… as wonderful as it gets in 6th grade dances I suppose. While our banter started a bit awkward, by the end of the evening we were laughing and having a good time. At some point along the way, I realized she’d taken off her gloves. Yet I still held her hands. Warts and all.
And I did not even care.
We were having fun. And for that moment in time, that was good enough.
I guess building a Trumpeter kit is kinda like going to a dance with a little curly-haired girl who has warts on her hands. You may have some reservations at first, but you just need to get over yourself. Have fun with it. Before you know it, you’ll be dancing the night away, blissfully ignorant of the warts that at one time were your focus.
Give Trumpeter’s newly-tooled 1/48 Fairey Firefly a shot. It’s loads more fun to build than the Special Hobby kit. It looks like what it is meant to model. You’ll enjoy the build, and end up with a not often seen airplane on your shelf.
And I can promise you it will not cause warts. No matter what that guy in the nacho line at the IPMS-US Nationals says. 😉

Leave a Reply