
A few years ago, a friend had started building Warhammer 40K figures. He’d always built a variety of things, from traditional aircraft and armor subjects, to scifi and other “exotic” subjects. (Exotic to me… 😉 ) When he showed me his 40K figures, while I thought they looked cool, I didn’t see them as something I wanted to do. Nothing wrong with them, really, just not my cup of tea.
One day he told me about a new Warhammer kit he was working on. It sounded to be some sort of mech walker. His description reminded me of the vehicles that I had played in the old MechWarrior game. Of course, when he told me the price of the kit – well over $125 – I decided cool or not, that was too rich for my blood.
Not long after, I saw his completed model. I had to admit – it looked awesome. He’d placed various lights in it, and that really made it look great. And while his other 40K work seemed cool, this one really stuck in my mind. The seed was planted – I wanted to build one.
It was called an Imperial Knight.
But that price…. I’d just about need to be an imperial knight to afford it.
Fast Forward
It’s funny how you meet people online. While particular hobbies, interests, and geographical commonality are readily apparent, the number of times I encounter folks that a more personal connection exists amazes me.
One fellow had noticed a Warhammer build I’d posted to this site. He liked it, and contacted me asking if I did commission builds. I explained I no longer did those, as my focus was now on building and writing specifically for the blog. Of course, he was disappointed, but he understood.
He’d just hoped to get an Imperial Knight built is all. 🙂
To pull out a Wizard of Oz quote, “Well, bust my buttons! Why didn’t you say that in the first place? That’s a horse of a different color!” 😀
We began exchanging emails, as I mulled over in my mind the possibility of “coming out of retirement” for this one build. I mean – it was an Imperial Knight. The kit’s cost, in a commission build scenario, would vanish. I’d get to build it, and make some money on it – with no worries about whether it would sell on Ebay, where I normally post my completed work.
As we talked, he mentioned that he’d read I was a former paratrooper. Turns out he was too. Further emails revealed we’d been stationed at Fort Bragg, North Carolina at the same time. We’d actually chewed some of the same dirt, so to speak.
A brother paratrooper wanted an Imperial Knight built. How could I say no? 🙂
Getting The Frame Ready
I’d get to build two… one for me, and one for him. I decided to build mine first, so I could sort out any areas that needed attention in the build sequence.
The first step was heading over to the Warhammer TV channel on Youtube. Everyone’s favorite Warhammer TV presenter, Duncan Rhodes, has a four-part tutorial on building and painting an Imperial Knight. Part 1 details the initial assembly, and is a great place to get started in the series.
Duncan explained that it was easiest to build the frame first, leaving the armor pieces off until later. This made perfect sense, of course. I’d actually applied his tips earlier this year when I’d built the Armiger Helverin, which is basically a smaller version of the Knight.
As with all of the Citadel kits I’ve built so far, the parts were very nicely cast, providing sharp, robust raised edges on every detail. Fit was generally good, though a few places here and there required a small bit of filler.
Of course, as with most Citadel kits, actually finding things on their sprues proved a bit maddening at times. They lay out the parts to maximize the use of space, which I can appreciate. It cuts down on coasts, which can thus be passed along to the consumer. (Oh, wait… not really LOL) However, this parts layout – which can be a bit random – is combined with a numbering sequence that is quite haphazard. In some cases, part x and part y, which need to be glued together, sit right next to each other on the sprue. Yet in other cases, the two may be (seemingly) randomly placed on the sprue, with no sense of logic behind the location of the two. So finding parts is often a bit like a game of “Where’s Waldo”. 🙂
(Rumor has it that the fellow who designed their office layout does the sprues also… though I may be mistaken about that. 😉 )
Bring Out The Glue
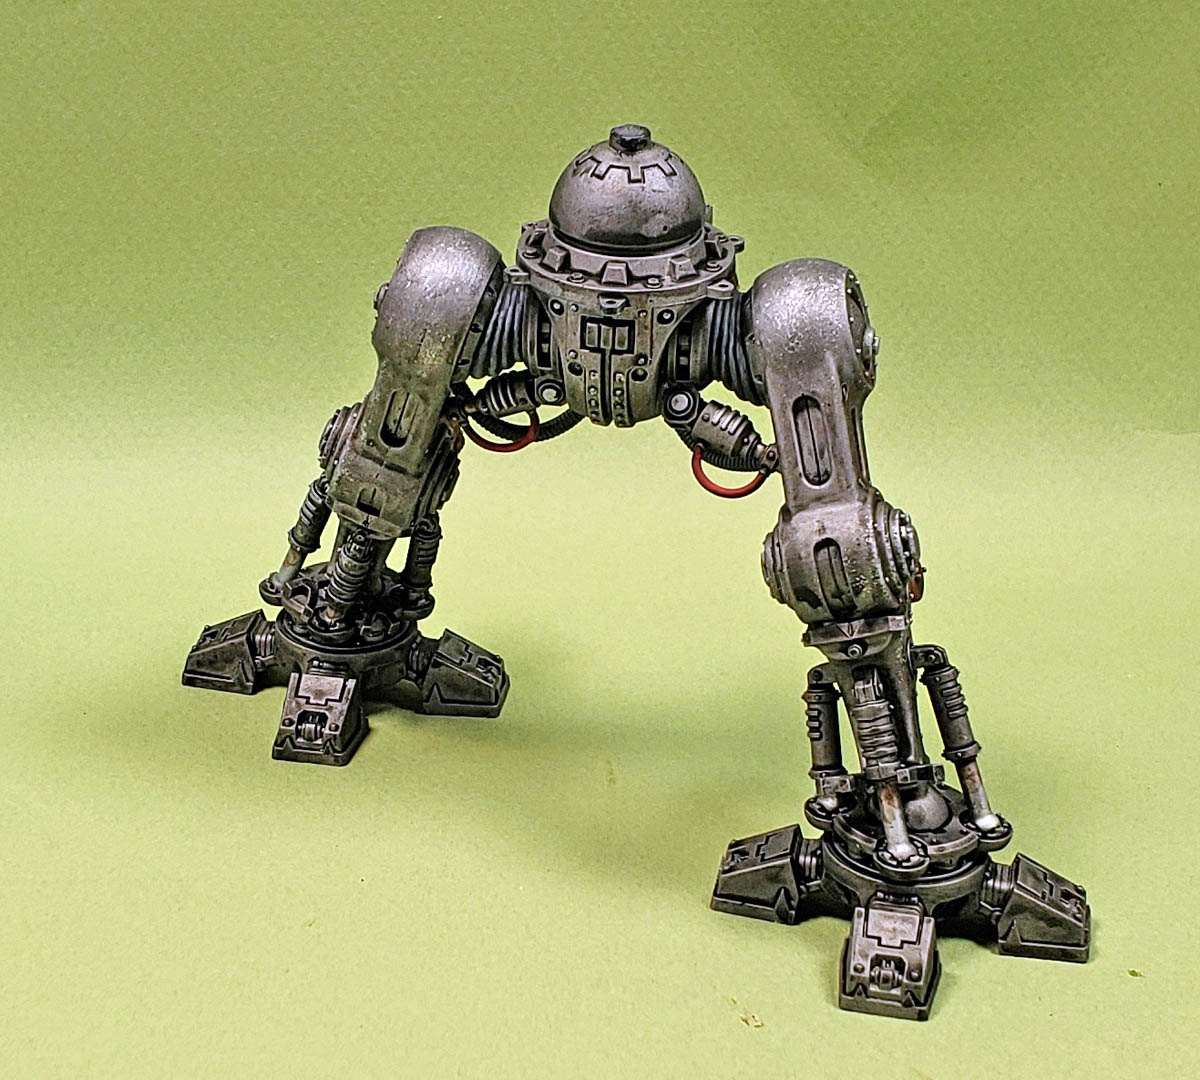
While there are quite a number of parts compared to the other Citadel kits I’ve built, assembly goes very quickly. Do pay close attention to the assembly of the feet and its associated pistons if you build the kit. While the instructions are very clear about what part goes where, if you don’t pay attention, you might end up with legs that don’t look quite right. Thus requiring pulling things apart, after the glue has set a bit. (Ask me how I know this…. DOH!)
The pelvis section was assembled next, consisting of just a few parts. The upper torso has a good number of parts, but all are logical in placement, and fit quite well. I recommend leaving off the small U-shaped parts that will hold the small shield, gun, and head to the torso. Keeping those parts separate made painting easier.
The two arms were assembled next. Each has a certain degree of movement designed in, with a few small pistons which aren’t glued, but are left free-moving. I still haven’t decided if I will leave them this way, as over-extension in some arcs of movement may allow the piston parts to fall out of their receptacle. Getting them back in is no problem, but the more I think about it, the less need I see for the model to be articulated. Still, I may leave it up to the eventual buyer to decide.
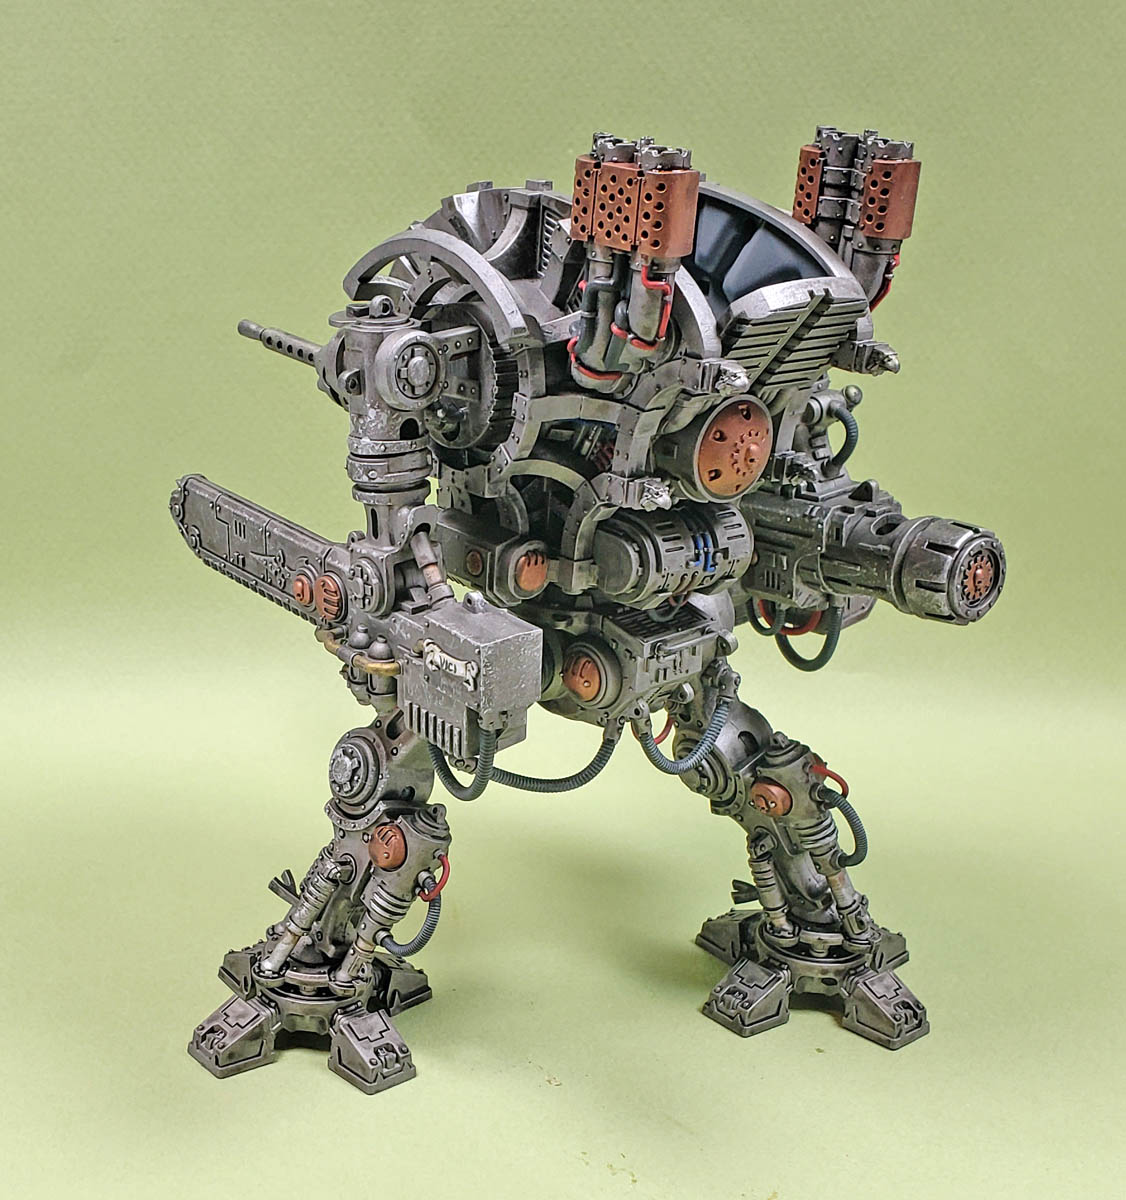
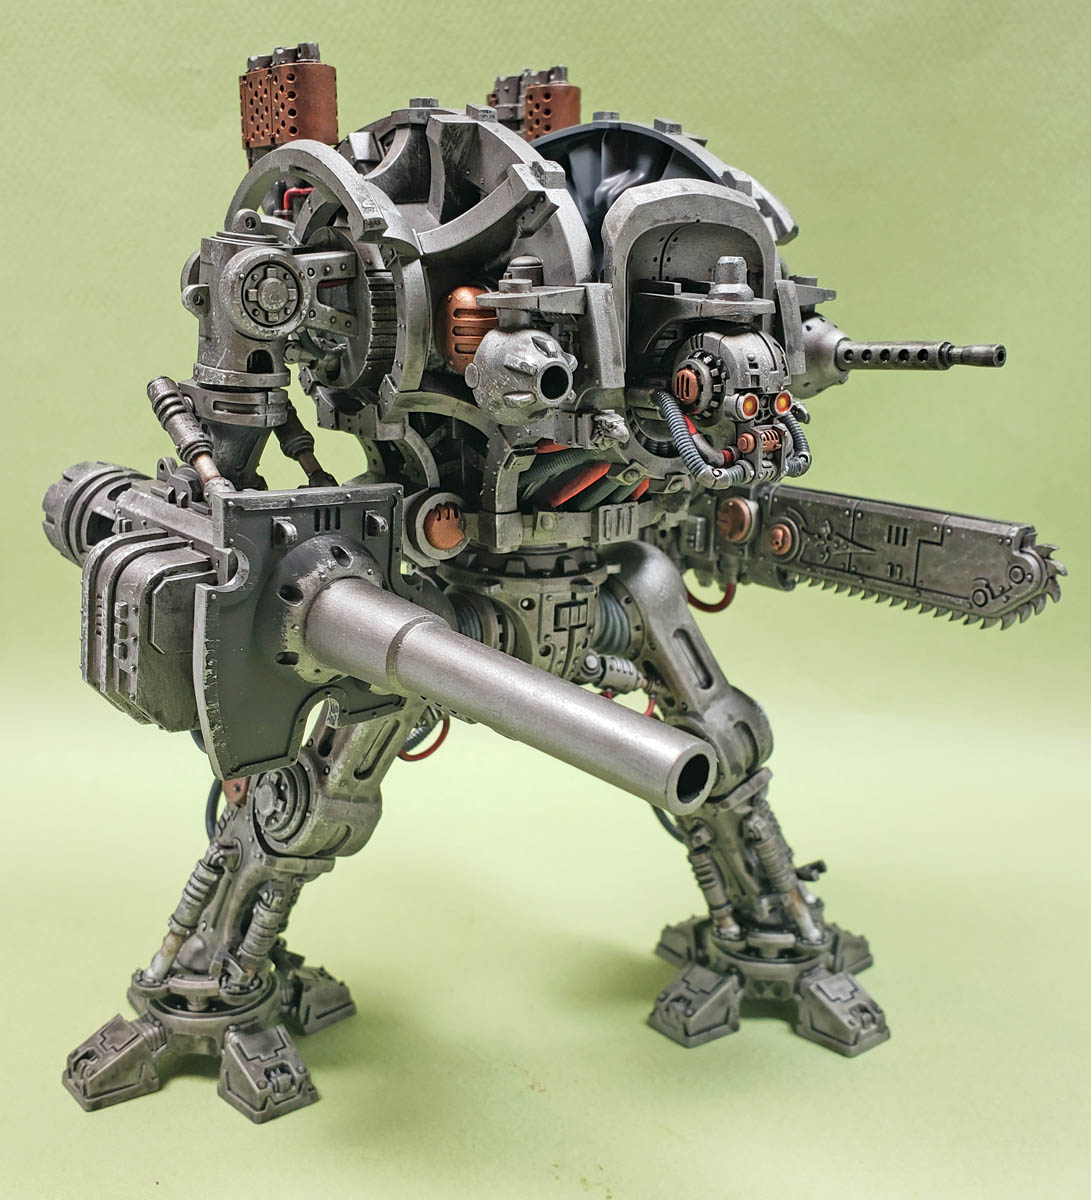
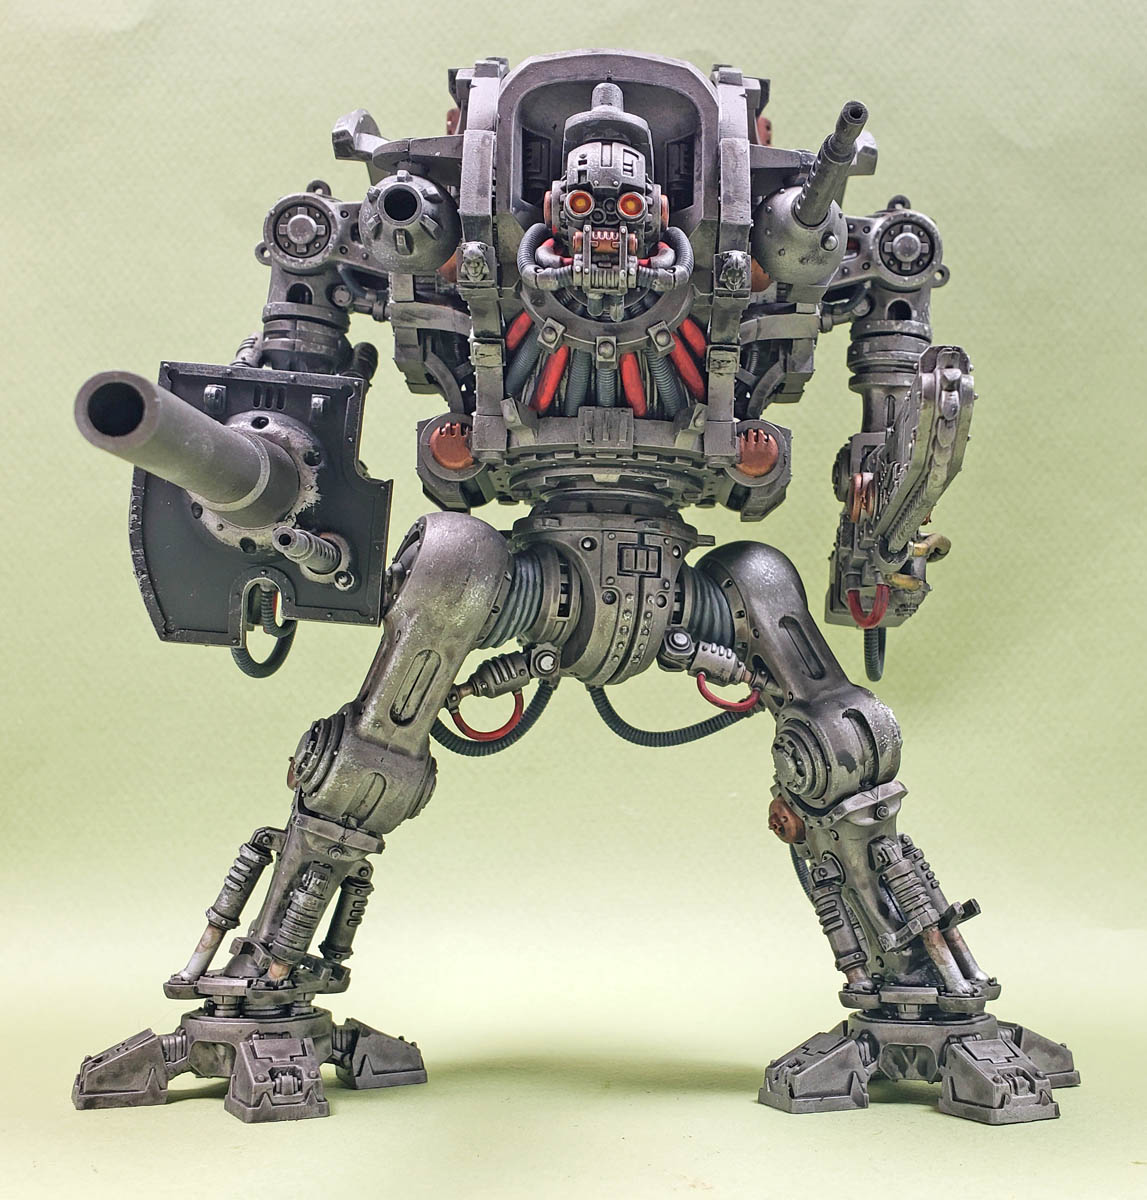
When finished with basic assembly, I had these sub-assemblies: two legs, pelvis, upper torso, head, both arms, and a few smaller bits – hoses and pistons for the leg/pelvis join, and the aforementioned parts to mount the items on the torso.
Adding The Colors
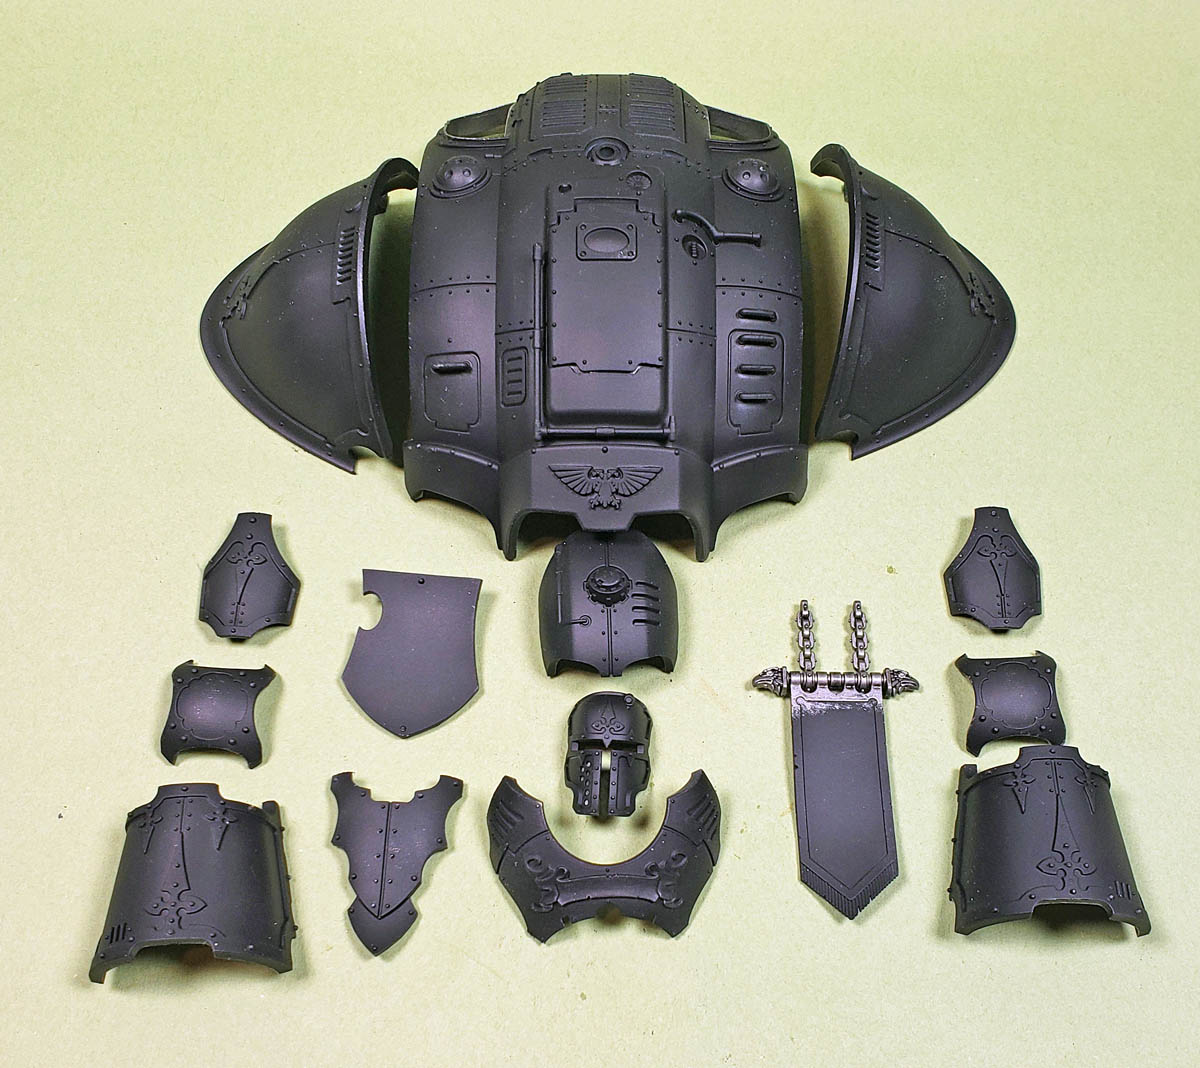
All parts were primed with Badger’s Stynylrez Black Primer. I went ahead and primed all the shield parts too, as I planned to paint the backsides of them in the same manner as the skeleton.
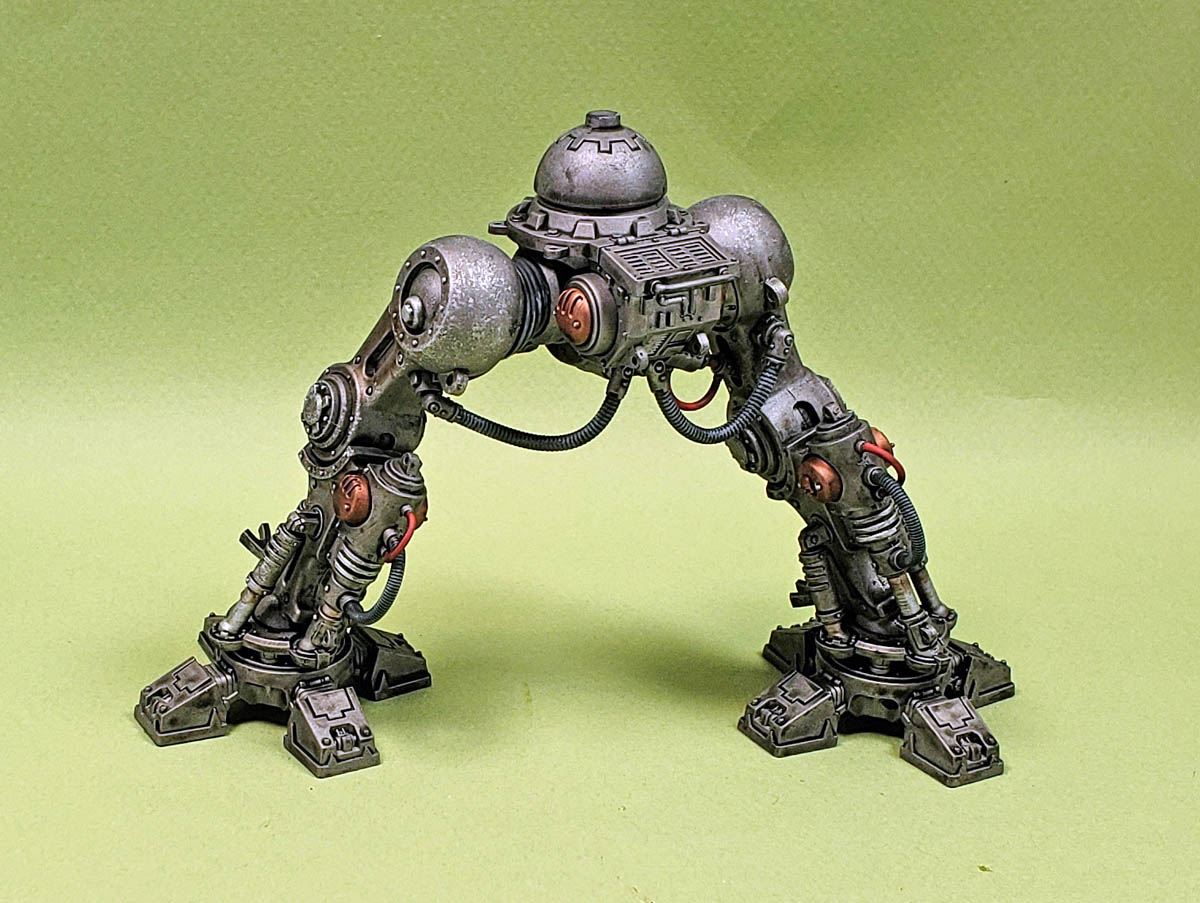
The first color applied was Citadel’s Leadbelcher, a wonderful steel type color. I applied it with a very large #12 flat brush, using an application method that essentially looked like drybrushing. However, I made sure to load enough paint on the brush to get full coverage. This resulted in a very smooth surface finish, but it went on very quickly. If I’d have loaded the brush a bit less with paint, a nice patchy metal look would have resulted. However, that was not the finish I wanted on this one. Still – if you’re building it and choose to employ that method of paint application, you can get some nice, varied effects simply by adjusting the amount of paint on the brush. (Master of the obvious am I! 😉 )
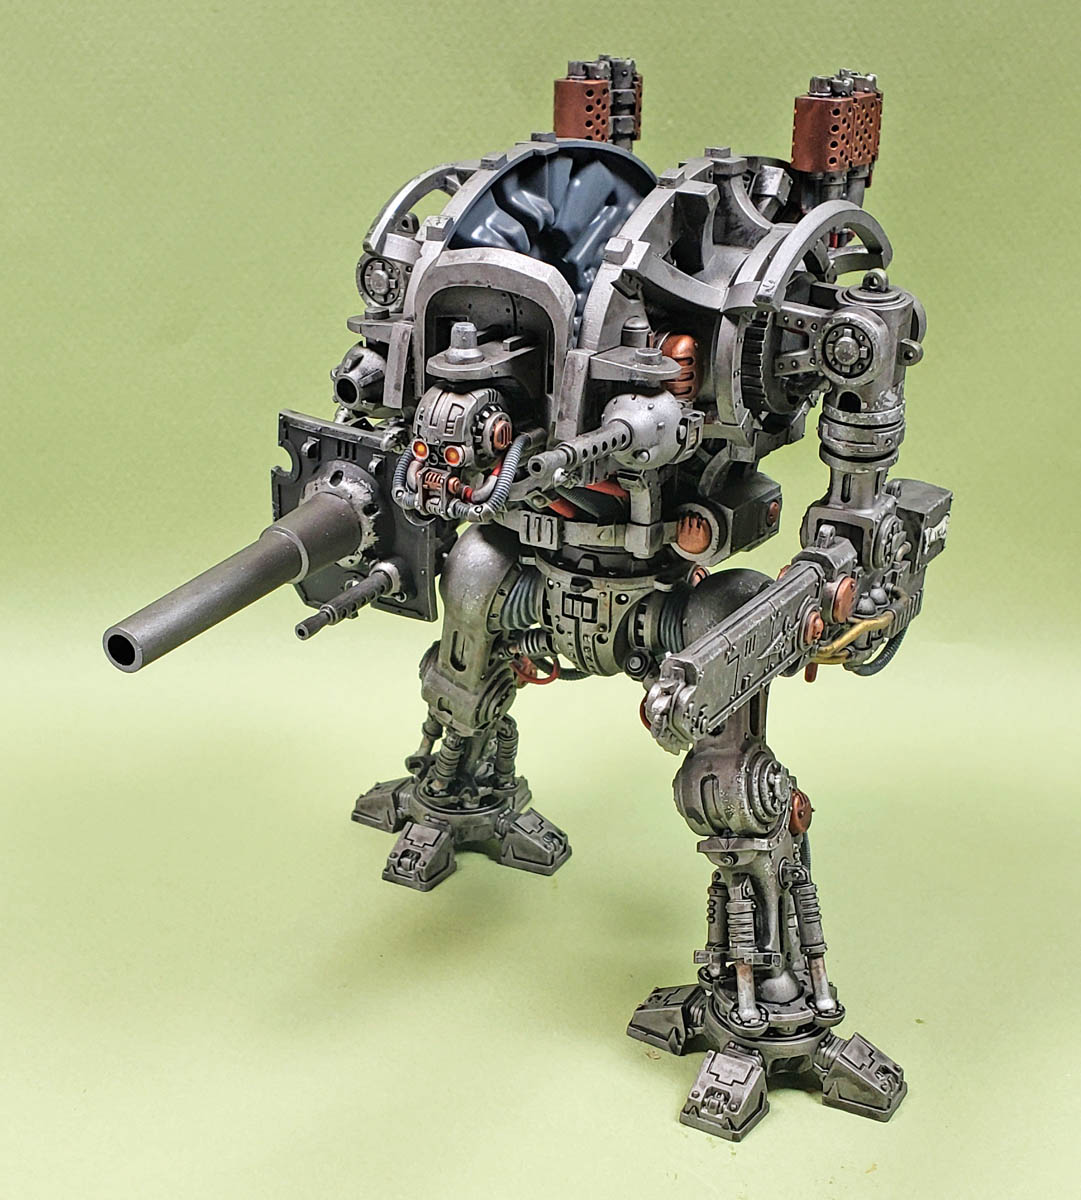
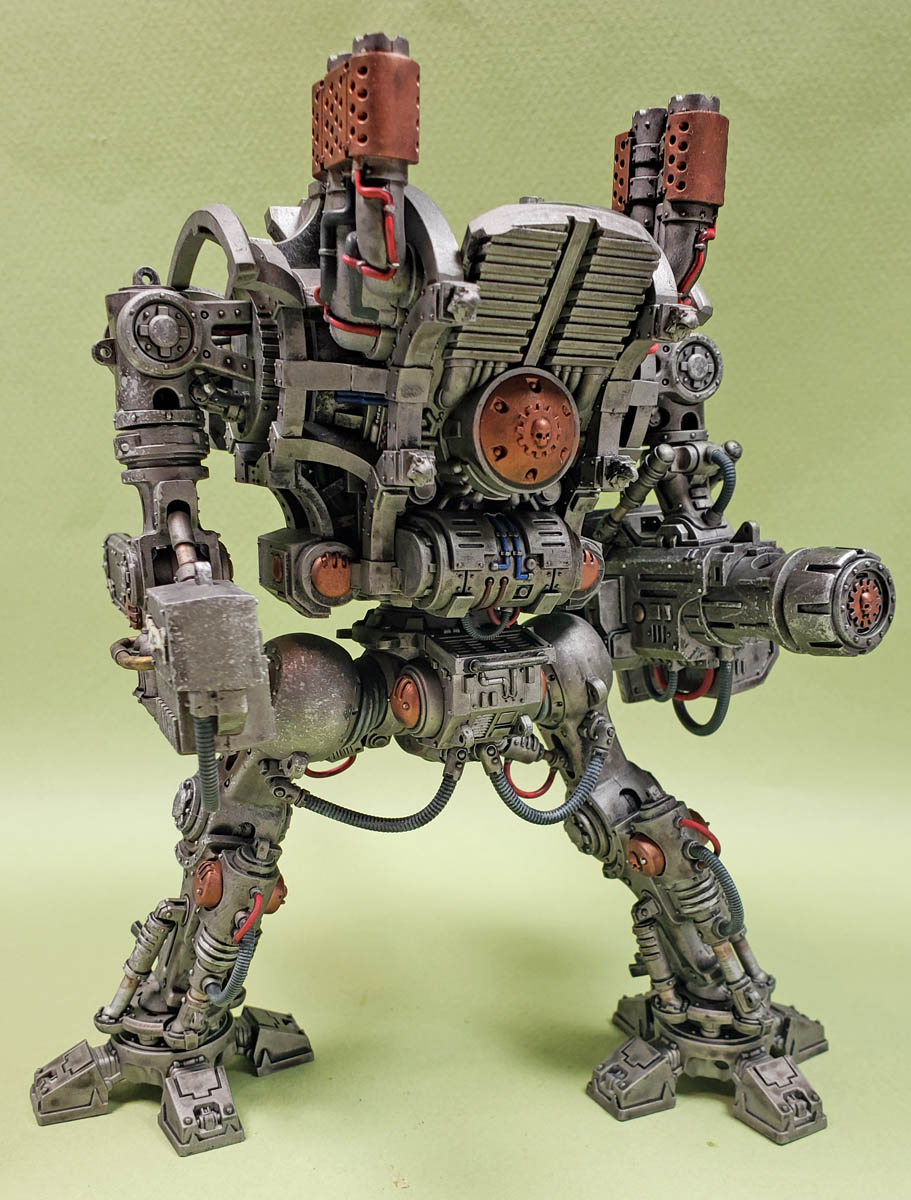
With that paint on, I moved on to picking out various parts in Balthazar Gold, another Citadel paint. This is actually more of a bronze color, but it’s very strong, and I really like it. I can’t say there was too much rhyme or reason in my selection of what to paint… I just went with the “make it look cool” ethos. (Hoping I achieved that… 😉 ) Painting that on over the Leadbelcher worked well, as it imparted a nice, bright look to all the parts.
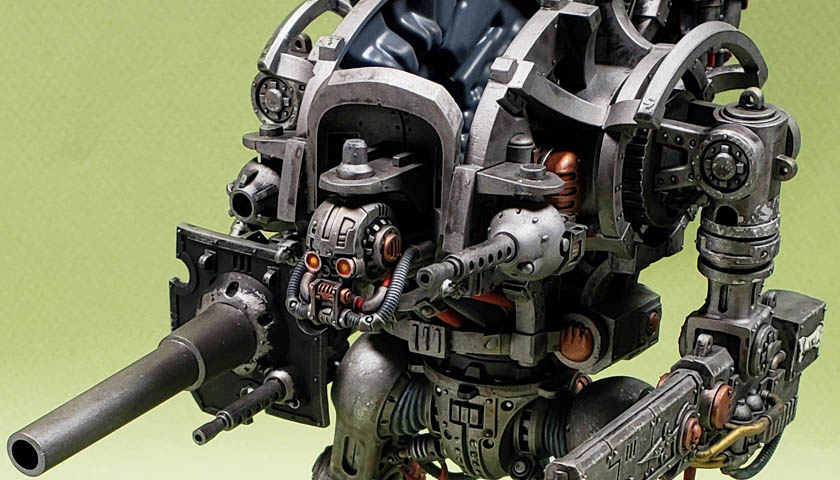
Other colors followed. I decided that all of the segmented hose sections would be painted in Vallejo Model Color Black Gray, and smooth hoses in Vallejo Gory Red. On the torso, I also applied some Vallejo Mecha Color Electric Blue to various cables and hoses, but in just a few smaller areas.
Made In The Shade
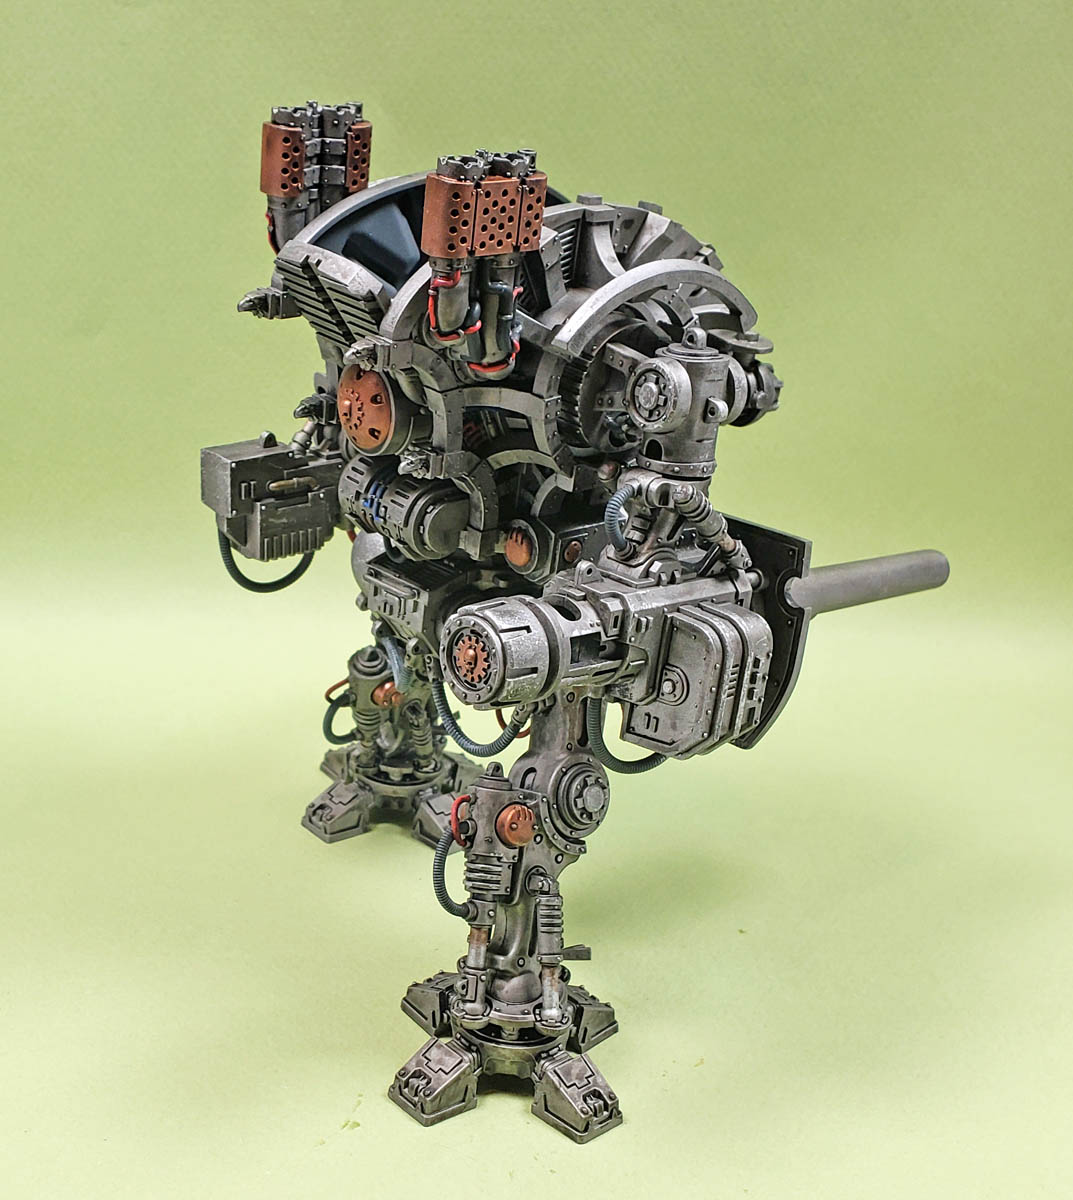
With the basic colors blocked in, out came the shades. Starting with Citadel’s Nuln Oil Gloss, it was applied with a #8 round brush. The Nuln Oil wasn’t spared, either… I slopped it on quite thick. While I did try to avoid too much “pooling”, because I wanted a grimy, dirty look, I decided to accept a certain level of tide marks. Anything that was too over the top could be “knocked back” later with a focused drybrushing of the appropriate base color.
Once I had that coat applied over everything, I followed Duncan’s lead from the video, and did it again. Adding multiple coats (two thin ones of course! 🙂 ) of Nuln Oil over Leadbelcher really gives a steely, grimy, worn look. It can work on any model – from Gunpla frames to aircraft engines and gun barrels.
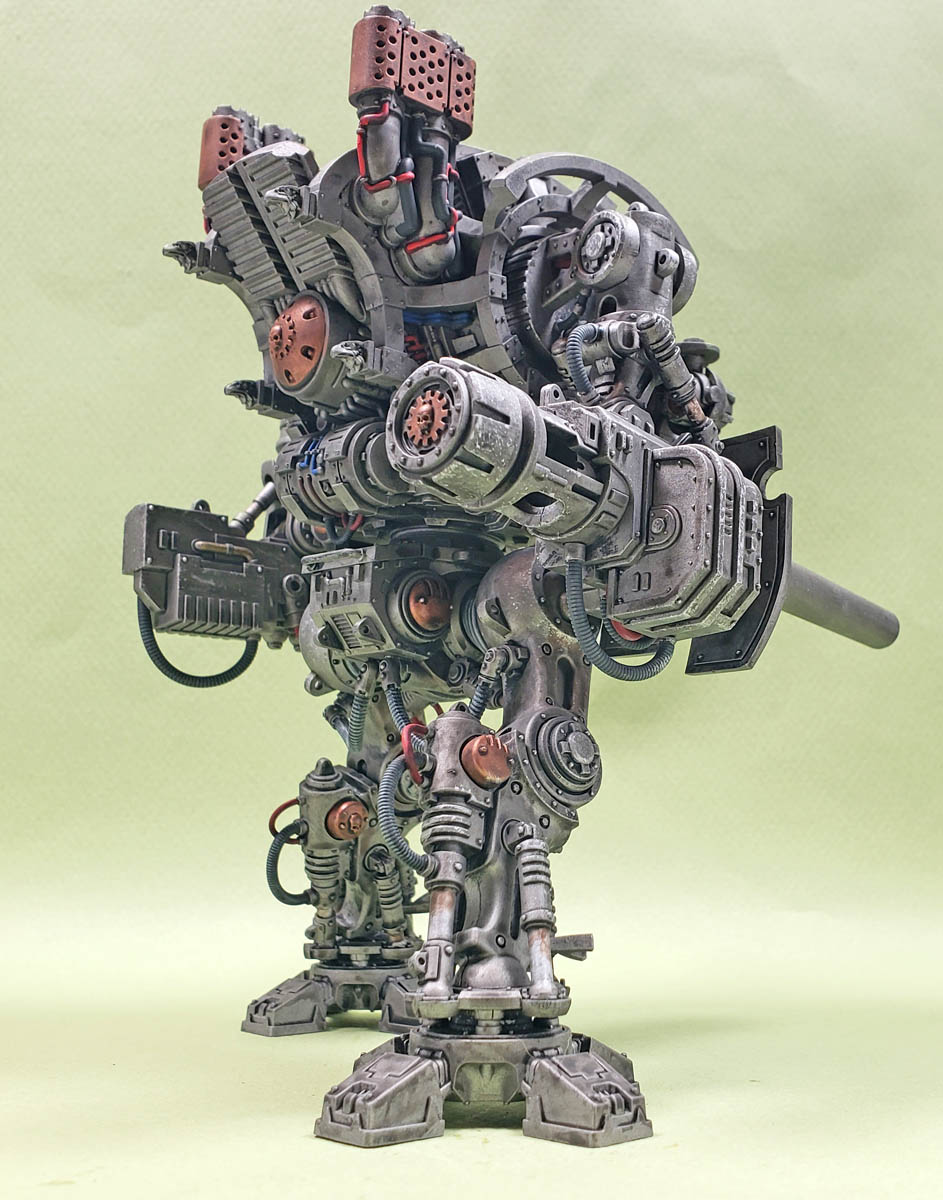
When the Nuln Oil was dry, I gave all silver parts a light drybrush of Leadbelcher, to bring back a bit of the “shine”, and to provide contrast between the raised and recessed areas. I also added some scratches, both via sponge and brush, using Runefang Steel. This is a lighter silver color from Citadel. It is very effective at simulating areas where grime may have worn away, or the surface of the metal has been scratched. It also provides additional visual interest that I simply think looks cool.
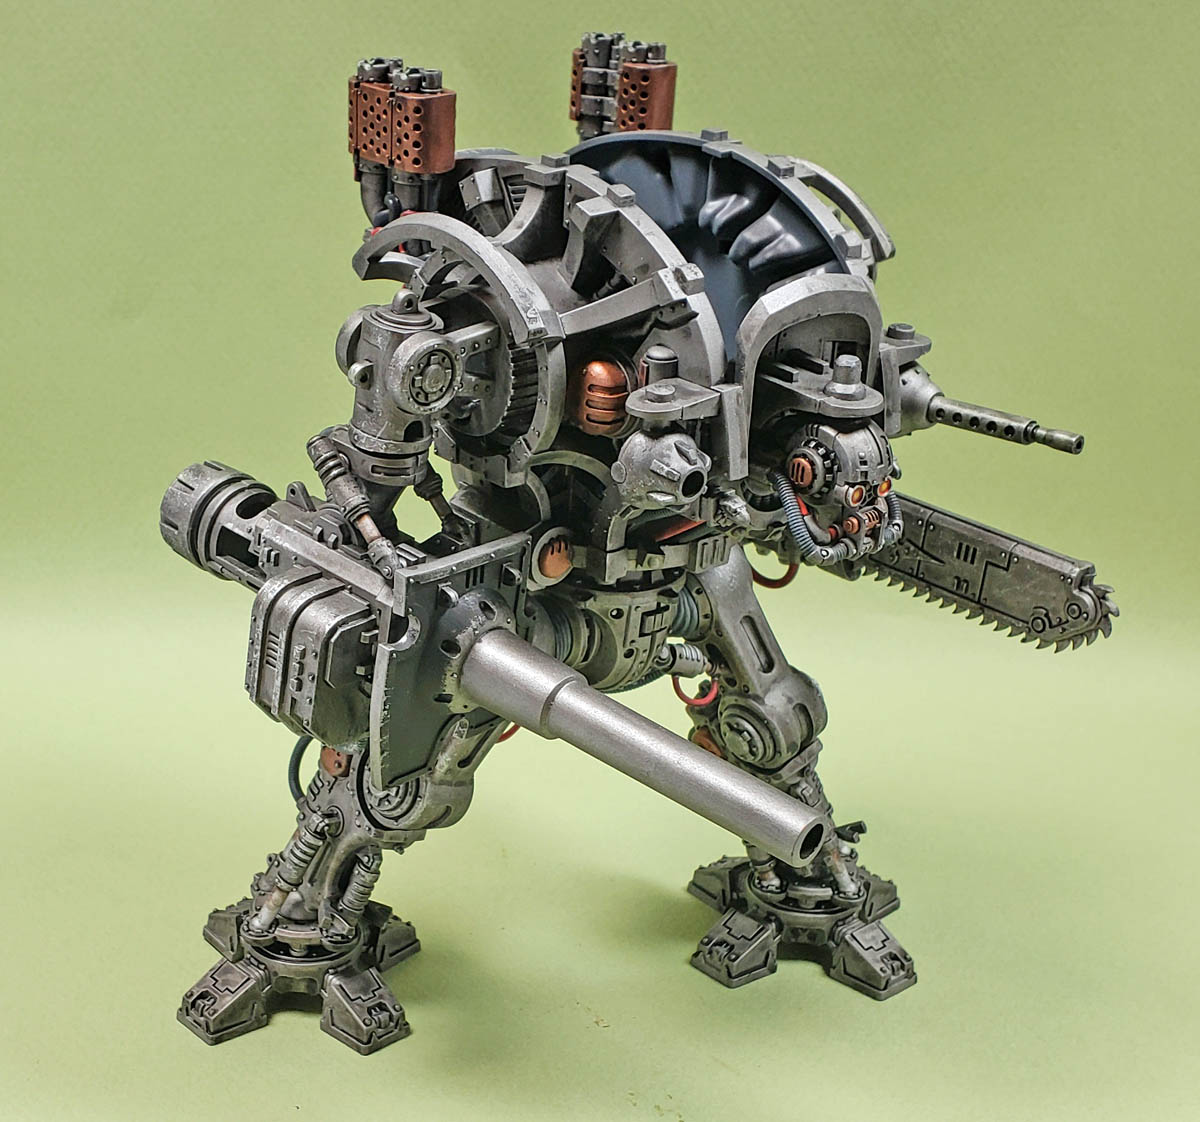
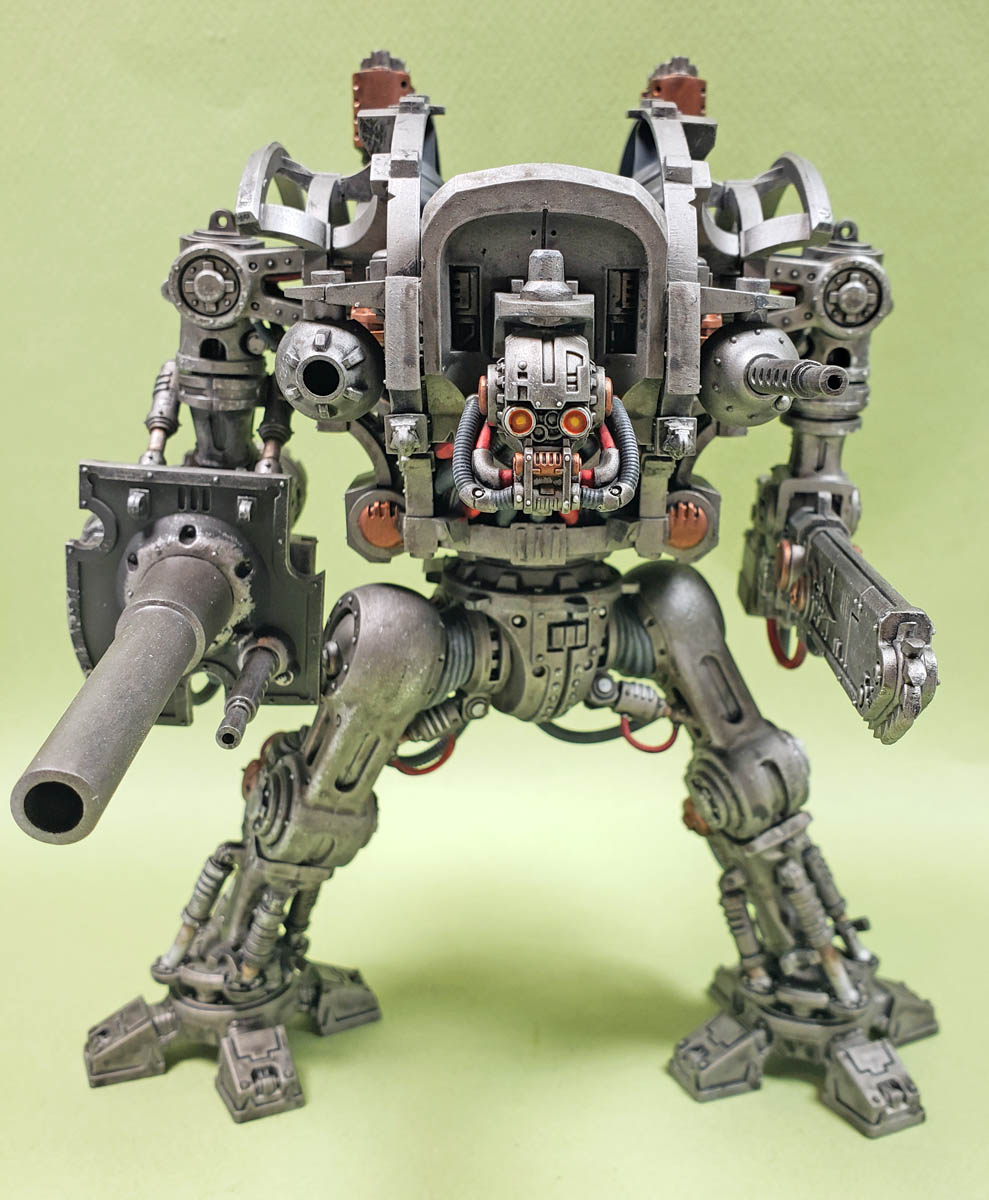
The black gray segmented hoses were drybrushed with Vallejo Sky Gray, and the red hoses highlighted with Vallejo Mecha Color SZ Red. For the eyes, I decided to go with an orange color. While I’ve not seen this used on Imperial Knights in my perusal of other artist’s work, I actually had some logic behind it. The bulk of the outer armor will be blue, and on the color wheel, blue and orange are opposite. (That and my son is a Denver Broncos fan… 😀 )
More Nuln Oil was applied in selected areas, to either add or restore to the shadows, or to give certain areas an oily, grimy look. Other parts were treated to Citadel’s Agrax Earthshade, a browny-colored shade. This was used to suggest oil stains on pistons, and a few oil streaks. I’m not doing a lot of weathering at this stage, but rather just giving things a general level of griminess. Later, once the armor is on, I will go back and add additional stains, streaks, chips, and weathering. Doing so at the end of the build will allow for a more cohesive look to the model.
With all manner of paints and shades applied, I gave everything a coat of Vallejo Mecha Color Matt Varnish. My reasons for this were two-fold.
First, it knocked back the shine, and allowed me to look at everything from a single “tonality”, if that makes sense. (And I may have used the wrong word there…) Because of the various media I had applied, some sections were highly glossy, while others were very matte. Seeing it all in one finish helped me to assess what else I might want to do.
A second benefit to the matte coat was to apply a more “grippy” surface for later weathering treatments. Many weathering products will slide right off of a gloss surface, so dulling it all down avoids that. I can go back near the end of the build to apply a few gloss stains and streaks that will simulate fresh oil, grease, and water streaks.
Wrapping Up
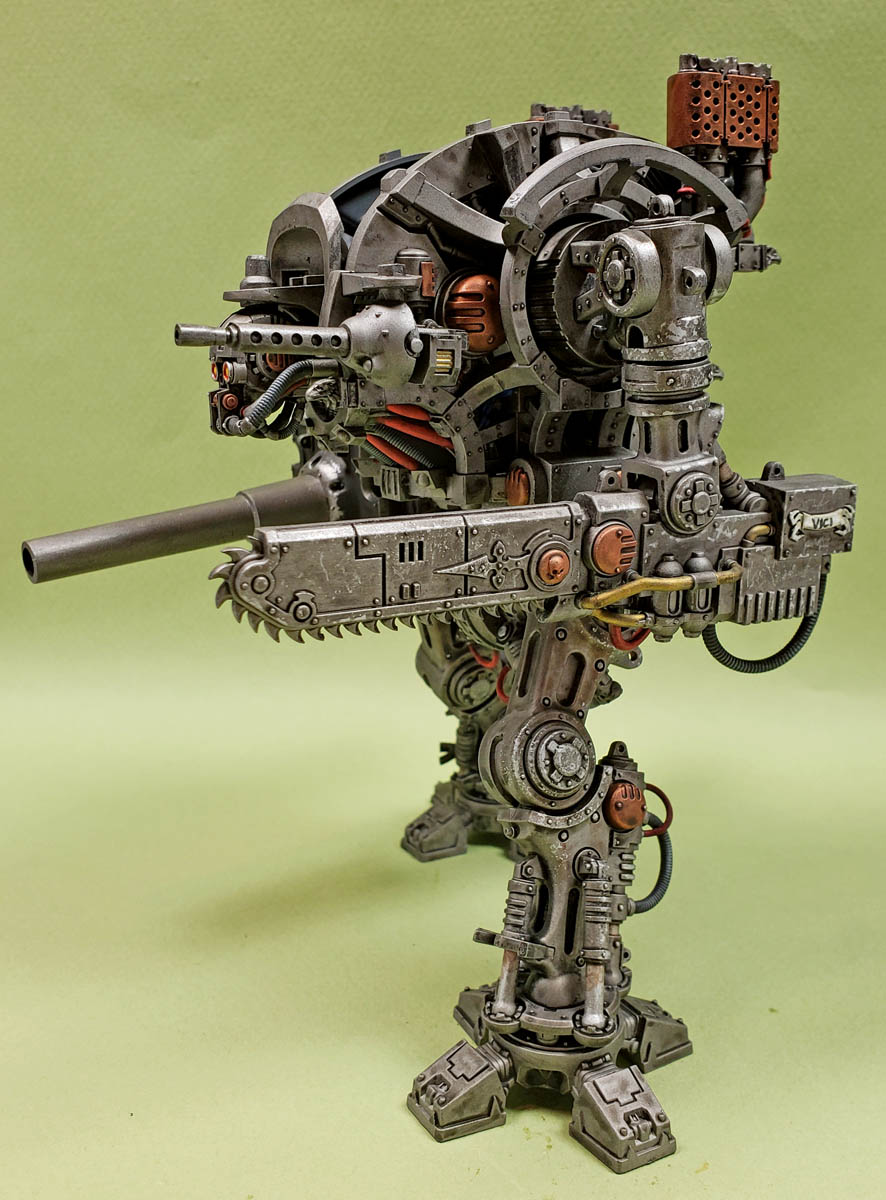
Thus far, I am really happy with how this build is progressing. The size of the model, combined with all of the nooks, crannies, and greeblies, makes for a fun painting experience. And every bit of the paint was applied by brush – a method I am enjoying more and more. Only the primer and matt coat were added through the airbrush.
Next up will be the armor parts, which I am really looking forward to. Thought he skeleton of this fellow has been quite fun, the armor is far more colorful, and I am excited about the plans I have for those sections.
I can’t say that I’ll go back into commission builds anytime soon, but I am quite pleased my brother paratrooper contacted me about doing this. It’s really fun. (Thank you, bro – you know who you are! 😉 ) To be able to build these kits is truly a modeling bucket list item for me.
It’s hard to say “you have to build this kit”. It is quite fun, and very much worth experiencing. Unfortunately, the Games Workshop pricing structure makes this kit a bit out of reach for many – and that’s a shame.
I can say that if you’ve been on the fence about it – save your pennies. (Or whatever your currency of choice is. 😉 ) If it is doable from a financial standpoint, the build is worth it.
On to the armor!
Leave a Reply