The lady stepped up to the counter at the coffee shop. Ordering a medium-sized latte, she waited for the barista to ring it up. As she heard the price, the lady began to protest.
“I ordered this same drink last week, and it was twenty cents less!”
The barista nodded, that kind of nod which indicates she’s had this same conversation a hundred times already. “Yes ma’am. We’ve had a price increase, and….”
The woman would have no part of it. “I’m not worried about your price increase. How can a drink I paid one price for on Friday cost more on Monday?”
The young lady, a part-time employee working her way through community college, nodded again. “Yes ma’am, I understand, and I apologize for the inconvenience. However, the price…”
“No. No ma’am. I’m not paying more for this…. In fact…” She went on and on.
I was standing behind the…. lady. Wanting to get on with my day, I motioned to the barista, who I knew from dropping in to the coffee shop quite often. I motioned to her that I would pay for it.
She finally interrupted Her Irateness, who was now several paragraphs into a tome on the injustice of gourmet coffee prices. “Ma’am, I do apologize. Please accept the coffee for free… this time. Have a nice day.”
The woman mentioned a few more times about how unfair the whole situation was, and finally took her coffee, walking off to add cream and sugar at the nearby stand, muttering to herself the entire time.
I stepped up to the counter.
Painting The Defiant
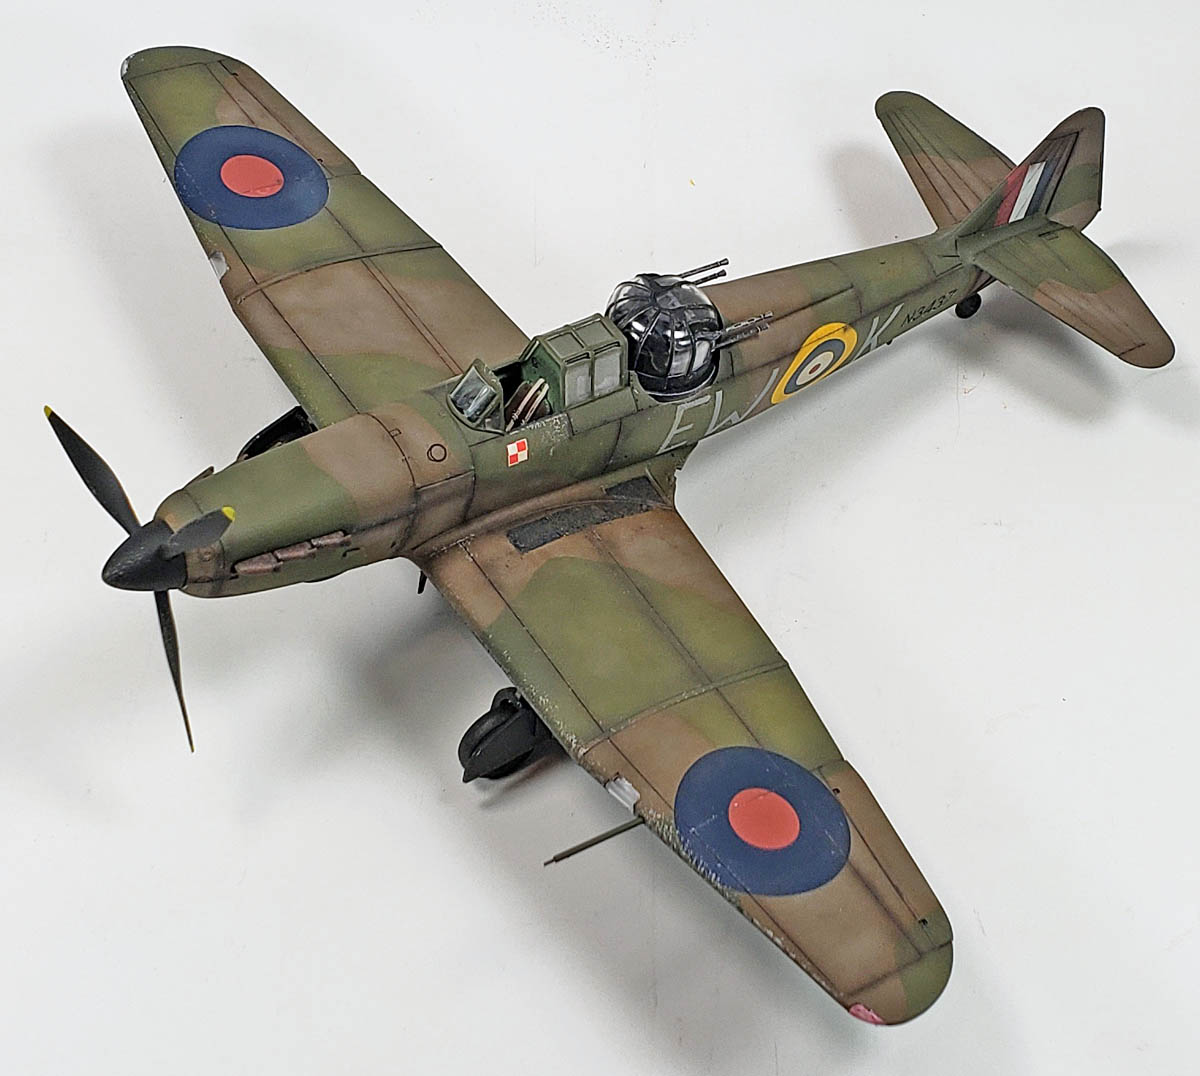
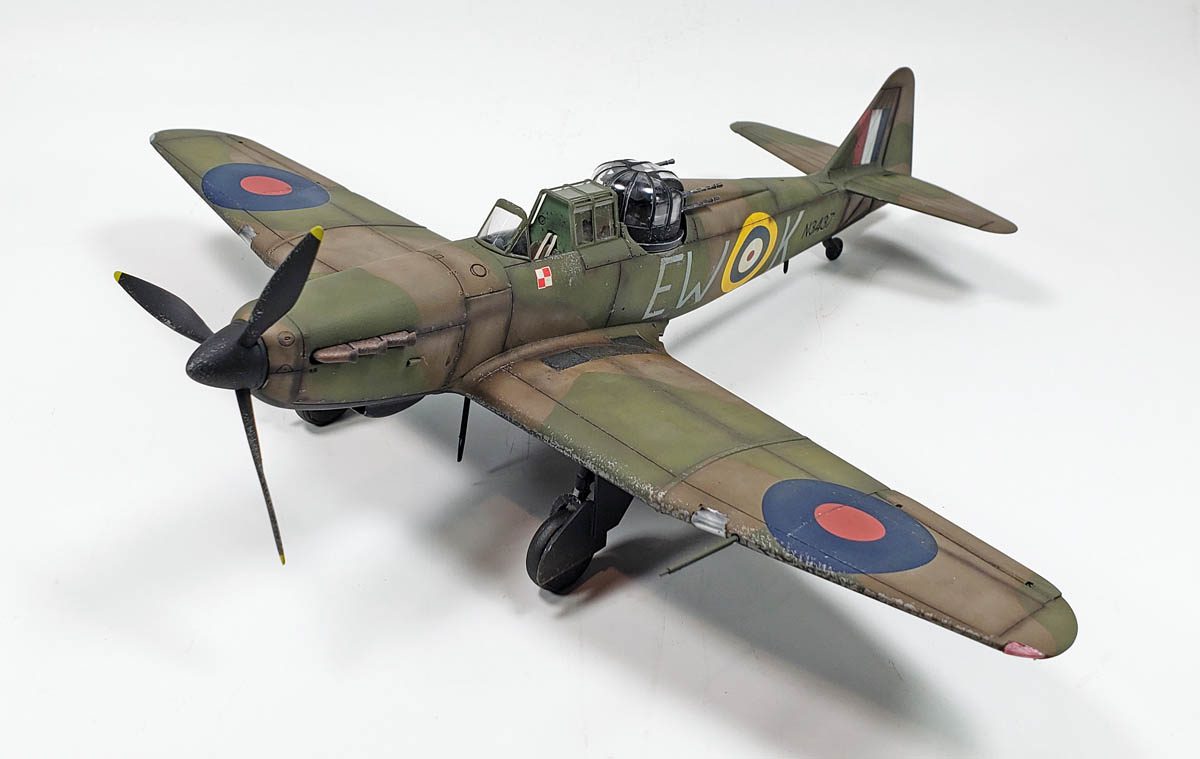
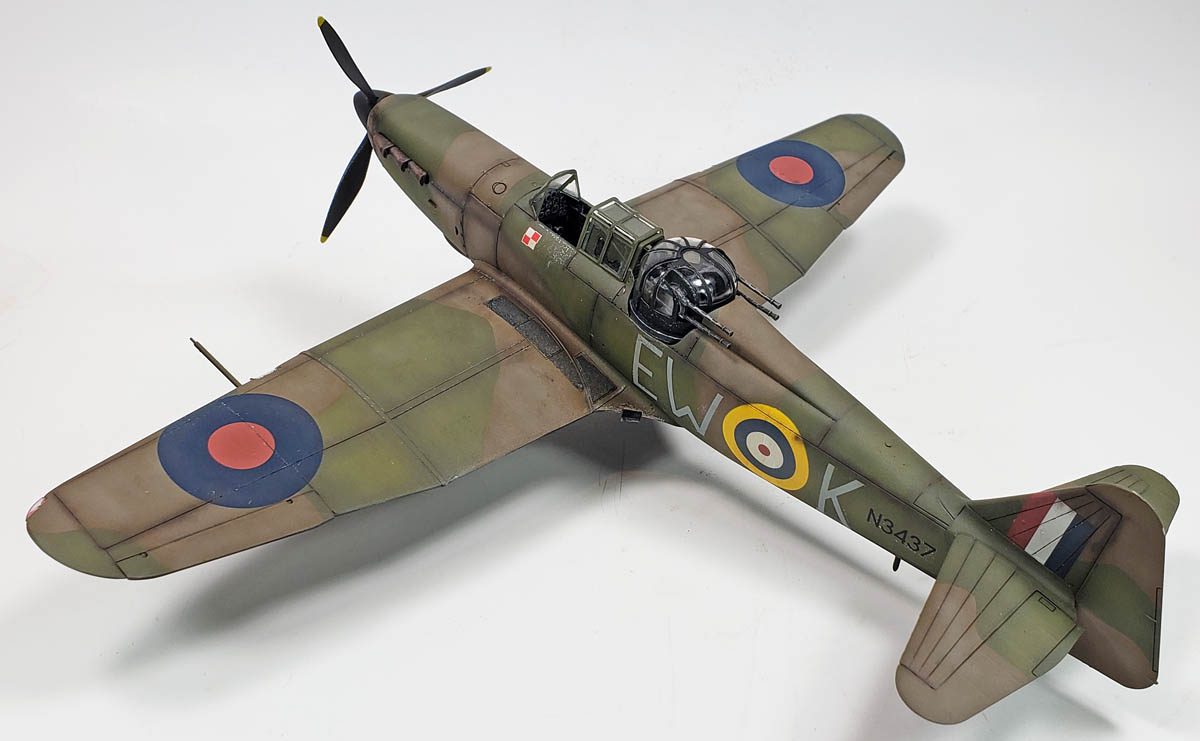
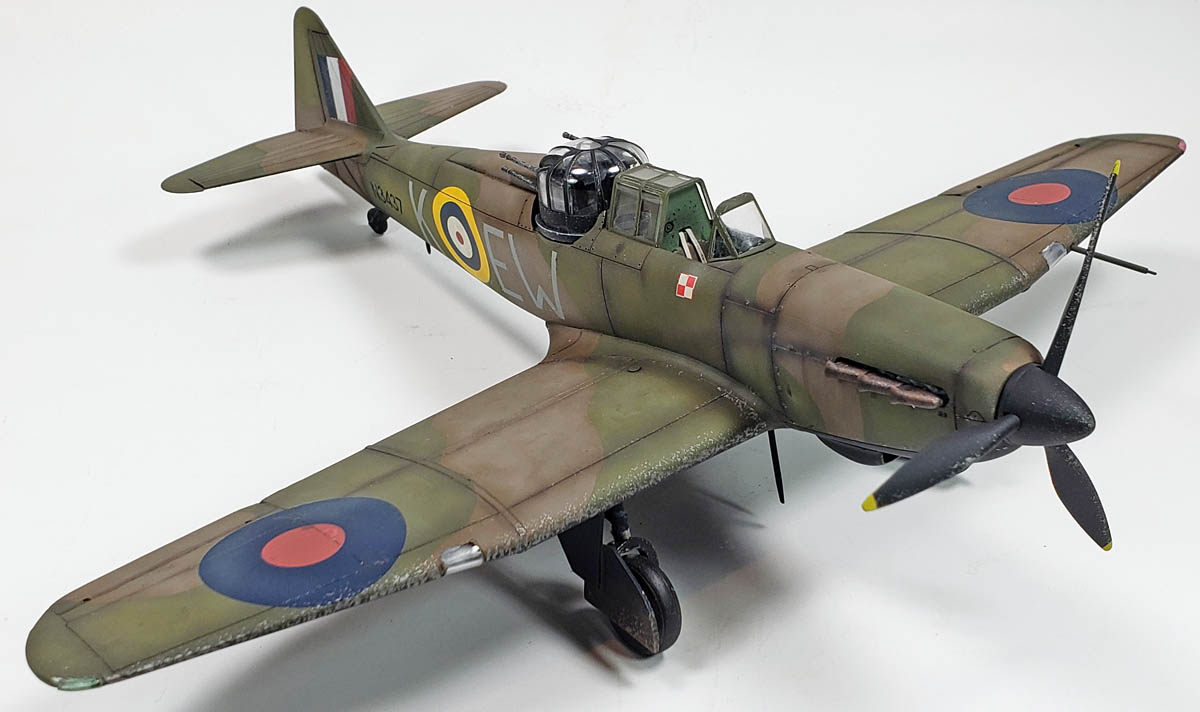
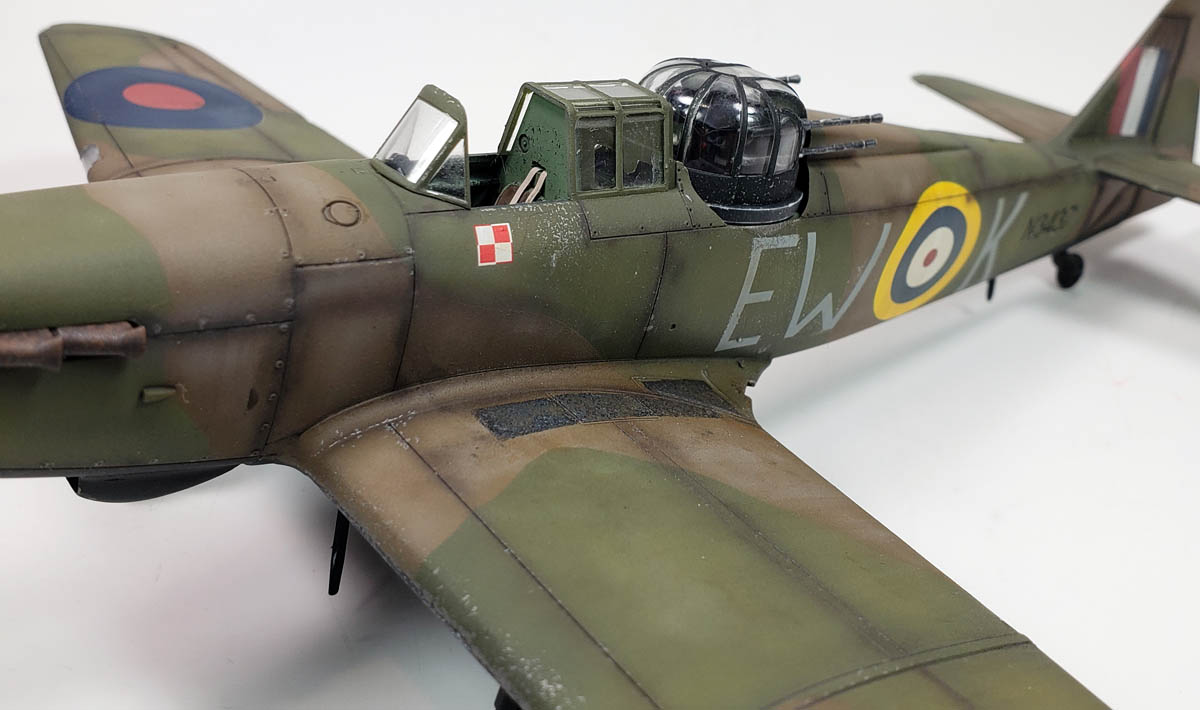
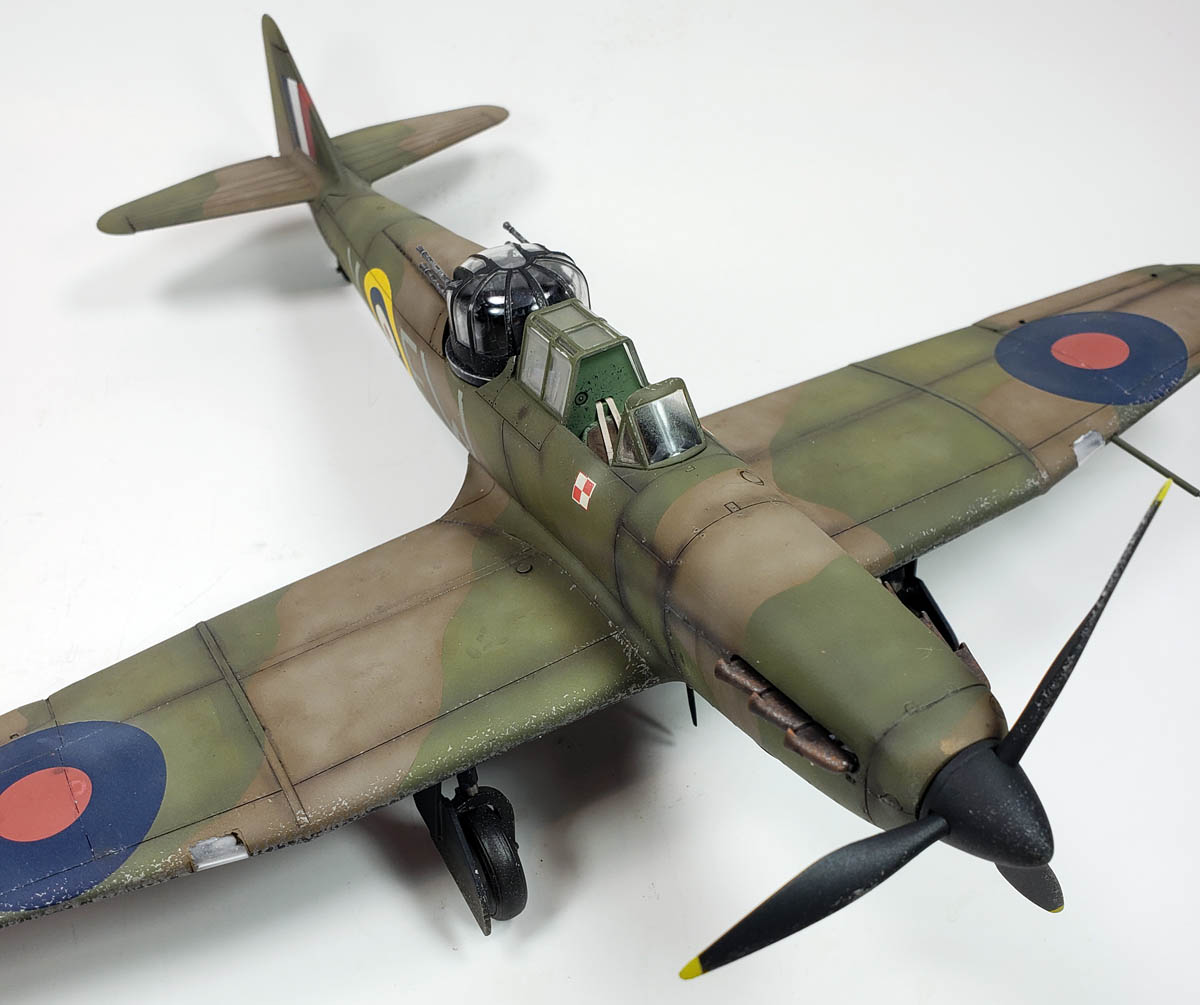
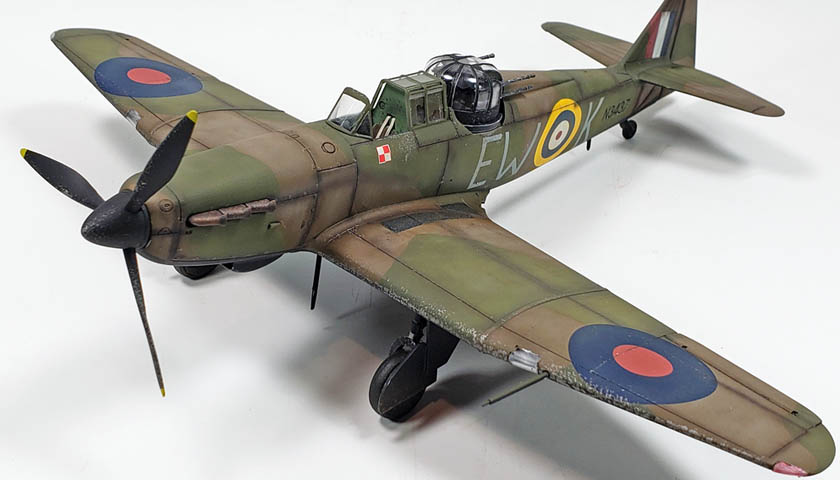
I’d assembled and primed the Defiant a few weeks before, so the next step was painting. The kit markings were the early color scheme of dark earth and dark green over sky, which I’d already used on my previous build. Having a nice set of aftermarket decals from Hannants, I opted for a night fighter scheme. It featured the radical difference of the undersides being black. 🙂
I did some searching on the interwebs of the net, as I’d recalled that the correct color was something called “Night”. Based on that research, I gathered that the color was a mix of black and venomous hatred and rivet counting. 😉 Suffice to say… there seemed to be some disagreement. General consensus was blue with some black, or black with some blue. Out of fear for getting some black and blue marks myself, I refrained from contributing to the discussions, and did what I normally do. I made it up in my brain.
Mixing 1 part Tamiya Semi-Gloss Black with 1 part Tamiya Sea Blue, I had my color.
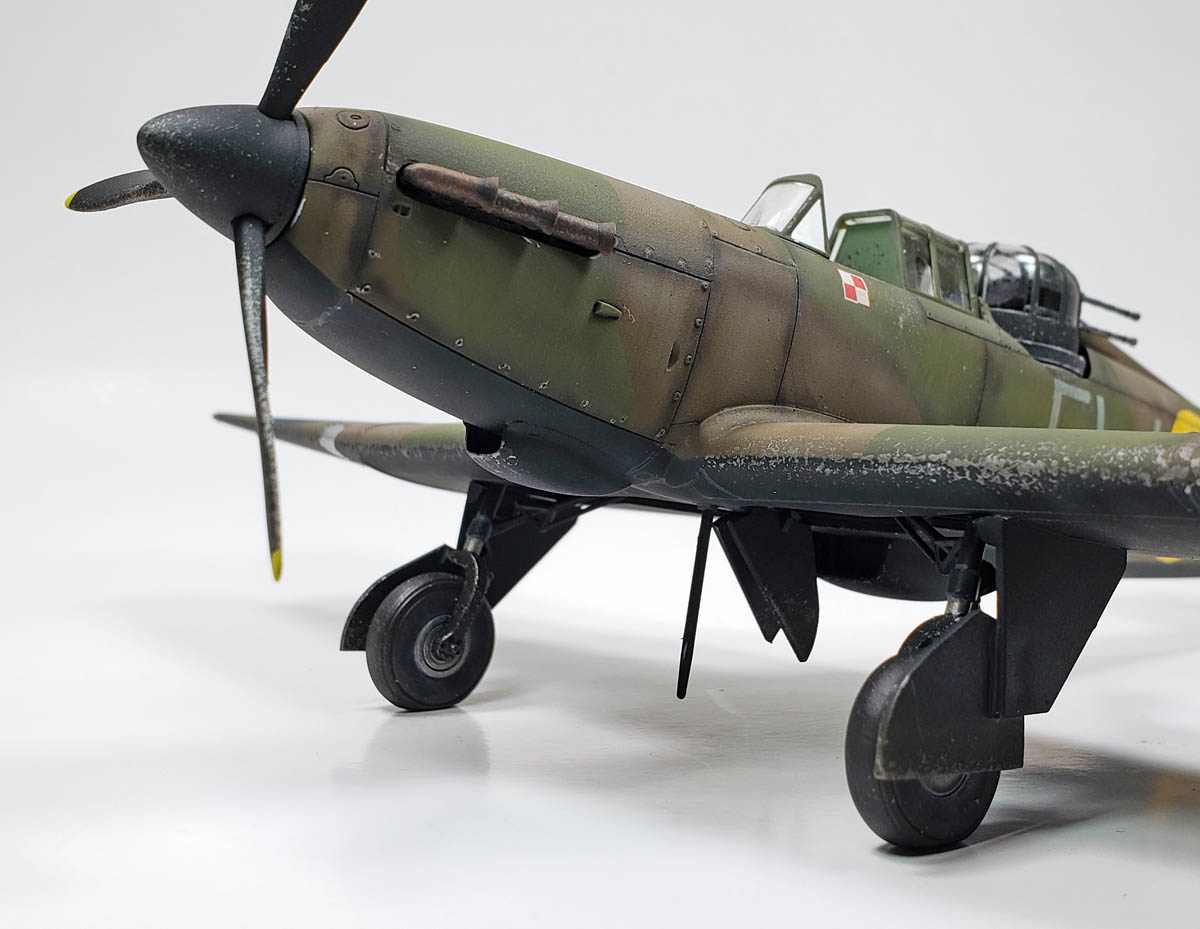
The undersides were sprayed this color, and for good measure, so were the tires and the prop. I was quite pleased with the color too. As I held it to the light, it looked very much like the underside of a fighter painted black. So far, so good.
Masking off the lower side, I started on the uppers, First to be sprayed on was Tamiya XF-81, Dark Green 2 (RAF). (Must be a sequel…) I thinned the paint with Mr. Color Leveling Thinner, which in my experience is the “secret sauce” for Tamiya acrylics. Adding a little bit of XF-4 Yellow Green to the color cup, as well as some additional thinner, I did some panel highlighting, focusing on the center of the panels.
With that color applied, I set the model aside to dry overnight. The next day, I added tape camo masks, following the procedure I outlined in this blog post. For my next color, I switched to Vallejo Model Air Dark Earth. While I love Tamiya paints, the range of colors available is quite limited relative to other paint makers. And while they have several browns that are close – my normal choice being XF-72 Brown (JGSDF) – I decided to use the Vallejo color. I thought it better captured the RAF’s dark earth shade a bit better.
I applied it in the open areas, building it up a little slower than Tamiya paints. Water color paints do better when built up in a few layers, while Tamiya can be added much quicker. Vallejo is a nice balance, requiring a few more coats than Tamiya, but not near as many as Ammo’s paint. And because I’d painted the first color over the entire model, I was not fighting different undercoats. The brown went down nicely, and covered the green well.
Switching to Tamiya, I mixed a bit of Tamiya White with the aforementioned XF-72, and after heavily thinning it, misted on some highlights to the brown color.
More Acrylic Weathering, Sir?
Sticking with my recent theme of all acrylic weathering, I decided some experimenting was in order.
First, everything was given a good gloss coat of Future, and then the decals were added and resealed with more gloss coat. While my next step would normally be enamel washes for the panel lines, this time I reached for Citadel’s Gloss Nuln Oil.
Though enamels and oils can be applied rather haphazardly, and later cleaned up, acrylic washes are best applied precisely, and if there are any missteps, they should be cleaned immediately. The process of adding the Nuln Oil took longer due to the effort to be neat, but the fact that it was dry within half an hour meant a huge net time savings over enamels and oils. Instead of setting the model aside for a day to dry, I could go right into the next steps.
Of course, if speed is not a thing for you, then use of acrylics may be more annoying than helpful. For my purposes… which is essentially building in order to feed my writing bug… speed is a high priority.
For the undersides, I mixed up a homemade “brew” using Future, water, and Vallejo’s Sky Gray. It worked OK… not nearly as nicely as the Nuln Oil, but still good enough.
My shelf was them emptied of most of my newly acquired Vallejo weathering products, all acrylics. While they have different names and purposes, all are essentially either dry pigments, or acrylic paints in various stages of “thin-ness”.
I started by attempting to replicate the results I get from a dot filter application using oils. Putting various colors in my palette wells, I began streaking the acrylic washes and grimes onto the model, using a #1 liner brush. Wings received a treatment fore to aft, while the fuselage was vertically oriented. I found that the colors seemed quite intense at first, but as they dried, became very translucent. Thus I was able to build up a lot of tonal variation very quickly. Satisfied with how that looked, I then moved on to “blotching”.
This step was an attempt to get the same results I normally do from stippling on very, very thin layers of oils, using a wide, flat brush. The process was about the same with the acrylics. I experimented with pre-wetting the surface with water, and using the weathering products thinned to varying degrees, from straight out of the pot to downright watery.
One thing to note about this process… if you use a coffee cup for your cleaning water, it will turn a nice shade of brown at this stage. Make sure you keep it and your actual coffee mug with actual coffee in it far away from each other. Ask me how I know this… 😉
Happy with the results of that step, I called it “good enough” and moved on to the chipping. This was done with both a silver Prismacolor pencil, and Citadel’s Leadblecher applied with a sponge. I tried not to go to “chip happy”, as I was imagining the aircraft being early on in its service life.
Final weathering included various oil stains, streaks, exhaust stains, and other bits and bobs. I worked to the TLAR point… “that looks about right”.
I decided to matt coat the model and then add the turret, so a coat of Vallejo Mecha Color Matt Varnish was applied. It was at that point I learned something. Or rather, re-learned it.
All of that wonderfully subtle acrylic weathering that I was so happy with vanished under a matt coat. Well… not all of it. Maybe 80% of it. I kicked myself a bit for not thinking of it. The same thing happens with oil and enamel weathering – the matt coat will tone them down, blend them a bit. So it’s a requirement to go a bit further than you might want the final look to appear in order to account for that.
I knew this. I’ve known it for years.
Yet I was so focused on seeing how subtle I could get with the acrylic weathering, I completely forgot to account for it.
Still… lesson learned. Don’t forget stuff. 🙂
Wrangling The Turret In Place
One of the benefits of building the same model more than once is having the chance to apply lessons learned from the first time around. Getting the turret in place was certainly a case in point. While it wasn’t particularly difficult the first time, I did figure out a better way to do it. (At least I think it’s better… 😉 )
That initial time, I’d built the turret as a unit, according to the instructions, only leaving off the turret clear part, The rest I’d set in place, and then did some masking gymnastics to make it all work. It got the job done, but it also was in the way a bit during painting and weathering.
This time around I decided to experiment a little, and came up with the following solution.
First, before priming or painting the airframe, I made sure to test fit the lower half of the turret into the fuselage opening, each time sanding and filing things away until it slid in easily, and turned with very little pressure. That is critical.
Leaving the turret and clear parts off the model, I simply masked the entire opening off with tape and some paper towel. I did glue the forward windscreen in place, and temporarily tacked the sliding portion on to act as a mask. I then painted the model, weathered it, and applied the matt coat. All masking was removed from all clear parts, including the turret.
This left me with the parts as shown:

I started by sliding the lower half of the turret in place. Note that it will catch on the parts shown. That’s OK – a slight bit of pressure, and a slight turn, will get it past that.

When the turret is in place, rotate it so the gunner’s seat is on the right side of the aircraft, and the front of the turret is facing left.

Set the guns in place. DO NOT glue them. Just set them there. (Once the clear part is in place, it will hold them firmly.) Rotate them up to about the angle shown.

Grab the cleat canopy part, and holding it with a slight forward tilt, gently slide it over the gun barrels. It should travel down without catching.

Once in place, mine dropped right to the level position, no fuss. DO NOT ADD GLUE YET.

Carefully rotate the guns to the almost vertical position. Then, grasping the assembly firmly, rotate the guns aft.

Once rotated aft, lower the guns down to the desired position.

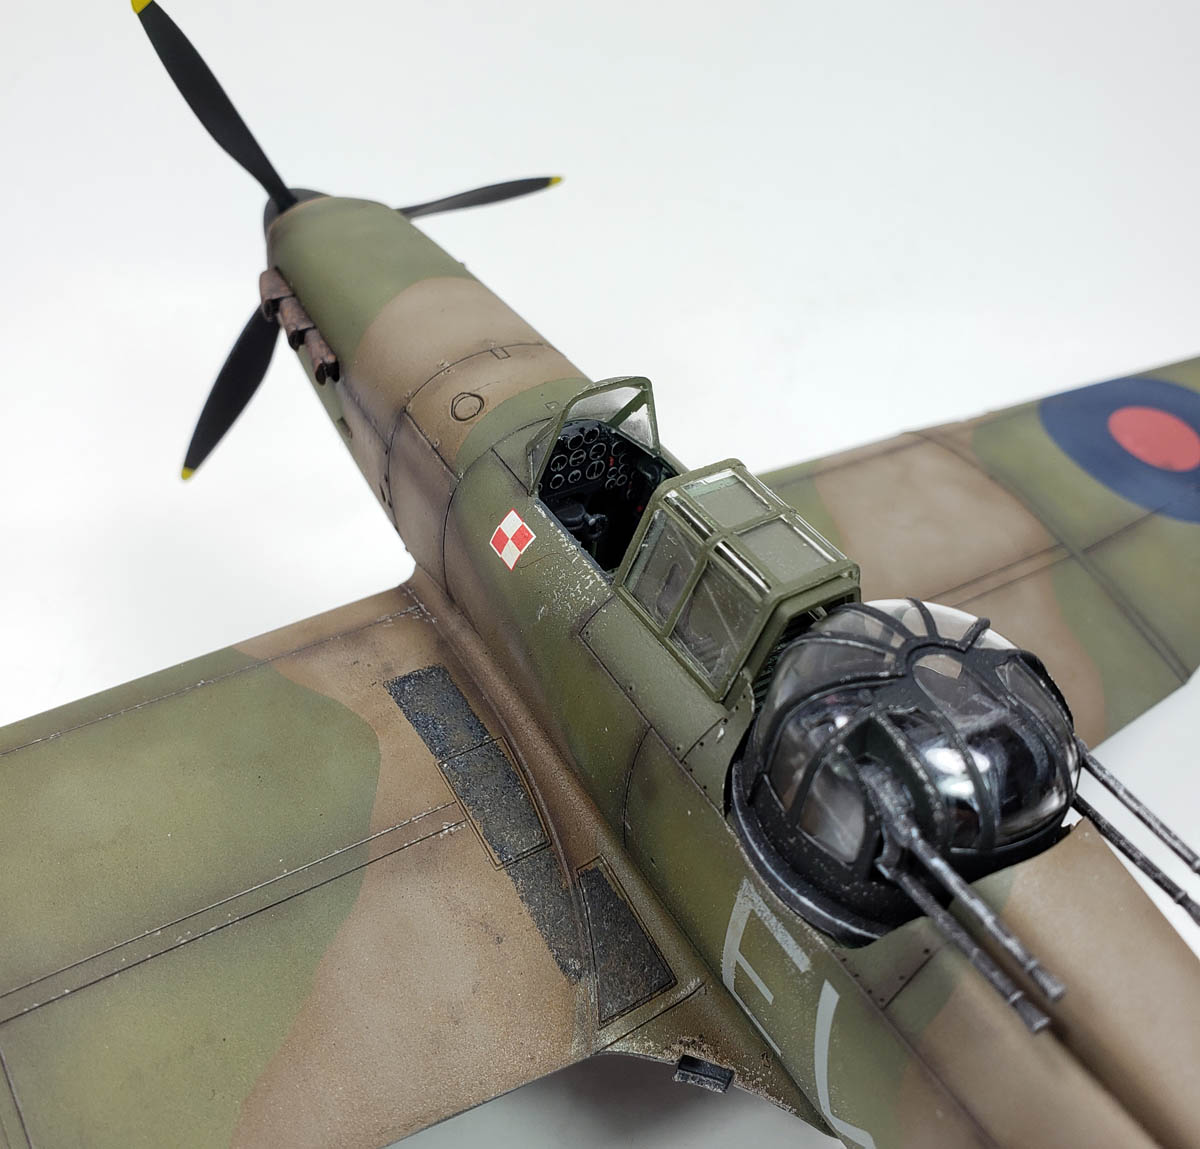
Assuming you are building the model in the open canopy configuration, glue on the aft clear part. It’s designed to be a bit narrow so the sliding canopy portion will fit nicely over it. Get it in place, making sure the forward edge is aligned with the aft part of the seat armor. At this point, I added a few dots of Tamiya Extra Thin cement as indicated (both sides). Capillary action will draw the glue into the gap. Gently push in the appropriate direction to get good contact. (Note: I glued the turret clear part to the turret ring, NOT the turret ring to the fuselage.)
If you are building closed canopy, the procedure is the same, simply using that part instead.

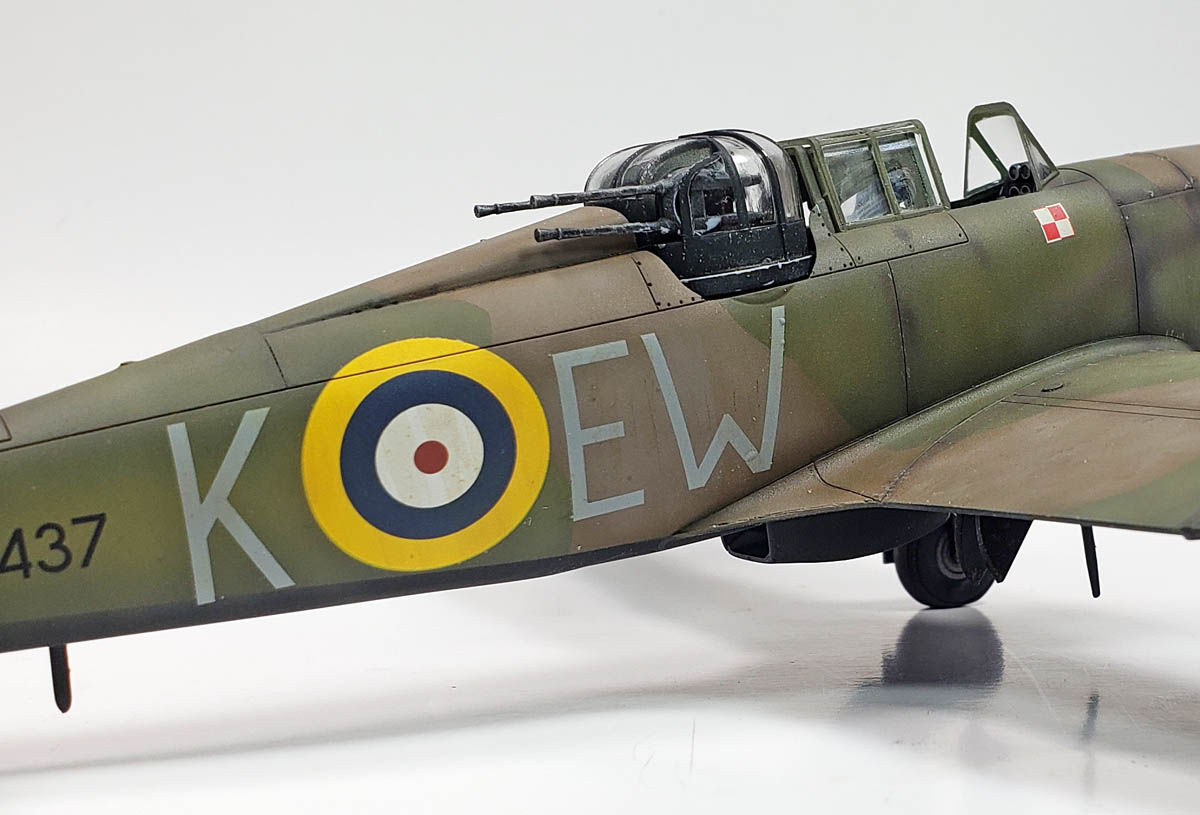
Attach the sliding canopy portion in place, and you’re finished!

Back To The Coffee Shop
The barista thanked me, and said how appreciative she was for my gesture. I smiled.
“Well, I’m glad to help out. But truth be told, I simply hate drama, and waiting around for it to play out. So I did that more to just get on with the day than anything.”
She laughed. “Either way, it works for me!” She rang up my coffee, and the ladie’s coffee. Another barista on duty, who knew how I liked my morning coffee (medium, black) already had it ready. Handing it to me, the barista at the register also handed me a small brown bag. Before I could question her, she gave me a playful smile, shooshed me, and waved me off.
Smiling, and headed to my car. I checked in the bag. Two very large, freshly baked oatmeal raisin cookies stared back at me. 🙂
Airfix’s 1/48 Boulton Paul Defiant Mk. I kit is one of the most pleasant build experiences I’ve ever had. Aside from possibly masking the turret, there isn’t really anything that would give a young teen builder a problem. Your 9-year-old nephew may need a little help, but that’s probably the case on any model. While it’s not the most glamorous build, or the most exciting historically, it is just good fun. It looks different from all the others sitting on the shelf, and has a uniqueness to it that only footnotes in aviation history can have.
And while I didn’t hit my weathering target precisely, I am happy with the overall look of the thing. It was a fun build, with no drama other than that which I imposed upon it. I don’t think a modeler could ask for anything more.
Except oatmeal raisin cookies. Those are always good. 😉




Leave a Reply