One of the odd things I’ve discovered about Citadel Warhammer 40K vehicle kits is that quite often the wonderful engineering of interior parts is hidden. A perfect example of this is the Taurox.
I’d first been introduced to this model via Warhammer TV. Duncan Rhodes did a great two-part video series describing how to paint the Militarum Tempestus version, the Taurox Prime. I’d watched the videos on several occasions, and was quite eager to start this model.
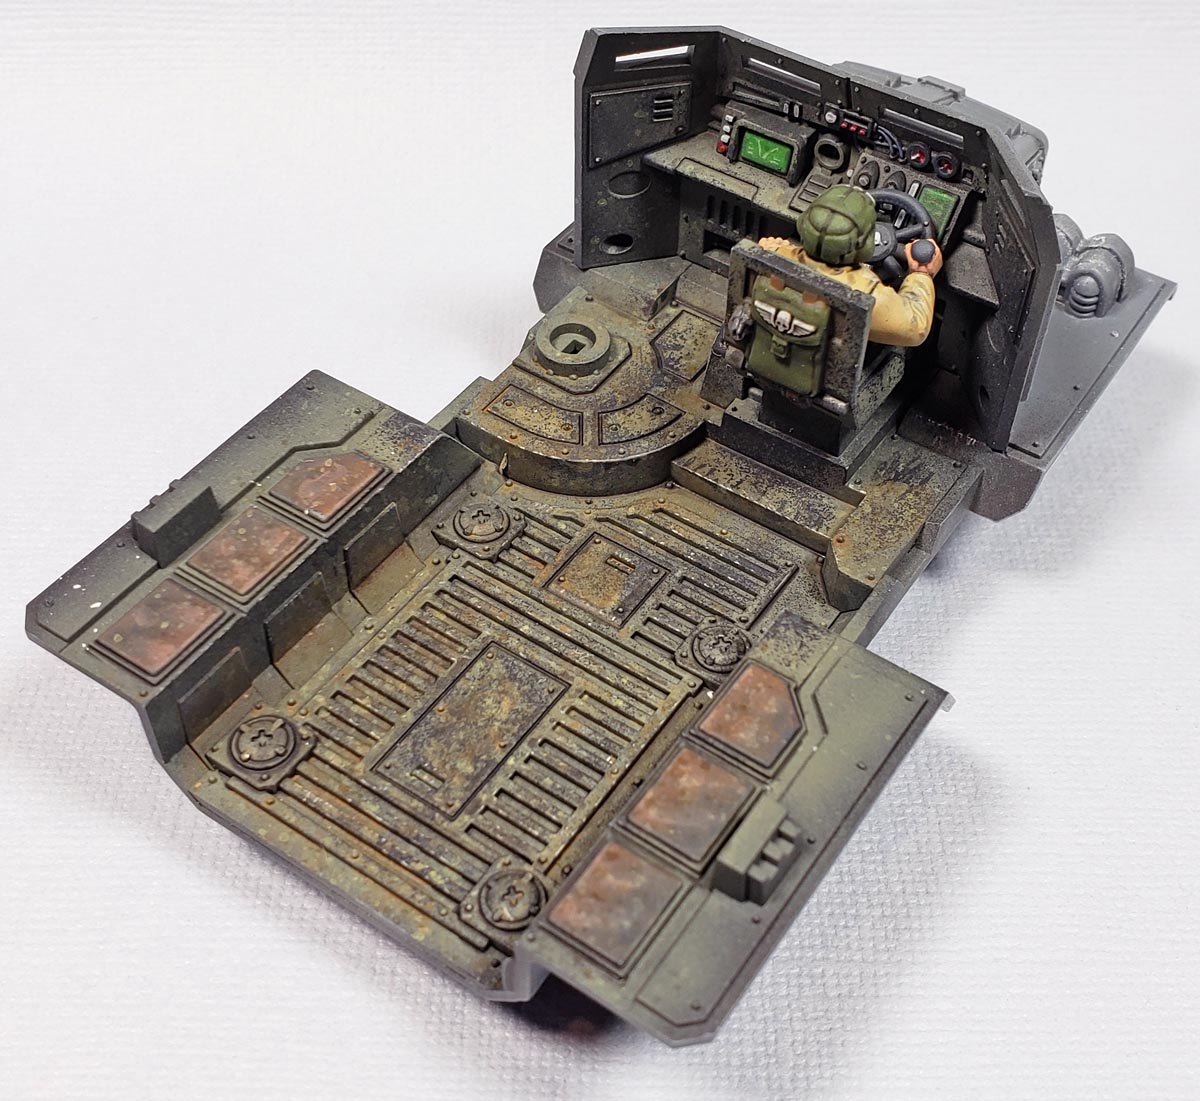
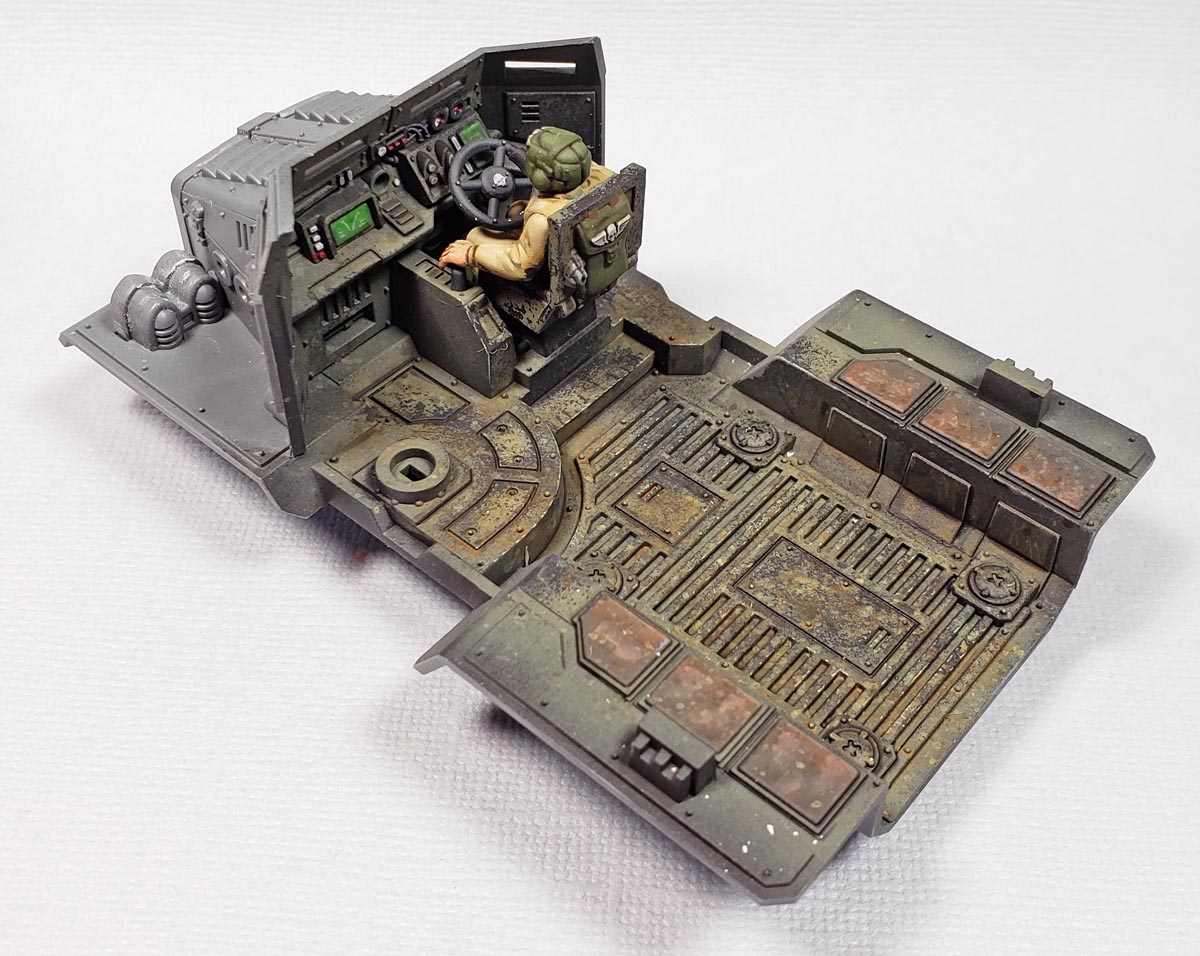
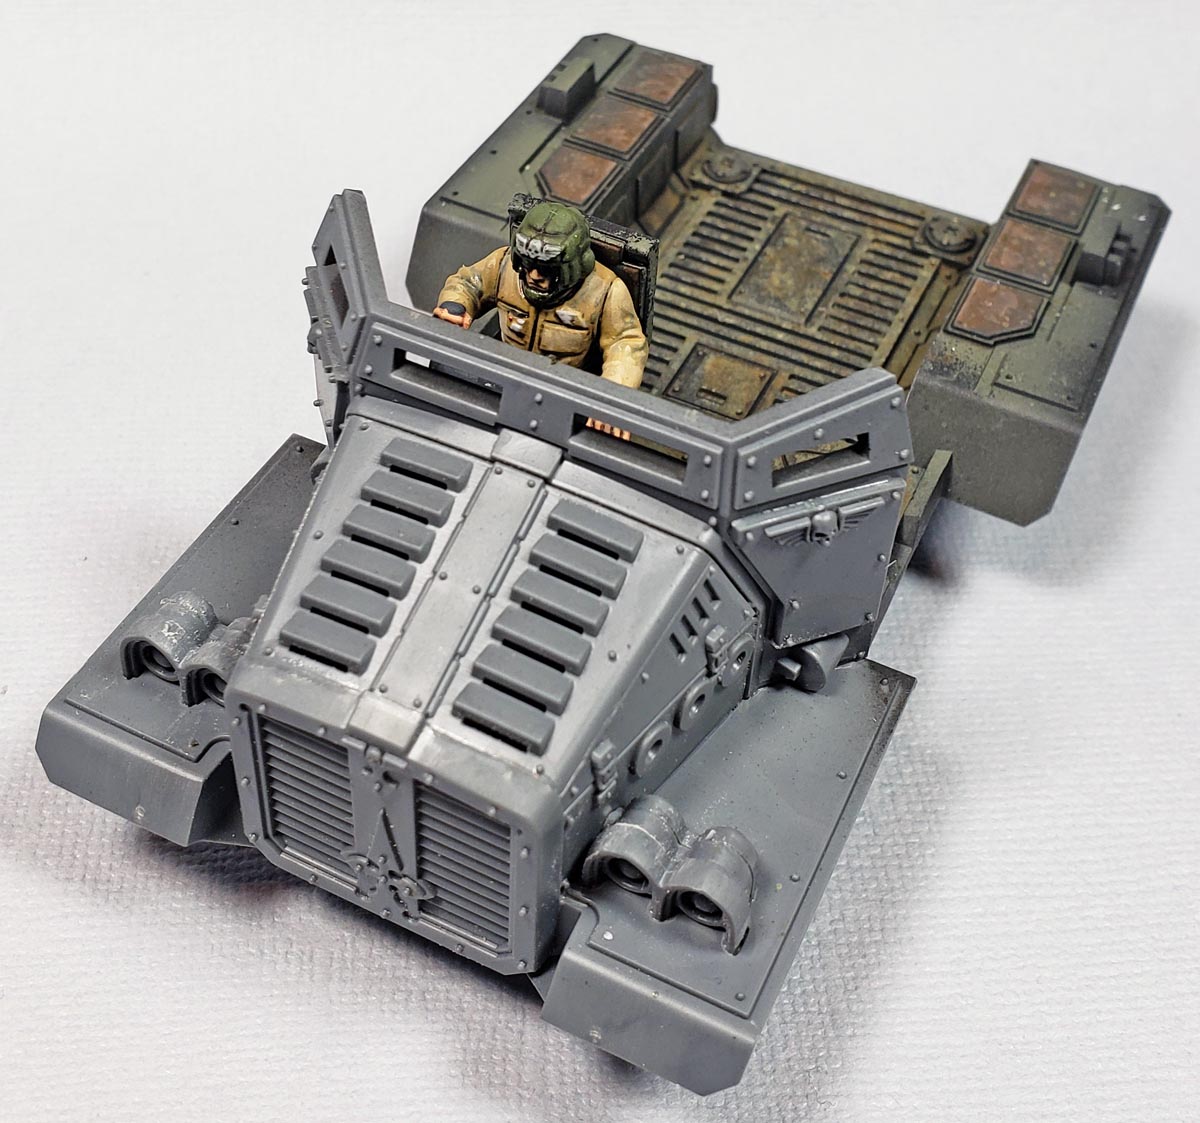
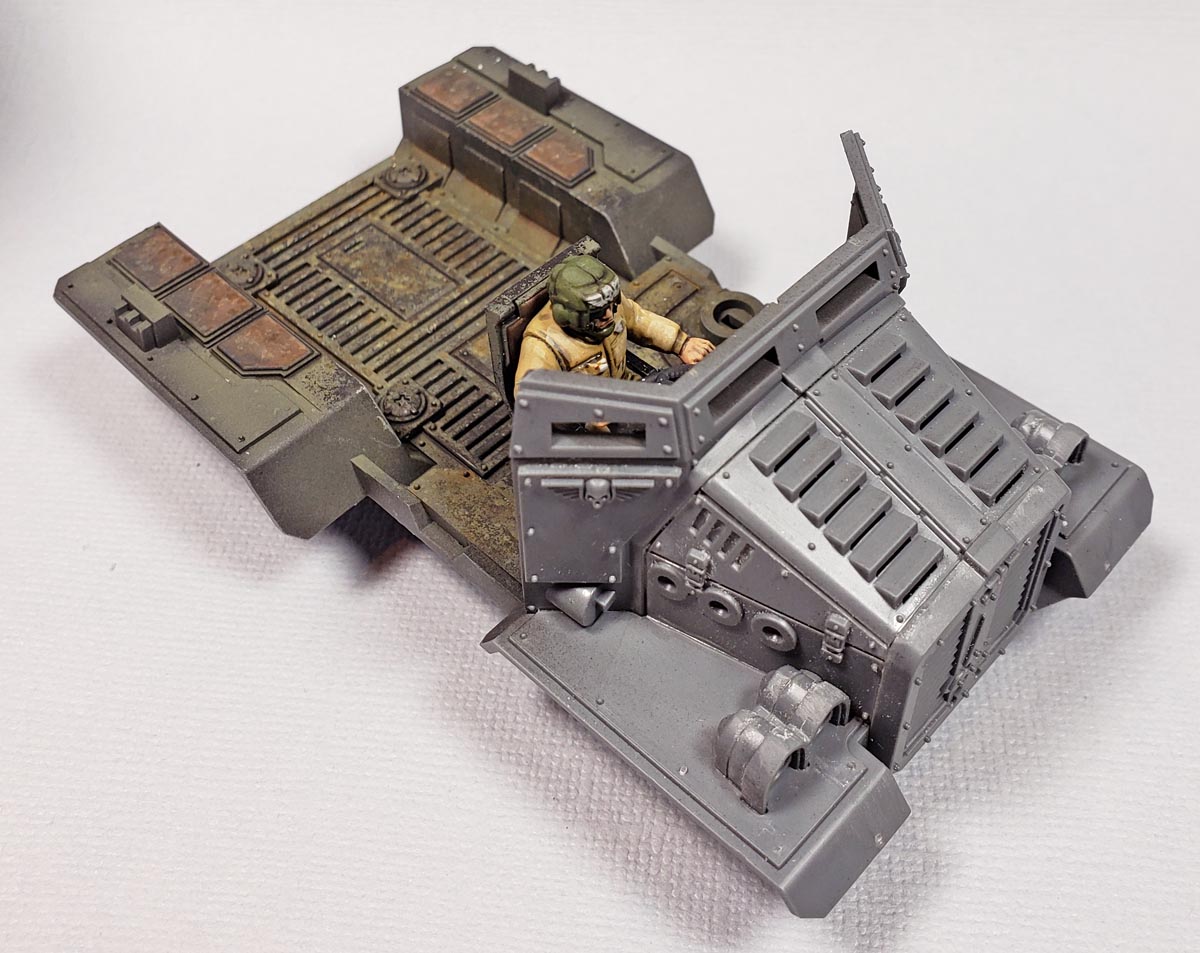
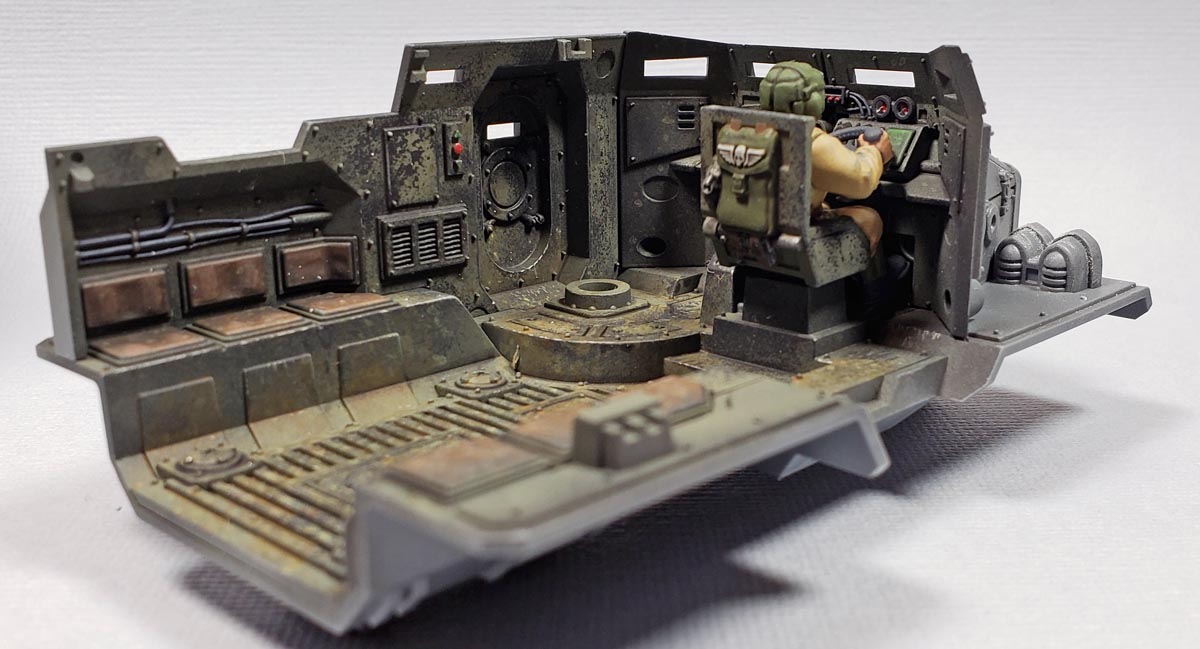
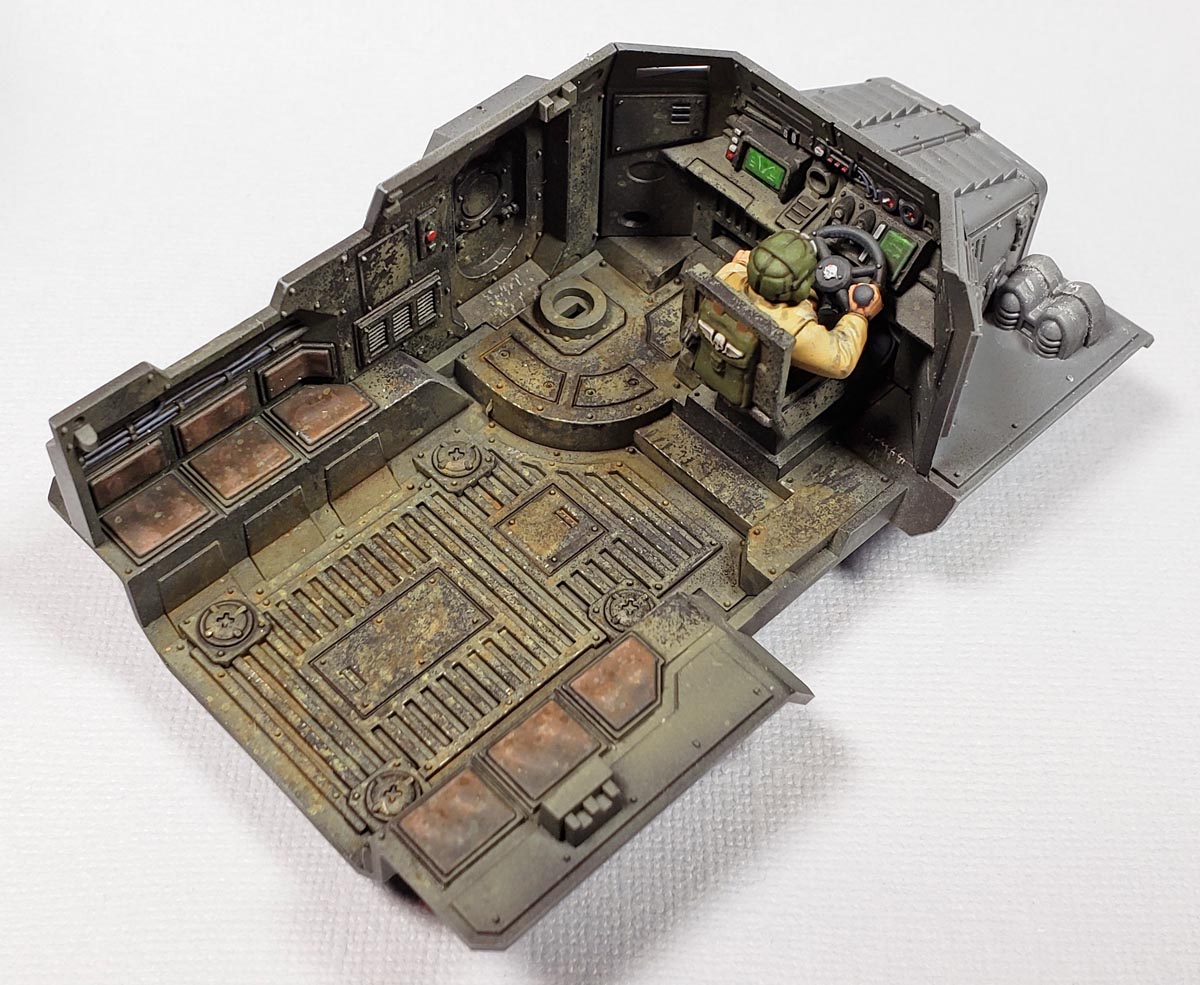
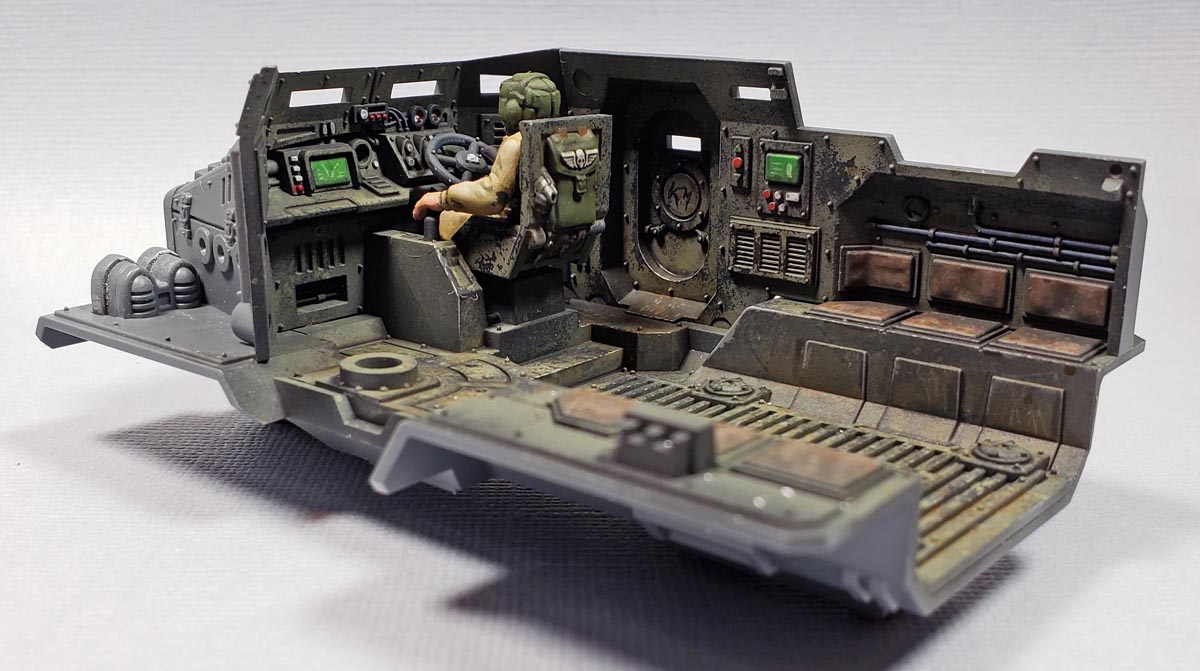
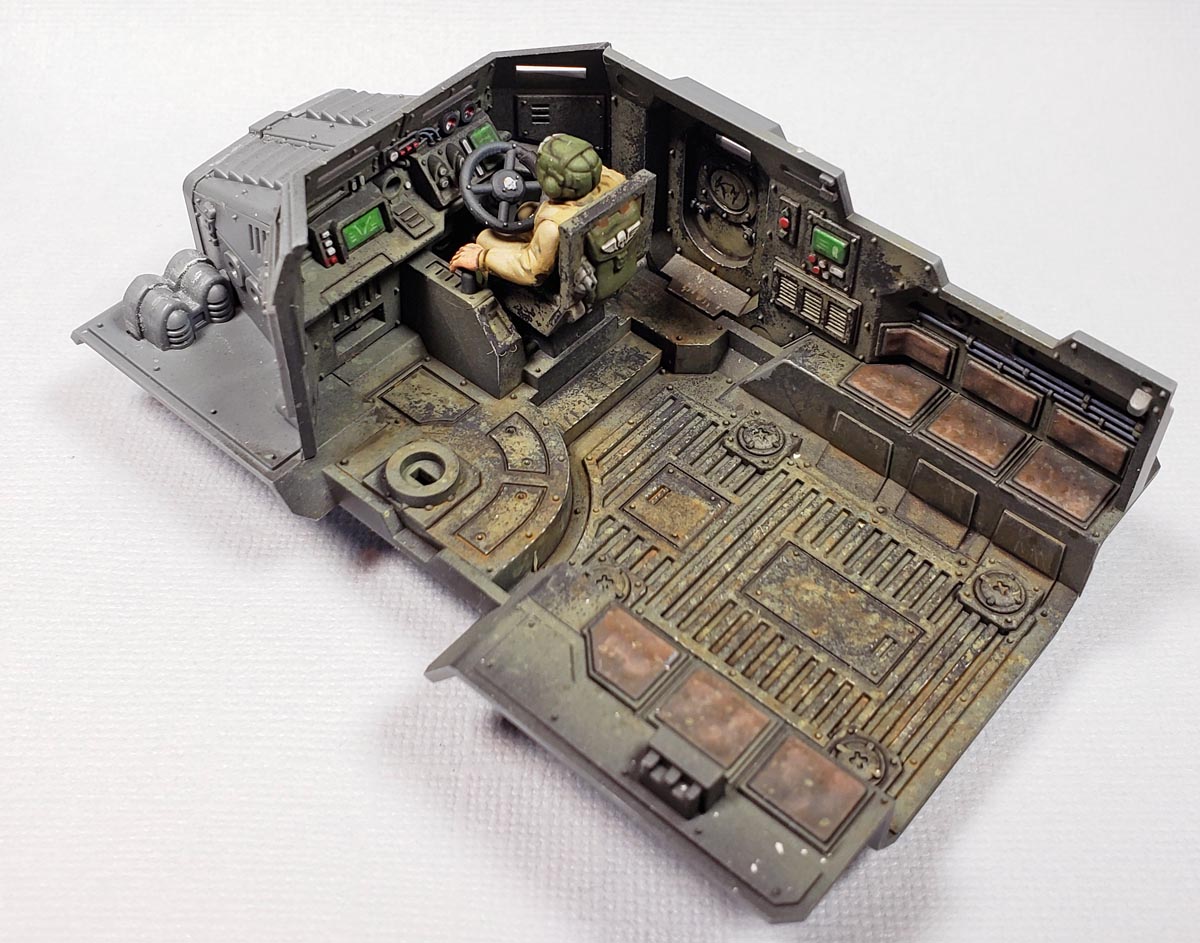
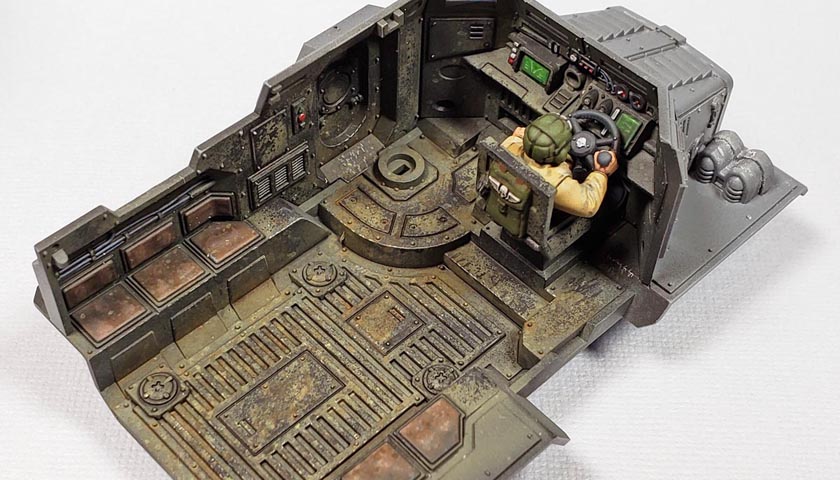
As I did my standard pre-build planning, I was in for a bit of a surprise. The model featured a wonderfully detailed interior, to the point that its inside was visually more exciting to my eye than the outside. (Not that the outside is a slouch by any means!)
While I get that the purpose of those videos is more focused on getting gamers ready to play quickly, I thought it was definitely a missed opportunity on Games Workshop’s part. One of the complaints about building Warhammer kits is their cost. A video about painting the interior could have really sold the value of the kit in my opinion.
A Shift In Gears
My original build plan had assumed that the model had little to no interior, so I had the opportunity to rethink it a bit. On past Warhammer builds, I’d opted for a bit of tongue-in-cheek fun with the whole “grim dark future” idea of the game by painting the vehicle interiors with bright, over the top buttons and knobs and screens. I’d started this on the Space Marine Razorback, and continued the practice in later builds.
Of course, the move did get some criticism. A few folks thought it looked a bit silly. (They were probably right… 😉 ) But it had a certain humor, and I found it fun to have such an irony slipped into the whole ethos of the 40K universe.
On this build though, I decided to go the 40K route. A grim, dark style interior could be fun too, and would allow me to stretch myself a bit also. Plus… I’d done the “Simon” interior plenty. How about something more realistic.
Because the Taurox had a somewhat WWII German look to my eye, I decided to use some colors in that style. I’ve always liked the look of RLM02, which was used for the interiors of aircraft early on in the war. And having a bottle of Vallejo Model Air 71044 Light Grey Green made the decision easy.
Initially I’d planned to do my basic prime and paint method. However, as I looked around all the angles and greeblies in the Taurox’s interior, I opted for a different approach.
A Shift In Chipping
Typically I prime models, then paint them, perhaps add a bit of modulation, and only later add chipping. Most of the time I do chipping using both brush and sponge applied methods. However, on models with loads of angles, nooks, and greeblies, the sponge chipping method doesn’t always work nicely. While it does leave some areas looking good, hard to reach places present a problem. Adequately reaching them often means overdoing the areas surrounding said place. And while painted chips can be added, they never quite look like the sponge applied method.
It occured to me that all of this could be easily mitigated through the use of chipping medium. While I have used it some in the past, it was not part of my “standard methods”. So this would also be an “experience gathering” opportunity also – bonus! 🙂
I’d used AK, Ammo, and old-fashioned hairspray for chipping on prior models, but I was never really happy with the results. While it was more likely due to my inexperience in applying the method, I never felt as if I were in control of the process. Always looking for a new solution, I decided to try Vallejo Chipping Medium 73.214.
I first primed the parts with Badger’s Stynylrez Black Primer. To save a bit of time, I decided it would also be the chip color. Because the RLM02 color is a bit dark, I wanted to make sure the chips were at maximum contrast.
With the primer coat applied, I followed up with two thin coats of the Vallejo Chipping Medium, applied with my Badger Patriot 105, using the .5 nozzle. Allowing that to dry for 10 minutes, I followed it up next with the RLM02, and then just a touch of modulation. This was done by adding a bit of white to the base color.
Just Add Water
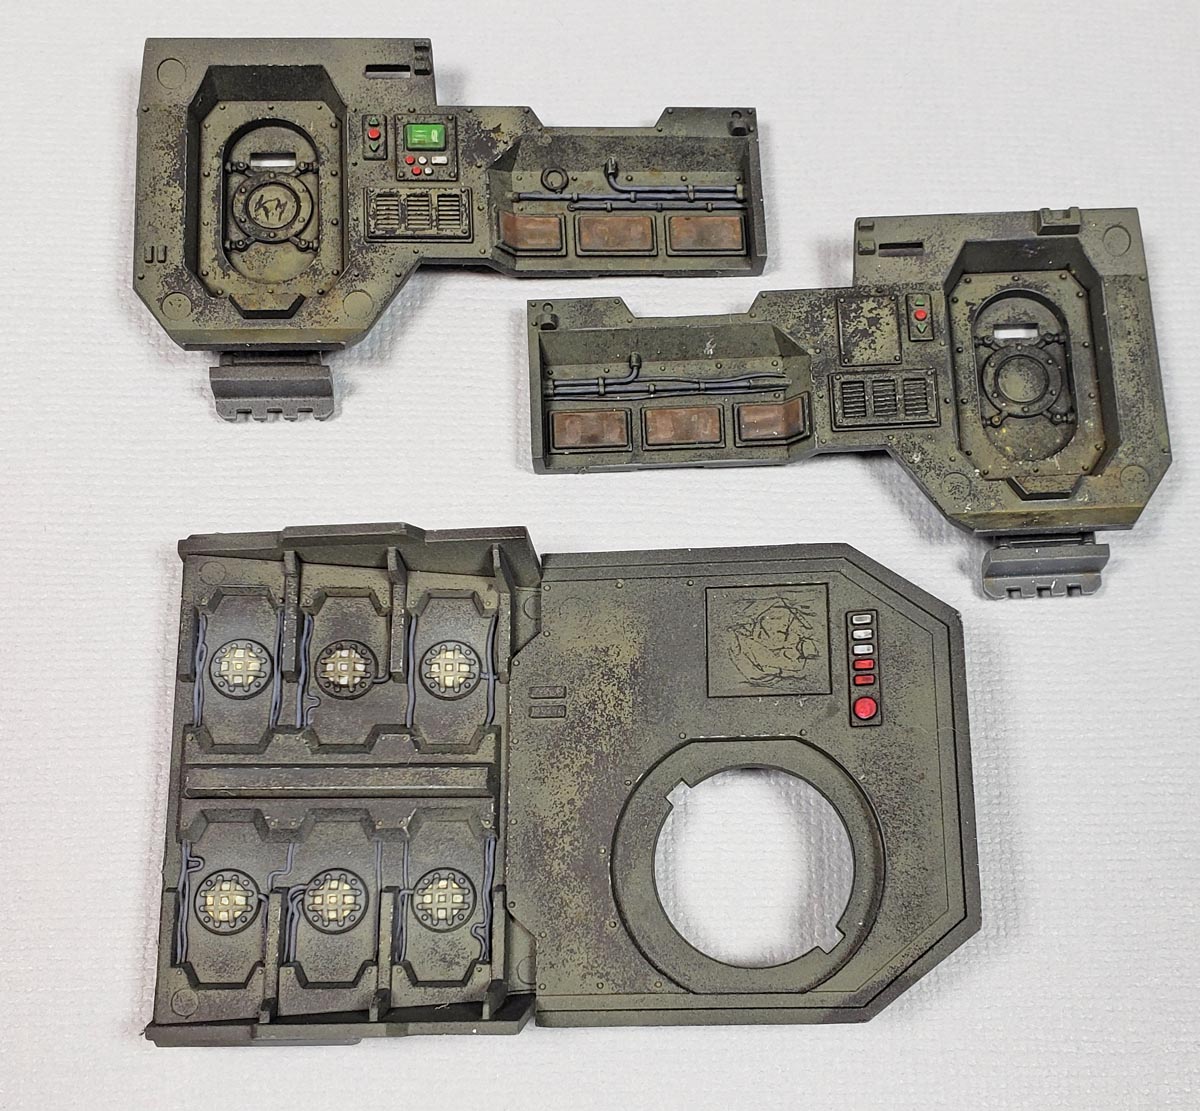
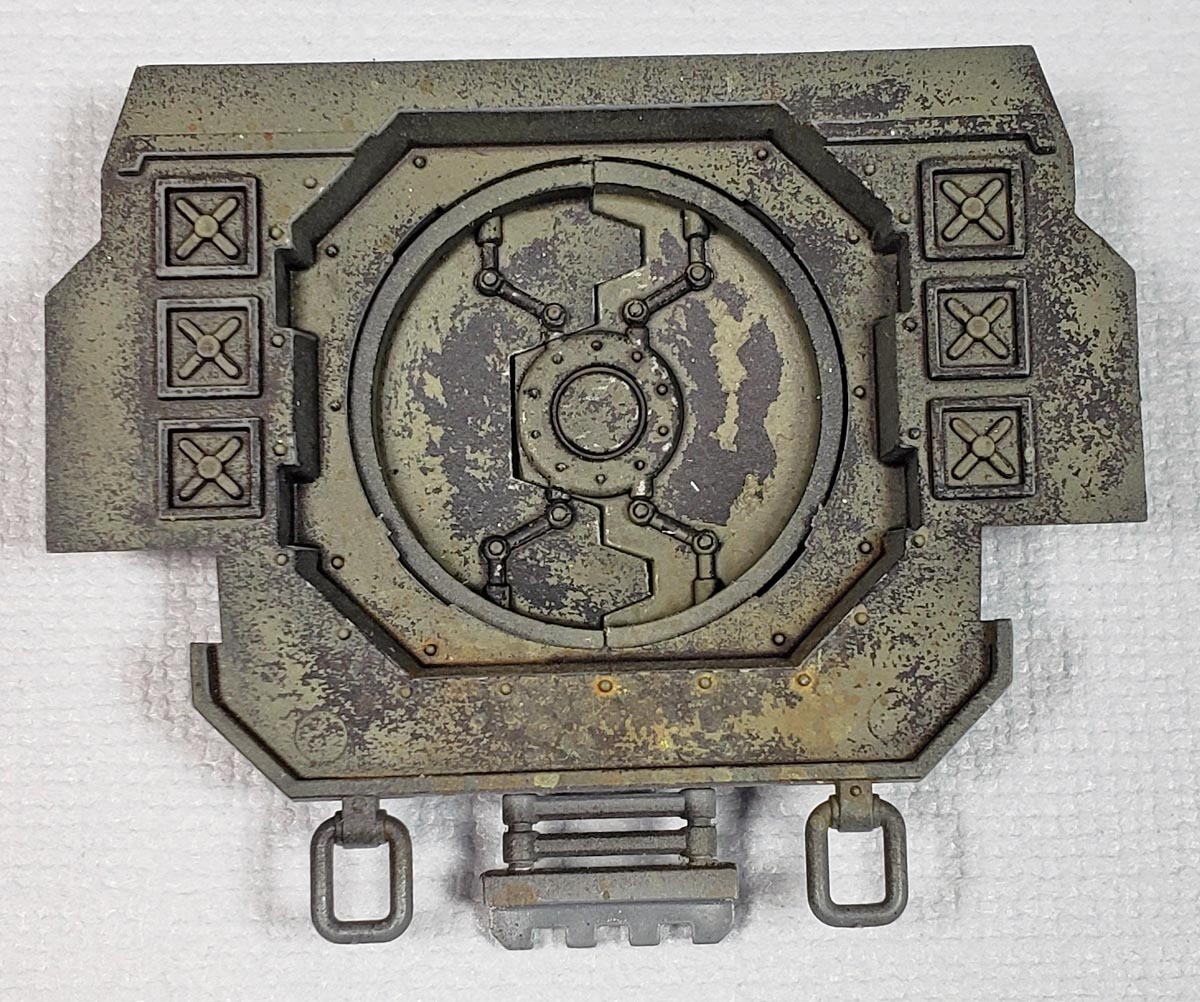
Allowing 10 more minutes for that to dry, I then went after the paint with some clear tap water and a larger soft brush. Doing just as I’d seen in so many videos, I wet the surface generously, and then began stabbing and poking and streaking with the brush.
Unlike past attempts, I felt as though I had much more control over the process. I’m not sure if it was the change in product, or simply that I had gained enough experience to begin to see more success using the method. The most likely explanation is a bit of both. Whatever the case, I was able to get exactly the chipping effect I’d hoped for.
In a few places, the paint seemed a bit stubborn. Using a toothpick, I made a few small scrapes, which seemed to have the effect of allowing the water to get under the paint, and to the chipping medium. At that point, things worked fine on those tougher areas.
In the end, I felt that switching up methods did exactly what I’d planned for – a fairly balanced amount of chipping, even in the hard to reach areas. Which brings up a good point – having a wide variety of methods available in your “bag of tricks” is critical. While it makes sense to get good at a few things that can be generally employed, branching out into areas that may be a bit towards the edge of the envelopes gives the benefit of choice when you really need it.
On To The Paint
With the chipping in place, I began the process of brush painting all the interior detail.
In order to give everything a nice, deep, shadowed edge, I painted all the details in Vallejo Black Gray 70.862. This did several things for me. As noted, it set the stage for good shadowed edges. Because I’d be using darker washes later in the process, a good dark base would “merge” nicely with that. It also kept the “grim dark” idea going, as all later layers of paint would have a more desaturated look to them.
With the dark basing finished, other colors were used to pick out details. Knobs and buttons were painted light gray, and the seat cushions were given a coat of leather color, using Vallejo Leather Brown 70.871. The seat cushions were then given a “gradiation” coat, using successive layers of the leather color, lightened up a bit. This was applied in very thin coats, starting from the back of the cushion to the front. By heavily thinning the paint, and layering it in successive coats closer to the front, a nice fading effect was achieved.
Meet Our Driver
The driver was painted in fairly standard Games Workshop style, using Zandri Dust for the base of his uniform, Castellan Green for this helmet, and Cadian Fleshtone for his skin. A wash of Nuln Oil provided sharp contrast for the details.
Each of the base colors were then lightened using a touch of white, and a layering process like that used on the seat cushions was applied.
I’ll have to admit I still struggle with figures. While I understand the basic techniques, I simply have not applied them to enough models to feel comfortable with the process. The results aren’t bad, I think, yet they’re certainly nothing to crow about. As with anything in this hobby, the path to success is practice. And we know what that means, right?
I need to build more models. 😉
The Weatherings
For the last few models I’ve built, acrylic weathering products have been the focus of my efforts. The interior of the Taurox was no exception.
I first applied a gloss coat to everything, Recesses were then shaded with Citadel’s Nuln Oil Gloss, a fairly heavy double application being employed.
Once that was dry, I used a variety of Vallejo Washes – browns, greens, and grays – to add a variety of streaks, splashes, splatters, and grunge. I deliberately chose to go with a fairly “wet on wet” approach, switching colors frequently. Some areas were treated with wash straight from the bottle, while others used thinned application.
The application method was varied to. Some areas were “painted” in more traditional fashion, while others were stippled, streaked, poked, and prodded.
It wasn’t entirely haphazard though. Early layers focused on adding the deepest and darkest and areas of dirt and stain. Successive layers focused more on thinned streaks, spots, and even splattered areas, using a toothpick to “rake” the brush across. All of this served to produce what I think is a fairly “deep” result. I’d certainly not declare it “great”, but I did feel as if the effort really grew me as a modeler.
A final coat of Nuln Oil restored shadows to some of the recessed areas that were lightened up a bit too much by the lighter Vallejo Washes. With all of that dry, a coat of Vallejo Mecha Color Matt Varnish dulled it all down.
Having My Cake And Eating It Too
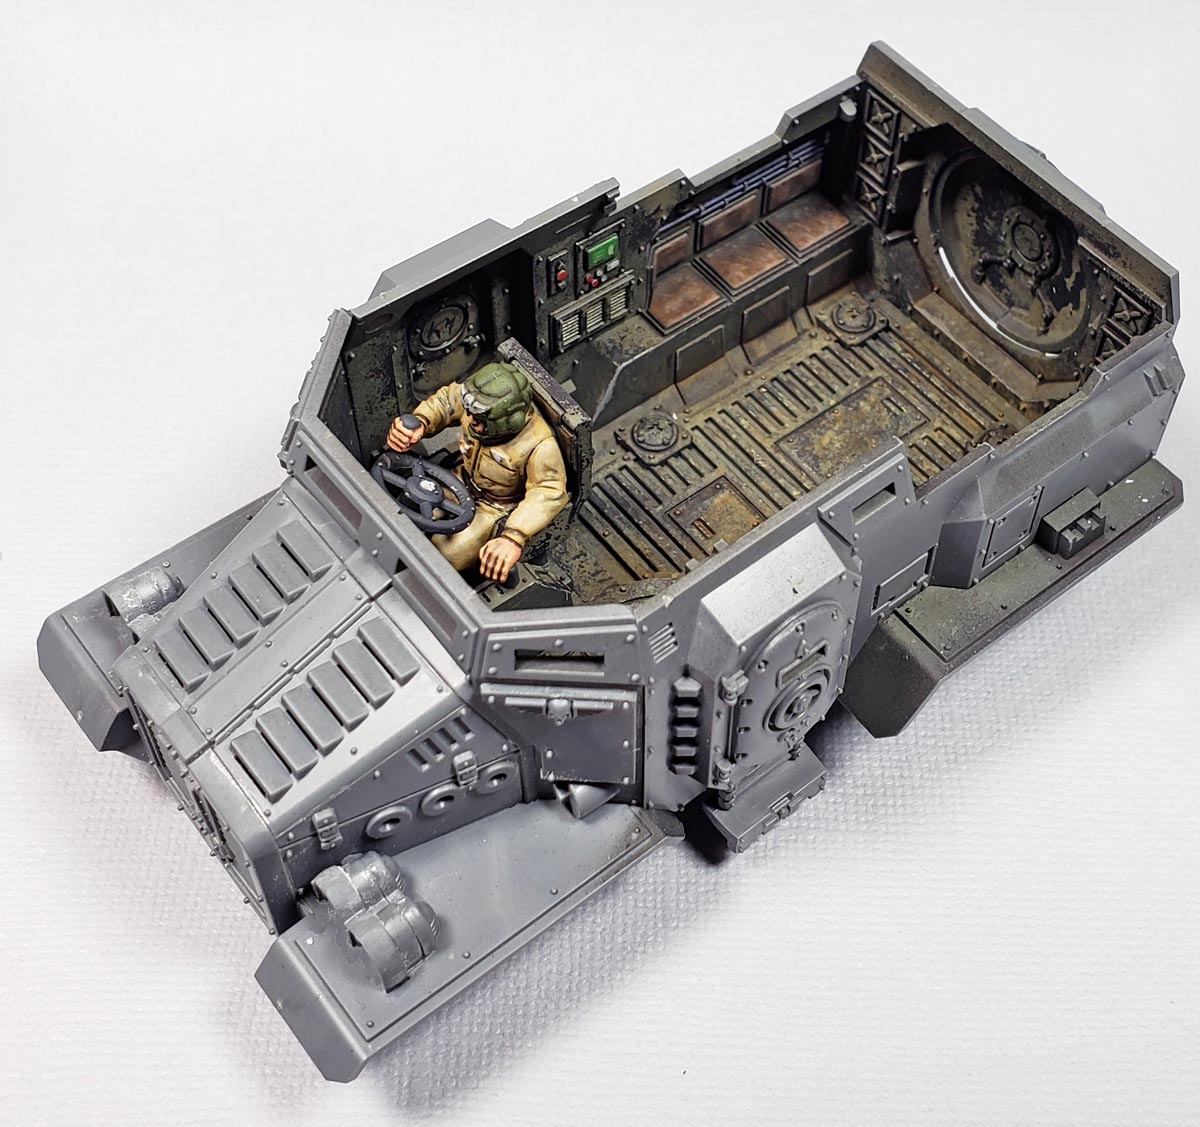
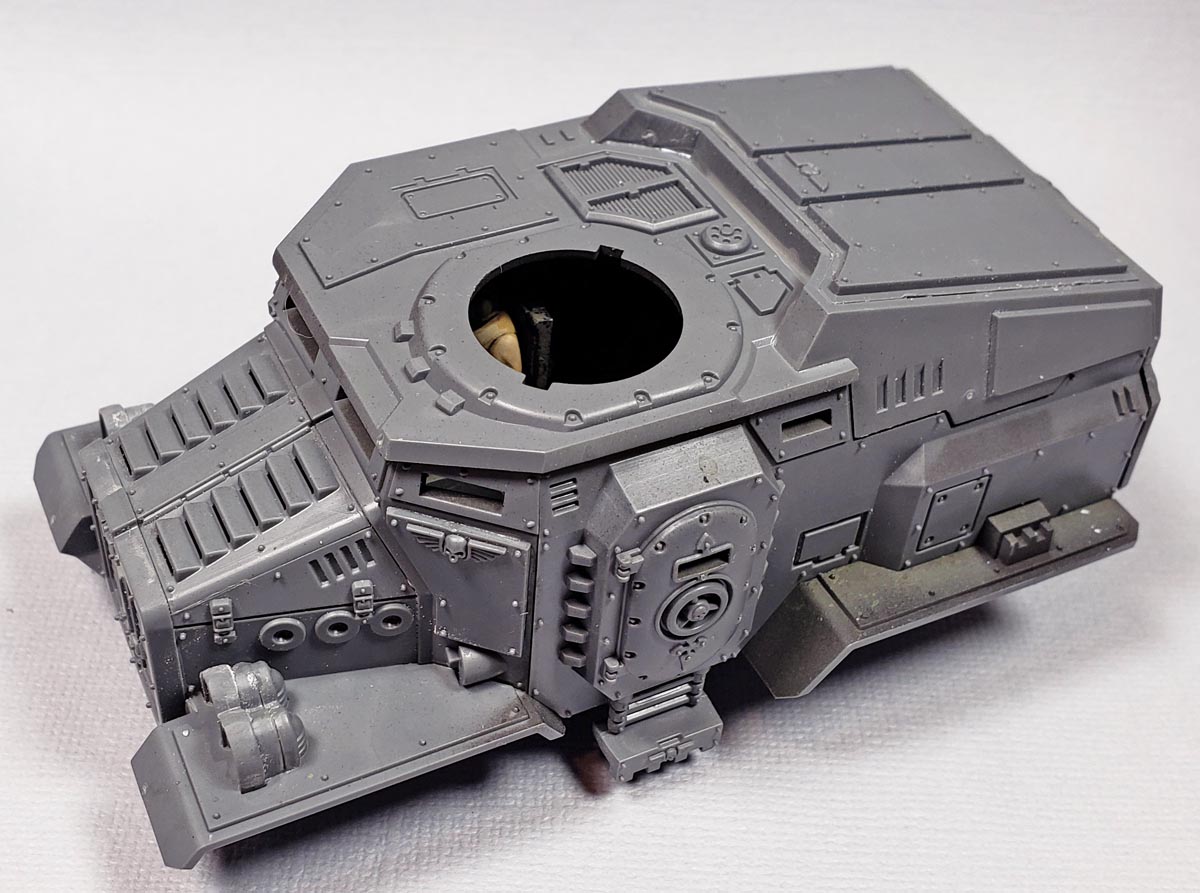
With all of that applied, I assembled the interior parts, which to that point had been mostly separate. Test fitting had shown that the entire roof could be left loose, so all the work on the interior would not be lost. It could be set in place for painting, and later for play (if the eventual buyer is a gamer), yet also removed at any time to take a look at all the detail Citadel provided for the modeler to enjoy.
Overall, I’m very happy with the result. I was able to stretch myself in a few areas – chipping medium, acrylic weathering, and figure painting – all of which will help me continue to grow and improve as a modeler. Best of all, it was a fun process. Sometimes trying new things can be frustrating, but I’ve learned if you stick to it, breakthroughs will happen, and a whole new aspect of the hobby will be opened up.
The next steps for this wonderful little Taurox model will be painting and weathering the exterior. I plan to employ all the techniques listed above – and maybe a few more. As grungy as the interior is, I want the exterior to be moreso! 🙂

Leave a Reply