I can’t recall the number of times in my life I’ve wished that a “redo” was possible. Things said to others, actions taken, decisions made… just having a chance to try again always carries some great appeal.
A particular instance came to mind as I contemplated this notion. In my last airborne operation in the Army, just days before I signed out of the service in the late 90’s, I was jumping from a small aircraft, a de Havilland Twin Otter, over a very familiar jump zone on Fort Bragg.
The jump was thankfully “Hollywood”, meaning other than the parachute, my helmet, and a few other basic pieces of equipment, it was a fairly simple jump. Though the parachutes were of the round variety, they did have some ability to steer left and right – so I was anticipating an uneventful landing. (For the curious, it was an MC1-1C, a chute I’d jumped many times.)
As the plane departed the small dirt strip that ran perpendicular to the length of the drop zone, I had the chance to think back over my Army time. I was positioned as the first jumper, and so I could sit literally in the door, legs hanging out. I could observe the whole of Fort Bragg, as we made our turn to align for the drop.
Now I’m Free… Freefalling… (Well, Static Line 😉 )
Once we crossed the edge of the drop zone, the jump master – a good friend of many years – patted me on the shoulder, gave me the thumbs up and a smile, and then as the light turned green, shouted “GO!” (It’s been almost 21 years since that day, but as I write this I still get a lump in my throat remembering that feeling.)
Out the door I went, counting as I dropped – ONE THOUSAND TWO THOUSAND THREE THOU…. UGHHHHH – then quickly being jerked to a standstill as the chute unfolded and I drifted down. Looking around, I took in for the last time the scene. Though I loved being a paratrooper, I’d firmly established in my mind that once out of the service, I’d not jump any more. So this was it.
As I got lower to the ground, I began to pick out the spot I was most likely to land on. Training took over. I turned the chute into the wind, slowing my drift to almost a standstill. As I got lower, I made sure to be in a good landing position – feet and knees together – and ready to do a proper parachute landing fall.
It turns out the ground had other plans in mind, though.
Getting A Do Over
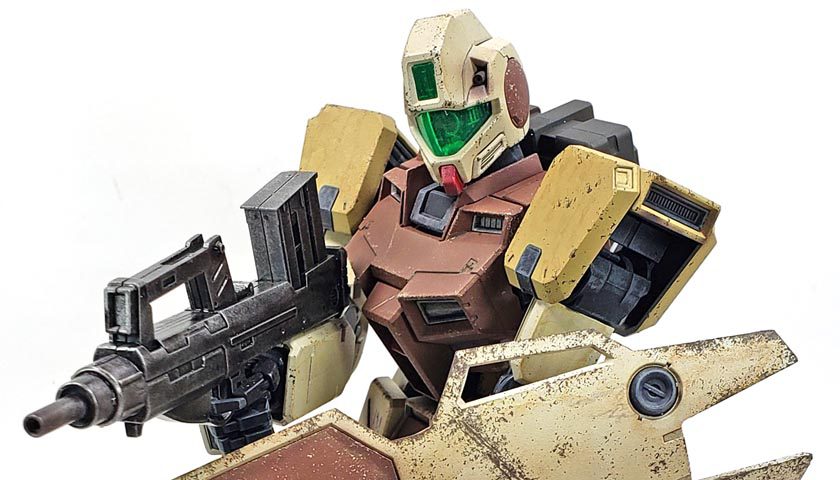
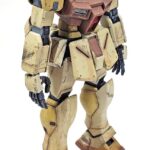
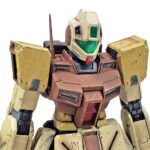
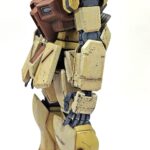
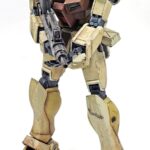
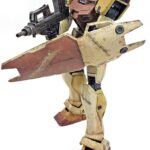
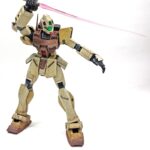
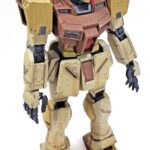
The last time this Gunpla had made an appearance on the blog, it was after having received its initial coat of paint. The canon color scheme was a bit plain – a very light tan, and a very dark brown. The tan was so light as to appear white, and the dark brown visually “read” as a very dark gray – almost black. Aside from a few touches of red to offset things, the look was quite… boring.
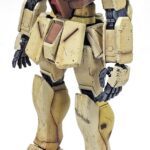
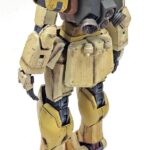
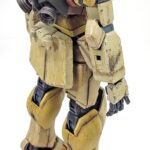
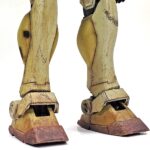
Falling back on my aircraft building experience, I chose to pursue a sort of desert look, using colors inspired by the RAF’s Desert Air Force in WWII. While I generally stayed with Bandai’s overall color distinctions, I opted for a three color approach to break up the larger areas of the lighter color.
For the lightest color, I used a mix of Tamiya White and Deck Tan, in a ratio of about 2 parts white to one part deck tan. This was given some variation by applying Tamiya’s XF-60 Flat Dark Yellow on more prominent areas. The color alluded to the Middlestone shade that the RAF used on their aircraft.
Though I usually employ Tamiya’s XF-72 Brown (JGSDF) for the RAF’s Dark Earth, I wanted something with just a bit more warmth, and thus settled on XF-65 Red Brown.
The choice of colors brought to mind a pumpkin spice latte… a coffee drink which I do have some familiarity with. 🙂
Moving Beyond The Paint
With paint applied, I gave the model a gloss coat, using Future Floor Polish. (It’s now called Pledge, I believe, but I think I’ll always call it Future…) Over this, I added Citadel’s Nuln Oil, applied into the recesses and panel lines. This combination works well to produce very nice shading, yet is quite ready for additional layers soon after application because of its fast drying time. If some does get into areas you’d prefer it not be, simply moisten a small brush (I use a #0 round) with Vallejo Airbrush Thinner, and carefully work away the errant shade. I use more of a dabbing motion, and this fairly quickly will lift the color right up. The gloss coat underneath protects the previously applied paint.
Chipping was next, the bulk of it being applied with a sponge. For the two lighter colored areas of the armor, I chose Vallejo Mecha Color Chipping Brown (69.035). On previous builds I’d used Ammo’s Chipping color, and the two are virtually identical – except in one regard. The Ammo paint is quite thin, and I was never entirely happy with its overall performance. When I saw Vallejo’s Mecha Line had a similar color, I grabbed it. The Mecha Color paints are a bit thicker, so when a fuller “body” is needed, they deliver. Of course, thinning them is always an option. But it is much easier to thin paints than to thicken them, so the swap is a good one I think.
Additional chips were applied via #0 liner brush, to simulate larger areas of scrapes and damage. For the darker red/brown parts of the suit, I used Tamiya’s XF-55 Deck Tan. While not the exact color of the suit’s lighter armor, applied to the darker parts it looked quite nice, suggesting that the darker color was applied over the lighter, and thus chipped away.
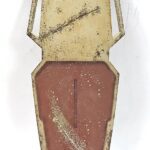
I generally kept the chipping minimal, as I wanted to replicate how a mobile suit might look after just a few battles. I did opt to make the shield look a bit more worn, as if it had been swapped out with another unit, or had been heavily used. I’d planned to add some sort of stripe on it to break up the large brown area on the shield, but simply forgot to. A cheap fallback was to add a large scrape across it along a diagonal, and this somewhat accomplished the goal.
Making It All A Bit Grimy
I wanted to start with the lighter weathering tones, so I opened up Vallejo Model Wash Desert Dust (76.522). As I’ve mentioned in a few past blogs, acrylic weathering products require a bit of a different approach than the enamel and oil options. Colors are slowly built up with acrylics, using more of an additive approach.
I added a few drops of the color to my palette, and then thinned it with about the same amount of water. Acrylic washes go on with more color than will actually show once dry, so learning how to judge it requires practice. (Something I am still working on! 🙂 )
Initial application of color was done with a #0 liner brush, applying random vertically oriented streaks over much of the armor. The idea behind this is to replicate the result of a dot filter application using oils. Additional Vallejo Washes were applied in this manner, again highly thinned, and built up on top of each other. I made use of European Dust ((76.523) and Brown (76.513). As I worked, I did some mixing of colors to introduce additional tonal variety.
The goal in this process is not to make it look like a pinstripe suit, but rather to impart subtle variations on the armor’s surface, breaking up the monotone look.
Same Colors, Different Application
With that process complete, I moved to adding the same colors, this time using a stippled application method. For this, a #3 round brush was employed. Additional color was added to the palette straight from the bottle, as I wanted these stains to be a bit more opaque.
Because the surface was still somewhat glossy, the stippled application had a tendency to bead up a bit – which was exactly what I wanted. Applying these products over a matte surface will result in some color “bleed”. While at times this may be the desired outcome, in this case, I was looking for more of a smoother stained effect than a more high contrast bleed look.
Throughout these steps, I would occasionally switch to a brush dampened with water to clean up any spots that weren’t quite what I wanted. While the acrylics do dry very fast, there is a brief window after application to make some adjustments by “chiseling” away harsher edges. As I’m discovering, the technique for good weathering management with acrylics is a bit different!
The stippled colors were added from the lighter to the darker tones. In some areas, I wanted to simulate where dust might run down the mobile suit after rainfall. In others, I was trying to suggest areas where the dirt and dust would collect due to fluid leaks – oils, hydraulics, etc. And in more than a few areas, I simply went for the “cool” factor – does a splotch or two look cool right there?
Additional Stains And Spots
With the “environmental” effects applied, I moved on to the fluid leaks and stains. While mobile suits are certainly fiction, the actual dynamics of how fluids would behave still applies. A giant stompy robot that can move with the agility these display on-screen would, if real, be under tremendous hydraulic pressure at every joint.
I chose three colors – Petrol Spills ((73.817), Fuel Stains (73.814), and Oil Stains (73.813), all from Vallejo’s Weathering Effects line (Engine). These are a bit thicker and heavier than the washes, and dry to a gloss finish. As with the washes, the process to employ them is additive. They can be thinned with water, combined with other water based washes, and even used with pigments to get an extra grimy look. (Though in this scale that would look a bit odd.)
The #0 liner was again employed, adding more thinned stains initially, building up until I was using the colors at full opacity. Even right out of the bottle, they dry fairly translucent. I chose areas that I thought would show leaks – below joints, along armor breaks, and other areas. Again, I tried to think with some real world logic, but still leaning towards the “just make it look cool” line of thinking.
A few areas, mostly around the lower foot, were treated to some weathering powders, Burnt Umber (73.110) and European Earth (73.119) being utilized from the Vallejo Pigments range. Applied with a medium flat brush, the pigments were affixed with some of the Brown Model Wash.
Wrapping Up The Build
As a final step, I airbrushed on some streaks and general post-shading using my favorite mix of two parts Tamiya XF-69 Nato Black and one part XF-9 Hull Red, heavily thinned with 91% alcohol. This color can act in many roles, imparting a look that simulates exhaust stains, grime, and against some underlying colors, a dark rust. Opting once more for the “just make it look cool” approach, I allowed the airbrush to somewhat meander around the suit, focusing in on areas that appealed to my eye. I think this final step helps blend previous layers together. Still, care must be taken not to overdo it, as the color can build up quickly and be quite stark.
With all of that in place, a final matte varnish, using Vallejo’s Mecha Color Matte Varnish was applied.
As a foot note to the acrylic weathering, while the application technique can take some adjusting, the speed with which they can be utilized is incredible. If I’d have used oils and enamels to impart this type of weathering on a Gunpla, it would have taken days – perhaps up to a week – to allow fully for drying time, and to prevent later layers from conflicting with earlier ones.
However, because of the speed at which acrylics dry, I was able to do all of this weathering in a 24 hour period. And it could have been shorter, as that time was broken up by a good night’s sleep, a trip to church, and several naps due to a nasty cold that I can’t seem to shake. Acrylic weathering is proving itself to me as a good method to apply because of the result it produces, but the main attraction is certainly the speed.
Maybe One More Try?
As I drifted down, the place I was headed to for landing appeared like any other bit of ground on the drop zone – mostly flat, some patches of dirt, some of grass, a few small scrub brushes here and there. Only later did I discover that the place I was headed concealed a bit of a trap.
When grass takes root on a windswept area, quite often the surrounding dirt will be washed or blown away, leaving a small but quite dangerous projection on the ground. Though the landing procedure is to keep your feet and knees together, and do a sort of side “tumble” (it’s called a PLF – parachute landing fall), the process of dropping from the sky at about 20 feet per second is not always forgiving.
From the air, it simply appeared to another patch of grass among many. But it actually stood up from the surface almost a foot in height. Training teaches you to look at the horizon, not at the ground, to avoid the temptation for tensing up or reaching for it. So with only seconds to go before landing, I dutifully leveled my head, looked at the horizon, and waited for the impact – a process I’d done many times before.
As my feet touched down, I accomplished a million-to-one-placement. My right foot caught the tough as rock edge of the grass clump. And while I had my feet and knees together as trained, I was not tensed up. Stiffening your legs could quickly result in a broken bone.
The impact of me coming straight down, my boot being caught right on the edge, and perhaps being a bit to overly confident in my last jump led to a painful result. My right knee folded under me, and I went straight down on top of it, literally having all my weight come down on my foot, now beneath me. My left leg was straight out on front of me. Because of the grass projection, it also caught my tailbone – already sore from being broken many jumps before.
The result was an agonizing hypertension of my knee. Thankfully, I was able to limp away. Knowing this was my last jump – in fact the last few days I was in the Army at all – I ignored seeking medical care. The amount of paperwork involved, and the chance of slowing down my out processing, wasn’t worth it.
But I always wanted a do-over on that jump.
A Less Painful Do Over
Thankfully, neither the first GM Sniper I built, nor this second attempt, were anywhere near as painful. In fact, both were quite enjoyable processes. I wish all do-overs were so painless.
I’m really happy with the result, too. While I liked the final look of my original Sniper II better, I think this model is a bit more refined overall in terms of technique application. That is a great encouragement to me, as growth in the hobby is always my goal. And I’m pleased with the color choices, too. It seems to give the look of a desert mobile suit, stomping about in the sands somewhere, battling other stompy robots.
If you’re looking for a Master Grade Gunpla to build, I’d suggest picking up any of the GM designs based on the Sniper II kit. They are very nicely detailed, yet go together very well. Articulation is extremely good, so if posing is your thing – you’ll really like them.
And if you’ve already built one, why not give another a try? Taking the lessons learned from the first one can be fun to apply!
The best part is that there is no need to fall out of airplanes to do so! 😉

Leave a Reply