The aircraft had been unceremoniously dumped off the airfield, scattered about almost as if a child had quickly thrown his toys aside. Sitting in the sand, baked in the sun, they were the epitome of weathered and worn.
The team was moving along the perimeter of the airfield, getting in place to prepare for the day’s operation As there were a few minutes to spare , everyone dismounted from the Humvees to look around.

One soldier wandered over to a familiar shape, a MiG-21. Clambering up the wing, he moved forward and made his way to the cockpit. Carefully lowering himself into the cramped interior, the soldier looked at the fighter’s now stripped office with wonder.
Growing up as a child of the Cold War, the airplane had always represented the “bad guys” in the simplistic world of his youth. Yet sitting there, in that relic of a conflict that just simply seemed to have dissolve , it felt as though it were from a distant, alien past.
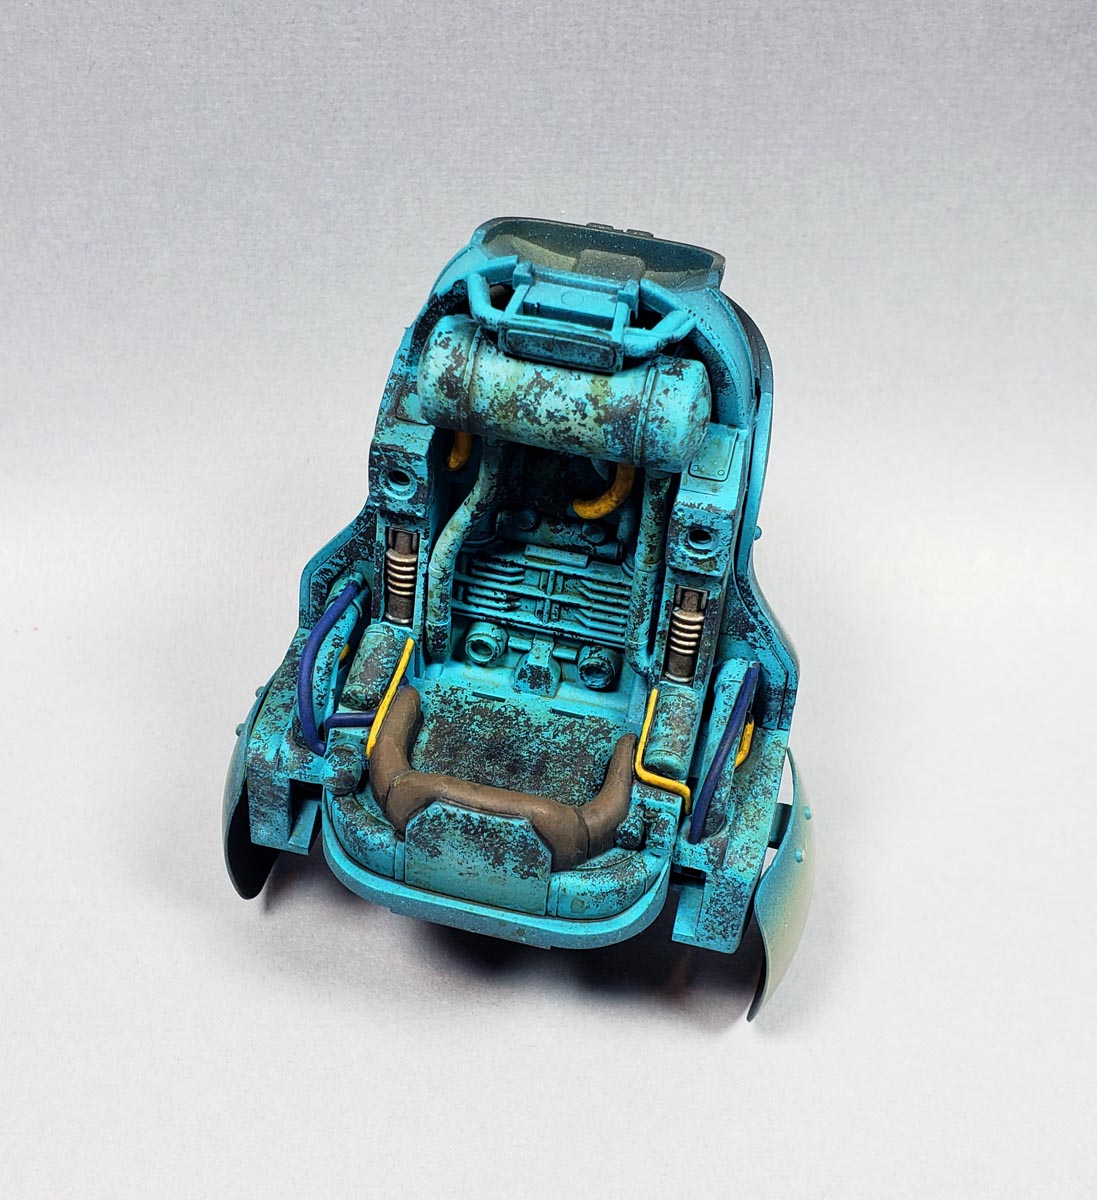
The interior was colored a garish blue-green, with great chunks of paint missing, pulled loose by neglect, scavengers, wind and rain. Crevices were filled with the brown dust that swirled, here and there broken up by what appeared to be various oil stains.
The soldier’s buddy walked up alongside the airplane. “You ready to go?”
The soldier looked around one more time, taking it all in. Though the jet was long past operational days, it still retained that aircraft smell.
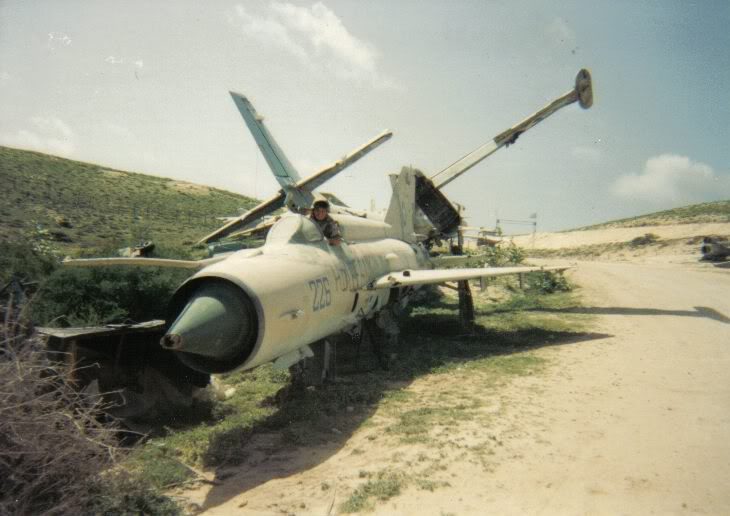
Handing his disposable camera down to his friend, he said “Hey – get a photo of me.” The other soldier grabbed the camera, walked a few feet away, and snapped the photo. Turning back to the vehicles, he called over his shoulder. “Almost time.”
The soldier climbed out of the MiG, and jumped down. “Yep, about that time.” They mounted up inside the Humvees. The soldier emerged from the open turret in the hard shell roof, looking over the MiG-21 as they passed by.
Shaking his head, the soldier swore under his breath.
“I should’ve taken a picture of the inside.”
They drove off, the Cold War forgotten, yet its fragments looming before them.
The Ammoknight Difference
Hasegawa’s Mk. 44 Ammoknight, part of the Maschinen Krieger universe is turning out to be a great kit. When I’d first started building Ma. K kits, a friend had suggested steering clear of the Hasegawa offerings, saying they were a bit fiddly and ill-fitting. At the time, I’d heeded his advice. But after seeing several of Lincoln Wright’s videos about building and weathering his Ammoknight, my mind was changed. I made sure one found its way into my model stash.
The kit is divided up as any Ma. K suit is… in fact, as any “stompy robot” type kit is. Torso, arms, legs, and various accessories. But a standout feature of the Ammoknight is one that I believe is unique among Ma. K kits.
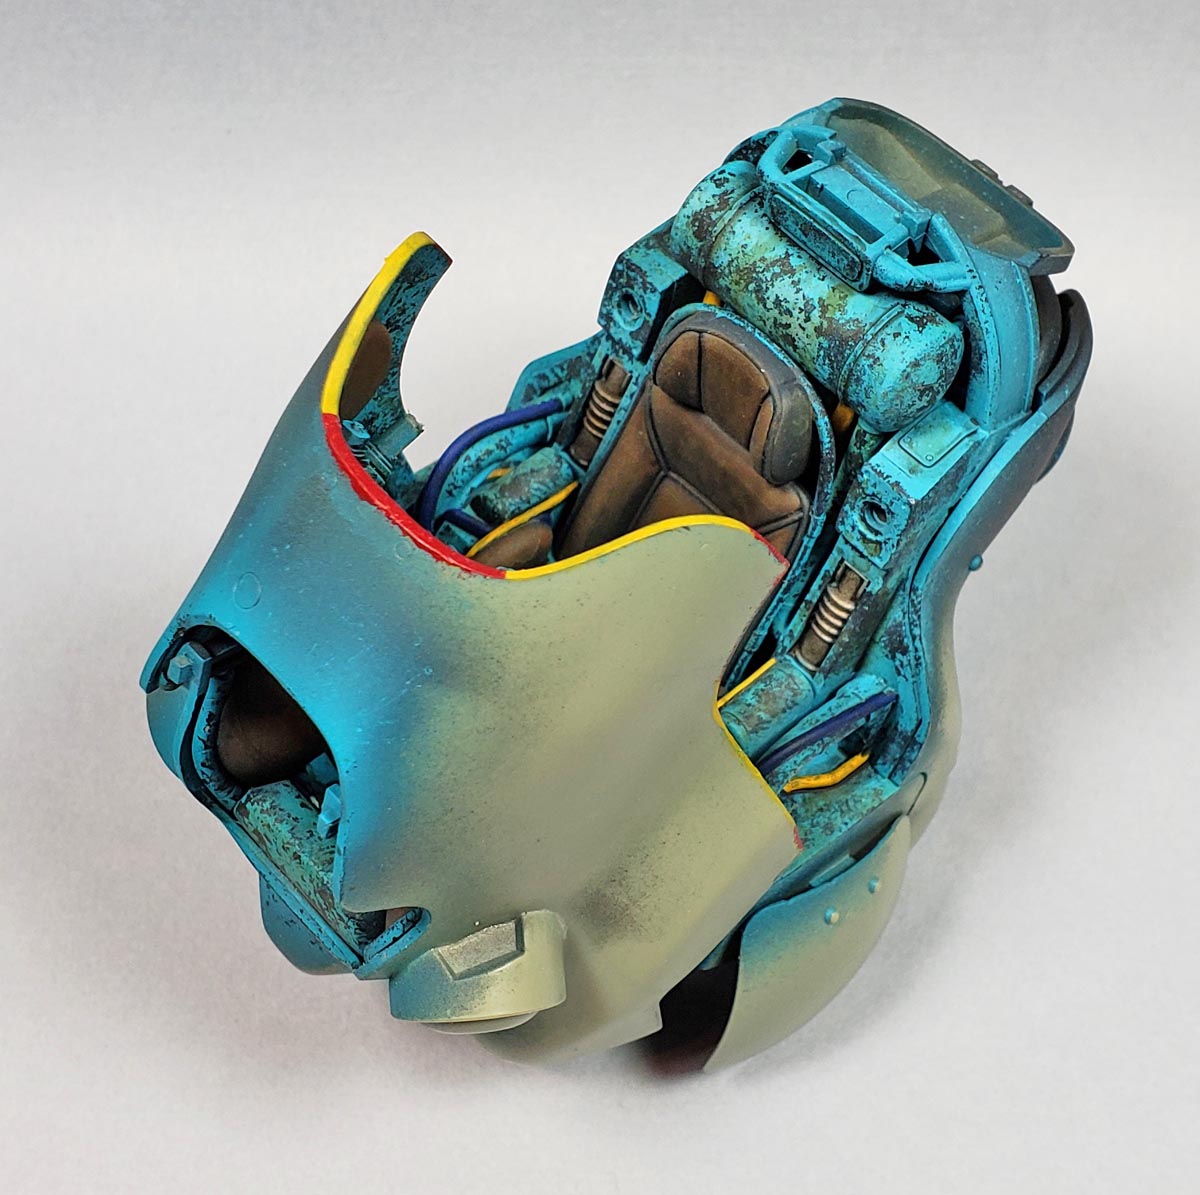
Most of the suits I’ve seen and built open at the very top, revealing a small portion of the interior – basically from the pilot’s neck on up. The Ammoknight’s design, however, allows it to open forward like a clamshell, revealing virtually the full cockpit. Only the area where the pilots arms and legs extend is left blanked over. And Hasegawa has generously packed that area with loads of wonderfully detailed surfaces.
Building The Ammoknight’s Office
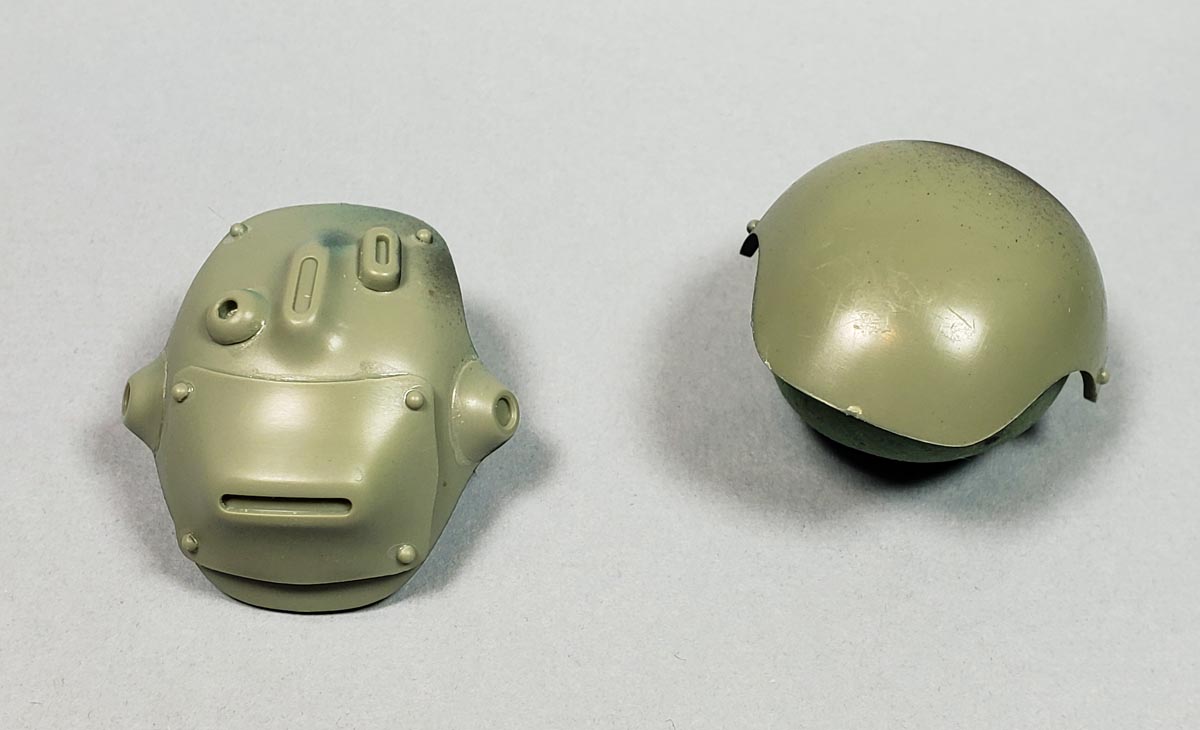
Assembly of the interior parts is very straightforward. Essentially there are two halves – rear and forward. To facilitate painting, I left the seat back out, as did not mount the forward hatch.
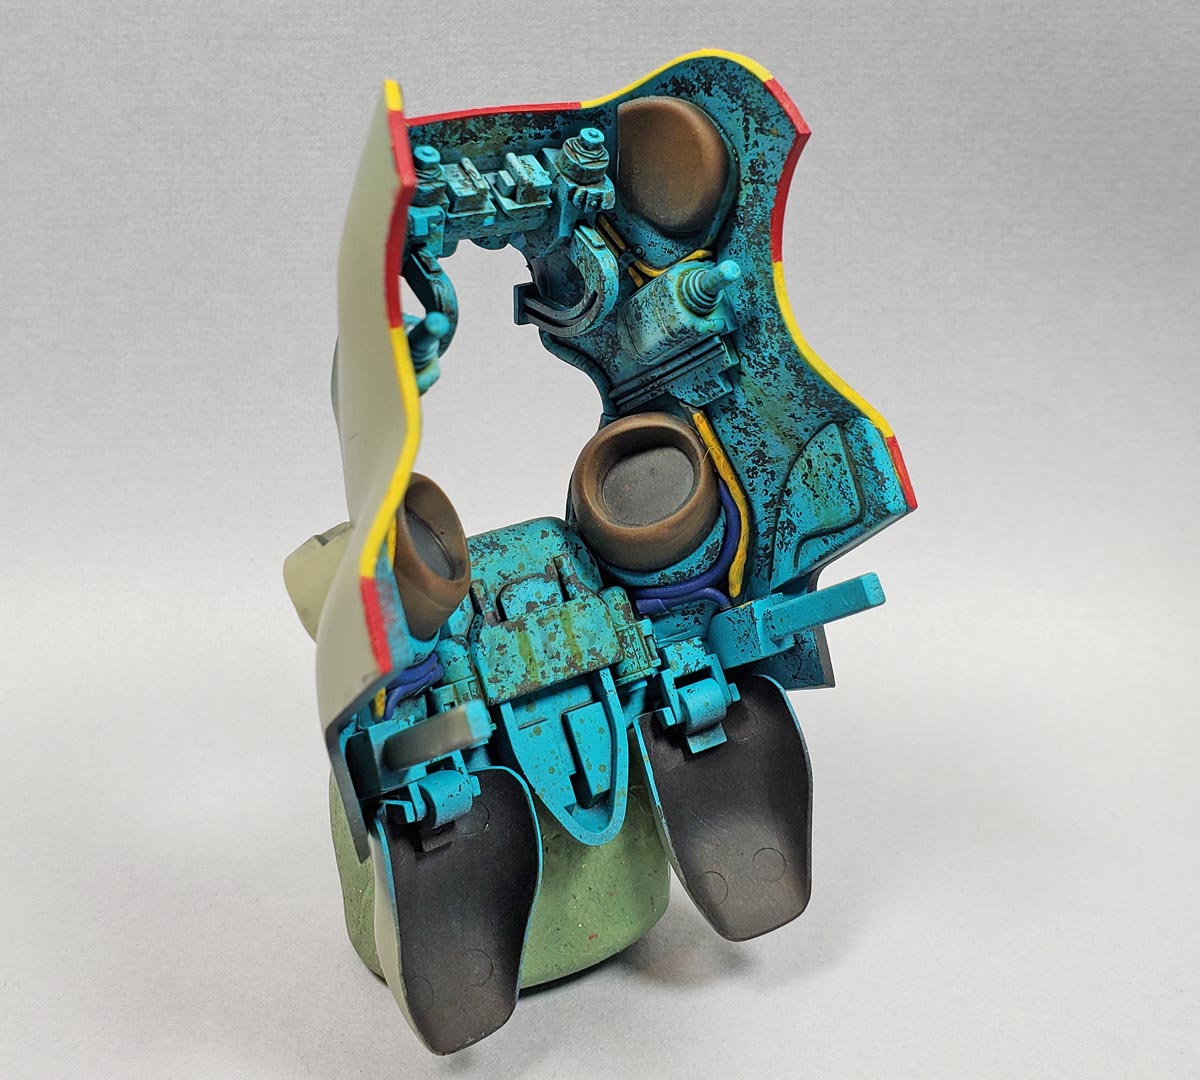
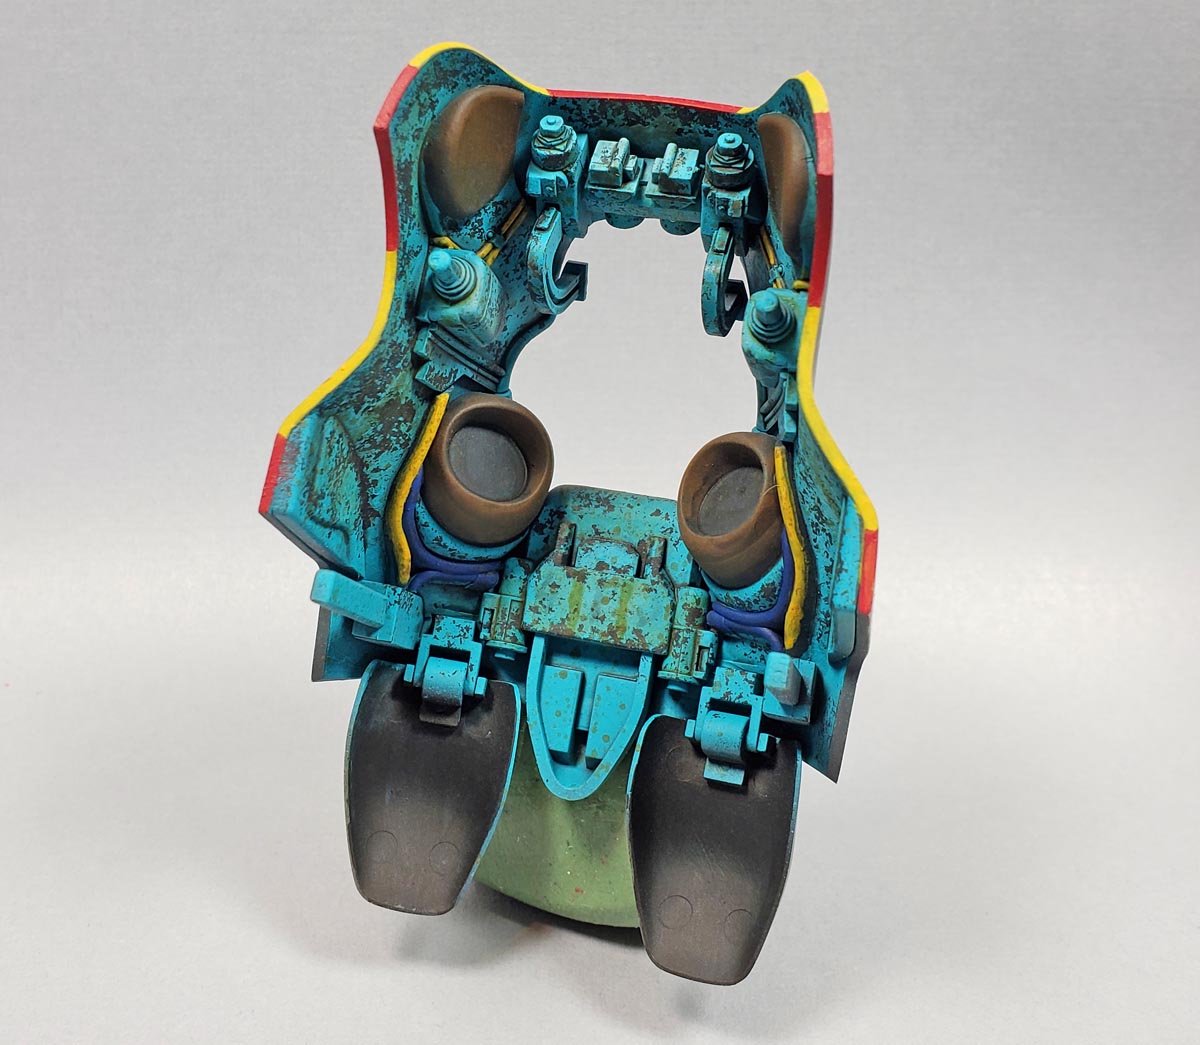
Just aft the cockpit, on the backside, there is also a great deal of detail. The parts look almost like an air conditioner unit. I’m guessing it is supposed to be the engine, but I I’m sure the pilot would appreciate some nice, cool air from time to time – so who knows. 🙂
The decision was made to cover this area up, however. My plan is to display the model “opened up”, with pilot beside it, and I felt that trying to show the engine/air conditioner also would take away from the crew interior area. So while I did place all parts in, I knew all along they’d not be visible.
I did take care in assembling the two arms that will allow the forward hatch to open. The instructions note that glue should not be used in portions of their assembly, to allow free movement. While I may end up gluing it in place once finished, depending on how the final pose looks, I wanted to allow some flexibility.
With all the parts in place, I primed everything with Badger’s Stynylrez Black Primer.
Picking The Colors
While the other Maschinen Krieger kits I’ve built have a very distinct look to them, the Ammoknight is quite different visually. Where the SAFS type suits are upright, and have gentle curves, the Ammoknight has a decidedly hunchbacked appearance, oddly placed arms, and legs that almost seem to be buckling backwards. In many ways, it reminds me of the silhouette of a heavily laden soldier, straining under the weight of a large pack. (A strain I am familiar with! 🙂 )
And for some reason, it seems a bit “Russian” to me in look. If you were to build and paint a series of these kits as though in a fictional alternate Cold War scenario, I could see these being the Russian armor suits. Much like the mental image I have of the T-55, BMP, or the MiG-21, the Ammoknight seems very purposeful in design. It’s not meant to be aesthetically pleasing, but rather every bit of its shape facilitates its purpose – war.
As I pondered the colors, the mental image of a Soviet built aircraft I’d sat in a lifetime ago came to mind. Knowing that the blue-green color would certainly stand out as a focal point when opened up, I opted to try to replicate a battered MiG-21 cockpit – as I remembered it.
Chips Galore
While I’ve read many discussions about the correct color for Cold War era Soviet jets, I decided to take the simple route – go with what ya got! I had a bottle of Vallejo Model Color Blue Green (70.808), and as I’d liked how that looked on my Chinese JL-9 trainer jet, I went with it.
The first step was to apply some Vallejo Chipping Fluid to the primer coat. I decided to go high contrast with the chips, liking the dark look they’d provide. My recollection of the MiG was that the chips were very dark. I certainly doubt they were black, but in scale, that extra contrast helps. (Plus it was one less step… 😉 )
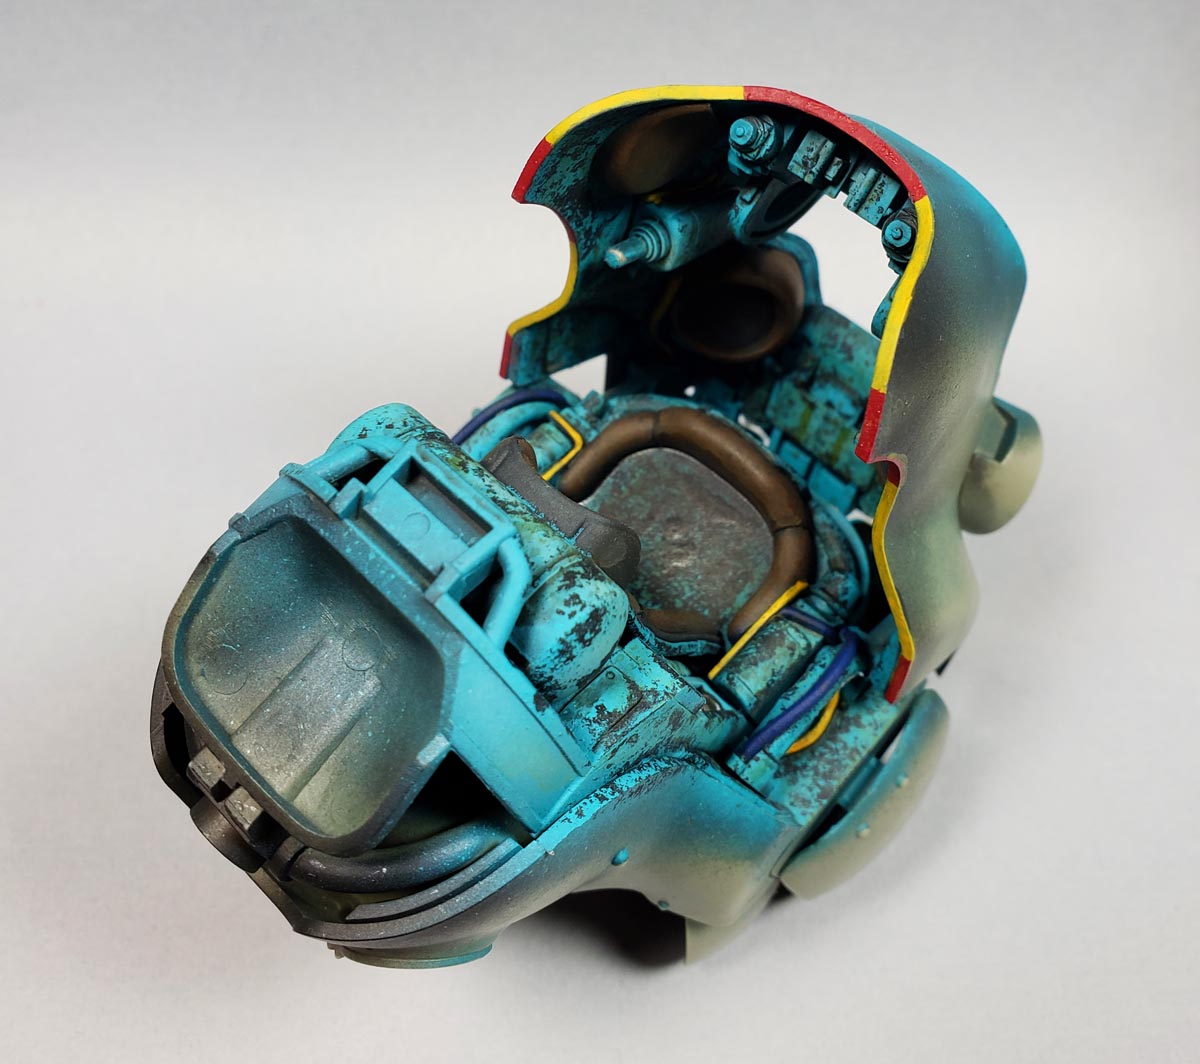
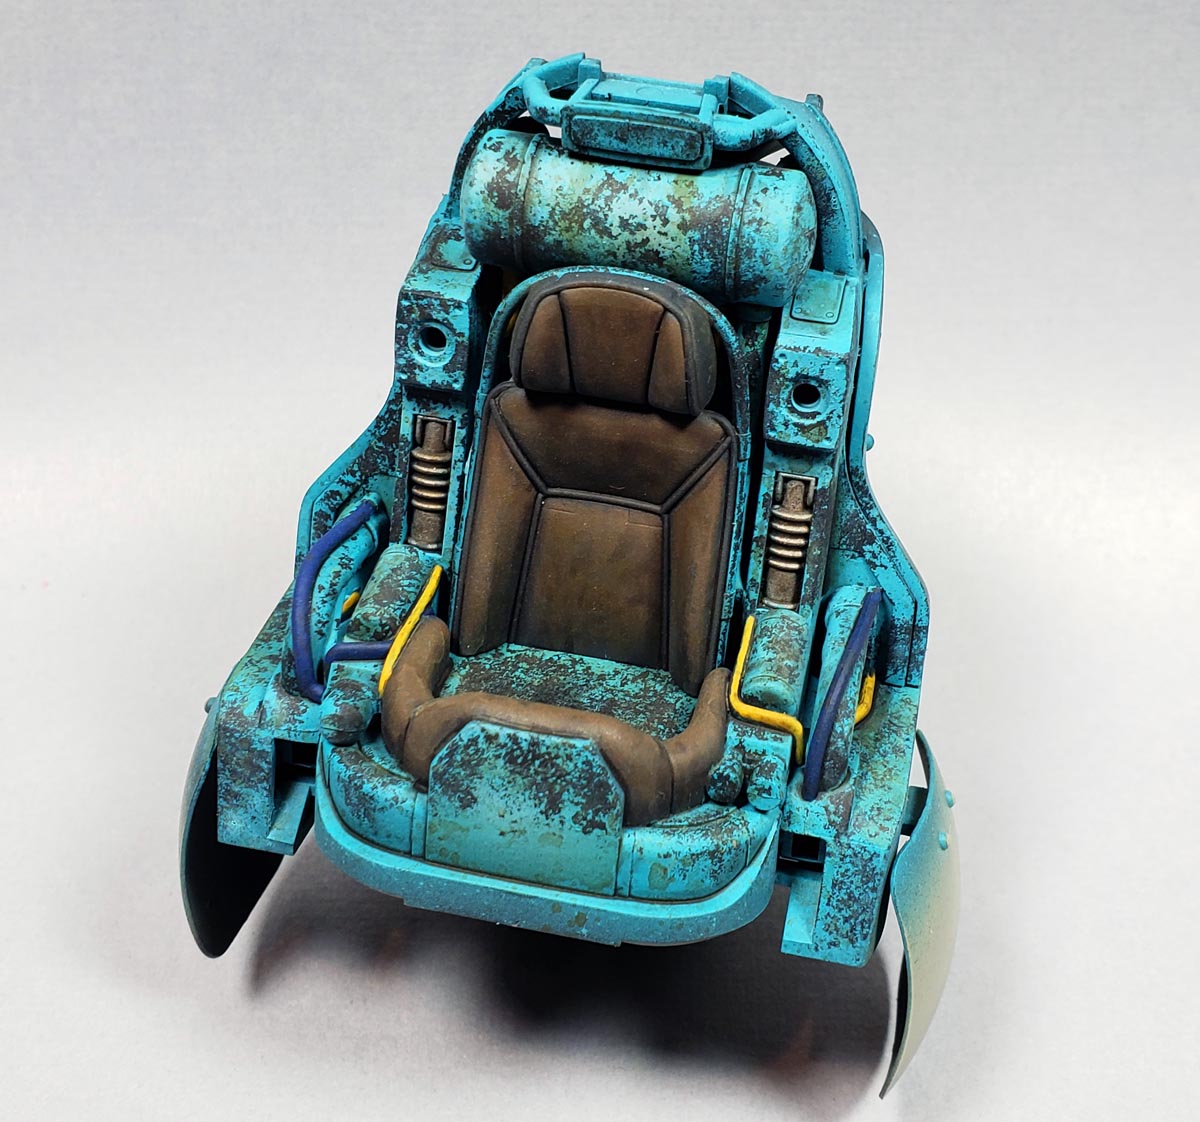
After applying the chipping fluid, I thinned the Blue Green down, and sprayed it onto the interior parts. Adding more than a few drops of white, and more thinner, I then applied a bit of modulation. A bit of it still pokes through the round tank just above the seat – exactly the look I was hoping for.
Chipping was easy enough – water and a big brush, dabbed and stabbed until I had something resembling what my memory holds of that day long ago.
Painting Some Details
The next step was to undercoat all of the raised detail that would receive another color with Vallejo Model Color Black Gray. I like to do this to re-establish a dark undertone, but also to begin developing a “shadow zone”. By painting all the details black, I could establish a very dark edge. When later color was applied, I would not fully cover that dark area, but rather attempt to let the light color “merge” with the dark. When later washes (shades) were applied, it would blend the two in a very nice fashion.
At least it sounds good in theory when I write it out. 😉
Over the top of the black gray I added additional colors. Applying some color theory to pick colors for the tubes, though I admit it’s probably a bit simplistic in thinking. Reckoning it was blue/green, but mostly green, I figured green was made up of blue and yellow. Using slightly desaturated versions of those colors, I picked out the tubes, deliberately making them look a bit cleaner and newer. Perhaps they were later replacements, or made of a material that nothing would cling to very well? (Like Wave Ma. K polycaps… 😉 ) Or maybe I just liked the contrast… who knows?
A bit of playfulness was introduced by adding a red and yellow “warning strip” around the edge of the forward section. I could just imagine a nervous government official insisting this be added, for safety… of course. (Not liability… never. 😉 )
Additional bits were picked out in Citadel’s Leadbelcher, and then leather areas were layered in Valleo Leather Brown. Everything was then given a gloss coat. A very heavy wash of Citadel’s Nuln Oil was applied to really deepen the shadows and provide additional contrast with the lighter areas. Those portions were set aside to dry.
Please Take A Seat
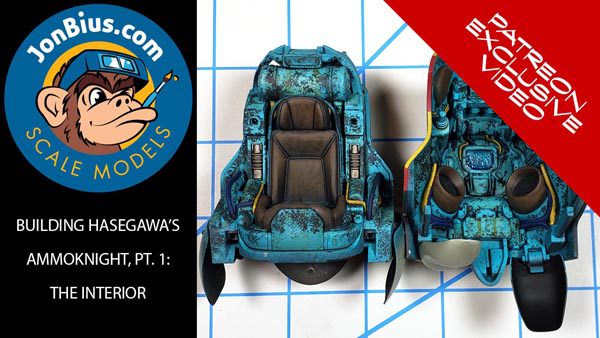
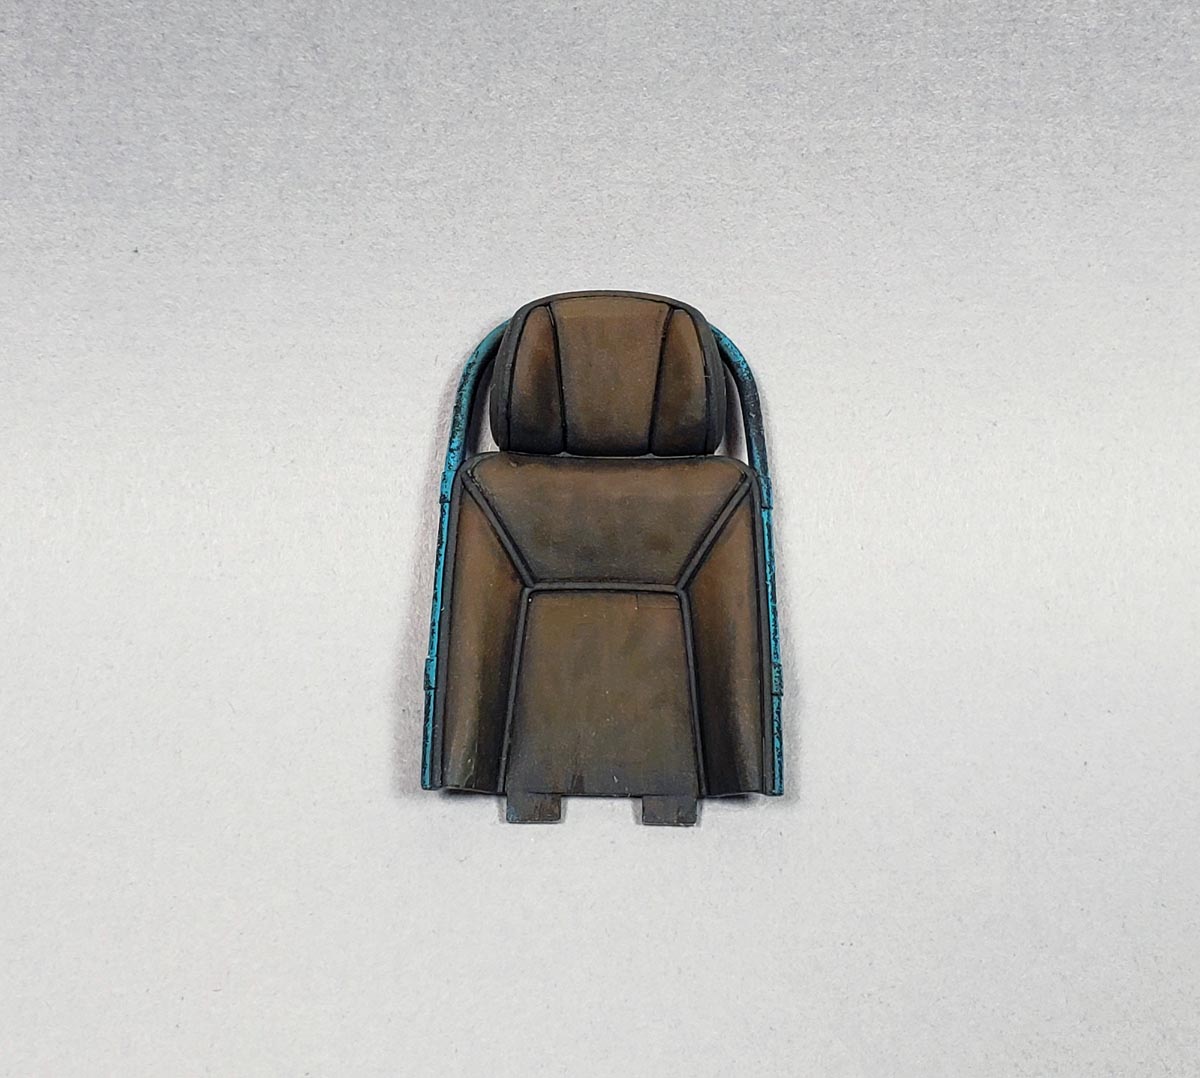
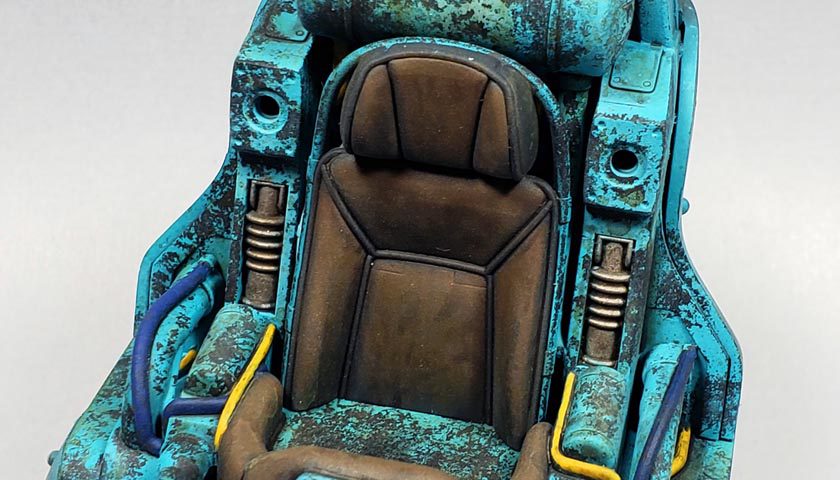
I’d held the seat back aside to paint separately, as I was hoping to really make it a standout point in the open interior. The frame had already been painted the blue green color, and the seat pads themselves blocked out with the black gray.
Using heavily thinned Vallejo Model Color Leather Brown (70.871), I began the process of layering that I’ve been experimenting with on several previous builds. Using my Army Painter Regiment brush, I applied thin coats, drawing the brush strokes from the area I wanted shadowed to the area of highlight. This took advantage of the fact that the brush leaves the most paint at the end of the brush stroke.
Because the paint was so thin, by the time I worked my way around the seat pads, the section I’d started with would be dry. I then applied another coat, in the same fashion, but starting slightly further away from the area of deepest shadow.
This continued for many, many coats. The beauty of this method is you can always add more paint layers – continually building up until you get the exact amount of color graduation you want. At no time did I change colors – it was all the single color. But by building them up, I was able to get a nice gradient.
Of course, additional colors could be added to the mix to get more dramatic highlights. The method is very flexible, and with just a little practice, works very well.
Splitter Splatter
The final step in the preparation of the cockpit was to add streaks, stains, and splatters. A variety of Washes and Weathering products from Vallejo were used for this, including Oil Stains (73.813) and Petrol Spills (73.817) from the Vallejo Weathering Effects line, and the same company’s Model Washes – European Dust (76.523), Desert Dust (76.522), and Brown (76.513).
Three methods of application were used.The washes were “streaked” on, heavily thinned, using a #0 liner brush. All of the above mentioned colors were then applied with a #2 round brush, using a stippling, dabbing motion. It was not total coverage of course – some was done randomly, and other areas were done with deliberation, such as where a fluid leak might occur, or where dirt might collect. Finally, the washes were “splattered” on, using a paint brush flicked against a toothpick, creating a nice, random splattering effect.
A few final touches of paint, shade, and weathering were added as needed, and then it was all given a coat of Vallejo Mecha Color Matte Varnish.
Recreating A Memory
I’m not sure that if I were able carry these model parts back in time to that day so many years ago that everything would match up. I know memories, over the years, can meld and merge with other things. But in my mind, this is how I recall things looked, as I sat crouched in the cockpit of a MiG fighter, wondering how it might have looked in better days.
This process of recollection has made building this Ammoknight a bit special to me. I can always look at it and know that the colors and weathering aren’t just some random choice, but an actual part of my own history.
With the interior finished, I’ll continue assembling the exterior parts, adding texture, painting, and weathering.
If you’re looking for something different to build – give this Ammoknight a serious look!


Leave a Reply