As a kid, I loved opening Christmas presents. The excitement of not knowing what was in the wrapped package was beyond words. Never the kid to carefully pull open the paper around the present, I always tore right into it. Most of the time I was greeted with some toy that produced an immediate smile and an exclamation of “coooool!” (And a reminder from mom to say “thank you.”)
Occasionally, there might be a more muted response, like when an elderly relative knitted a scarf for me. Or someone gave the dreaded pack of tube socks.
The worst though, was when the box was opened only to find something missing, or broken. Or needing batteries. That seemed to make the thing even more vital to have. I could see it, feel it, hold it… but because of a flaw, I could not enjoy the fun.
Of course, I was a bit selfish in all of this. While I was a nice enough kid, I suppose, I was definitely about me when it came to Christmas presents.
Fast Forward
I’d like to think I have matured a bit. I enjoy giving now, far more than receiving. In fact, when asked “what do you want for Christmas”, my usual response is “don’t spend any money on me.” My reason is twofold. First, I have more than I need, and what I don’t have I can usually procure. Second, quite often the query comes from a family member, and I’d much rather their money be spent on someone else in the family.
Still, it’s nice to get a present. So in early December when this Citadel Space Marine Predator arrived by way of a kind friend, I was most appreciative. I gave a quick perusal of the kit, looked at my upcoming build calendar, and decided to slot it in place after completing my Taurox. Because of the Christmas holiday, and then being sick for a while in January, I did not get to start on the kit until early February.
Starting The Build
Once I started, I followed a sort of ritual I have for most kits, building up as many sub assemblies as I can before ever painting anything. Starting at step 1, I began to work.
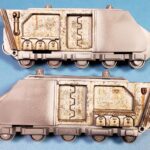
Citadel kits build up really fast. If you’re not painting details on the interior, even the most complicated kit can be assembled in just a few hours, at most. This Predator was no exception. I quickly worked through the first few steps, building the two sides of the hull, assembling the gun sponsons, and cleaning up the parts that made up the interior.
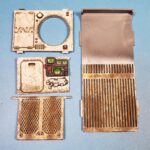
Taking a brief respite from assembly, I decided to prime the interior parts, so that those could be drying while the rest of the kit was worked through. That way, once finished with the subassembly process, i could go right into painting the interior.
After priming those parts, I headed back to my model desk. The next step was the turret. Reaching into the box of sprues, I made a discovery.
My Kingdom For A Sprue!
There was no turret sprue in the box.
It’s a bit funny, looking back, at my search process. I pulled all the sprues out from the box, and then carefully examined each one to confirm it was indeed not the turret sprue. This was done three times, just to make sure. (I am thorough…) The search expanded to other places – sprues in other kits, likely places I might have set it down. The field was widened to even unlikely places, like behind bottles of paint, or under my palette, as if the missing plastic could be there.
Finally, I sat and recollected the process of getting the kit. It had come in an Amazon box, which I opened. The kit was still shrink wrapped, so I’d opened that. I’d rummaged through the parts, placed the lid back on it, and set it on my shelf of “coming soon” kits. There it had sat from early December to the present.
As I pondered what could have happened, it dawned on me that there were TWO sprues of the sponson parts. A check of the kit’s instructions showed I should only have one. I came to the conclusion that somewhere in the world there was a modeler who had two turrets, and was desperately searching for his sponson parts.
GW To The Rescue
I decided to give Games Workshop’s customer service a try, contacting them via email. I explained the situation… it was a gift, no receipt was to be had, and it was past the time it could be returned. Knowing this was a bit of a stretch to ask for help, I offered to purchase the missing parts, if that option was available.
Initially I received the standard format template reply, which basically said I needed a receipt, otherwise contact the original seller if it was not GW. Knowing how typical customer service works, I thought this may have simply been an auto reply. I replied back to the email, explaining again the situation.
Happily, I received a real person’s reply the second time. She kindly asked a few questions about the details of the matter, and asked for a few photos. I quickly responded to all the queries, providing more prose and photography than was probably needed.
Now, my gut feeling was that in the end, my case was too far outside of the guidelines to get help. I wasn’t upset about it, really, because I knew I was asking for quite a bit of grace. Still, I did have some hope that perhaps they’d take pity on me.
Imagine My Surprise
A few days later, a notice arrived in my email – your order is on the way. Zero charge. From the looks of it, they were sending an entire replacement kit.
I felt like a kid who thought they were getting socks, only to discover it was actually Rockem Sockem Robots, with a jumbo bag of peanut M&Ms tucked in to the box. 🙂
When the package arrived, I tore into it… shades of 10-year-old Jon. Sure enough, there was the kit, shrinkwrapped. Opening it up, I found my turret parts in among the sprues. Happy days. 😀
Interior
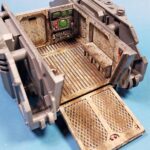
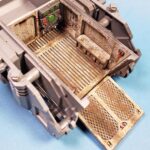
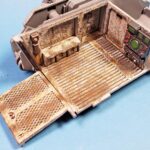
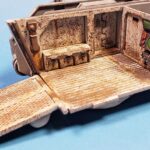
The Predator uses the Space Marine Rhino APC as the basis for its hull. Thus, the interior is best suited to that of an armored personnel carrier, not a tank. While the intent, I guess, is that the modeler would simply glue the rear hatch shut, I couldn’t help myself. While not the most detailed interior on a Citadel kit, it’s nice enough that it begged for some paint. I’d had quite the bit of fun painting the interior on my Razorback – based on the same hull – so I opted to paint this one too. Accuracy, shmaccuracy… this is all made up stuff anyway. 😉
Unlike the Razorback, I opted to do this one with a bit more of a “realistic” finish, leaving out the garish, multicolored blinky light.
Vallejo Model Air Light Gull Gray was applied over the black Stynylrez primer. On top of that, I applied quite a bit of sponge chipping, using Vallejo Mecha Color Chipping Brown. I used my own experience to dictate much of the chipping, having ridden in a few APCs in my Army days. Details were picked out in various colors – black, red, and green primarily. After gloss coating, a shade of Vallejo Weathering Effects Petrol Spills was applied, and then layers of streaks, grime, splotches, and stains were added with several Vallejo Washes, Weathering Effects, and Pigments. A final matt coat of Mechacolor Matt Varnish sealed it all in.
Exterior
Assembly of the hull and turret was trouble-free. The fit of all of the Citadel kits I’ve built has been good, with very little in the way of troublesome gaps. In the few areas that there were some small fit issues, an application of Mr. Surfacer worked to turn it into a panel line, or a quick smear of putty, and some sanding, easily smoothed it out.
On this build, the join of the outer track sections to the inner hull left a bit of a hairline crack. For some reason, the bug bit me to handle it a bit different. I’d make “weld seams”.
Now, I have no idea if this fits the lore of the 40K universe. But I felt the rule of cool would prevail – I thought it would look cool, and that was enough.
Playing With Fire
Stretching a bit of sprue over a flame, I cut off sections of the stretched plastic to roughly fit the areas to be filled. Setting them in place, I applied a generous amount of Tamiya Extra Thin cement. This would accomplish two things. First, it would get the plastic set firmly in place. Second, though, was the more important need to melt the sprue.
Tamiya Extra Thin cement is a welding glue. It literally melts the plastic, and when clamped together, joins the two surfaces with a strong bond. For simulating weld beads, however, it does something else.
Once the applied piece of sprue had softened up a bit from the glue, I used the back of my hobby knife to gently apply pressure, working at an angle to the sprue itself. By pressing the knife into the sprue in literally hundreds of small indents, side by side, I was able to create the look of a weld bead, all along the crack. (Armor modelers are likely very familiar with this technique.)
Thus I not only sealed the gap, but I was able to add some visual interest as well to the surface.
Priming
With everything assembled into the basic components, the model was ready to be primed. I did leave the tracks and sponson guns separate, to make later painting easier.
All of the Space Marine vehicles I have built thus far were in the blue color of the Indianapolis Colts, sometimes referred to as “Ultramarines”. 🙂 This time, I decided to choose a different chapter.
As I know little of the 40K lore behind each chapter, the decision for the overall finish was based more on color than any thought of who the Space Marine chapter was. The box photos showed a red Predator from the Blood Angels, which I’m guessing my also be a biker gang. And the ridiculousness of a piece of tactical equipment being painted bright red had some appeal. While it has little value for camouflage, it is a fun color to weather – so Blood Angels it would be.
As I wanted the color to remain fairly strong, I knew that priming in black or gray would not work. Not only would it greatly desaturate the base coat of paint, it would also be quite a pain to cover. While adding red to any color can quickly warm things up, red is not always the best color for coverage.
White primer would of course lead to a strong, bright finish. But coverage would again be an issue. While black or gray could be counted as “pre-shading”, white would simply need coat after coat of red to get full coverage.
A Spanish Solution
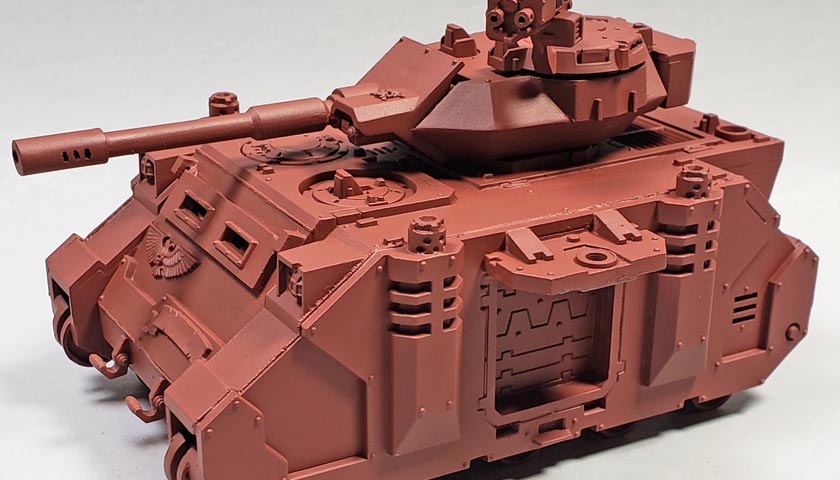
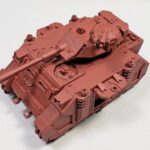
I thus opted for a small bottle of primer I’d had sitting around for a while… Vallejo German Red Brown Primer. The bottle had come in a set of rust effects, and aside from using a few drops simply as rust colored paint, I’d not used it for the intended purpose – priming. But I knew using this as the undercoat for red would result in a strong red color, and would not be difficult to get good coverage over.
Applying the primer through my Badger Patriot’s .5 nozzle, I was very impressed with how smoothly it went on. Unlike the Badger Stynylrez Primer I normally use, the Vallejo product showed almost no tip dry. Aside from cleaning the needle a time or two with my thumbnail, it sprayed very nicely. And I thought the primed Predator looked quite cool in the red-brown color.
I’m not ready to toss out the Badger product by any means – I really like it. But this experience with the Vallejo primer was positive enough I will be trying some additional colors for comparison.
Next Steps
When the Predator comes back up in my work calendar in a few weeks time, I’ll be painting and weathering the beastie. I plan to do a little research into Citadel canon colors for the Blood Angles, and then see what red colors have in my existing paints that match.
Of course, the real story here is how pleased I am with Games Workshop, and the superb level of customer support they provided. Even though my situation was very much outside of the norm, and I would not have been upset had they said “sorry, we can’t help”, the fact that they did has really had an impact on me. I already enjoy building their kits, but to know that they stand behind their products in such good fashion engenders great loyalty.
To Games Workshop, and specifically the kind person who I had the pleasure of exchanging emails – thank you!
I can say without reservation that 10-year-old Jon is quite excited that his toy now works. And that no socks or scarves were involved. 😉


Leave a Reply