“Jon. JON. JON!“
I was startled back to reality by my teacher’s ever louder calls. I looked around the classroom. Kids were staring at me. A few laughed. The teacher walked over, looking down at my desk.
My handwriting worksheet was adorned with all manner of star fighters, diving, spinning, climbing. Here and there were explosions, or dashed lines that indicated laser fire. Several of the space fighters had speech bubbles rising from them, with various exclamations written in a youthful comic book style. “Look out!” ” I see him!” “Roll left!” The banter was simply that gleaned from all manner of TV show, but on the battle taking place in two dimensions, it was quite serious.
The teacher’s raised eyebrow indicated a distinct lack of displeasure with my departure from planned educational schedules. Picking it up, she looked at it briefly. A glance back at me, then a bit of that warm smile.
Turning, she walked back to the front of the class, and began to continue her discussion of the importance of good handwriting. Taking another worksheet off of her desk – this one void of space battles – she returned to my desk, setting it in front of me.
Back to work, I suppose.
Later, as I was leaving for the day, headed to the bus, the teacher called me to her. Of course, this thrilled me. I had the worst crush on her. I was quite sure if she could just wait a few years until I was old, like 19 or so, we could be happily married and she would find me quite the suitable husband. Aside from getting off task and drawing space battles now and again, I was generally a good guy. I could kick a football very far, and dogs always liked me. What more could she want?
But 10-year-old Jon was not bold enough to profess his love.
“Here’s your drawing Jon. You put a lot of hard work into it, and it’s very nice. I just wish you’d do that during art time – not handwriting.” Her smile made me a bit weak in the knees. She hugged me, and walked me to the bus.
The Mk. VII Viper
In previous builds of the other Moebius Battlestar Galactica Vipers, I wasn’t too impressed with the cockpits. Out of the box they are very basic. I think of the three, the Mk. II probably had the best overall look. This Mk. VII seemed to be the most barebones of them. Of course, I’ve seen quite a few wonderful builds that went to great lengths to apply aftermarket and scratch build additions, and the result was quite good.
As is usually the case though, my goal for this model was simply to squeeze out what I could from the kit parts.
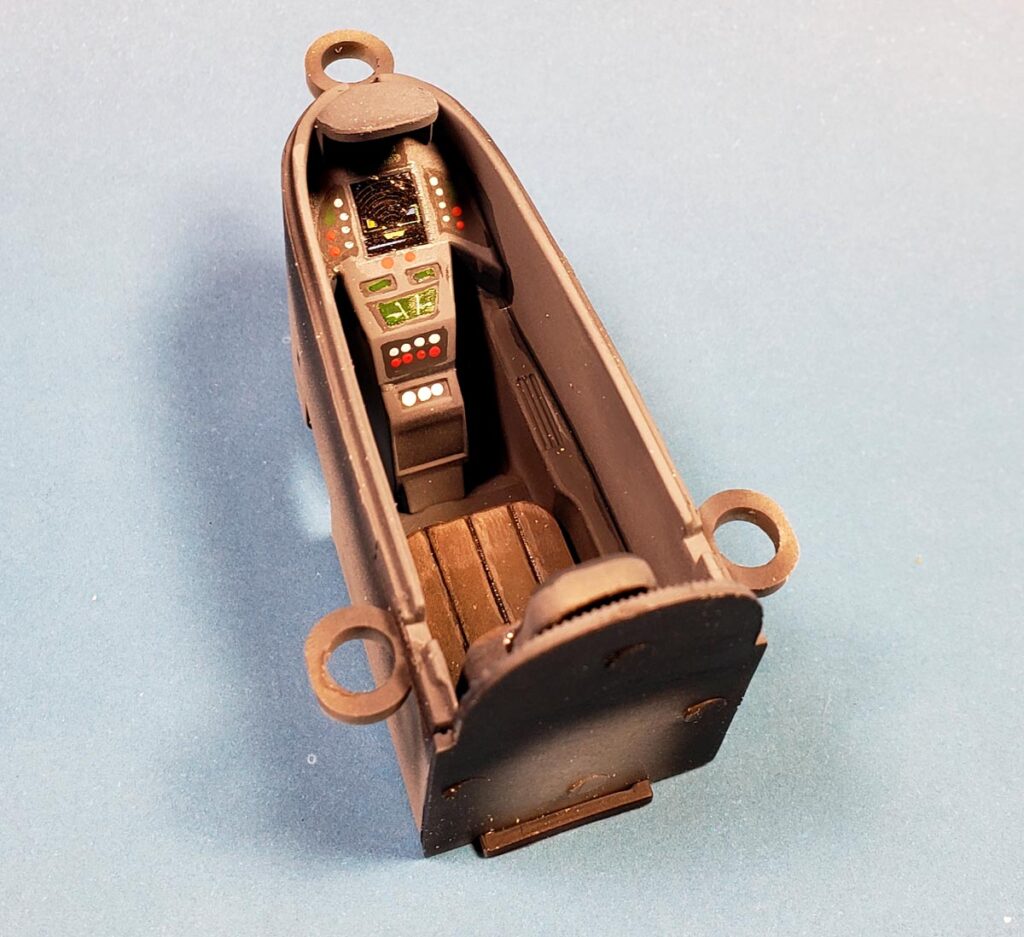
The cockpit consists of a “tub” that has nothing more than a few recessed areas for detail. The seat has some recesses to make it look like cushions, and the rear wall has additional recessed lines that essentially amount to texture. The pilot was less than stellar.
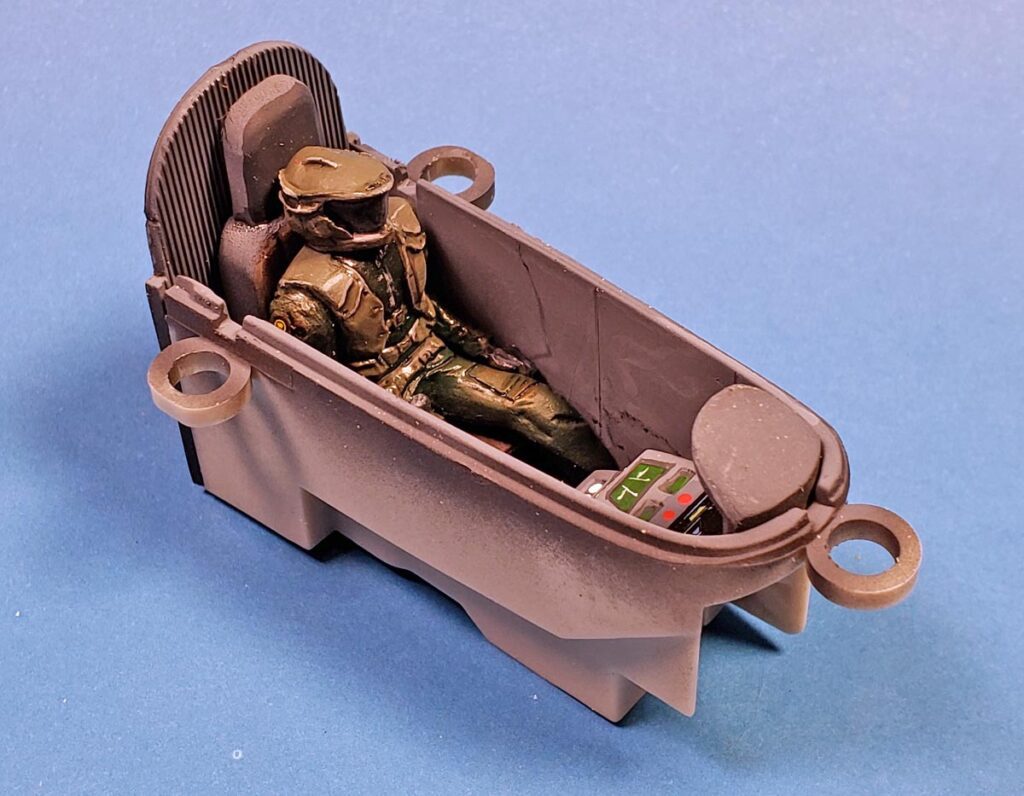
On the Viper Mk. I, I’d built the model with a closed canopy. The pilot on tha tone looked slightly better, so I thought I could make that work. The Mk. II’s nicer cockpit, but awful pilot, dictated an open cockpit build. For this Mk. VII, a poor cockpit and pilot dictated a lesser of two evils approach – a closed cockpit with some hand painted detail. And hope for the best. 🙂
After priming, everything was painted in Tamiya’s XF-63 German Gray, and then a slight gradient was built up towards the upper cockpit areas using XF-66 Light Gray. I suppose I called it “giving it a sense of depth”, but the end result looks like a balding, middle-aged man painted a gradient. 🙂
I spent way too much time painting the seat pads in a graduated leather color, using Vallejo’s Leather Brown. Many thin coats were layers on top of each other, each successive coat starting further away from the shadow, and the brush stroke going towards the highlight. I really enjoy this method of painting, and did it more for practice of the technique than any thought that the eventual buyer would peer in and think “my, what a nice gradient!”
A Brief Philosophical Departure
One of the things I try to do in each segment of a build is identify something specifically to work on as a means of growth, and improvement. It may be refinement of a new technique, introduction of an old, or perhaps the use of a new product.
It’s very easy to fall into the trap of simply doing the same thing over and over. There’s a comfort level that comes with that, and thus a very natural trap to get in. But doing so doesn’t promote growth as a modeler. I learned this the hard way. As Lincoln Wright says, “you don’t have 25 years of experience, you have 1 year of experience 25 times.” (Or something to that effect… 😉 )
One of the areas that I’ve identified as a weak point for me is brush painting. While I have no problem applying base coats in a reasonable fashion, the more advanced blending and layering still elude me. So I saw the leather seat as a natural way to work on a specific skill. The identified outcome then was not so much a nice seat, but rather further exposure to, and growth in, a technique I’d like to develop.
Take the time in your next build planning stage (you DO plan your builds, right? 🙂 ) to identify areas of the model that could have a specific technique or product applied. Specifically target things you may not be as comfortable doing, perhaps something you even avoid. Don’t let fear of “ruining the model” hold you back. Paint can be stripped. But more importantly, a willingness to fail breeds experience.
Back To the Cockpit
The interior detail consists of a few recessed areas that I suppose represent display panels, and a single decal that looks a bit like a radar display. I painted in the recessed areas, and added the decal. A #2 round brush was employed to paint additional display panels by hand. I wasn’t too worried about being straight or neat with it for two reasons. One, I knew it would be viewed from no less than a foot away most likely, through a curved canopy piece. Second – my hand shakes. It is what it is.
A toothpick and some red and white paint were employed to add buttons. Green paint was added to a few of the display areas, to simulate display panels. A few white lines were painted into the green display areas, in an effort to simulate space things.
The pilot was a bit rough-looking. Having never seen the new Battlestar Galactica series, I had to head to the Googles to see what color the uniform needed to be. Unfortunately it turned out to be a shimmery greenish bronze. After several attempts at “shimmery” – which I apparently can’t do – I settled for “random green with bronze highlights”.
I suppose figure painting needs to be next on my list of developmental goals. 😉
In the end, it looked pretty much like a simple, generic cockpit in a space flying thing. Good enough for me.
Assembling The Parts
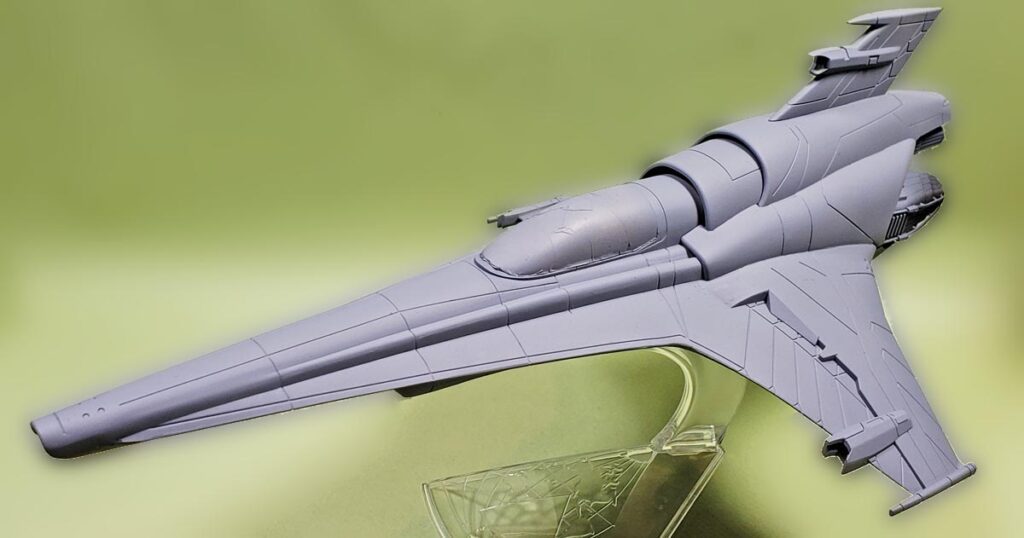
In both of the previous Viper builds, I’d left key components off during priming and initial painting to ease the process. Test fitting on this one, and an evaluation of the monotone paint scheme to follow, showed that building the entire model was feasible.
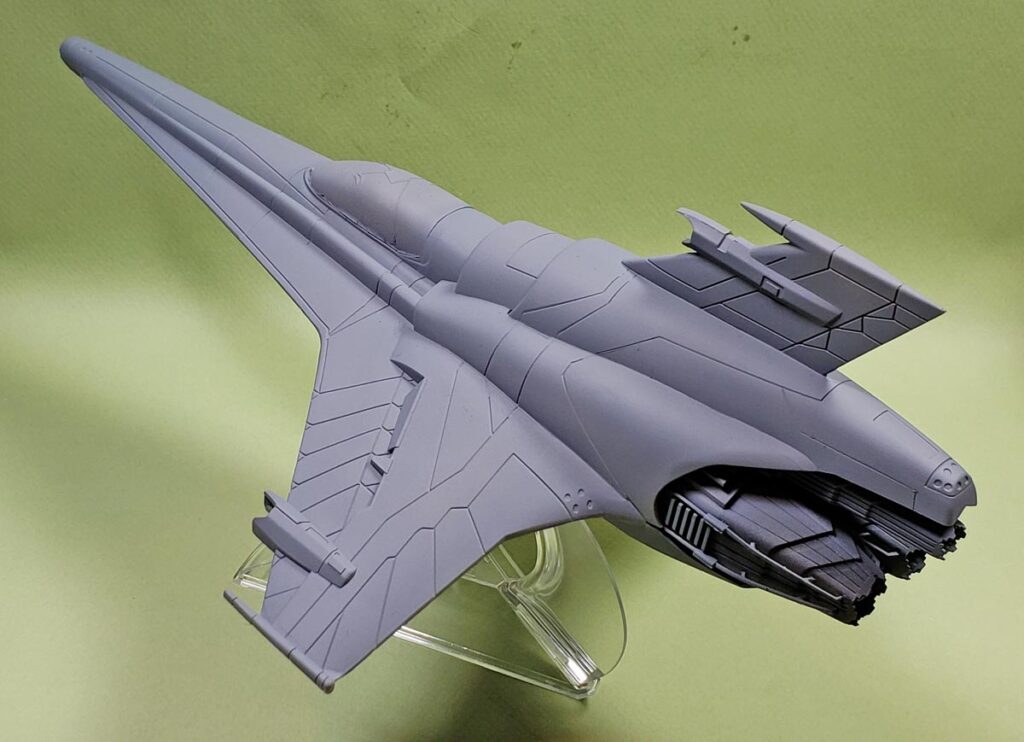
The model has three major subsections – the forward upper fuselage/wings, upper aft engine cover, and lower fuselage wings. The engines are a quick assembly, and I fitted these into the lower aft fuselage/wing section. The cockpit mates neatly into the forward fuselage section.
The path to success for any of these Moebius kits is test fit, adjust, test fit, adjust… over and over. I suppose that is the case for any model, but it is absolutely essential for these. As part of my pre-planning in a build, I use a Sharpie marker to identify anything that may cause fit issues, and get rid of them. There were a large number of what I call ejector crowns – large protruding stubs of plastic. A few areas had very slight bumps and dimples, but there were removed too. Being extra zealous in the prep will benefit later.
Filling Seams. Lots Of Seams.
Once fitted together, things actually lined up reasonably well. All of the major sections fitted together well, with the upper engine cover being especially tight. The fit of the lower section to the upper did leave a gap around the perimeter. Moebius smartly engineered this join so that the upper fuselage/wing section wrapped around a bit to the lower, forming a nice, neat edge. But where the lower section then meets it, the resultant mating needs addressing.
Around the perimeter of the model, I simply decided to treat it as a panel line, and filled it with Mr. Surfacer, sealing any cracks, and wiping away the excess with a cotton bud soaked in alcohol.
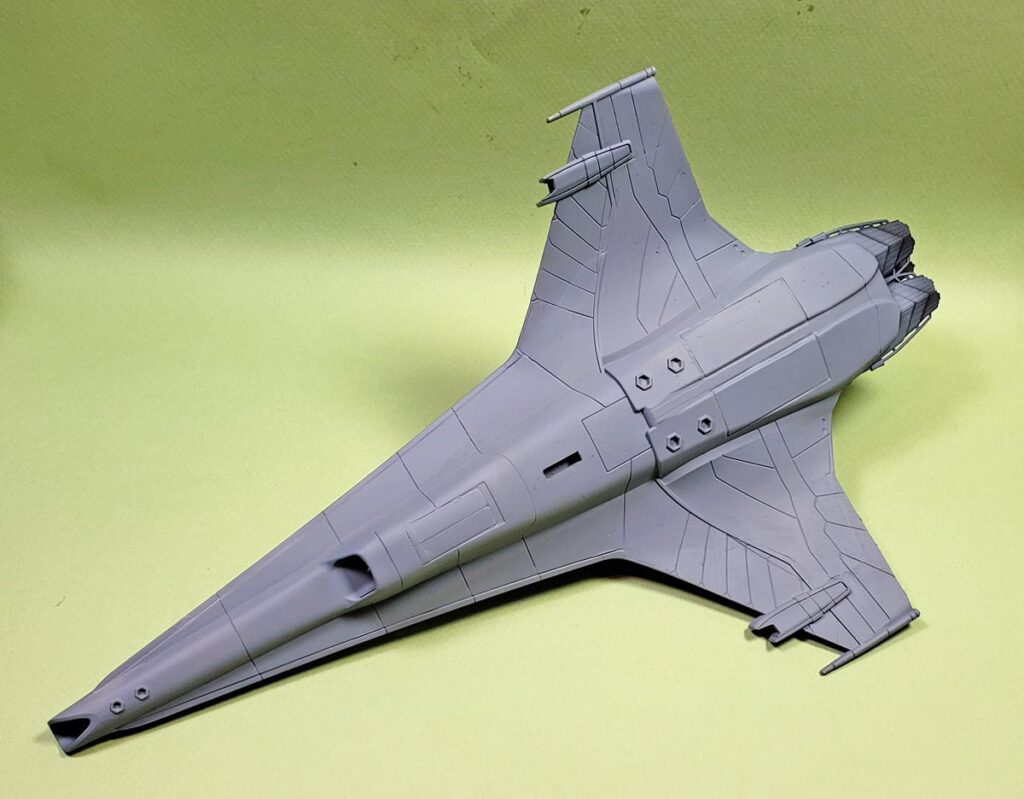
A few seam lines on the lower wings could not be simply passed off as panel lines. For these areas, I used Tamiya Basic Putty to fill them in, rescribing the areas once smooth. Landing gear doors, and virtually every other join on the model needed some form of treatment to fill gaps that ranged from “hairline” to “Alfred E. Neuman “. If you build the model, examine every square inch of the airframe. It’s easy to miss a few.
Time To Prime
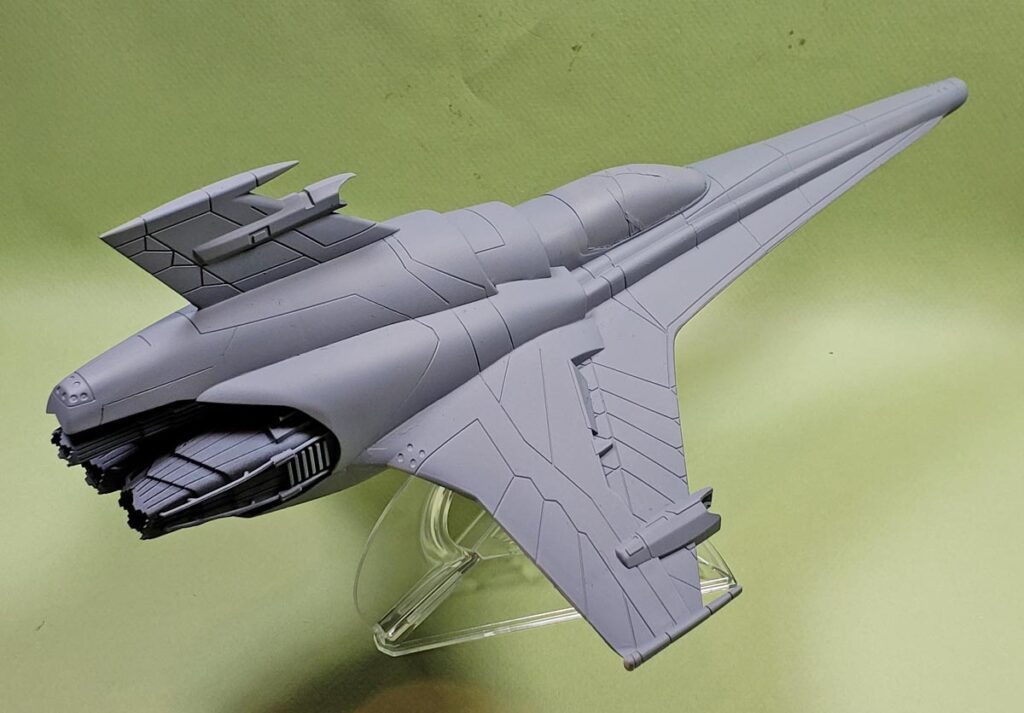
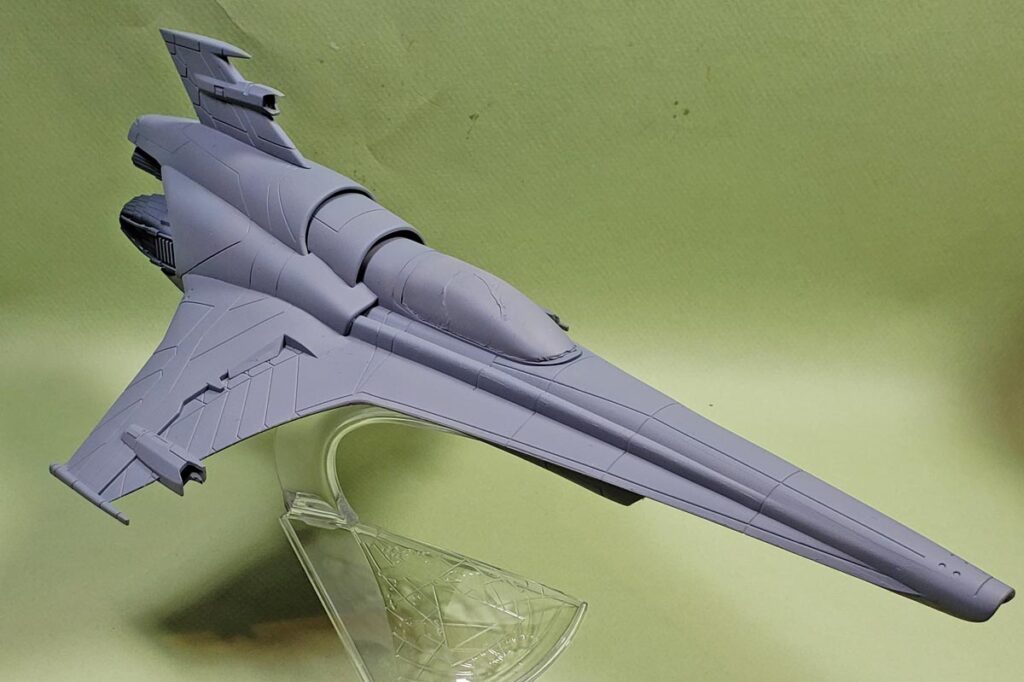
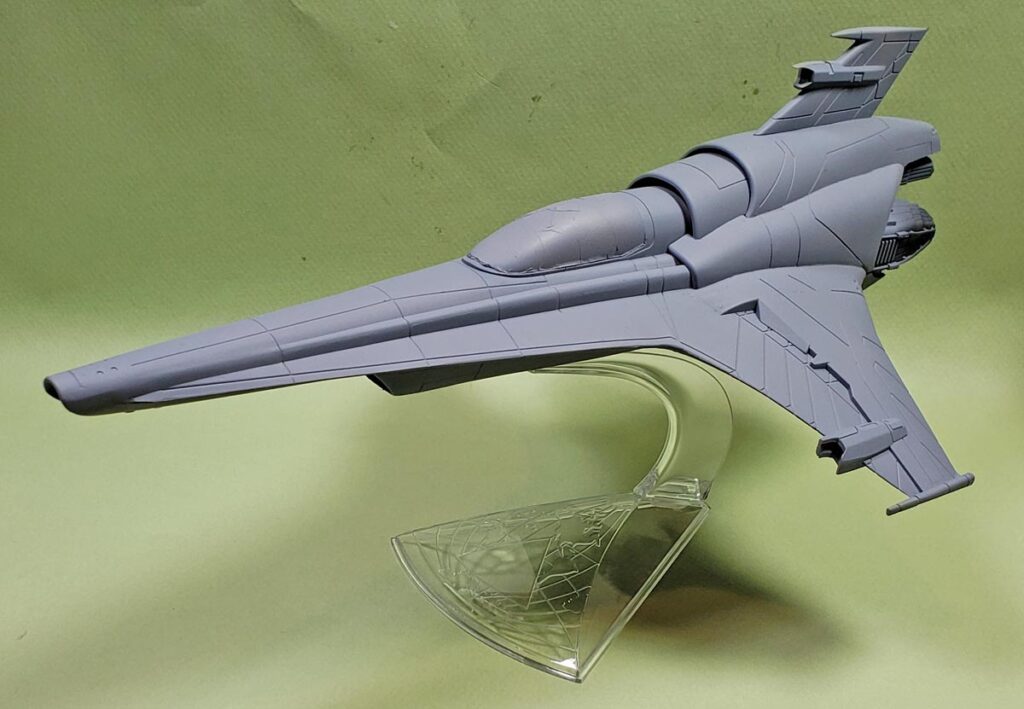
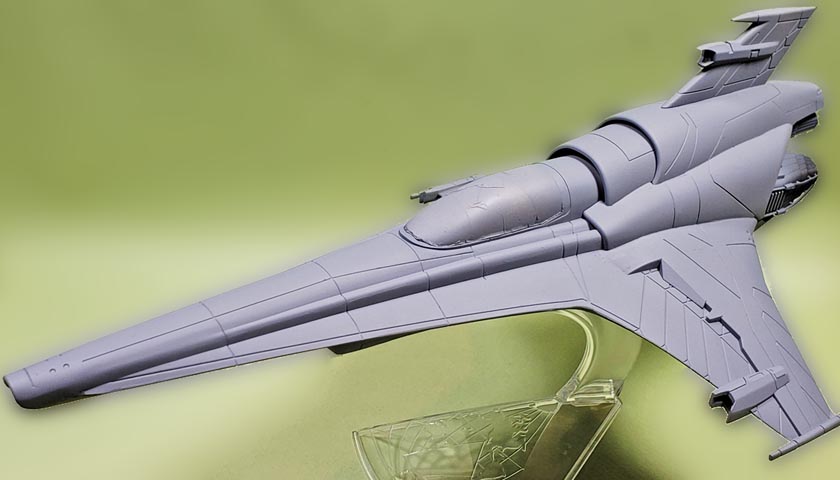
The fit of the canopy is very, very good. It takes a bit of pressure to click it into place, but once in place – it’s there. As it has no framework cast in, I simply masked it off with Parafilm, trimming right down to the edge of the clear part. A cotton bud soaked in hot water, served perfectly to burnish the waxy Parafilm down and ensure a good seal.
Before closing the fuselage up, I’d primed the engines and panels surrounding them in black. While the engine will eventually be a metallic silver color, I decided that the parts that are recessed into the fuselage would be best colored black. Any areas that will be visible can be painted by hand, masked, and then the fuselage sprayed. Areas I can’t reach by hand will be far enough back that the black will simply appear as shadow.
Priming was done with Badger Stynylrez Gray primer, through my Badger Patriot 105. This is a great acrylic primer that goes on very smooth, and dries quickly. It does suffer from a bit of tip dry though, so I always make sure to clean off the airbrush needle with my thumbnail every few minutes. I’ve heard some folks talk of thinning the product to ease the issue, but I’ve always avoided that. A primer is not just gray paint – it bonds in a different way, and provides a surface for later applications to grip to. So I’ve always thought thinning reduced a primer’s effectiveness when it came to acrylic primers. Your mileage may vary, of course.
Ready For What’s Next
Writing so much about the lack of cockpit detail, poor pilot sculpting, and loads of seam lines may make it appear as though I’m not enjoying the kit. It’s actually quite the contrary – I’m very much enjoying this build, despite the challenges. While there are a few, they’re easily overcome. And the fact that the model simply looks so darn cool makes them worth tackling.
While it’s not blessed with the classic look of the Mk. I, or the “throwback nod” of the Mk. II, I think this Mk. VII kit has the look of a space fighter I would have drawn as a kid. Lots of odd angles, big engines, and a prominent canopy for the pilot to peer through. Looking back, I suppose most of the drawings were some versions of multiple triangles, joined at angles. This model is exactly that – a triangular shark slicing through space.
So 10-year-old Jon is quite happy with the progress, and looking forward to the painting and weathering. And as long as I keep that guy happy, I know I’m having fun.
And that’s what modeling is about, right? 😉







Leave a Reply