I think one of the saddest things I see as the number of trips I make around the sun has increased is people’s loss of imagination as they get older. It’s certainly not everyone, of course. But many move so far into the “adulting” spectrum of grown-up-edness that they lose their sense of wonder and fun.
Quite often when my peers see my work, they’re not sure what to think. While they appreciate the effort, I suppose, they tend to get the look of a dog staring at a wristwatch. The head tilts, there’s a pause, and then something is expressed that amounts to “that’s nice, but why?”
Maybe I just never grew up, or lack a certain level of maturity. But it makes me shake my head, and pity them a bit, to see how that aspect of their life has gone away.
No Loss Here
I have a healthy sense of imagination. Quite often as I am working on a model, or even just thinking about the model, my mind will take me away and put me in the model. I can picture myself riding in it, flying and darting around. The scene plays almost like an old Hollywood movie in my mind’s eye.
In many ways, it helps me plan a model build. By allowing that free roaming, child-like imagination process to “rule the roost” for a brief bit, the plan of paint and weathering is actually visualized. That scratch of in the paint, or the stain from that panel, is not just something added to the model. Rather, it is essentially re-creating an event that took place in my imagination.
Perhaps it is a bit odd. My wife quite often tells me I’m an odd man. Hopefully that is part of what she finds loveable about me though. All I know is I just hope I never lose the sense of wonder and joy that comes from imagination.
Getting To The Model
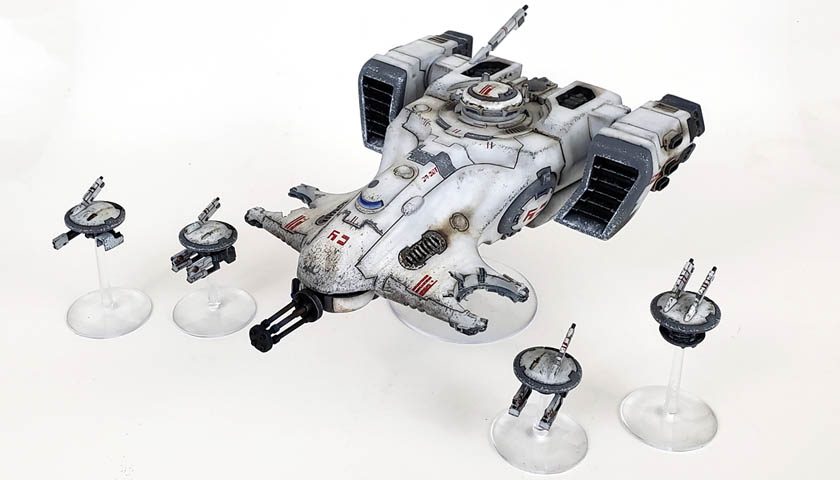
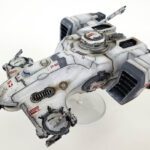
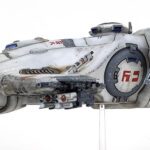
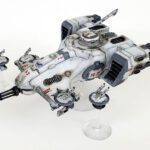
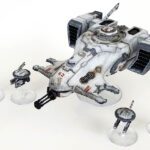
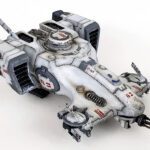
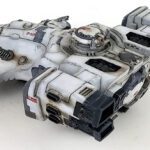
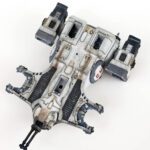
After getting the base paint on the Devilfish, I briefly considered leaving it clean. I really liked the look of it. The combination of the stark black and white, with a little gray and a touch of red, gave me pause to smile. Yet as I looked at it, the thought occurred to me…
Clean models? We don’t need no stinkin’ clean models!
And then I laughed and laughed. 😀
Big Weathering Decisions
While recent build had featured mostly (or all) acrylic weathering, I decided for this one to go the oil and enamels route.
Weathering white can be really, really tricky. While it doesn’t take much color to make it look dirty, the trick is to make it look dirty, yet still have it “read” white. It can be very easy to end up with a model that looks like it has sat on the shelf of your crazy aunt Maude’s house for 20 years… suffering through a 2-pack a day unfiltered Camel cigarette habit.
Oils and enamels, because of their long working time, can be blended back and toned down with a great degree of control. Even the most stark stain can be knocked back to merely a light smudge.
So the choice of products was very purpose driven. While the drying times would be longer, the trade-off in control would be worth it.
Getting To Work
The start of the weathering process was adding some panel line washes. I initially used some Mig Productions Dark Wash, which is a sort of grimy brownish/grayish/smude-ish. It’s not pure black, but definitely leans that way. Thanks to the exaggerated detail on Citadel kits, the wash flowed wonderfully around the model’s still glossed surface.
In panel lines, I left the wash full strength. Around raised details, I pre-wet the surface with odorless thinner, and touched just the barest drop of wash into it, allowing it to flow around the detail. The black areas received a wash of light gray, using some thinned Ammo of Mig Oil Brushers.
Once that dried, a few areas seemed a bit “grainy” in the panel lines. I touched those up with some strategic dots of Abteilung 502 Starship Filth. These dots were placed in unthinned, and then “smeared” through the panel line. Cleanup was done with a small brush damped with odorless thinner, to make sure the edges were still sharp.
Not Tau Many Chips, OK?
I first started the chipping with Vallejo Light Gray, applied with a sponge. I hoped the chips would be subtle by using this color. However, after a few dabs, I realized they were very subtle… so subtle they simply did not show up unless viewed from about 3 inches away.
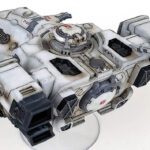
I called an audible at the line, and the formation shifted over to neutral gray, again using Vallejo. This was much more to my liking, as it provided good contrast, yet wasn’t jarringly stark. I focused the chipping more towards the front and bottom, as I surmised that these sections would receive the most abuse. After sponging chips on, I switched to a #0 liner brush to add in a few areas of larger brush chipping.
Additional “tiny chips” were added in using a mechanical pencil with a .5 mm lead. While appearing a bit shiny when initially added to the model, I knew that after being treated to a matt varnish coat, they’d essentially look neutral gray… and thus would fit in nicely.
The gray and black areas were chipped with white initially, but after seeing how stark that was, I switched to Vallejo Sky Gray for the rest of those areas.
Smudges And Stains
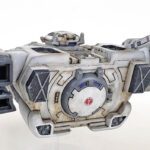
For the smudges and stains, I wanted a few areas to be really dirty, as white can pick up so much grime. But I also wanted some areas to remain almost pristine white. While that may not be as realistic, I felt it would help sell the notion that this vehicle was at one time a nice, clean white.
I resorted to the A502 Starship Filth and some Winsor and Newton Raw Umber for this step. I started with just the barest touches of it, applied in panel lines, and then streaked back and blended. While I wanted a dirty, grimy look overall, I knew that stains can build up fast on white. Thus, taking the process slowly, and continually examining from normal viewing distance, would be critical.
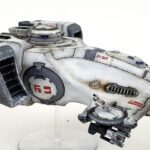
After betting those initial stains on, I added deeper and darker streaks. Focus was given to sections that looked as if they might have some fluid in or around them, and would be subject to streaking. Other areas received attention to simulate external moisture – rain and so forth – and the grime that collected in those areas.
Throughout this process, I was quite pleased with the decision to use oils and enamels. The long working time allowed me to really blend, streak, refine, and generally fiddle around with the look until I got it to the TLAR (That Looks About Right) standard.
More Grimy Stuff
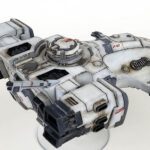
On the undersides and front, I felt that an application of splatters would really help. I thinned out my oil paints a bit, and getting them on a larger brush, flicked the bristles against a toothpick. it’s best to do this on a piece of paper towel first, so you can judge the pattern and intensity. I concentrated this step on the nose and front underside, though I did apply some more highly thinned splatters in other areas. These turned out to be a little too subtle, as later steps pretty much blended them away.
I also used the same colors, highly thinned, to stipple on some smudges around the model’s exterior, concentrating on vents, access panels, and any other area I thought would get some general grime. Once again, the oils proved very useful for this. The smudges could be stippled on in fairly heavy fashion, and then toned down greatly after a few hours drying time by stippling with a clean, dry brush.
A few areas received some drybrushing with the oils, as I felt a few corners and angles needed some “assistance” to help them visually pop out a bit. I’d seen Lincoln Wright of Paint on Plastic do this once on a Maschinen Krieger kit. He’d simply drybrushed the white armor on the model with black, and it looked awesome. So stealing borrowing a page from his book, I followed suit. I really liked the result.
Final Steps
At this point, I knew I was getting close to the end. I rarely have a fixed “vision” of what finished looks like. Rather, I know I’m near the end of the build, and treat it as a variable “zone”. Once entered, I begin to view things very subjectively, trying to find the “that’s enough point”.
In specific areas, all of the above steps were repeated, in very miniscule fashion, adjusting the final look. This is a great time in the build to add some layered effects around he model, as this helps increase the depth of the finish.
When my eye told me “that’s it”, I drew it all to a close with some final airbrushed stains, and a matte coat to flatten it all down.
Time For The Real Fun
Once all was finished, the best part of the build could start. Just as I did as a kid, I pick the model up, and really examine it. Not as though it were a model, but imagining I’m right there next to it, as though it were real. I look for areas that I’d step up on, and imagine climbing around on the outside.
Eventually it all leads to flying it around my ManCave©®™, all the while making various sounds of engines, weapons fire, explosions, and crew talk. In a weird way, the model never feels fully complete unless I do this. It is as much a required step in the build as assembly and painting. I’ve often wondered if it is the real reason I still build – to have a toy to play with.
While any model can fulfill the role of firing the imagination, I love the Warhammer kits because in so many ways they resemble the toys I had – or wanted – in my childhood. Some of them look like the things I’d draw in my paper and pencil battles. The wide variety of shapes, colors, and details can give anyone something to find that will draw them in.
Assuming they haven’t shed that spark called imagination in the travails and trails of life.
While this Tau Devilfish kit required a little work early in the assembly, it has evolved into one of my favorite 40K builds yet. If you’ve never built one, maybe take a look through the Citadel catalog, and pick one out.
The kid in you may desperately need it. 😉








Leave a Reply