It’s odd how humans can become attached to an inanimate object. We most often see it with kids. It may be a teddy bear, or some other familiar, comfortable toy. Yet even as adults, we often find ourselves giving an object a life of its own – even if we don’t intend to.
I’ve seen this frequently with my friends and their cars. While they might not coddle as if it were a stuffed animal, they definitely treat it as though it had some sort of sentient qualities. I suppose it’s not bad really, unless it gets to weird. “Hey, it’s just a car, right?” “SHHHH…. she might hear you.” 🙂
But Sometimes…
The affection we give to an object would be related to how useful and important it is to us, if I had to apply some amateur analysis. Looking back in my own life, I can recall a few examples.
In my late teens, I had a 1982 Firebird Trans Am. I didn’t exactly talk to the car, but I was quite wrapped up in it. Myself and that car were, in my mind, one thing. I thought it was awesome, and in my own immature analysis, felt it imparted cool to me.
Of course, the reality was that I was simply another 80s wanna-be rocker with a bad mullet and a nice car. 😉
Old Dependable
The inspiration for the color scheme of this particular model (yes, I will be getting to some model talk! 🙂 ) was a wrecked Somali Mig I sat in when I was deployed to Somalia in 1993. I’d always wanted to build that Mig-21, but in all these years I’ve never been able to. It’s hard to explain, really.
However, giving this Ammoknight the same scheme seemed almost therapeutic for me. As I worked on it, the model itself in a weird way dug up memories.
While I didn’t spend my time over there walking around in an armored fighting suit Maschinen Krieger style, I did put in a lot of hours in an M1025 Humvee. Day in and day out, we depended on it to get us there and get us back. And it did just that – it was always dependable.
More Than Conveyance

As far as Humvees go, it was fairly standard. The M1025 was a four seat hardtop, with a turret opening in the roof. The electrical system had been modified to be a 100 amp electrical system. The unit I was in employed loudspeakers, and those drew a lot of power. That modification helped us do our job.
It also had a distinguishing feature. The M0125 had a rotating turret ring, and various weapon and loudspeaker systems could be mounted to it. To work with our larger 450 watt loudspeakers, a simple metal adapter had been made that allowed the speaker frame to be attached. For some reason, once that adapter was in, it could not be removed. So recognizing my Hummer was easy to do. Among a sea of tan, green, and black, it stood out.
I spent many hours in it, sometimes in one of the seats, but most often I preferred to be up in the turret. I liked seeing things around me. And as much excitement (most unwanted) as combat can bring, there were long periods of waiting. Moving from this staging area to that staging area. Driving around on endless missions where nothing happened. Standing by, ready to go at a moment’s notice just in case something did happen.
Home Away From Home
Though the interior was not built for comfort, it was amazing how easily I could nap in it. Sitting in one of the back seats, I could wedge my flak vest up against the door jamb, rest my head over to one side, all the while cradling my rifle in such a way as to be ready for whatever happened.
We took many a meal in it too. Opening up one of the brown plastic MRE (Meal, Ready to Eat) bags, I’d sit and quietly much on whatever I’d been given that day. My favorite was spaghetti and meatballs. I also liked the dehydrated fruit packs. Pour in a little water, let it reconstitute, and if you used your imagination, it was almost like eating fresh fruit. Almost.
Of course, that Humvee provided shelter from the storms too. At times, that storm may be the elements, as hard rain showers poured down on us. Yes, it leaked a bit, and the doors were off. But it gave us some shelter to be partially dry, at least for a while.
And there were times the storms were man-made, and that old, reliable hunk of metal would place itself between us and the danger. The shelter in those times was even more welcome.
Finishing The Ammoknight
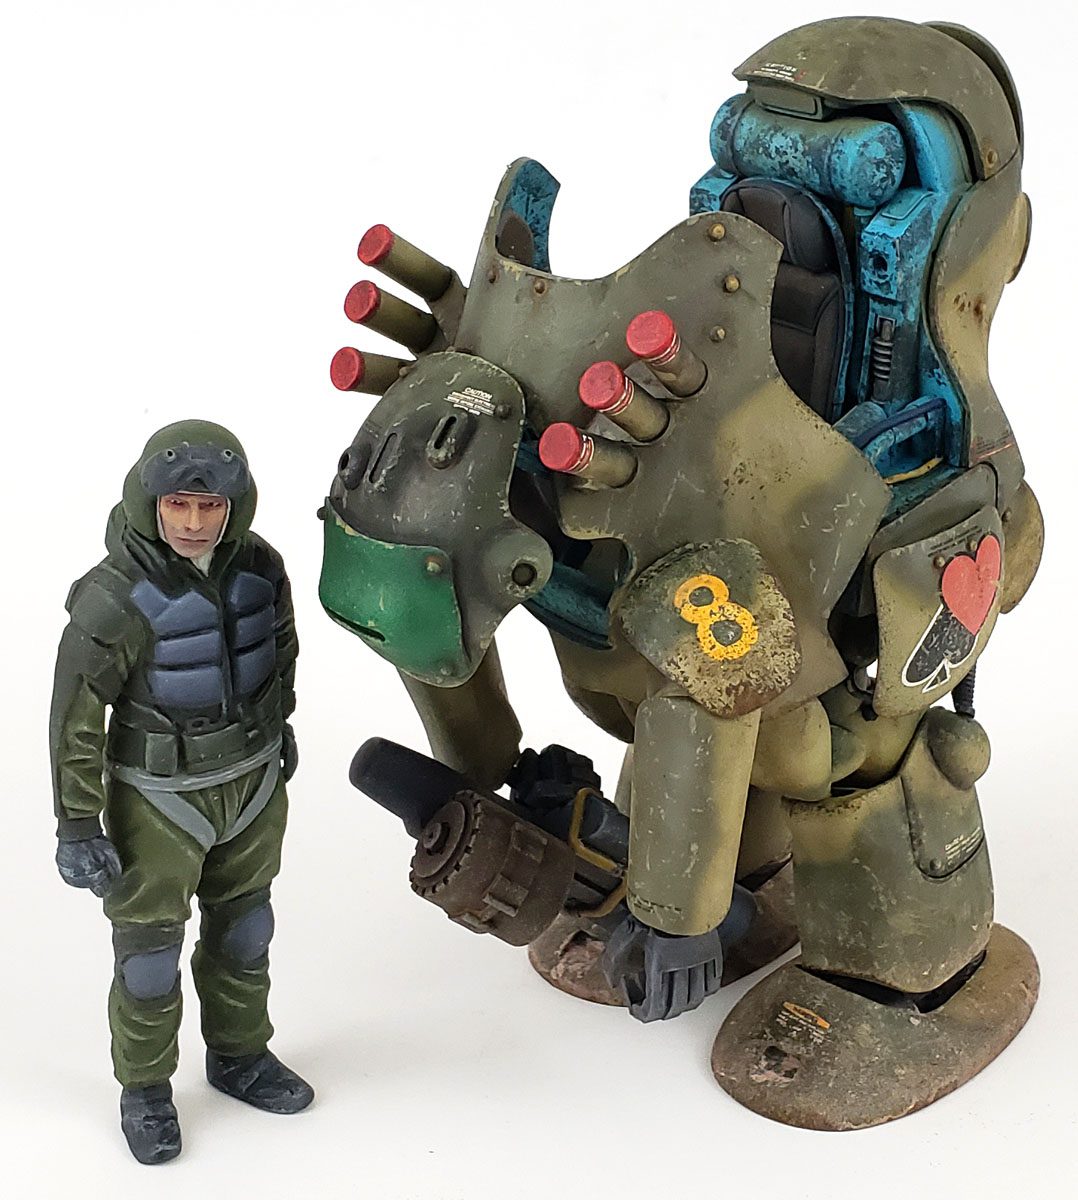
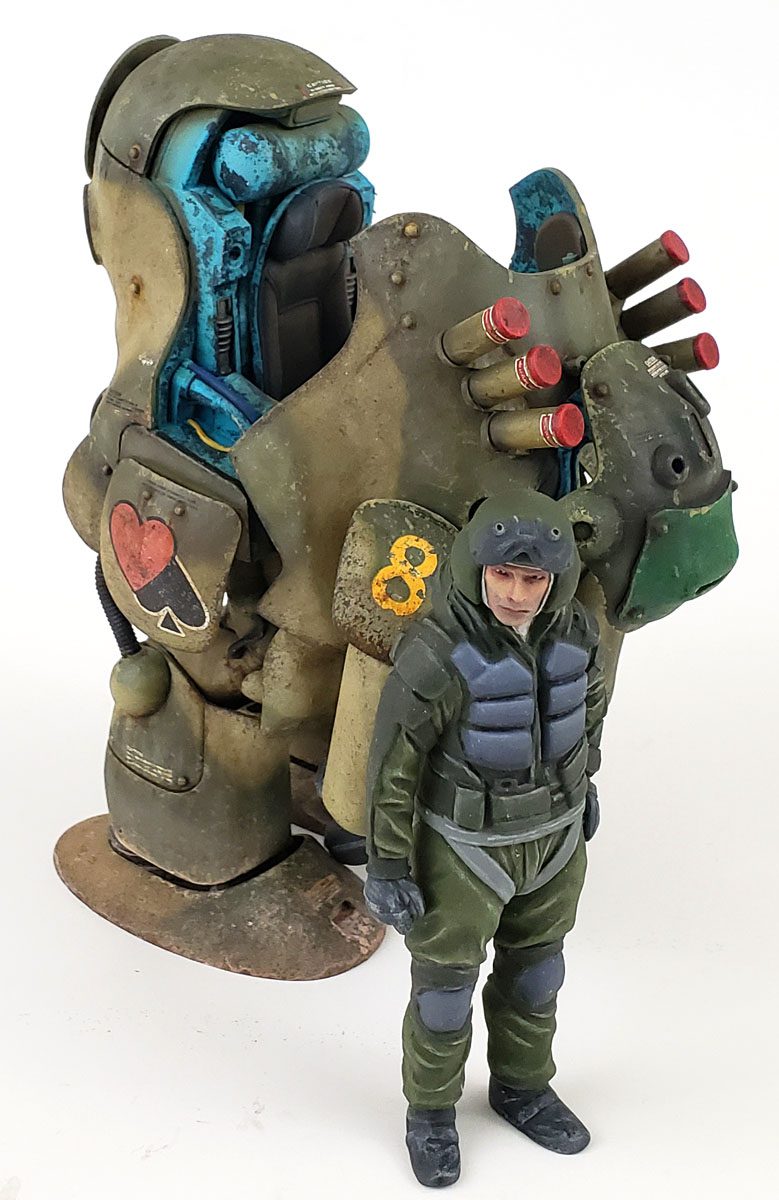
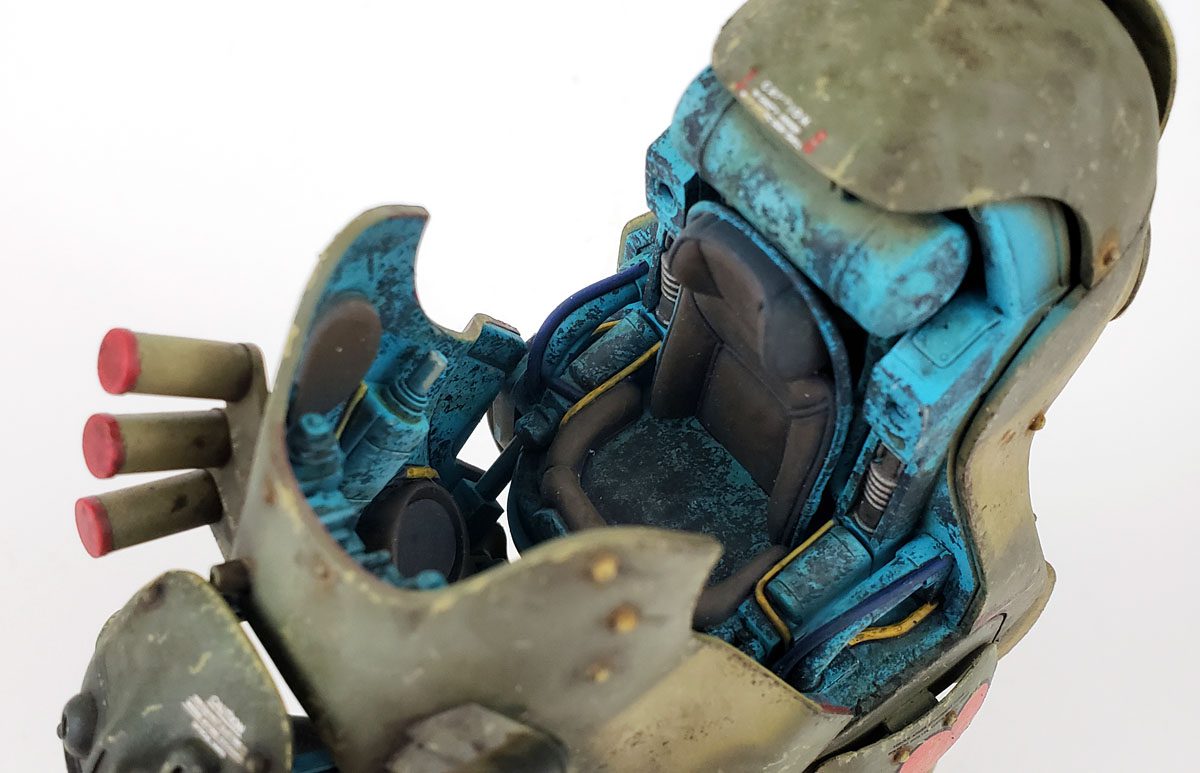
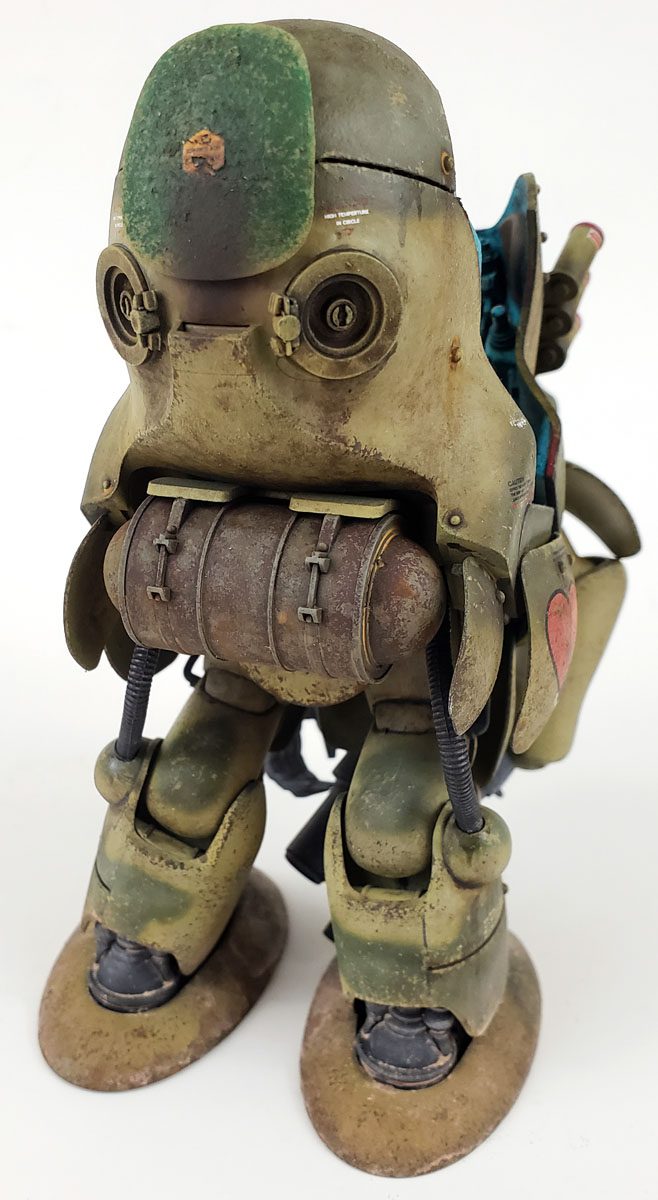
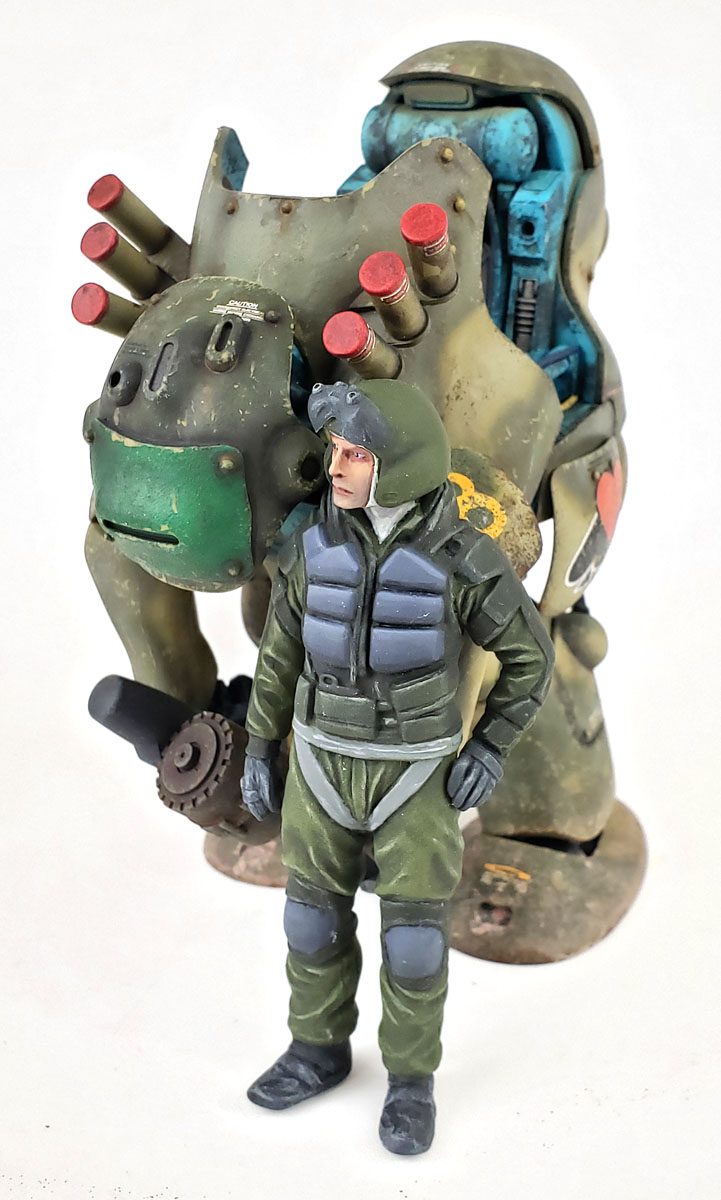
As I worked on the Hasegawa Mk. 44 Ammoknight, I began to think of it in terms of how the pilot might feel about it. Like I did in my Humvee, there would be times of sleep, and meals. Other times it would be a shelter from the elements. Some of the time, it would provide protection – and also be the point from which others would need protection.
The start of the post-paint process was adding a gloss coat and decals. I used Future as my gloss coat, applied in a fairly heavy manner to make sure that all the texture was completely covered. The kit decals were quite good, and settled in with an application of Solvaset. At first I was worried that they might take quite a few applications. But checking on them half an hour after a good dousing with the setting solution, they were practically melted into the surface, and looked pretty good.
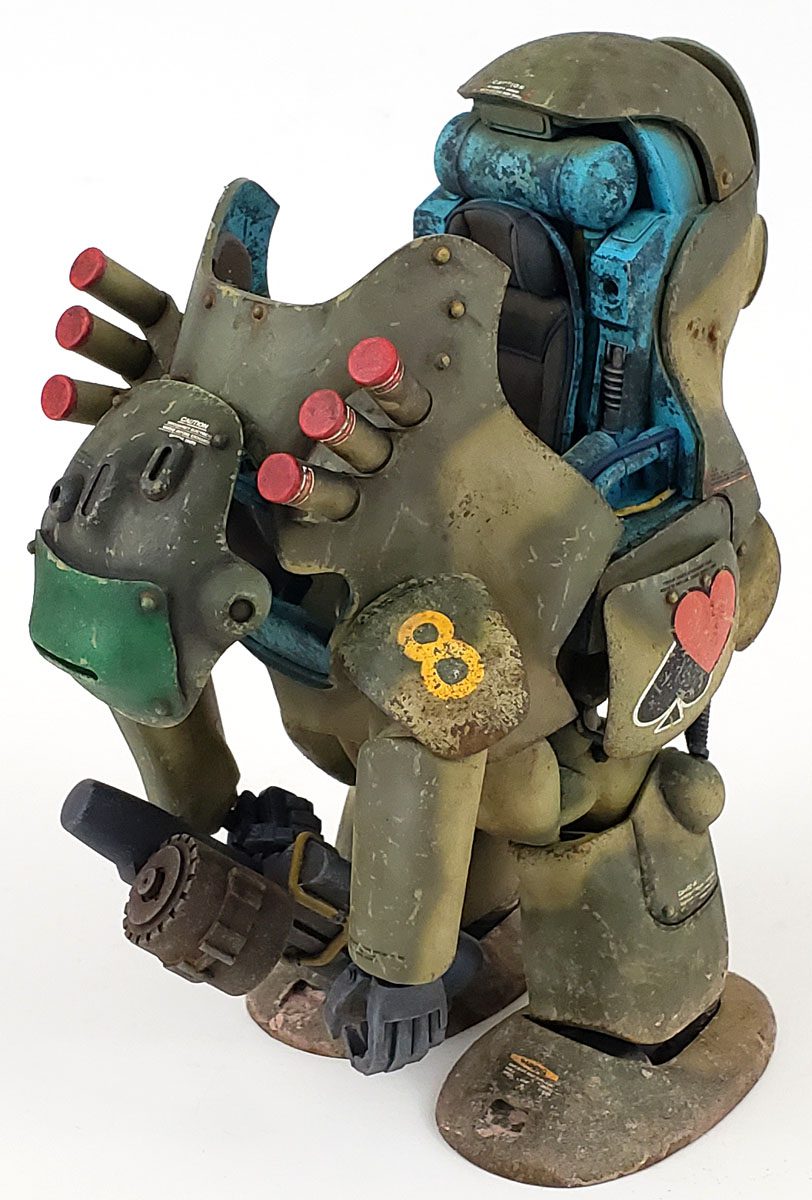
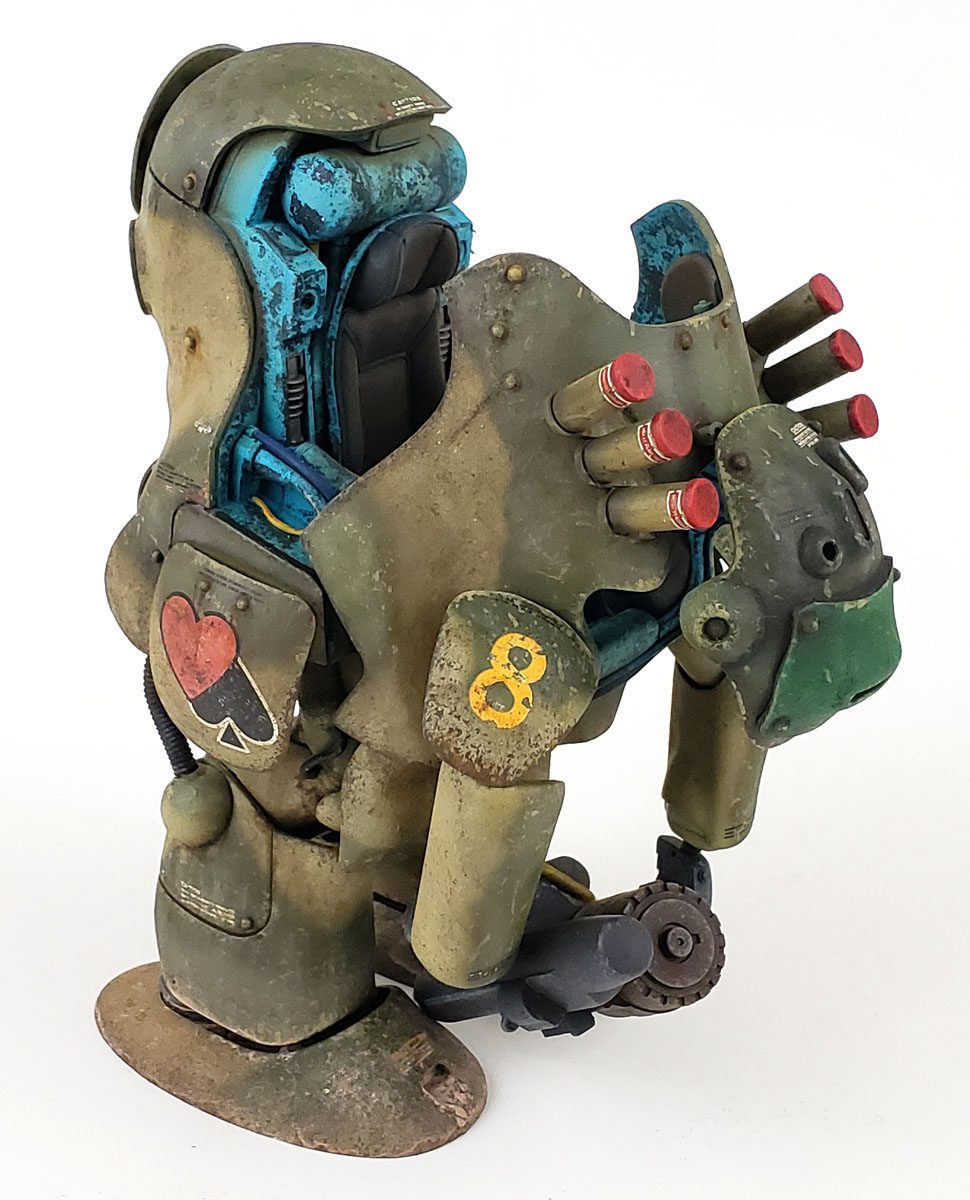
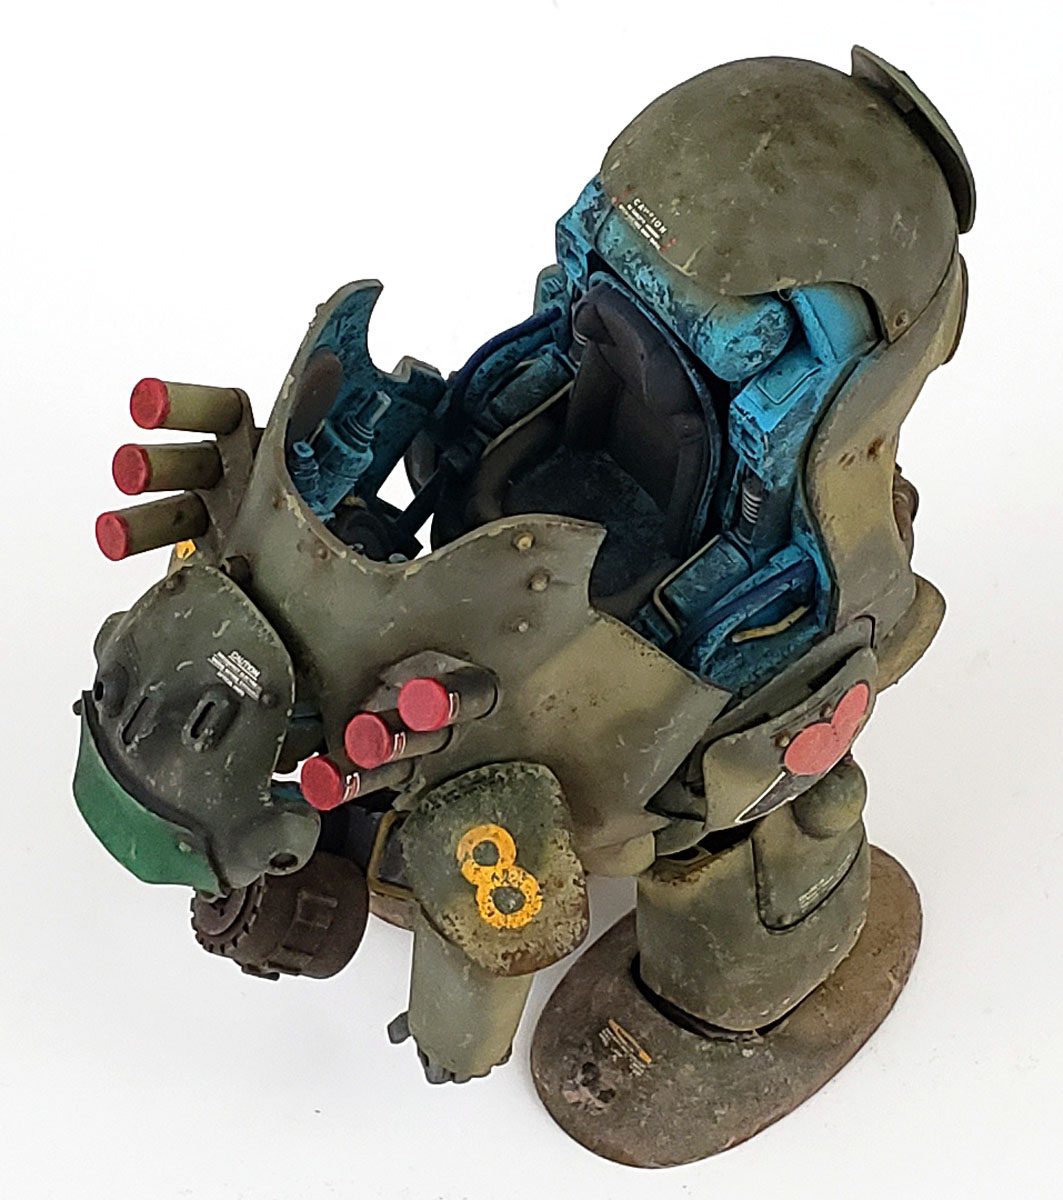
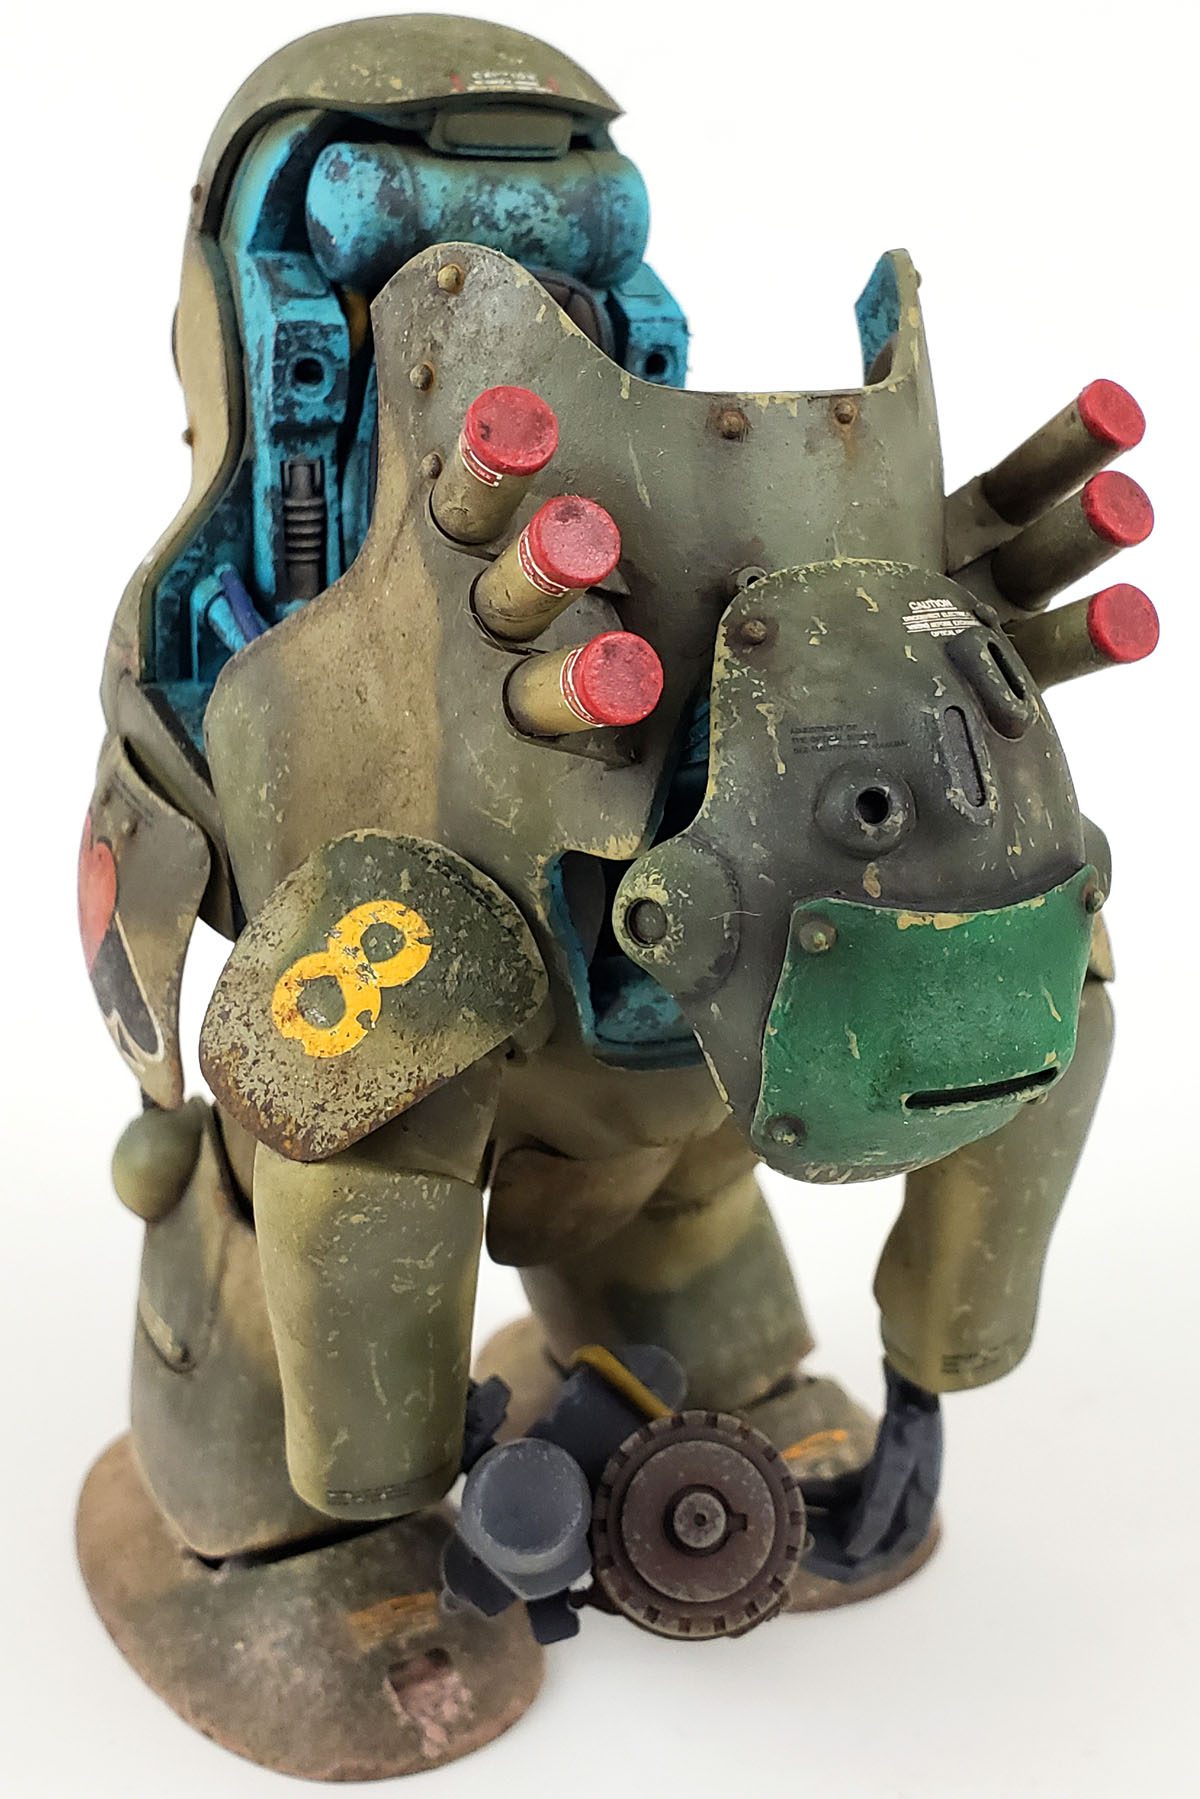
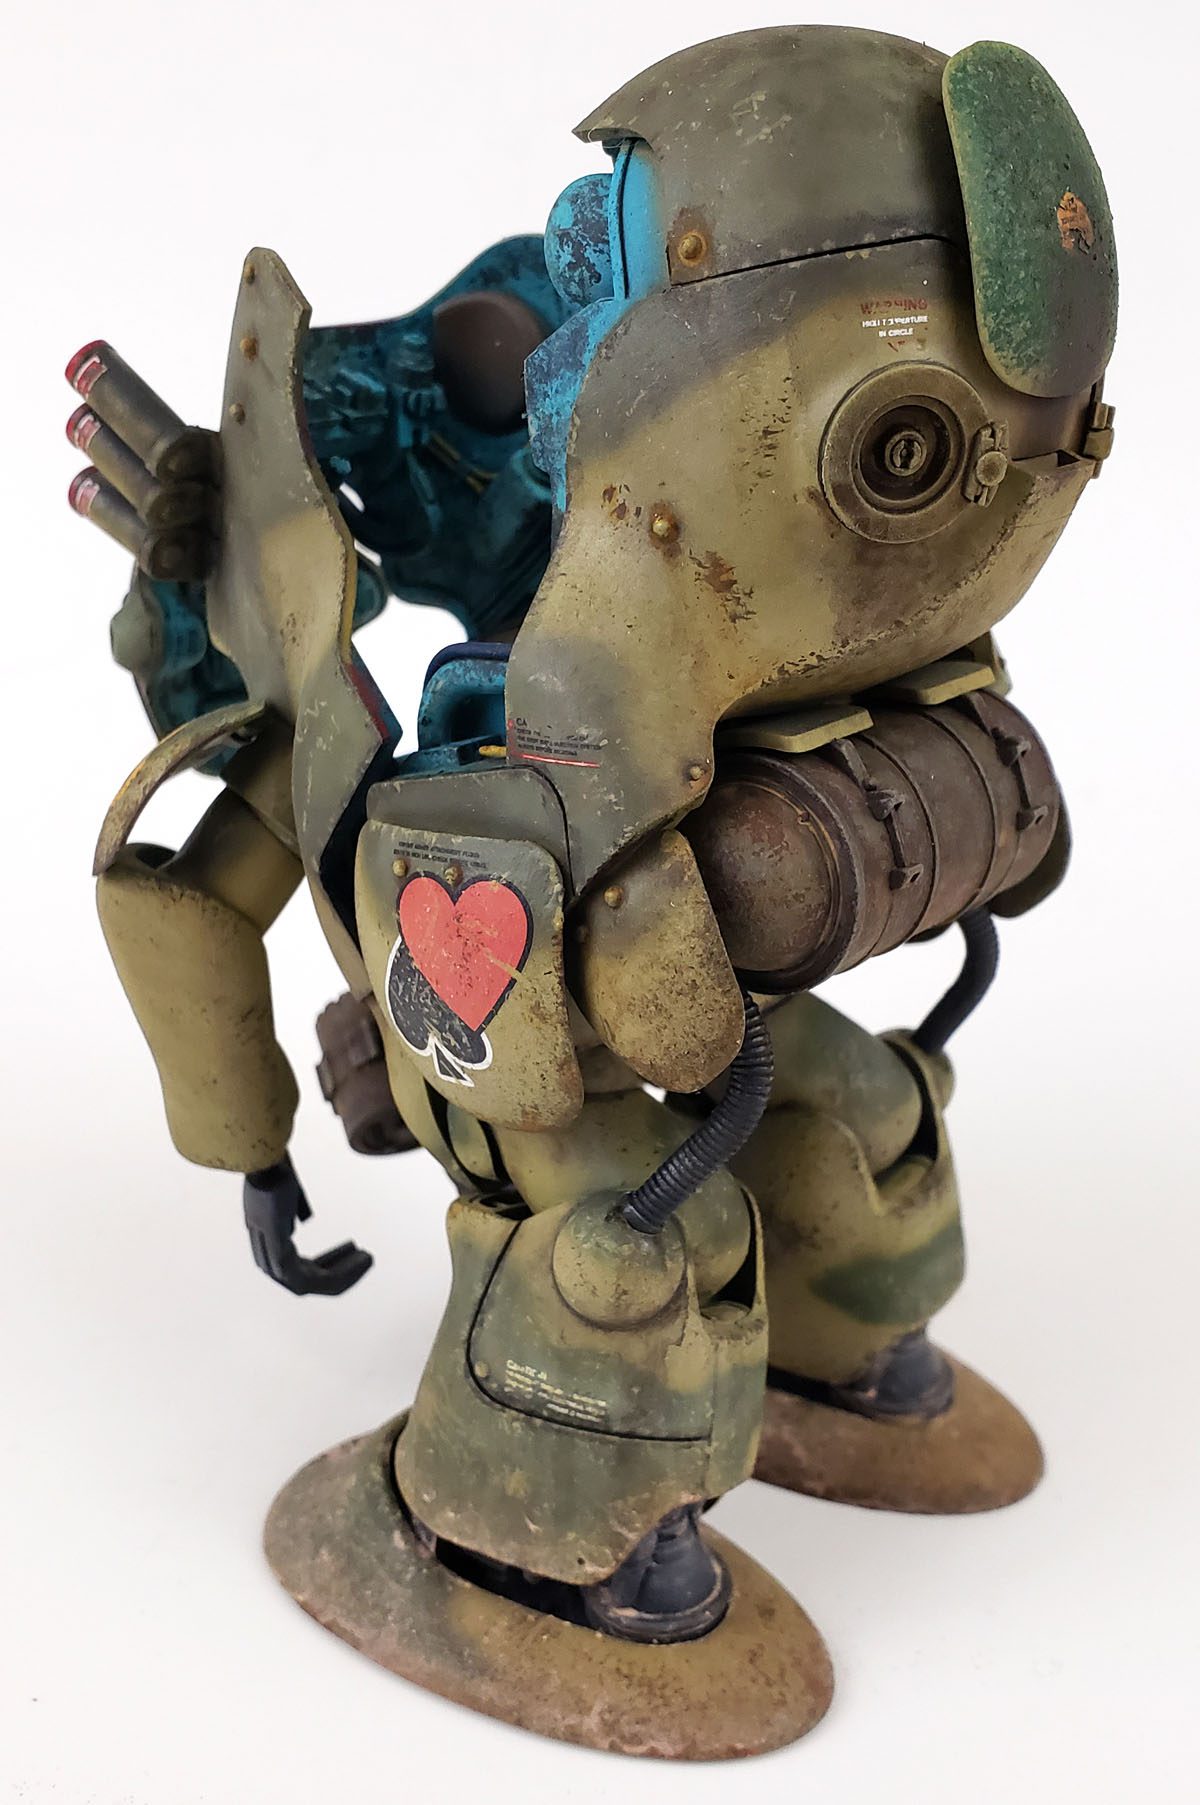
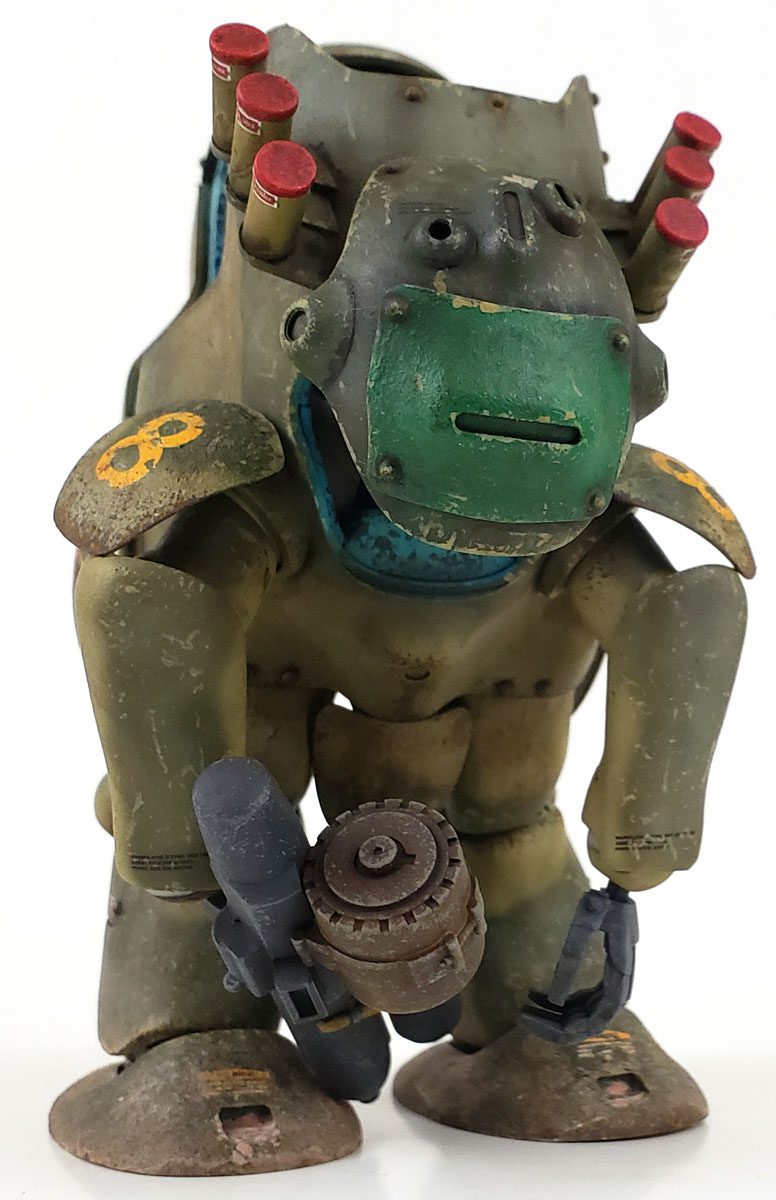
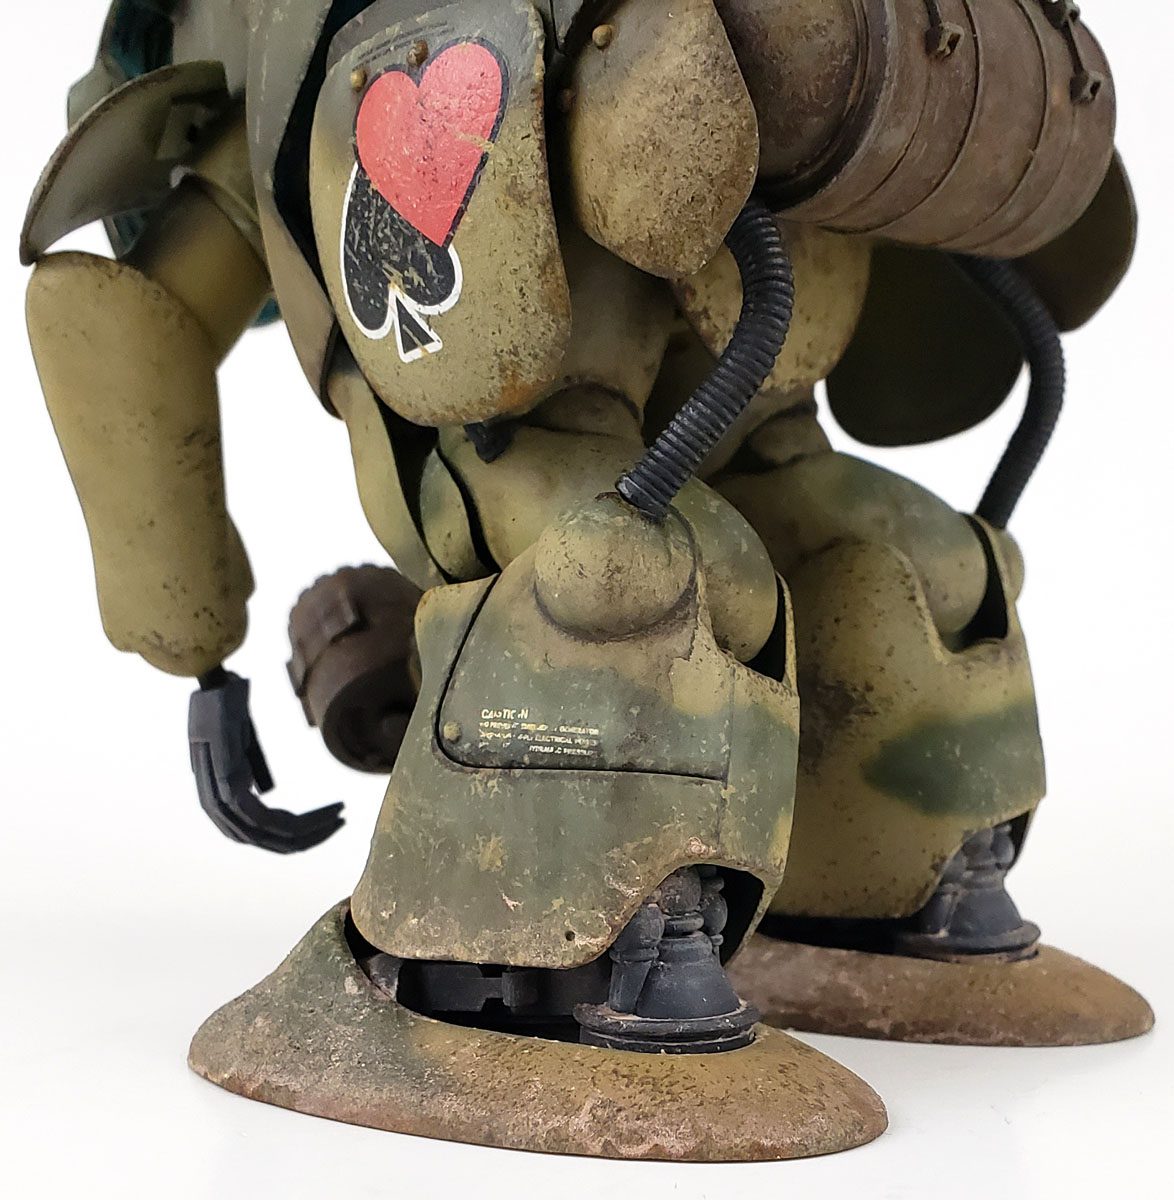
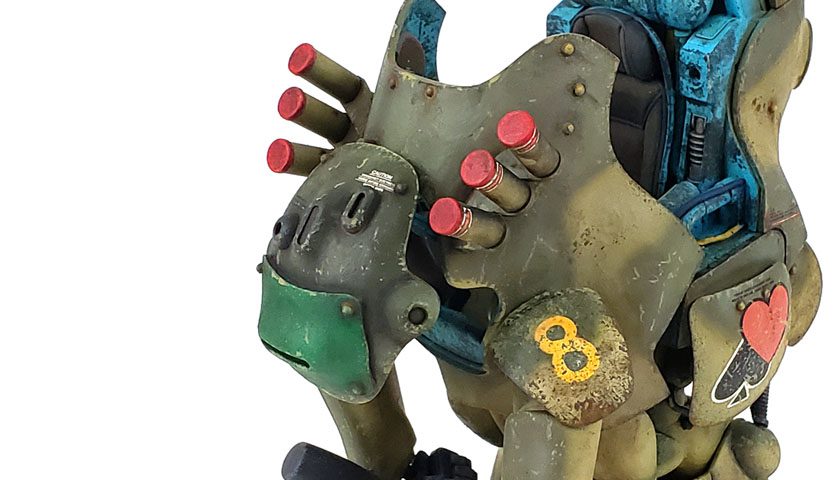
I picked a yellow number 8 for the shoulder armor, as I thought that color worked with the rest of the scheme. The “personal” markings were a bit fun. Trying to decide between one of the card suits had me a bit stumped. I finally settled on a combination – a heart and a spade. There was reason for it too… the combination is supposed to suggest “life and death”.
Adding The Lines
After the decals were sorted out, the model was given a satin overcoat. I prefer to apply oil and enamel weathering products over a satin finish. A gloss coat has no “grip”, and the process can be a bit difficult trying to control how easily the products slide across the surface. A matt coat gives good grip, but also can lead to excessive tide marks and color “bleed”. So a satin finish is just the right halfway point for me.
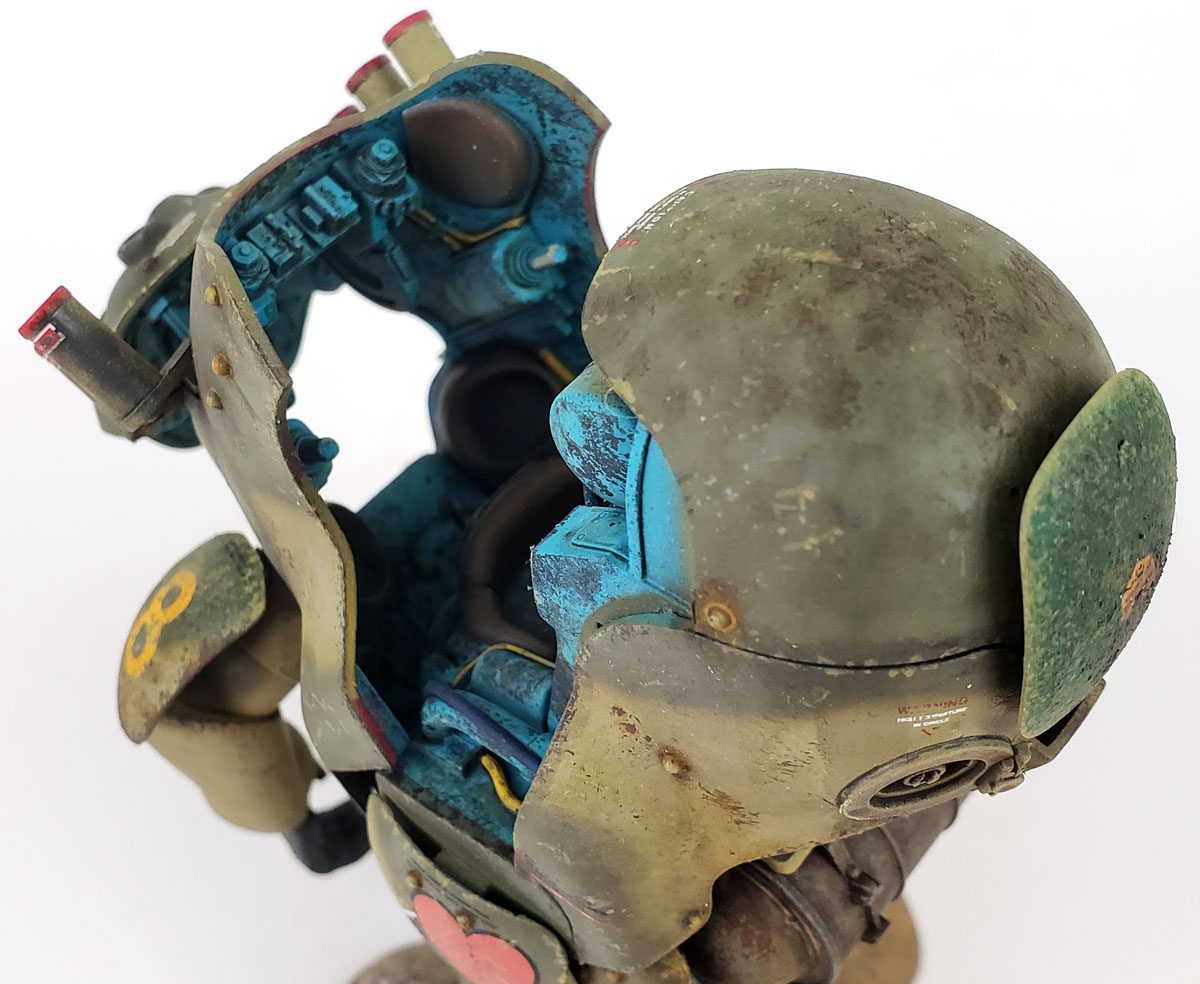
The panel lines were initially filled in using mechanical pencil. This gives a dark, full “undercoat” to later washes, making sure they are seen at max opacity. Enamel washes were then applied in panel lines, and around raised detail. Instead of cleaning off all of the excess, I went ahead and took the opportunity to begin the streaking and staining process. First the excess was streaked and blended in a downward motion with a small dry brush. An areas still needing attention were then touched up with a slightly damp brush – odorless thinner being the liquid of choice.
Some Chips Before Dinner?
The green areas were chipped with the base tan color, using both sponged and paintbrush application methods. This was done to “sell” the idea that the green camo color had been added after the tan. It also allowed for chips of a contrasting color to be used, so they could be seen.
The tan areas were chipped with a dark brown, using the same application methods. A few of the tan chips in the green camo areas also received some brown contrast, to suggest the scar went through both paints to the underlying material.
While I tried to place the marks randomly, I did think in terms of greater chipping lower down, and on the armor, and less on the upper or sheltered parts. A few areas received heavy chipping with no real backstory in mind, while other sections are mostly clean. I like to do this on a model as it helps the viewer “write” their own story. (At least that’s my story… and I’m sticking to it! 😉 )
Getting Oily
Once the enamels were dry, the next process was to provide some tonal variety and further griminess. In many past models, I’ve used the dot filter method, where small dots of multiple oil paint colors are applied, then streaked back until they are fully blended. This will leave a nice streaked appearance.
I wanted to do this one a bit different, however. Because of the crowded nature of some of the detail, keeping a consistent look might be difficult all over. Thus, I started with what I’ll loosely term the “dot stipple” method. The oils were applied as in a traditional dot filter approach, but then instead of being streaked, I simply used a soft, wide brush to stipple the oil paint. With the brush damped with thinner, it quickly blended, and the edges merged, and after a bit of work, produced what I think is a fairly varied yet not contrived surface.
More oils were added to add additional streaks from bolt detail, and panel line and access hatch detail, and even a few random streaks to the wider, open surfaces. During the whole process, I kept checking the model from arm’s length. I wanted to make sure it looked balanced. Not uniform, mind you – just that it looked as if all parts had been through the same places.
Rusty – Meet Grimy. Grimy, This Is Rusty

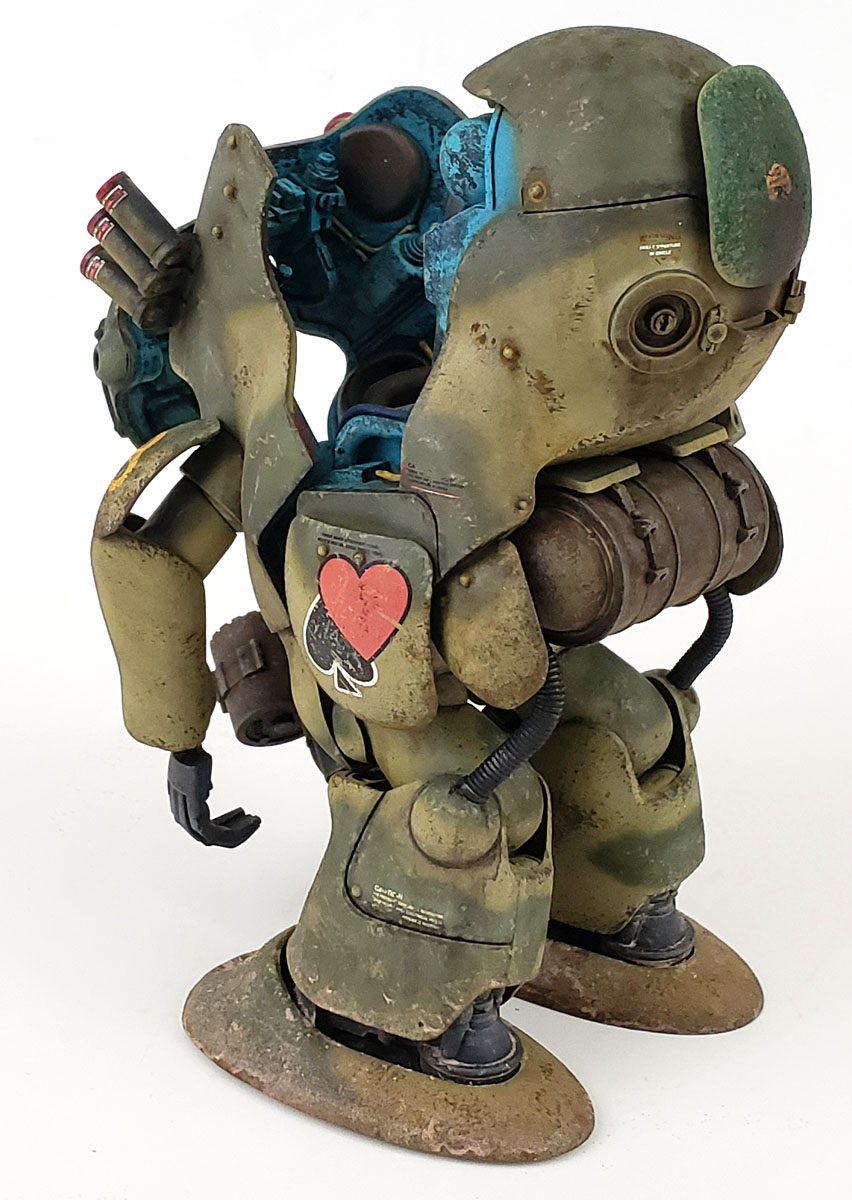
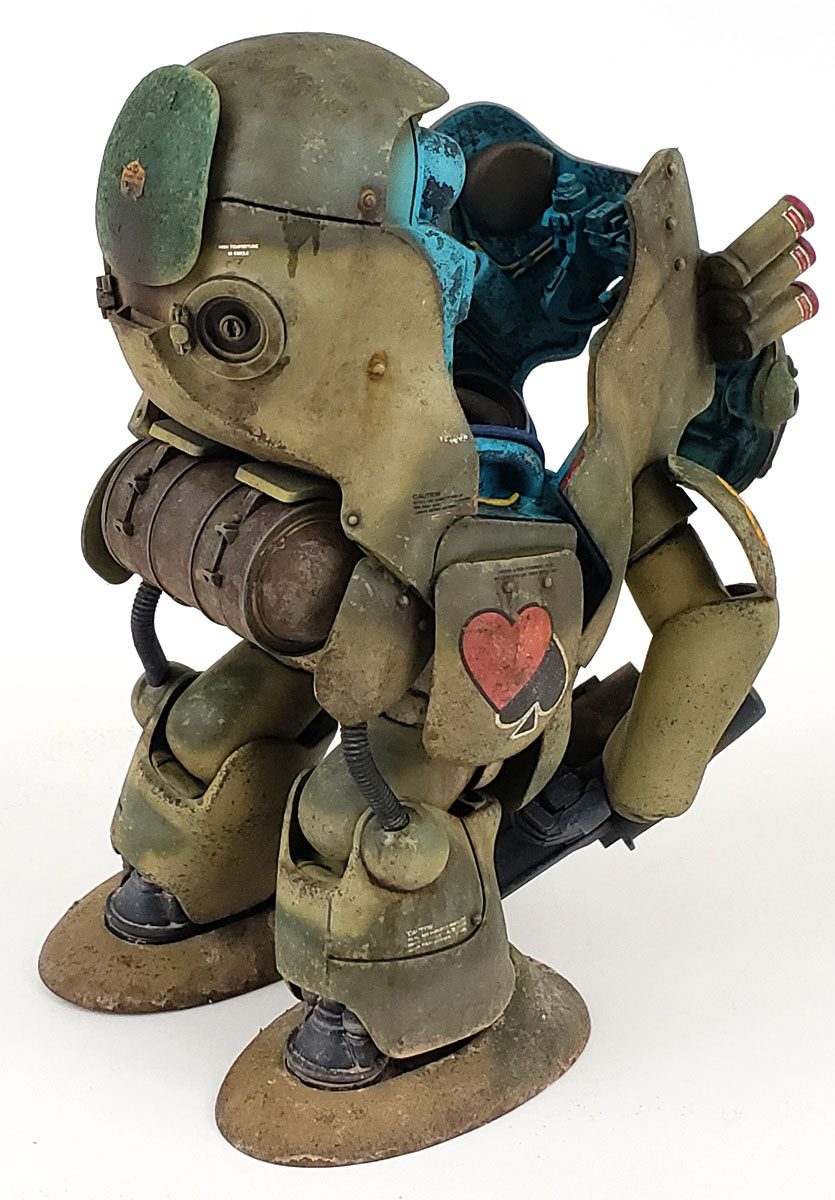
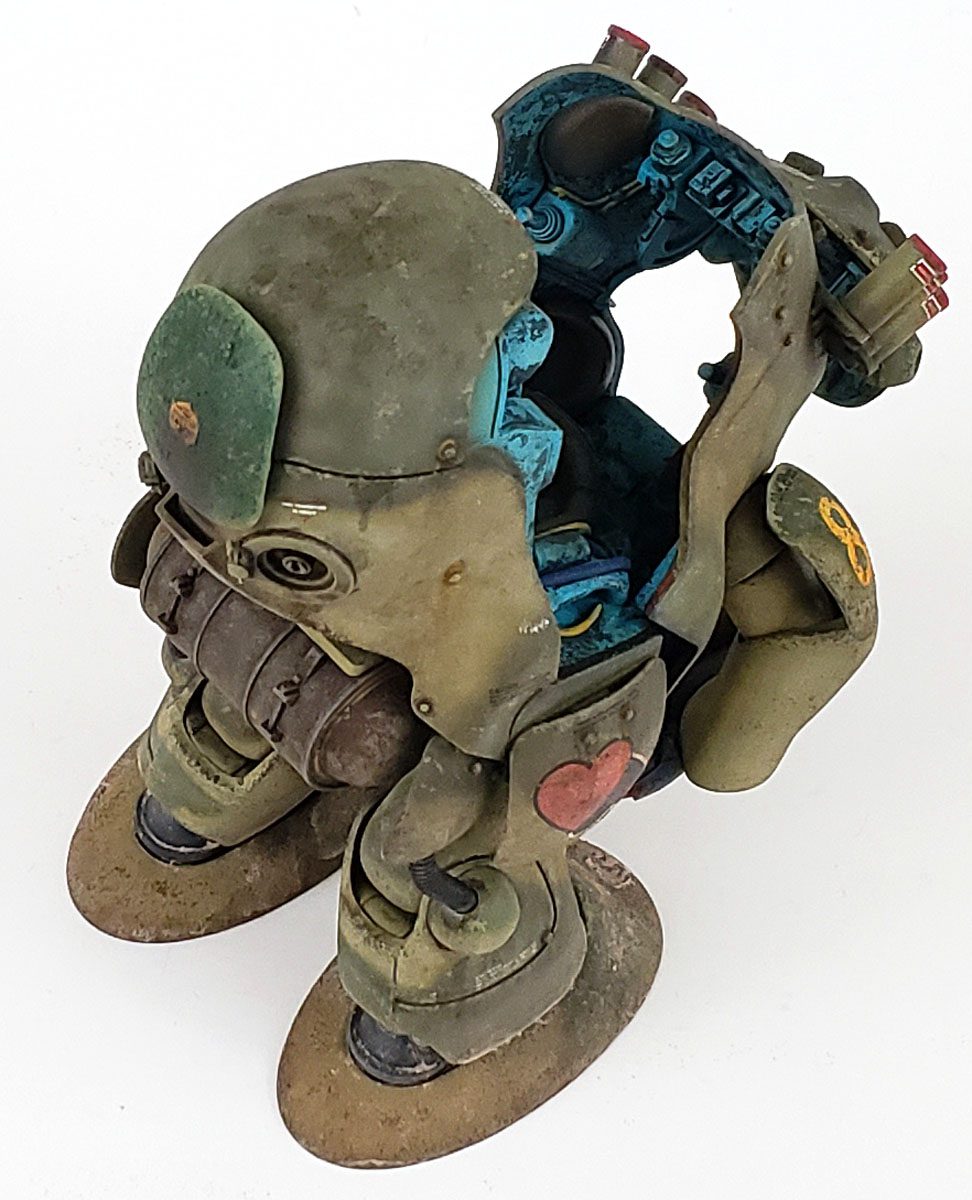
I used some rust colored oils next, as I wanted to hint at being out for a while in a harsh environment. Restraint was required though – I enjoy the rusting process as much as the chipping. Highly thinned oils were used for this, applied very wet. Once dry, a dry brush was used to stipple, blend, and streak them until the desired effect was achieved. These stains were focused in areas of heavy chipping, around bolts, and on the fuel tank slung under the suit’s hindquarters.
Finishing that part was a fun process. A rust color was applied over black primer using an airbrush. More rust colored acrylics were thin sponged on, using several shades of rust. Occasional dabs of RLM02 were also applied, to suggest that as the original outer color.
Using this application method not only gave a varied, rusty finish, but it also created a slight texture that I thought suggested how the material would look when rusted. Oils were then washed over it, both raw umber and burnt sienna, to give grime and rust colors to it. Additional spots were stippled on. After a matt coat, a few edges areas were hit with mechanical pencil to appear as if some of the bare, clean underlying metal was still exposed.
Take A Powder And Call It A Day
The final step was adding some pigments to suggest dirt and dust around the feet. I began by applying several colors dry, using a brush to dot and stipple them around the feet and lower legs. Additional more random dots of varying pigment colors were applied over that, and then drops of water applied. The resulting capillary action of the water flow blended and mixed the pigments, producing additional tones. Once dry, I felt it left a nice, dusty effect.
To seal it all in, a dual varnish approach was applied. Areas that I felt would be smoother and more reflective received a satin varnish coat, while others were given a matt coat. The idea seemed pretty good, but the final result was a bit too subtle. Unless you know where to look, and do so in the right light, it all appears rather satin, with a nod to matt. Still… it’s something I’ll try again to see how it develops.
The last step was to apply a few dots and streaks of a glass acrylic oil stain here and there, just to suggest a fresh leak of fluid.
Safety In An Object
When I left Somalia, the vehicle stayed for our replacements to use. I eventually did see it again, and rode in it many more times, in other places. It was a home away from home, and though I didn’t say much about it to my buddies, I found sitting in the vehicle quite comforting, even if we weren’t out on mission.
Once back home in the states, I even found that I missed its security a bit. Sometimes maybe a bit too much.
In so many ways, this model has been a helpful journey. Though I didn’t intend it to be, it’s allowed me to continue the processing of things long buried, and to reflect on that time with fresh eyes, 25 years along. And though I know the little model and pilot figure are simply plastic and paint, I was able (I think) to put myself “in their shoes”, and imagine how it would be if that had been the tool of my trade then. It was a benefit for me, and the model’s finish, I think.
As far as the kit goes – it is wonderful. If you’re looking for a scifi/Ma. K build to dip your toes in waters others than the usual, I highly recommend it. Its shape is unique, the fit is good, and the color and weathering possibilities are endless.
For me, it’s not just been a fun journey. I also realize it’s been a helpful journey. I think that is what hobbies are ultimately about.



Leave a Reply