The model shop of my youth was located in the back of a high-end kid’s store. The front half sold all manner of expensive toys. Whenever I’d visit – which was often as it was located across the street from school – I’d hurry past all those bright colors and big price tags.
Getting to the back of the shop, the world transformed. All of the bright colors slipped by, the shiny toys gave way, and the plastic models emerged. Shelves of kits, turnstiles with books, racks of paint, and showcases of accessories took over.
The fellow that worked there intimidated me a bit. He was always polite, but seemed a bit impatient when a group of kids came in. Looking back, I suppose it was because he knew we’d move stuff around, ask questions ad nauseam, and eventually if one of us did spend something, it would be a token amount with the little cash we had.
At times, I’d see older fellows in there… old meaning anyone not still in middle school, and he seemed to perk up with them. Hovering around, I’d pretend to look at a book, or gaze intently at a bottle of paint, just so I could hear the discussions.
A World Of Mystery
The talk always sounded so exotic. The customer would explain some bit of technique he was using to make something look battle damaged, or rusted, or dirty. The man who worked there often asked questions, or offered advice. Sometimes he’d grab a bottle of paint, or one of the other products, and explain how to use it. Occasionally they’d even discuss that which seemed almost magical black arts to me, airbrushing.
All the while I’d try to process this data, to make sense of it. And though I heard and understood the words, they never seemed to process correctly. In some cases, I couldn’t afford the tools they described. In others, the application of technique implied an understanding of other foundational techniques – most of which I didn’t know. It was exciting to think of the possibilities, yet at the same time frustrating to not fully understand how to do it.
Further Into The Cave Of Wonders
The thrill of thrills, though, was to step up to the showcase where the works of local modelers were displayed. Planes, tanks, cars, figures, ships, and spaceships sat side by side. To my youthful eye, they were simply the most amazing thing ever. Exhaust stains, paint chips, dirt, grime, oil… all were on show.
The true rare air – I recall it only happening twice – was being there when someone brought in these amazing works, and then described to the other older people what they did to make it look that way. That was worth paying for. I didn’t dare ask questions, as I worried someone would realize an interloper was in the inner sanctum, and run me away. (Though to be fair, that was surely a product of my immature mind…)
So I hid myself away… looking at a book, yet peering over the top, listening to these mysterious tales of the adult modeling wizards.
And then one day the unfathomable happened.
Wait… You Did That?
One day I was in the shop, doing my usual thing of wandering around, looking at everything, knowing the scant dollars in my pocket would again result in no more than a few bottles of paint, and maybe a very small kit. A familiar voice called to me.
Turning, I saw another kid from school. He was a year older than me, so we didn’t have any classes together. But we had mutual buddies, and had hung out before school, so I considered him a friend. We exchanged greetings, and he mentioned he’d brought in a model for a contest to be held that coming weekend. Eager to show it to me, he opened the box top.
Inside was what to my eyes at the time was one of the most stunning tanks I’d ever seen. He’d painted an M3 Grant in the colors of the British 8th Army. The weathering, exhaust stains, and crew figures looked every bit as good as the adult modelers’ work. I stood wide eyed, jaw open. It never occurred to me that a kid could do such work.
I stammered an almost insulting question. “You did that?“
The Big Headed Stompy Chicken
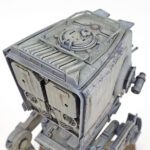
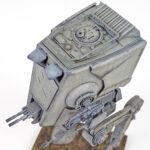
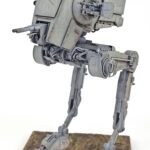
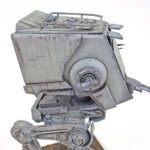
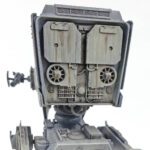
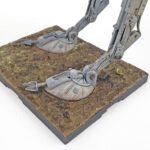
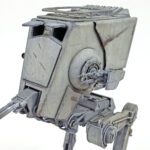
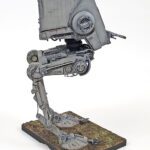
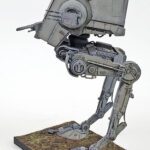
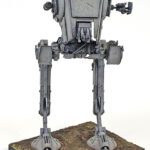
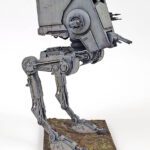
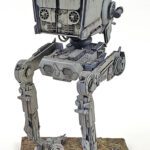
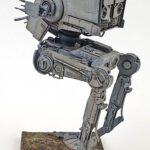
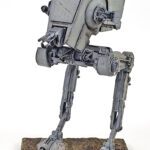
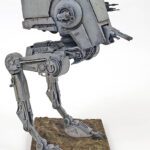
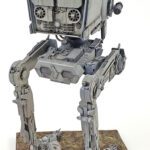
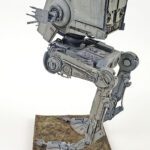
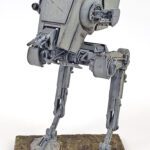
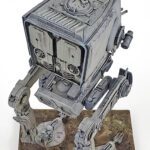
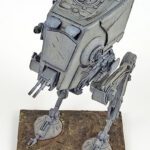
After getting the base paint on the Bandai AT-ST, I’d originally intended to go through the process of picking out various bit and pieces in different colors. Hoses, little greeblies, and other lumps and bumps would be the target of additional hues.
But a thought struck me… this was The Empire. The galactic bad bad guys. Things and people were utilitarian, with only one use – crushing all opposition. It sounds weird to say, but I decided to leave it all gray and lifeless. I thought doing so helped sell the “evil”. (Now that it is finished, even looking at the black voids with the “eye” armor open seems to contribute to this sinister look.)
So That Leaves The Weathering
One of the things I really wanted to achieve with this build was depth of finish. While a good look can be imparted by applying basic weathering techniques, I wanted a bit more. As I’ve grown in my weathering abilities, the pursuit of depth drives me. It takes a model beyond appearing as a fixed number of steps were applied after painting, and moves it into the “real” stage of result.
To do this, I planed to apply the basic steps multiple times, with the idea being that each successive layer would have more intense contrast, but less density overall. The idea was to mimic the real world. On any object that has been around for a while, there is more old weathering on the surface than new. The old gets faded, the new is more prominent. Layering with that in mind can help produce a more realistic looking finish. (At least that’s the theory… 😉 )
Building It Up
I started in a fairly standard fashion – add some panel line washes, add some streaks. Normally I’d move on to chipping. However, I decided to wait on that step. I realized that on most builds, the chipping was one of my first steps, yet by the end of most builds, later weathering covered it up and made it much more subdued. And while it is true that there can be different ages of chips, I decided to save those for later.
More layers of streaks were added. I’d initially started with an artist oil dot filter application, which laid a good foundation. Later layers of streaks reverted to using thinned acrylic wash, mainly gray and blue gray. The previously applied dot filter layer had been fairly random. The acrylics were applied with a brush, each streak being a specific brush stroke. To try and avoid uniformity, I focused on two areas to apply them.
Some Nitty Gritty
First, I looked for larger streaks of the oils. By applying a thinner but somewhat darker streak of the acrylic, I hoped it would sell the notion that this was an area that received continual wear. If you look at the side of a building, for example, it can be easy to see where the rain water flows. In a hard rain, everything gets wet. But in lighter rains, the water can be seen flowing in more localized and specific areas based on the shape of the surface. When dry, these areas show a different pattern of streaks, so that was the effect I was going for.
Secondly, I looked for areas that had lighter streaking, and applied darker streaks in between those areas. The theory here was that areas that rain and grime don’t gravitate too are less likely to “hold” abuse, thus the most visible stuff is always the fresher, newer staining.
Of course, I realize this all sounds terribly complicated. Why not just put the darn stuff on and be done with it? I get that. However, I wanted to be very deliberate about this process – how much difference would it make to apply these techniques in depth, with some nod to color and contrast? While I hoped it would produce a deep, realistic finish, I also wanted to see if it didn’t amount to a hill of beans.
The Chipping And Stains
While I don’t always use a “two color” approach to my chipping, I thought this would be an ideal place to do so. With one color chipping, it can be very easy to overdo it. A single, contrasting chip color can really stand out. However, I’ve never been happy with my two-color chipping, as I felt it looked too contrived.
As I thought about this model, an idea came to mind. Deciding to make the bulk of the chips low contrast, I went for a shade of gray that was only just a bit darker than the base. I didn’t have any real materiel or universe reason in mind. Rather, the thought was to view it in a more artistic fashion. The lower contrast would not appear too overdone if I got a bit heavy handed.
Those chips were applied all over the model with a sponge, though a few scrapes and other abuses were added in with a brush. When I finished, the result was – a bit heavier than I wanted.
Reducing By Adding
The decision was made to carry on. Part of growing as a modeler is figuring your way out of the situation you’re in. As crazy as it sounds, I wondered if going with my original plan – adding a second, more contrasting color of chip, might help.
So grabbing a dark red/brown, I began adding in both sponged and painted chips, but this time striving for two goals – restraint, and high contrast.
The restraint would prevent the already heavy chipping from being drastically increased. My hope for the high contrast was that it would fool the eye into “blending” the darker gray chipping into the background.
Once I was finished, I felt the technique worked. The darker but less dense chips tend to grab the eye, blending the lower contrast abuse into the overall finish. The experiment, I feel, paid off.
(If nothing else, it sounds impressive to write about… 🤣)
Finishing It All Up
The last steps were basically a hodgepodge of all previously applied steps. Viewing the model at a “normal” distance – roughly 2 feet away – I looked for areas that just stood out. What can look random at the focal length of an optivisor can suddenly look quite awful and uniform at arm’s length.
In this stage, I normally use all acrylic weathering products, as the fast drying time allows many things to be applied in fairly quick succession. Streaks, chips, and stains were touched up here and there, all with a very fine tipped brush to make sure I did not overdo it.
I did add some non-acrylic grime, using a mix of artists oils thinned with enamel wash, which created a grimy, greasy, heavy look. I applied it in a few areas I felt were most logical. This step was reserved for last. Setting the model aside to dry overnight, I sealed all in with a coat of matte varnish.
Always Learning
My friend didn’t seem put off by my question. He seemed to enjoy the fact that I was so shocked. “Yep“, he said, “I did this.” He then began to explain it all.
It turns out his dad was one of the men who had models on display. So my friend had grown up watching dad build, paint, and weather. Early on, his dad had helped him with the models. But as his experience grew, the models eventually became his own. While dad was there to guide him, the techniques had been passed along.
Modeling can seem a bit mysterious. Quite often I’ve seen a finish, and then thought “how in the world did they do that?” Yet as I’ve grown in the hobby, and kind people have shared their secrets through a variety of avenues, I’ve realized very few of these things are hard. Anyone can do them. With few exceptions, the materials needed are affordable. Only rarely do I run across something that is a bit out of reach, and that is usually because of the expense of the tools – not the difficulty of the technique.
The Process Continues
Despite my friend explaining what he did, and even a few visits to his house to see it in action, I never really did pick up on it all. Turns out I lacked one other key ingredient – patience. I’d try something once, and if I didn’t see results that equaled (or to be truthful – exceeded) his results, I assumed I was a failure, and just moved on.
Still, I did learn a few things, and over time, they began to shape my work, gradually improving it. I likely would have continued that process, but…. girls, cars, and loud guitars took their place for over 20 years.
Assessing this Bandai AT-ST, now that it is finished, I’ve come to two conclusions. One, the theory was sound. The process of layering up “levels” of weathering, from high density but low contrast, up through low density but high contrast, seems to be a valid approach. While it can be easily overdone, rightly applied, the result can be nice.
Yet the second conclusion is simply that it’s not where I want it to be. I like it… if someone asked “does it look good?“, I’d say “yeah, it looks good.”
Good.
Not great. Good.
Just as I did in those days of the late 70’s, standing in that wonderful hobby shop, there’s still more to learn. More conversations to have, more books to read, more videos to watch, and most importantly – more things to try.
Growth in the hobby, I think, is not about reaching a destination. Rather, it’s about being on a continual road. The longer you are on it, the more you have tales of travel to share. Some people are coming along behind you, others are up ahead of you. Some stop along the way to rest a while. But all are on the road.
The prideful part of me does wonder if I could travel in time, back to those days long ago, would my 10 year old self be impressed with this AT-ST if set alongside those other models. Yet as I allow that thought to see light, I quickly stomp it down. Because I know the reality.
The 10-year-old Jon would have looked at it wide-eyed, without care to how it compared to the others, but would have simply said “cool!“
At the end of the day, I try not to worry about how I stack up. A kid declaring it “cool” is a good enough goal on this road.







Leave a Reply