I’ve always tried to express myself artistically, most often through drawing or painting. As a kid, I’d draw on anything and everything, even if it didn’t stand still. Though I’ve never been much of an artist, I enjoyed it quite a bit nonetheless.
I drew a variety of subjects, starting with dogs, people, and houses, though I eventually morphed into a focus on military subjects. And while my output would never win any awards, I did try to make my work recognizable.
Most of my time drawing was spent erasing, however. I could get the basic shapes down, and even if they weren’t perfect, I’d simply declare them good enough and move on.
But when it came to actually bringing them to life – shading, smudging, blending in the pencil work – I would go through dozens of cycles of draw, erase, draw, erase. Smudge, blend, erase. Draw, shade, crosshatch, smudge, blend, draw… no, no, no. Erase and start over.
Eventually I simply accepted things as they were for the sake of actually finishing anything.
Have Fun… Yet….
When I returned to scale modeling in 2006, my initial enthusiasm seemed to rule the day when it came to work satisfaction. I was so happy about returning to my childhood hobby that simply creating was enough. In fact, I think I was so enamored with it all that I had some difficulty objectively assessing my own work. It was only after having built a few models that my view began to change.
I’ve never been one to worry too much about accuracy. Though I fell into that trap briefly early on, I somehow managed to escape the clutches of that gravity well. It’s not so much that I am against accuracy, mind you, but rather I saw the pursuit of that and that alone was simply unsatisfying.
What did grab me – for good and bad – was that old notion from my childhood days of “does it look right?” And by right I don’t mean particular shape or detail accuracy. Rather, “right” for me is a notion that forms first in my head. It’s a particular vision of how I’d like the outcome to be.
It may be rooted in reality, or perhaps in some stylized vision. There may be more whimsy involved, or perhaps some feeling of nostalgia I want to get across. Or perhaps a bleak reality.
Throwing It Out There
No matter how much I build, the work all tends to fall along some spectrum of what I see in my head. And it’s a weird mix, too. (The model and my head… 😉 ) Sometimes things outside of modeling effect my mood, and it translates to the plastic. One kit that I am working on dates back to a particularly difficult time personally, and I’m still slogging away at it, years later. The problem is not the kit, but rather the association with those days.
Often it can be a matter of enthusiasm. While one particular aspect of a build may grab me initially, by the time I move on to the next part, the prospect of moving forward is quite boring. Or some other shinier object has popped up. (I think that is why I have a stash of kits…)
It is always amazing to me that I finish anything at all.
So “finishing” a model is not a single point for me. It’s a range of things. The closer it gets to the original vision, the more likely I am to declare it “complete”.
Accepting The Work
Yet no matter what point I declare any built as finished, I’m never fully happy with it. If it’s close to the original vision, I find I want to stop before I do something that “messes it up” in my view. In any build, there’s almost there, there, and too far. “There” is near the vision, but “too far” is almost like a plane stalling. It was near maximum altitude, but some misstep in angle of attack or throttle control causes it to plummet from the heights to altitudes much further down.
And it’s not that I hate my work, or even dislike it, in most cases. Somehow through it all I have fun, though some builds are more fun than others. But wrestling with the notion that it’s not quite there plagues every bit of work I do.
The Bel Air’s Interior
With this kit being the first model car I’ve worked on since the late 70’s, I was a bit surprised at the quality of the parts. They weren’t great. I’m assuming that this kit is perhaps the same kit I could have build as a kid. I hope that is the case, because if this is typical for newer car kits… I really feel sorry for car builders.
There was quite a bit of flash on the parts, and mold seams were quite heavy. Still, when cleaned up, the overall shapes and detail were pretty good. But coming from a background of Tamiya and Eduard kits, it was a bit of “culture shock”.
Still, am I a modeler or merely and assembler? (Don’t answer that… 😉 ) I cleaned up the parts, test fitted things together, and formed a plan. A vision of what I wanted the result to be resulted, and that vision would drive all the application of technique that would follow.
Applying The Basics
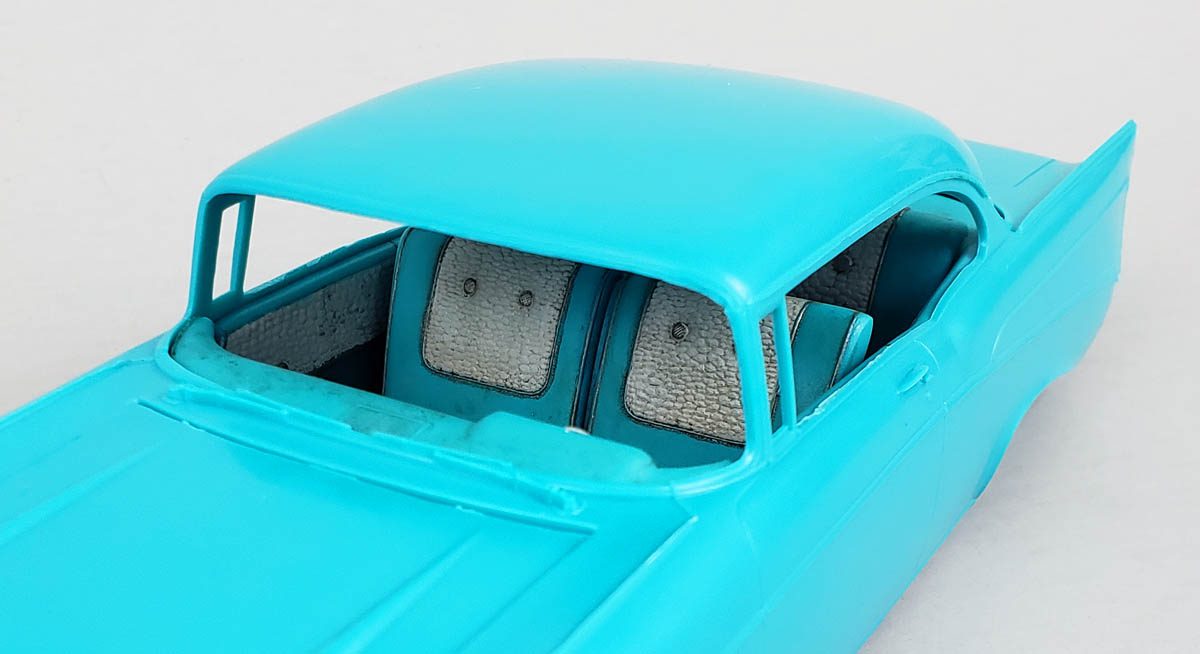
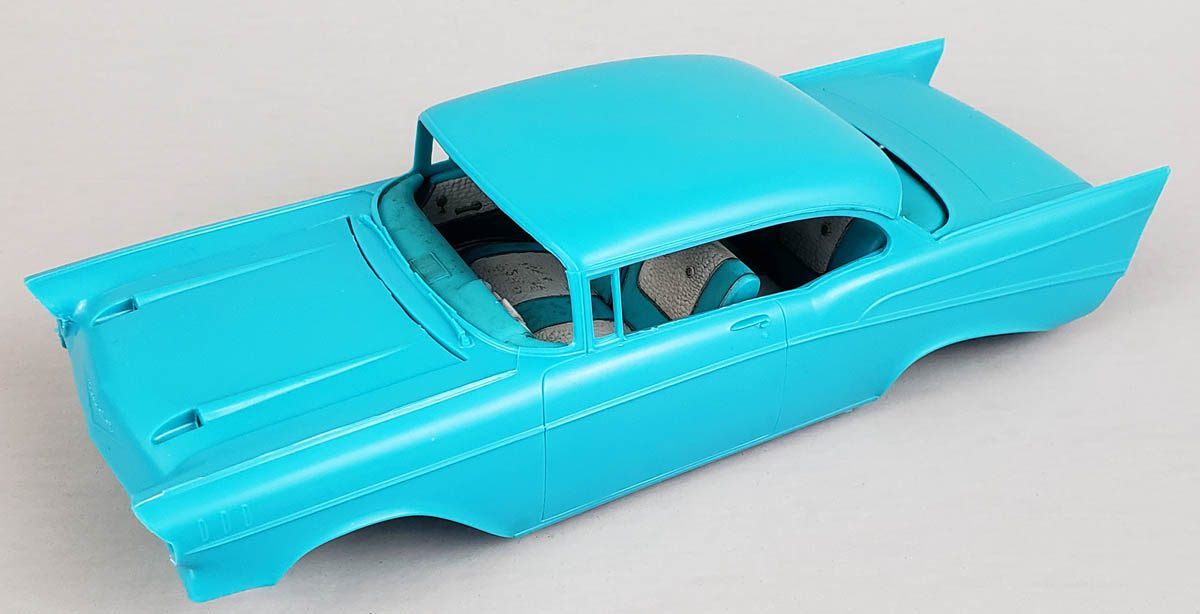
The plan for the completed model was to try and simulate the look of a 1957 Chevy about 10-12 years after original purchase. I wanted a used look, yet not a totally beat look. In my mind, I saw it as a son’s first car, given to him by his dad. I’d been in that place myself. When my dad purchased a used 1982 Lincoln Town Car, his ’78 Caprice Classic was handed down to me. Thus, a small bit of the vision for this model was driven from my own experience.
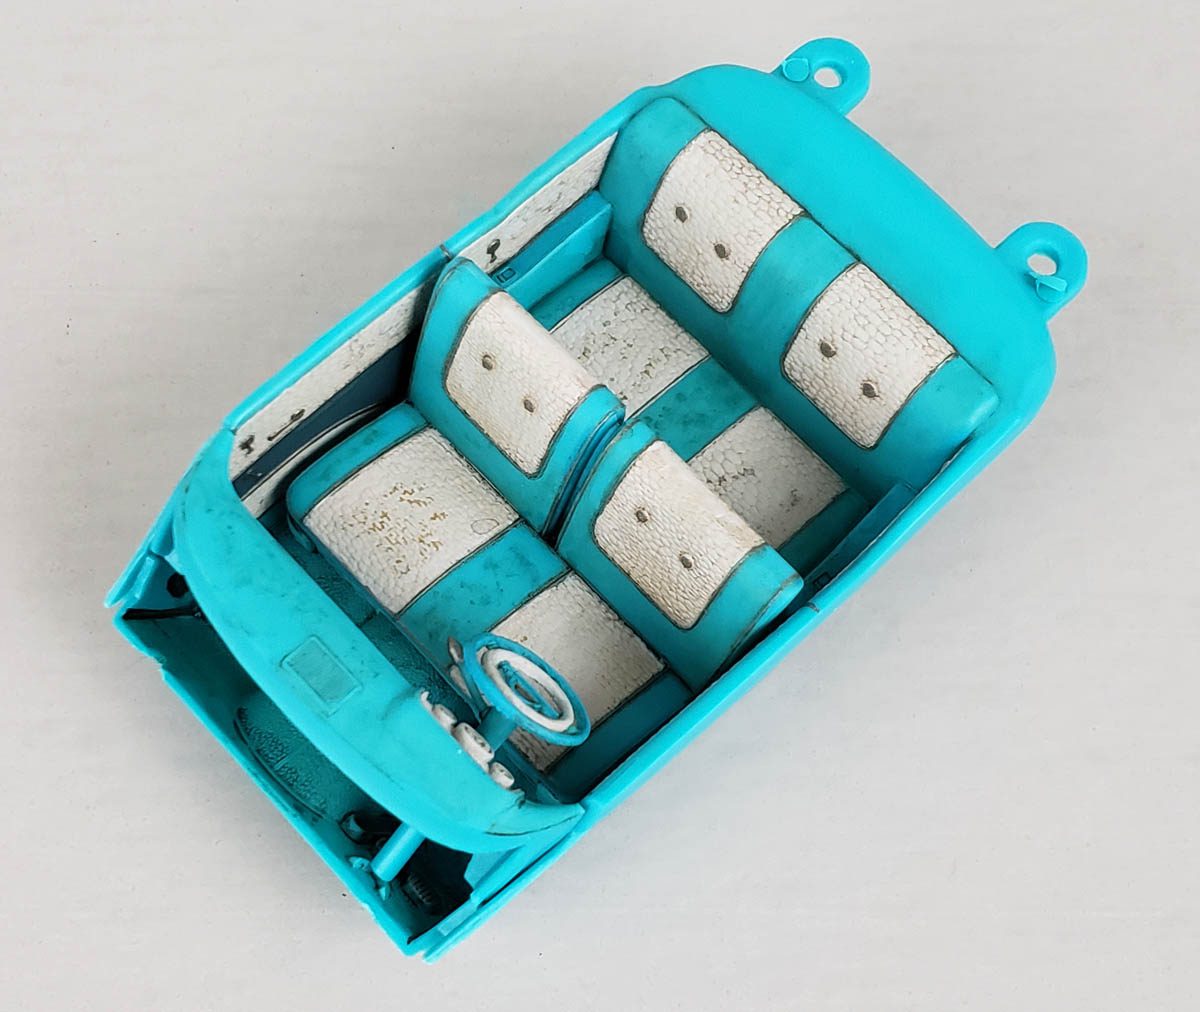
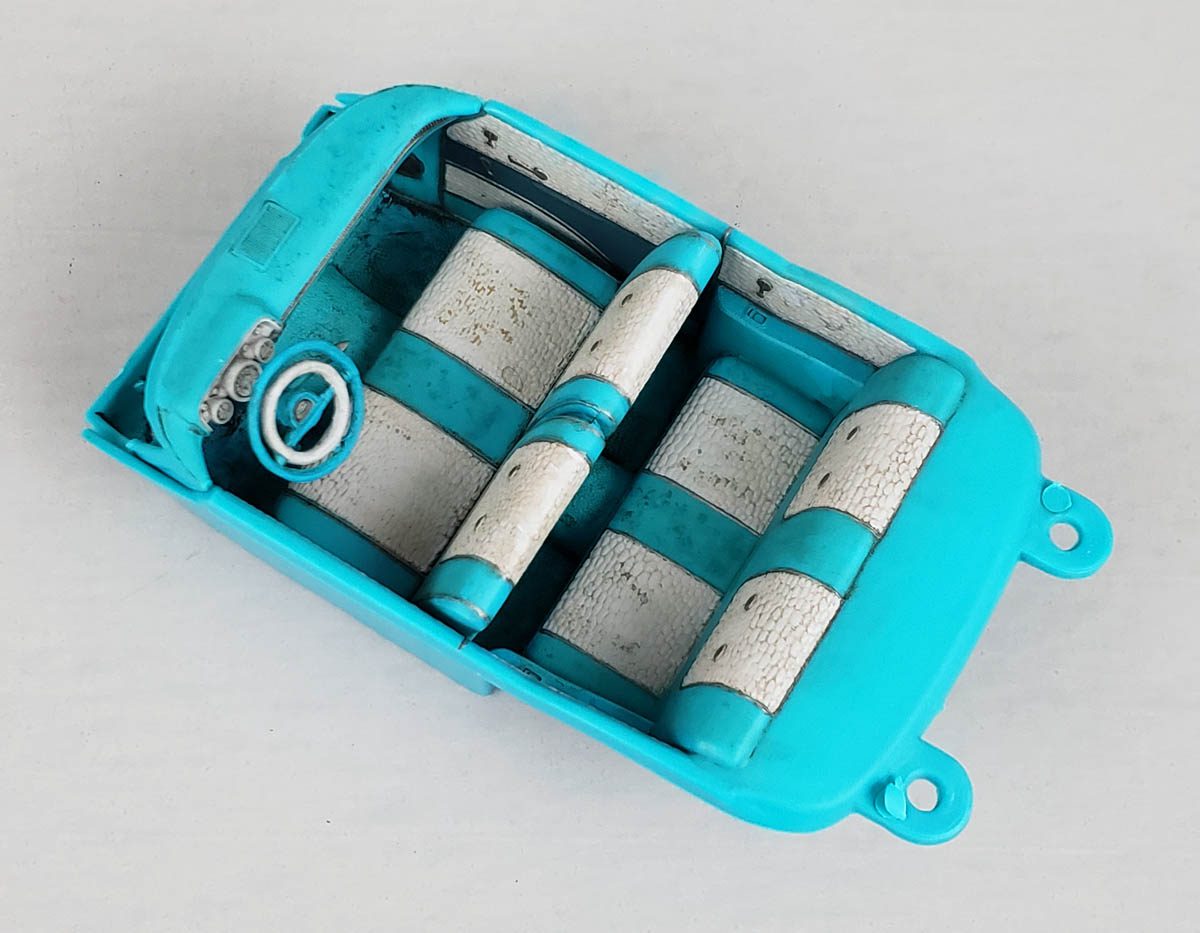
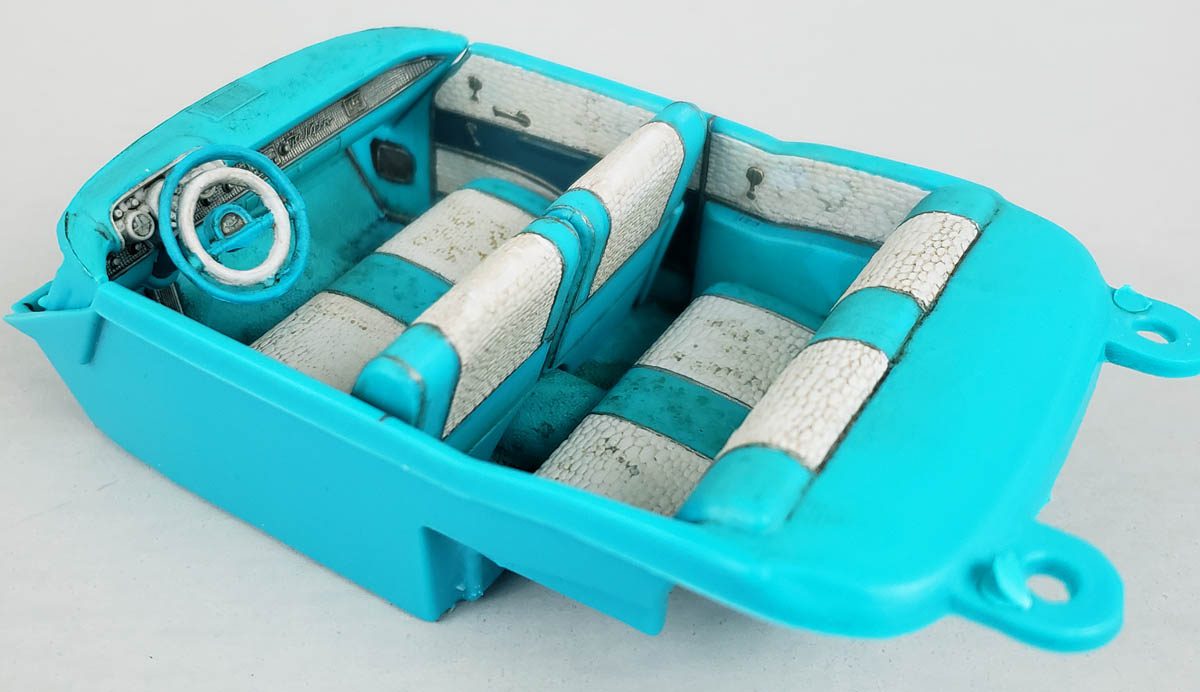
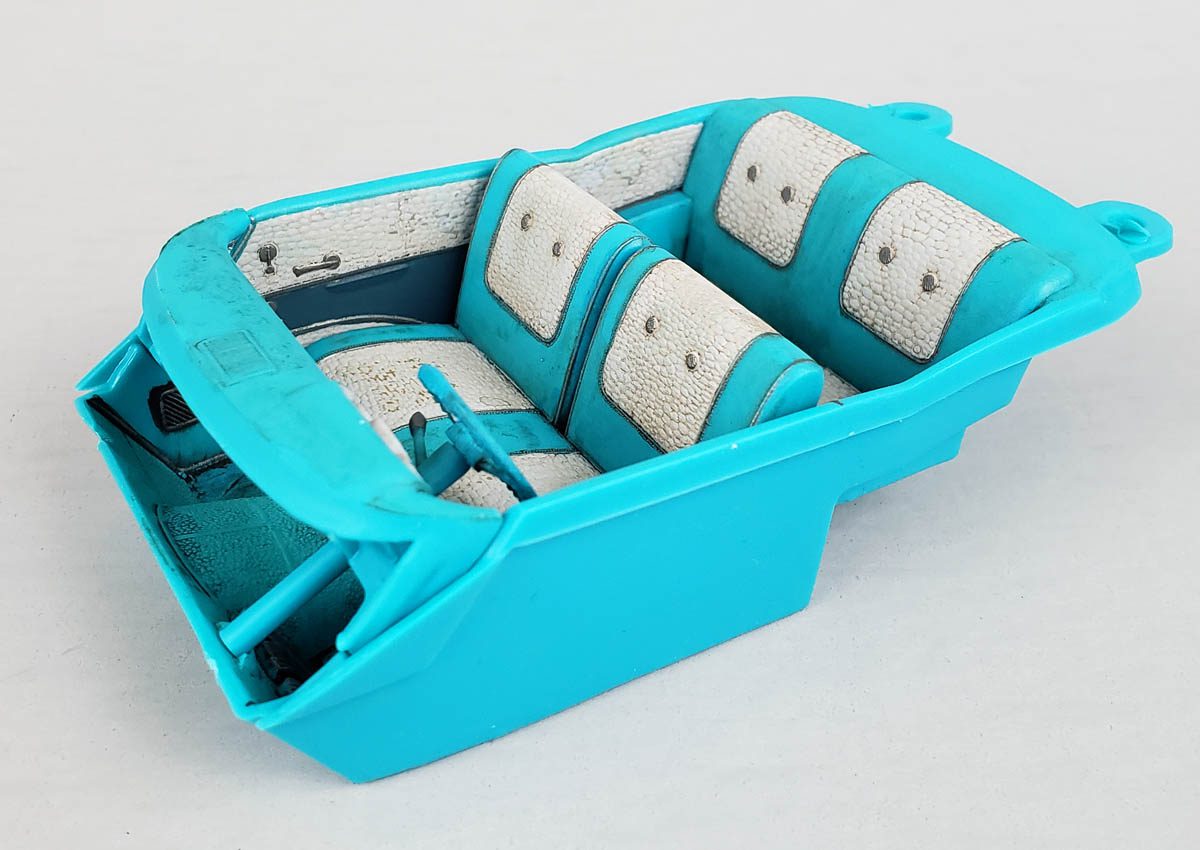
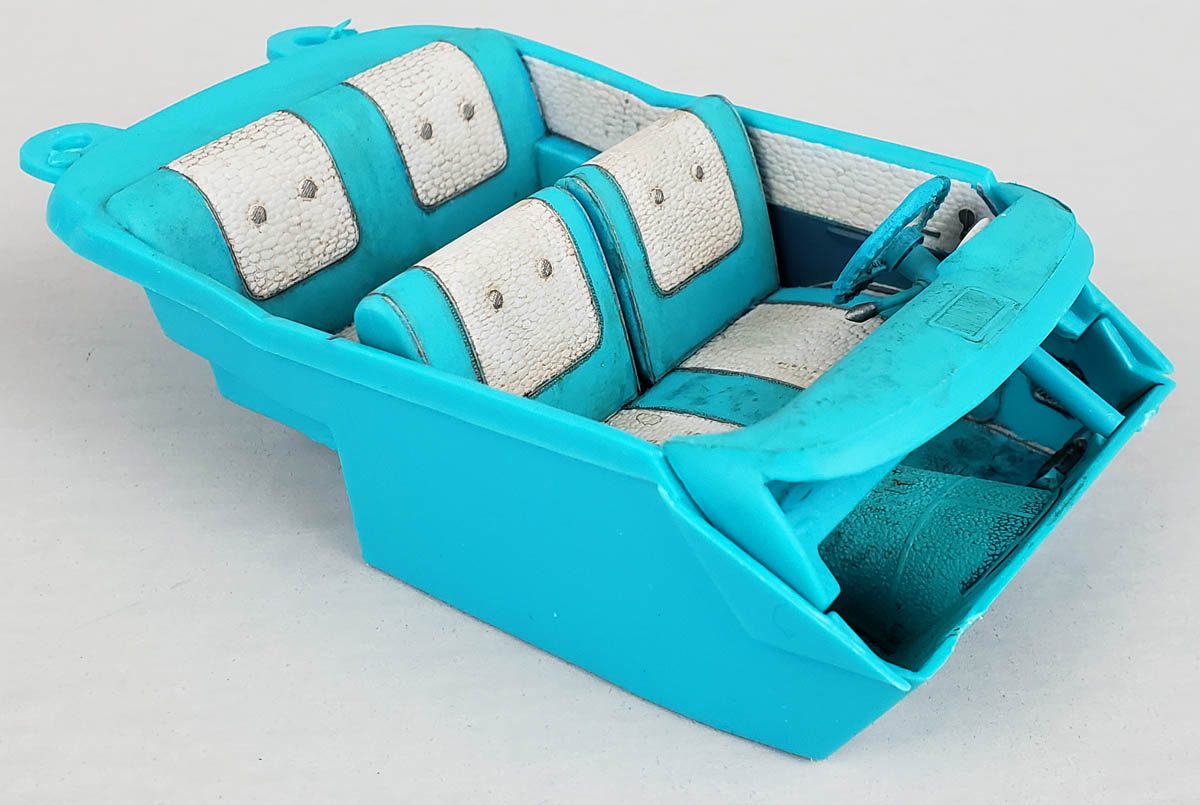
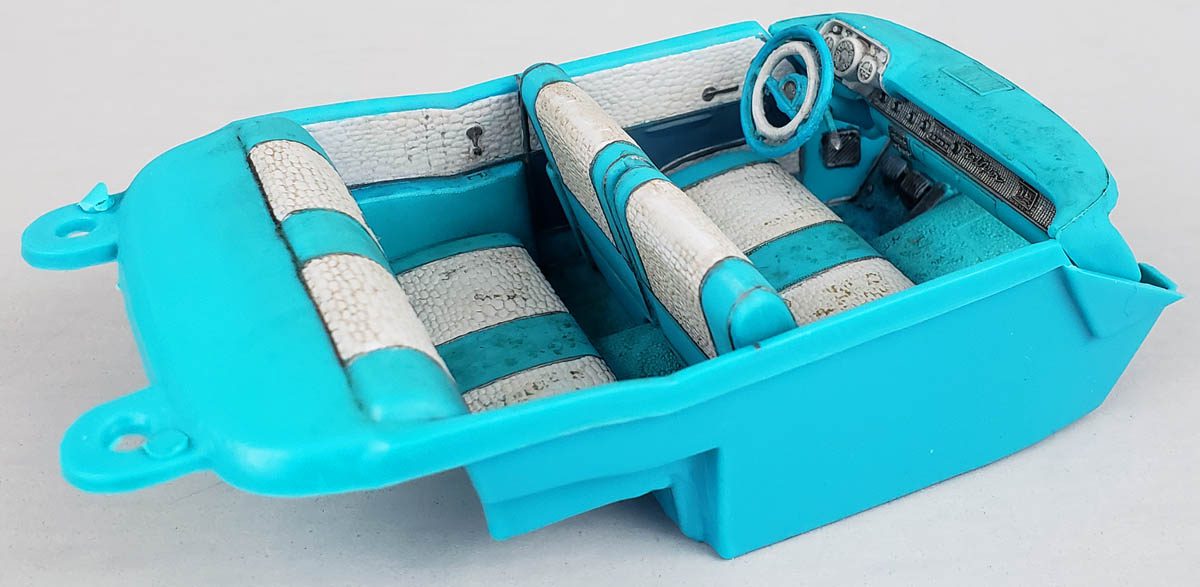
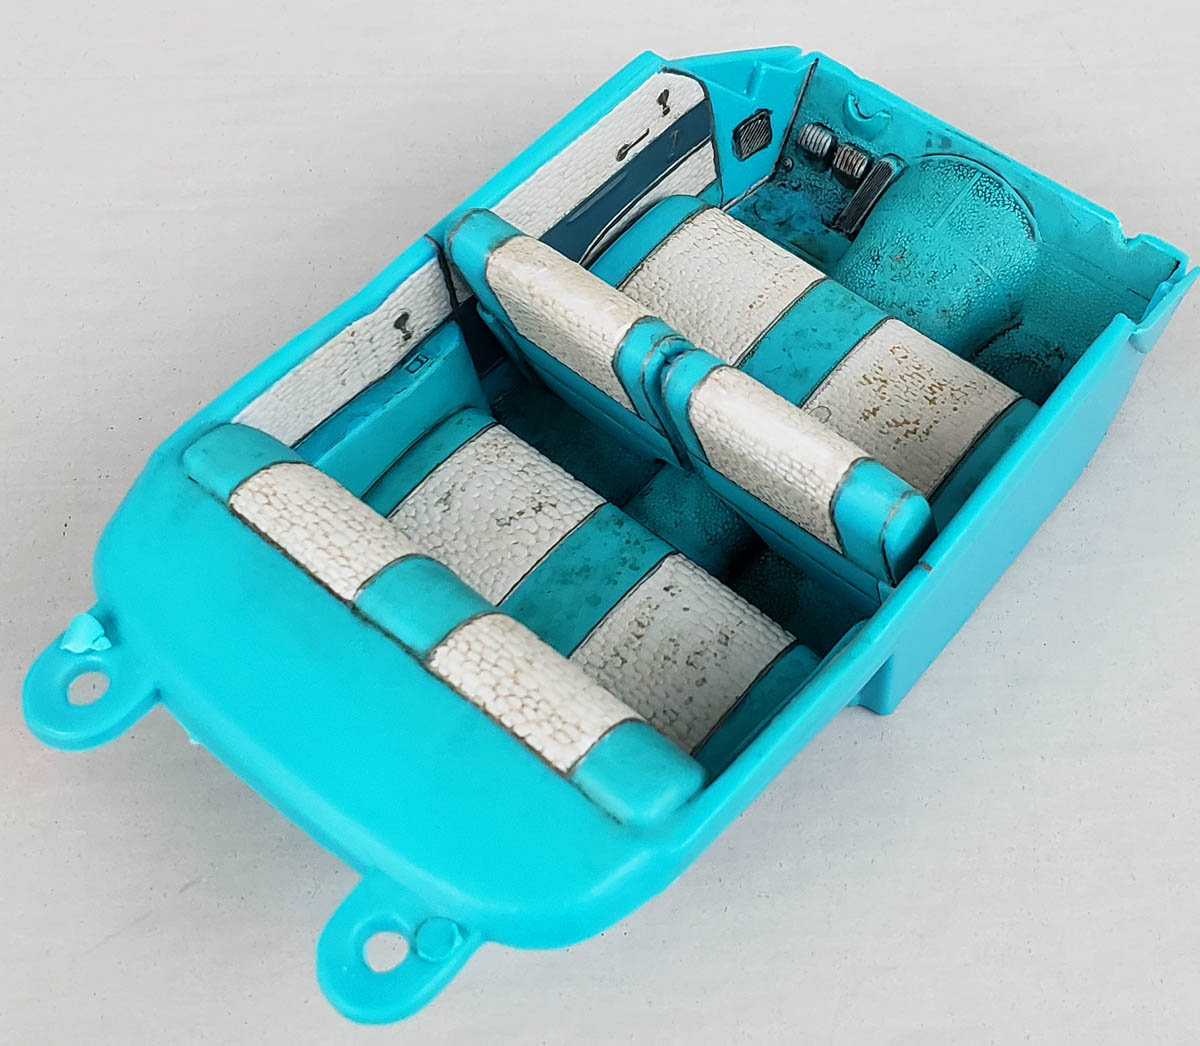
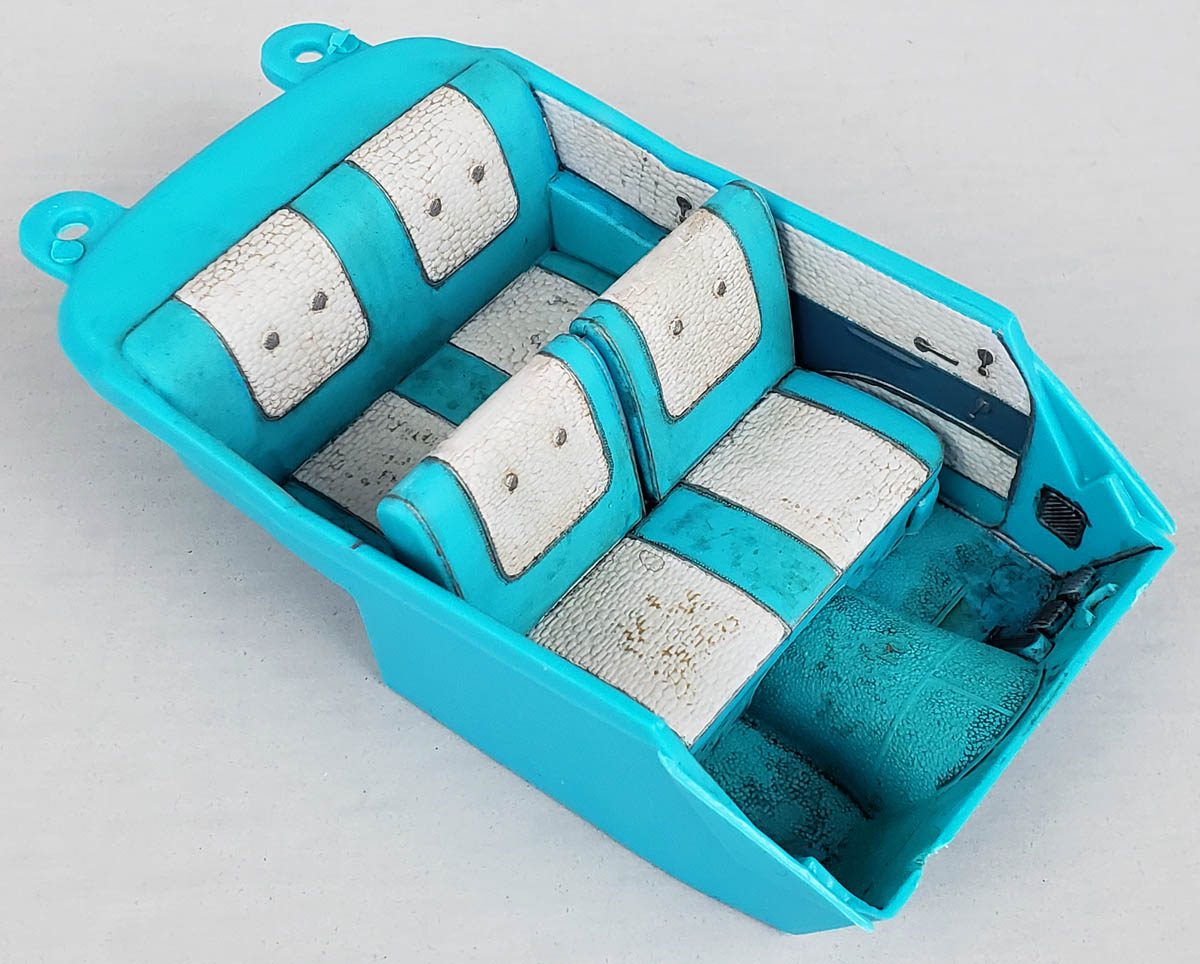
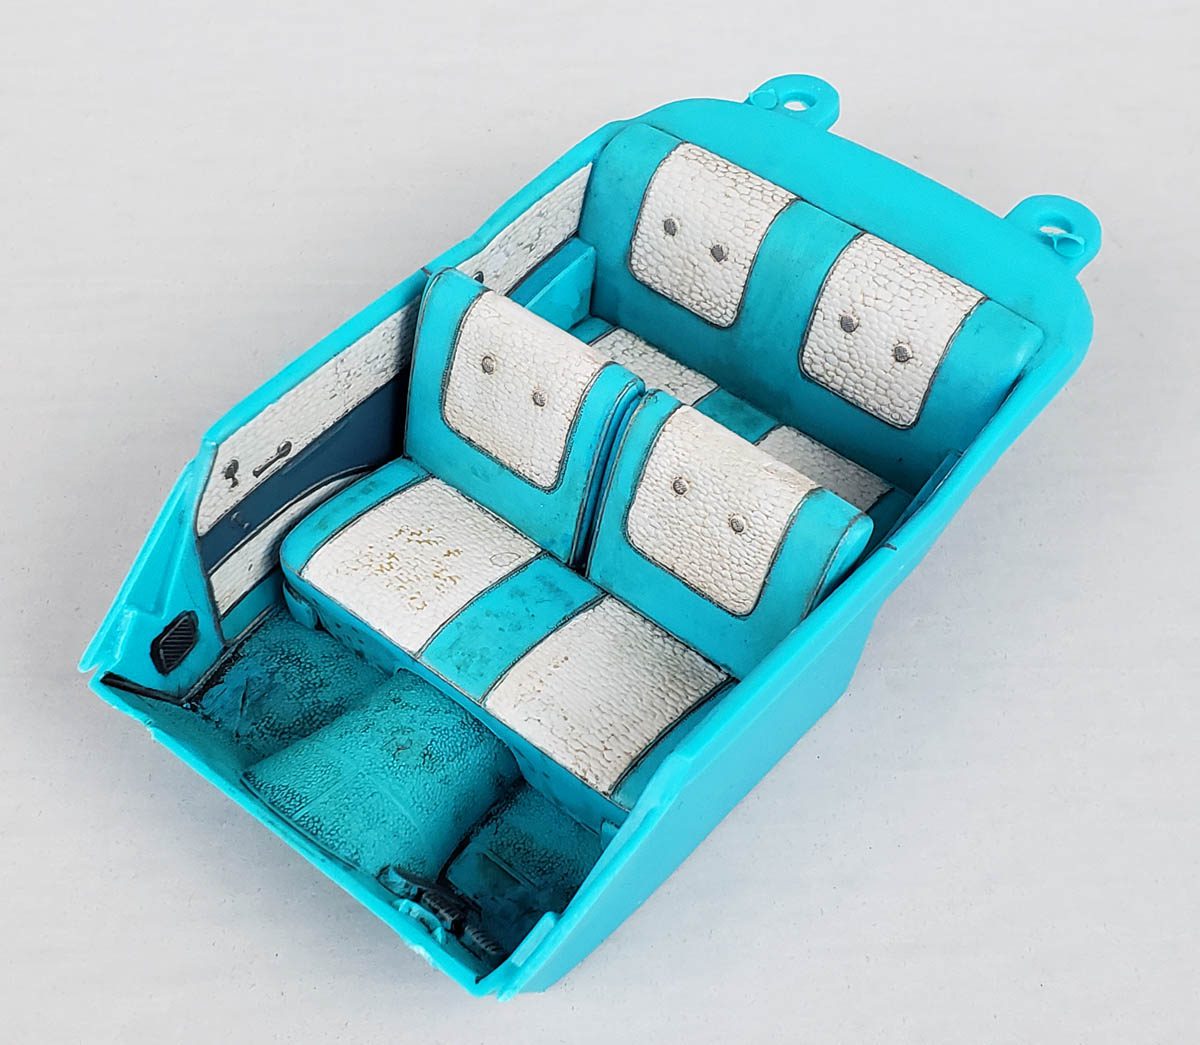
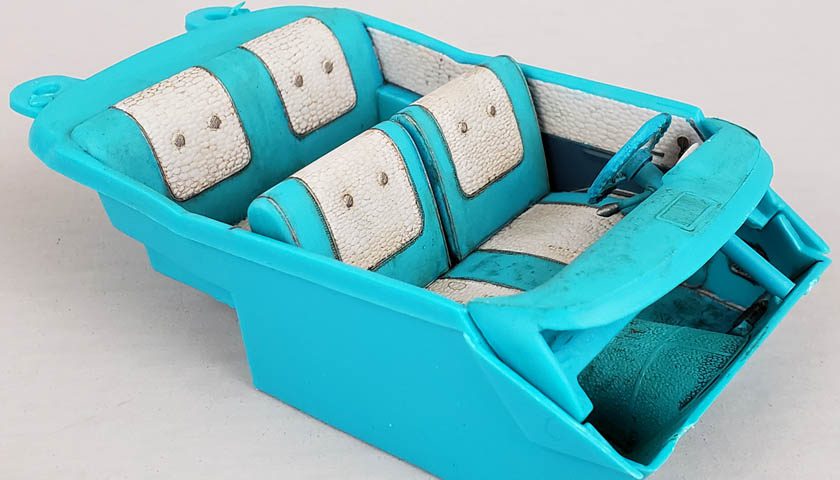
I liked the turquoise color of the plastic, and decided to go with it. The interior parts – a “tub” for the passenger area, the front seat, dash, and steering column, were all given a coat of AK Interactive Real Color RC206 Russian Cockpit Torquise. (Their spelling, not mine… 😉 ). It almost perfectly matched the plastic, in fact. I didn’t bother with a primer, as I knew that a proper lacquer paint would stick well enough.
The Details
The kit has some molded in texture on parts of the seats and sidewalls, and I wanted those areas to be white. I’d found a photo of an original interior, and while that photo was from a different colored car, I used its color “map” to determine where to place things.
The seats would feature white textured area, lined with a gray/silver striping. A brief test was conducted to see about masking it all off and airbrushing it, but I quickly realized I did not have the patience for that. Brush paint it would be.
I opted for a 50/50 mix of Vallejo Model COlor White and Sky Gray for the white areas, as this would give me some “space” for white highlights. Thinning the paints quite a bit to allow for maximum control, I carefully lined in the white areas using a #0 liner brush. This give a very fine point to work with, but did not have such a full belly on the brush to deposit too much paint.
Once the white areas were outlined, I reverted to a #2 round to fill everything in. This took about 3 coats, but in the end, everything looked reasonably tidy.
And More Details
Next I applied a darker color to a small area of the door, using a mix of Vallejo Model Color Blue Green and Black Gray, in about a 2 to 1 mix. This covered a bit easier, and only required two coats.
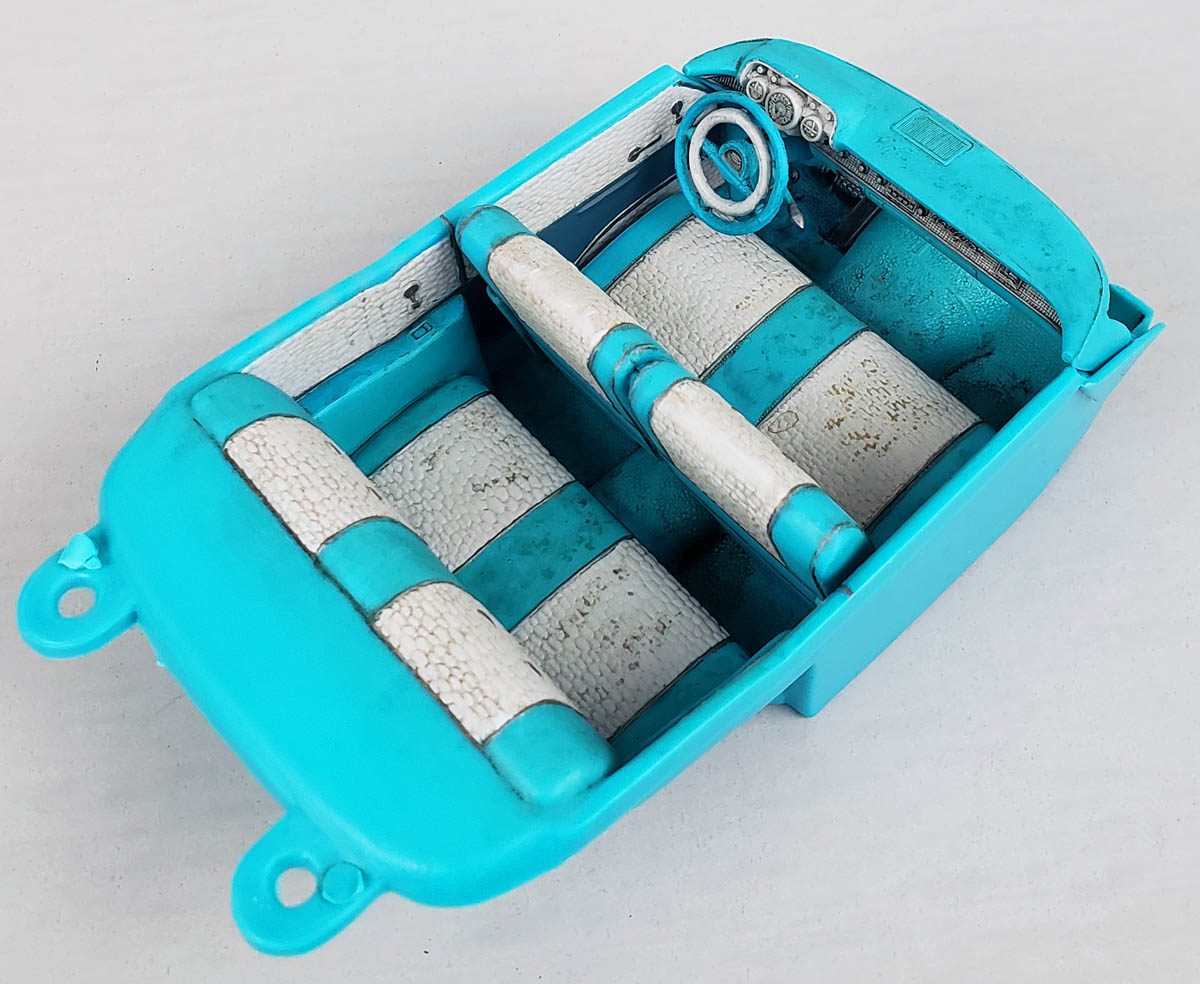
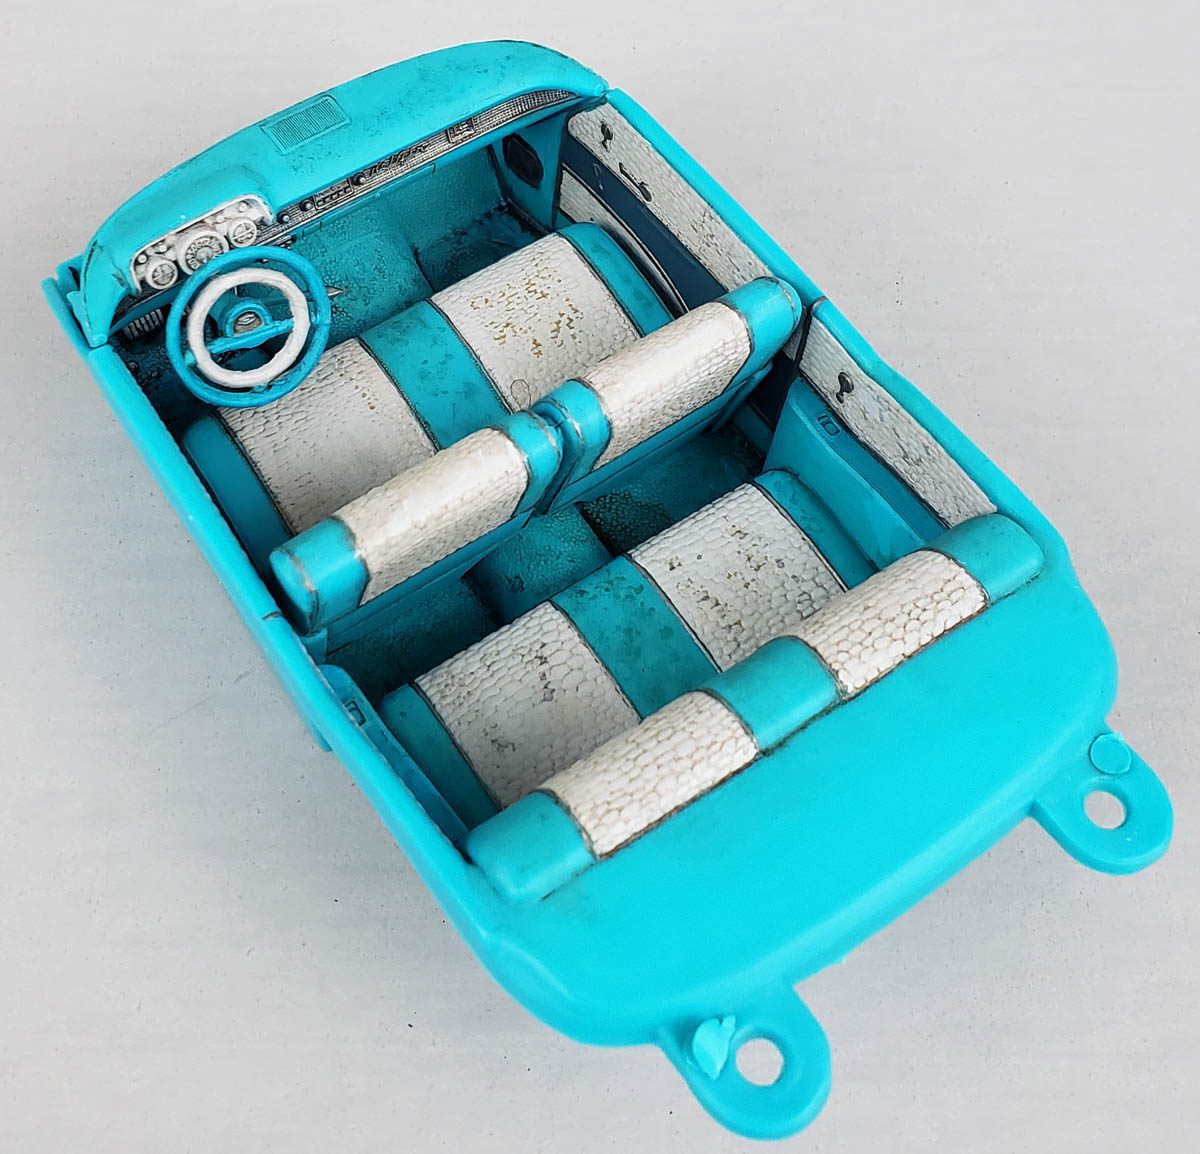
The next step would be a bit more difficult. All of the various trim areas were outlined with small raised lines, and a look at photos showed this was silver/gray in color. Because I wanted the interior to look worn, I chose Citadel’s Leadbeclcher. It would “sell” silver, yet also look a bit dirty.
Painting this on was a slow, somewhat frustrating process. A combination of less than perfect eyesight and hands that shake a bit required me to work slowly. And there were more than a few mess ups. The whole process became on of incremental adjustment. Paint the silver, clean up with my white and turquoise. Touch up the corrections with more silver, and then touch up the touch ups…
Eventually I got to a point of “it’s either good enough, or it will never get done.” Shades of childhood drawing…
Making It Dirty
Weathering is something I’m fairly comfortable with. While I’m not the “best ever” at it, I can generally make something look worn. Thus, going into this part I felt confident I could pull it off.
However….
Despite riding in cars all of my adult life, and most of those had fairly worn interiors, I found the process of making a model car interior look used quite difficult.
Making it clean would be easy. Making it look like a beat up junker would be easy. But making an object look work yet maintained and occasionally cleaned is another story in my mind.
I added some enamel wash, but it was too strong. Wiping that back, I shifted to oils, thinned heavily, and began staining and blending and manipulating. As with my copious use of an eraser in my childhood drawings, cotton buds and thinner were employed frequently to remove abuse.
The process went round and round.
Eventually. I reached a point of simply deciding that it was as close to the vision I had as it was going to get, given the circumstances. (Namely… having something to write about. 😉 )
A matte coat was added, and I set it down to look at it – from a couple of feet away.
Learning To Live With It
In all my drawings, regardless of how many cycles of erasure I went through, I’d always reach a point of decision. “Can I accept this?” I don’t know that I’ve ever had the expectation of “perfect”. It’s always been a realization that even if you keep slicing something 50% at a time, you never actually reach a point that there’s nothing left.
Back then, it was usually the end of the school day, or bed time, that forced a decision on completion. Today, it is an acceptance that the blog must be fed, or the next project needs work too, or that I’m simply bored with a particular stage.
And as much as I am looking forward to finishing the exterior of this, I realized with the interior that I needed to just call it done. I could have repainted, detailed, and reweathered it several more times, but it might never hit the mark of what I saw. And quite often when I get bogged down in a section, the vision blurs, and I find I’m at a bit of a loss.
So this is a car interior I can live with. It’s not bad, but it’s not great. But I balanced it all out so that I mostly had fun.
The Takeaway
I think one of the most valuable lessons I’ve learned through scale modeling is to realize it’s not that important. Yes, I want to do my best, and have fun. Yet at the same time, it’s not performing heart surgery or flying a Boeing 747. Those things are important. Really important. Do those wrong, or accept less than the best, and catastrophe occurs.
And while I always strive to do my best in modeling, learning when to step back and say “that’ll do pig” is critical to enjoying the hobby. Take what is learned, tuck it away, and apply it on the next build. Then the process starts over.
I guess that, for me, is where the fun is. Always learning, always growing.
A strange new world, yet ground well trodden at the same time.

Leave a Reply