I always liked reading about World War II airplanes and tanks as a kid. The school library was full of old books about them, each loaded with old black and white photos. I’d check them out over and over again, reading through them each time, and soaking in every bit of detail about each machine.
By the time I was in later elementary school, the little check out card tucked into the inside cover of each book was filled with my name. Line after line showed my name, the check out date, and the return date, all in the librarian’s neat handwriting. Ask me any question and I could tell you… the wingspan of a P-47, the horsepower of the Spitfire (please specify the Mark though), and the armor thickness of a Sherman.
I’m quite sure if the books would have covered it, I could have quickly cleared up the question about the airspeed velocity of an unladen swallow – African, European, or otherwise. 😉
A Gap In Knowledge
One area that I did not spend a lot of time studying was the actual timeline of World War II. While equipment knowledge did help me understand the combatants, how it all sorted out was a bit of a mystery.
I didn’t realize how poor my understanding was at the time until looking at a creative writing project from 3rd grade. I wrote about Captain Thunderbolt, a brave and daring pilot who flew a P-47B, which looked remarkably like the artwork on Lindberg’s model box of the same kit.
My story kicked off with the Battle of Britain and Pearl Harbor around breakfast, with mid-morning seeing the battles move to Midway and Stalingrad. Somewhere around noon came the invasion of quite a few islands, and the whole D-Day landing. Mid-afternoon was a bit of a setback during the Battle of the Bulge, but then the Allies finished off strong, as Captain Thunderbolt led the team to wins over the Axis. By dinner, everyone was home.
It’s funny looking back at it. My grasp of the timeline and scope of it all was comical. In terms of geography, I write the story as though it had taken place in the next county.
I even had a little drawing accompanying the assignment. Though my understanding of history was quite poor, those little line drawings were quite recognizable.
Filling In The Rest
By 6th grade, I’d started taking proper history courses, and began to find out that World War II actually occurred over a period of years… who knew? Still, my love of the equipment transferred into a love of times, events, and places, and my voracity for reading widened to include history. Before long, those library’s stock of WWII history books had my name on the cards too… multiple times.
While many aspects of the war fascinated me, I was especially interested in the desert campaign in North Africa. With leaders the likes of Rommel, Montgomery, and Patton taking center stage, I discovered a whole new focus of my reading. And my knowledge of equipment really helped me understand what was happening. All of the technical data began to sort itself out.
One of the areas I found most fascinating, where equipment and tactical reality met was in the camouflage patterns used by the RAF and Luftwaffe. The earthy colors – tans, browns, greens, and light blue – really caught my eye. As I was heavily into model making by this time, the number of subjects featuring those schemes began to hit my model desk more frequently. I don’t know that I could put my finger on it, but they were easily my favorite to paint.
Deciding On A Scheme
Hasegawa’s Falke Model I Otsu is a rebox of a previously released kit. This one features a decal scheme inspired by Australian Spitfires from the Southwest Pacific theater. Seeing that got me thinking about how to incorporate a cool WWII look into the world of Maschinen Krieger.
Factored into my thinking was something that I’d read about the genre’s creator, Kow Yokayama. It seems he is a fan of World War II aircraft, and the colors from that era figured heavily into his designs of both the models and his amazing artwork. I began trying to come up with a unique way to give a nod to the creator of Maschinen Krieger, and factor in my love of WWII aircraft scheme.
Initially I was thinking of doing something that drew inspiration from Australian Spitfires in the Southwest Pacific. Those were generally painted a light blue underneath, and the topside was a standard RAF pattern with brown and green. Sometimes the colors were locally produced, other times standard RAF paints. But the general look was most often brown and green over blue. (With exceptions of course…)
However…
That Photo

As I hunted the Googles of the interwebs for inspiration, I found a photo I’d seen many times before. It was of a German Messerschmitt 109, painted in a tan over light blue scheme. Darker green blotches had been painted on the top and side surfaces. The pattern stuck in my brain.
I decided to draw color inspiration from the RAF, however, as the Dark Earth and Middlestone over Azure Blue are my favorite colors from the period. And I really like the bright red spinner on those aircraft.
So the decision was made… RAF colors, Luftwaffe pattern. All on a 29th century scifi armored raider aircraft.
A Change Of Color
Lately I’ve been using AK Interactive’s Real Color lacquers more and more. In fact, I’m pretty much sold on them – they’re quickly replacing the Tamiya on the shelves in my airbrush room. (My wife calls it the laundry room for some reason.)
I’d primed the model with Badger’s Stynylrez Gray primer. However, my reason for that was less to make the surface “grippable” by later paint, because lacquers cling wonderfully. The initial priming was simply done to facilitate photography for the previous blog entry about this model. 😉
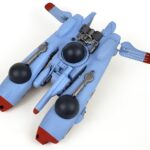
I started by covering the entire model in Real Color Azure Blue. I thinned it about 50/50 with AK’s High Compatibility Thinner, and applied it with a Badger Extreme Patriot (.3 nozzle) at about 18 psi. The paint went on very, very smoothly for the most part. A few places got a bit rough where I let overspray collect on the transitions from horizontal to vertical. A little sanding took care of that.
Brown, And Brown
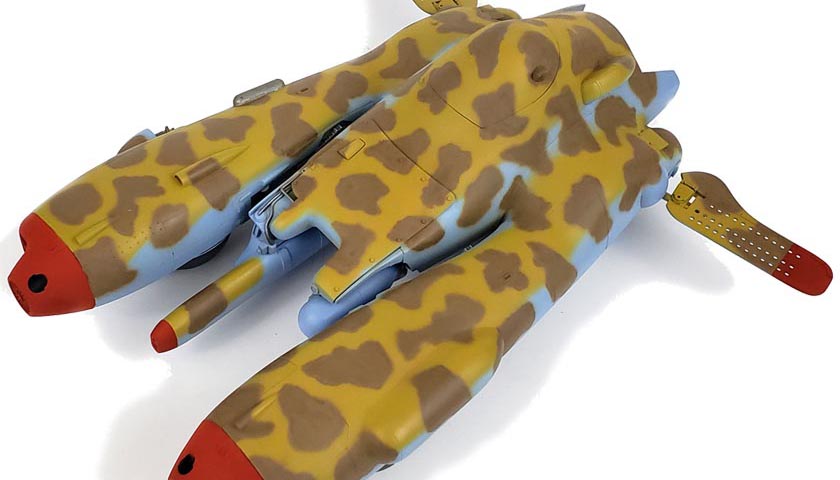
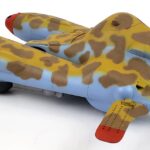
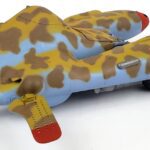
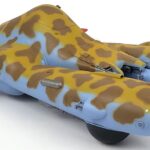
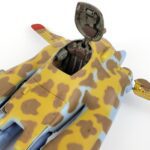
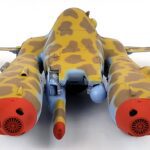
Following the pattern of the Luftwaffe 109 I’d found, I painted on the Real Color Middlestone on the upper surfaces, making sure to leave most of the sides in the Azure Blue. Using the same thinning ratio as before, I started by freehand spraying the demarcation line. Between Real Color’s excellent performance, and the fine line capability that the Extreme Patriot brings to the party, the process was quite simple. Normally after freehanding a camo color I’ll go back with some of the highly thinned base and clean up the edges. However, the paint went on so nicely that I did not need to do so.
Painting “blotches” can be a bit tricky. While the concept is simple enough – paint on some squiggly circles – execution can go a bit loppy-jawed if you’re not careful.
I’ve often seen where a modeler might start in one area with one size of pattern, yet by the time they got to the other side of the model, the pattern was quite a different size. And while the idea is to be random, the example I was following showed a fairly uniform “volume” for each shape.
Density is also a factor. I t can be very easy to start very loose in one area, and yet get very tight by the time you reach another. Or vice versa…
Making A Plan
To avoid these issues, I decided to be very deliberate about my approach to this camo painting. First, I painted a “reference blotch”. It would serve as the pattern for the volume of everything else. While I tried to differ the shapes, each would be about the same “square inch” measure. Having that one pattern to reference was very helpful. (The paint color was AK Real Color Dark Earth, thinned and applied as previously noted.)
I also resisted the temptation to work a section at a time as I normally do. After putting down my reference blotch, I went to the opposite and and side of the model to do another. I started small, gradually adding to the size, and differing the shape a bit, until I had something in scale with my reference.
I them moved to another part of the model, and repeated this process. Once I had seven or eight examples of the pattern across the airframe, I began to fill in the gaps, all the while paying attention to density and spacing. In a few areas that I had odd blank spaces, I found that instead of filling those areas with a smallish or too oddly shaped blotch, I could simply extend the borders of the surrounds blobs. This kept each within reasonable scale, but closed gaps in the pattern. I also made sure some overlapped the Azure Blue areas, as the Bf-109 example showed.
A Bit Of Cleanup
Because the pattern required me to shoot paint from many, many angles, there was a bit more overspray than with the Middlestone. Once the Dark Earth was applied, I loaded the color cup with highly thinned Middlestone – about 7 parts thinner and 3 parts paint. Closing the adjustment valve on my airbrush down a bit to lower the airflow, I went in and cleaned up the edges around the patterns. This also gave me a chance to refine shapes and tune the gaps.
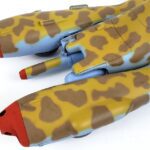
With the camp colors in place, the areas to be painted red were masked off. I used thin strips of tape right at the point of demarcation, and then added to that further back. Finally, I wrapped the whole thing in a plastic grocery bag, so that just the areas to be painted were visible. Red is not always the best covering color, but it can tint everything around it if you’re not careful. I applied Real Color Red as noted before, and removed the masking.
The Real Impact
As I began to learn more of the history of the equipment I so thoroughly studied, the gravity of it all began to loom. The more I read, the more the numbers began to run through my mind. All of that equipment, and all of those years, were not just in a vacuum. The toll of the war began to factor into my learning, taking my understanding and appreciation of the time even further. Yet even then, it was not all fully realized. Only years later, as I had a small taste of a conflict as an adult, did the full scope of it all begin to take shape.
It’s a rare day that I finish my work and think “Yeah, that’ll do, pig. That’ll do.” But this Falke really came ever so tantalizingly close to the vision in my head I’d started with. There is still a lot of work to do – decals will follow, and then loads of weathering. And I mean LOADS… 🙂 But in this base paint stage, I really, really like it. I can’t wait to see how it all ends up. (And I hope I don’t blow it after this point! )
And I hope the intent will come through. It’s not only a nod to the genre’s creator, but hopefully is also a bit of a memoriam to the pilot’s who flew those machines long ago – machines adorned with these colors and schemes. It can be easy in our hobby to get disconnected from the real numbers that matter. And while a youthful misunderstanding of it all can be dismissed, I hope as an adult to never forget the real sacrifice that was made.

Leave a Reply