I can’t recall if it was my 10th or 11th grade year that someone decided it would be a good thing to put me in an algebra class. Nothing in my scholastic history pointed to a career in math that went much beyond “Here’s your change, sir. Next order please?”
I’d taken pre-algebra, which confused me greatly. Numbers are numbers, and letters are letters. Why anyone thought that substituting a number for a letter was a good idea is far beyond me. It would have made the whole process much easier if everyone left the numbers where they were. Then we wouldn’t need to solve for x, because we’d know that x was obviously 42. Or 29. Perhaps 4. If you just leave the numbers alone, it greatly avoids confusion. (I should start a hashtag campaign…. Hmmm….)
As I sat in the first few class sessions, I became rather perturbed that the teacher kept waking me up. Not only was she not paying heed to my varsity letter jacket – which allowed me to sleep in class as though endowed with a super power – she actually expected me to learn the maths.
Quadratically Challenged

It turns out that what she wanted me to learn was something called the quadratic formula. As best as I can recall, this was a group of letters that became trapped in the math world, and arranged themselves among various math symbols to try and blend in like numbers, but woefully failed at the task. A few numbers came along to help, but their attempts only made the letters stand out more. As punishment for entering the world of numbers, they were forever relegated to being used as torture devices in high school algebra class.
The worst part was she wanted us to learn it by breaking it down and going through each bit, in quite gory detail, over the course of the semester. So for the next few weeks, it was a constant struggle. Her writing letters where numbers should be, me not getting much sleep, and I didn’t understand a thing.
Better To Be Lazy And Clever
I once read that it’s better to hire clever lazy people. Hiring dense lazy people is obviously a bad idea. They will get little done. Dense and energetic is a bad combo too, because they will do many stupid things quickly. Clever and energetic can be a good combination, of course. But the stars are quite often the clever lazy ones. They find efficient ways to do things with minimal effort. (I know it’s not a great theory, but I needed a paragraph here for transition. Work with me people! 🙂 )
While I had not yet been exposed to such MBA-level thinking, I did theorize that my life would go better if I could get her off my back. So I did what any clever, lazy person would do. I flipped to the back of the book. The publishers had apparently put the actual formula there, in all its glory. With a little trial and error, I figured out how to use the formula that we were working towards to figure out the problems we were presented each day. I simply memorized it, and suddenly I was getting straight A’s.
The teacher, of course, was suspicious. She watched me like a hawk during tests and quizzes, thinking I was cheating. I’d sit there, writing out the full formula, plugging in the numbers, and figuring out the answers. I could then plug them back into the problems on the quiz. I did it enough that eventually I could actually figure most of them out in my head. And true to form, I’d hand in my test ahead of everyone else, smiling at her the whole time.
Finally one day she observed what I was doing. I’d cheated without cheating. I’d short circuited her teaching process by actually learning how to do the maths. Exasperated, she tossed up her hands.
“That’s not how you’re supposed to do it!”
Thank You Bandai. More Please…
If you’ve read this blog for long, you know I like my Bandai Star Wars kits. I have built other brands a few times, but mainly because I didn’t find a Bandai equivalent. And while I’d certainly prefer not to confine my building to any one particular type, if suddenly all I could build was Bandai Star Wars, I’d be OK with it.
It’s no wonder, really. Bandai kits in general have amazing fit and detail. And when it comes to the Star Wars universe, they go to great length to recreate the original studio models. (Assuming the original was a proper model, and not just CGI….)
I realized this when I built the Bandai Y-Wing Fighter a while back. On close examination, I could clearly see that on the upper aft fuselage section, there were two shovels… the sort of equipment you’d see on a tank model. Bandai has so faithfully reproduced the studio model that even that little greebly detail was captured. Later, on a TIE Fighter, I discovered part of the suspension parts for a Sherman tank.
I think the only thing I could fault Bandai for is not producing more kits at a faster rate. Building one only makes me want to build more. And more. And yet again more. 🙂
It’s Not But It Is
While I think the A-Wing Fighter or the AT-ST were may favorite Bandai Star Wars kits, my favorite subject would have to be the X-Wing Fighter. It’s an icon in the world of scifi. Sitting in the theater as a 10-year-old kid in 1977, watching it speed down the trench in the Death Star, finally blowing up Darth Vader’s evil moon-that’s-not-a-moon… how could I not like it?
As a kit, it was a bit fiddly. Bandai did such a great job on the color separation that it made it a bit odd to paint in the “normal” method. Yet the fit is so good, it wasn’t that big of an issue. Still, of the “alphabet fighters”, it wasn’t at the top of my list from a kit standpoint. However, I did want to build another.
I saw that Bandai had released a Resistance X-Wing Fighter. The overall design was very similar to the Original X-Wing. However, I had to think about it. When it comes to the Star Wars universe, in my mind, there are three movies: Star Wars, Empire Strikes Back, and Return of the Jedi. None of this “Episode” stuff. In 1977, it was Star Wars. Star Wars will always be Stars Wars for me.
And after watching Episodes 1-3 (I honestly don’t even recall the names of the movies), I was a bit soured on the whole thing. (I blame Jar-Jar…) And while I did see Episode 7 (still no idea on the name…), my “Jar-Jar trauma” was a bit too much for me to fully enjoy it. That and “whiny emo boy turned angry Sith Lord”.
But I digress…. this is about a model. Anyway…
I hesitated on the Resistance X-Wing, until a friend pointed out “it’s a Bandai Star Wars model. Forget Jar-Jar and Darth Whiny.” Point taken…
Shortly after that, I picked up the kit.
And It’s Great
The kit is exactly what you’d expect from Bandai. If you’ve built one, no explanation is needed. If not… go build one. You won’t regret it.
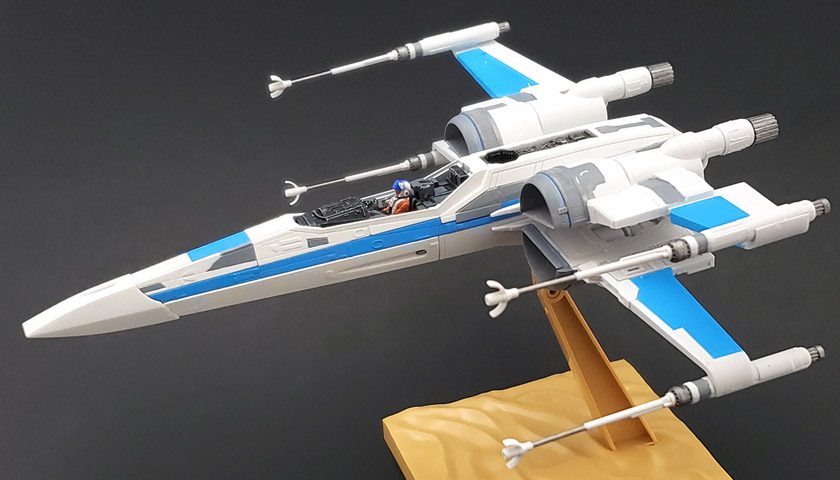
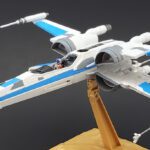
Like the Original X-Wing, however, the odd color separation makes painting a bit different. On that model I’d done a little masking and airbrushing, but a lot more hand painting. But all was done after assembly. On this one, I decided to do a test assembly. As all the Bandai Star Wars kits are snap fit, this was quite easy. In a few places here and there, I snipped connector pins to make disassembly easier. But by doing this step, I could determine if painting most of the parts before assembly would work.
Happily, it showed exactly what I’d expected – the kit can be built just fine after painting the major parts.
Fewer Colors
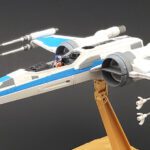
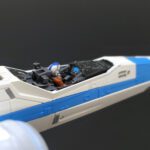
The major color separation I needed to deal with essentially came down to white and blue. Most of the parts were white, with just a few along the fuselage being blue.
The cockpit came first, of course. I gave that a coat of black primer, and then drybrushed it with Vallejo Sky Gray to help me better see the details. I then picked out the various sections in variants of Vallejo Neutral Gray, adding dots of white here and there to pick out the dials and knobs. The pilot was given a fairly quick paint job, essentially using a base/shade/drybrush approach, with only a few details picked out. I’d learned from my previous X-Wing build that little of this can be seen through the small canopy, so more attention was given to contrast and color placement than diving into great detail.
The white portions were painted using AK Real Color White Gray, a lacquer based paint. I like this color quite a bit, as it “reads’ white by itself, but when pure white highlights are added, things really pop. For the blue color, I chose Mr Color Gundam Color RX-78 Blue Ver. Anime Color. It too is lacquer based. While not a spot-on equal to the kit’s plastic, it fulfilled the “close enough” category.
Two Hours Masking, 2 Minutes Spraying
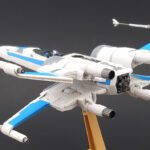
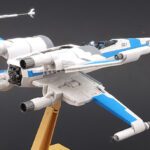
What’s not included in the color separation of parts are all the blue adornments on the upper and lower wings, and quite a bit of gray areas, primarily on the engine intakes. Banda provides nice waterslide decals for all of this color, but with all of the surface detail and contours, getting those to settle down would be a bit of a problem. I briefly considered masking and painting all of it, ultimately settling on doing just the blue. While it took a bit of time and careful masking, virtually all of it was on flat surfaces. The sections were painted with the same Mr. Color blue as I’d used on the fuselage.
With all of the blue and white color in place, I assembled the model, only applying a spot of glue here and there where I’d cut the pegs short. True to Bandai quality, any hairline gaps simply needed the slightest bit of Tamiya Extra Thin cement flowed in. A quick squeeze closed it all up.
Detailing The Rest
For the rest of the colors, I simply resorted to brush painting. Because the areas were well define – either bounded by recessed panel lines, or raised detail, the task was not difficult. I found a mix of three parts Vallejo Model Color Sky Gray, and two parts VMC Neutral Gray, came fairly close to matching the decal color. I added two drops of Vallejo Airbrush Flow Improver, and two drops of Vallejo Glaze medium to the mix. This gave it a nice viscosity that flowed well from the brush, settled down nicely, and did not dry too fast.
In a few areas I strayed from the lines a bit. However, a touch up with the white, or some strategic chipping and weathering, will take care of that nicely. A few silver bits were primed in black and given a coat of Citadel’s Leadbelcher. Setting it all on the stand that is provided with the kit, I gave it some time to dry.
Ah, But It’s How I Do It!
My poor teacher never did fully give up on me. And by “give up” I mean waking me from naps. With the cat out of the bag, every other kid in the class went to the end of the book, figured out the formula, and before long everyone was getting straight A’s. Her whole program of instruction for the semester now shredded and torn, she soldiered on in quiet denial of my Math Rebellion.
Until I’d discovered Bandai, I’d always thought that you didn’t paint models before building them. And for good reason – I don’t know of any other manufacturer that produces kits where it is even practical. Even Tamiya’s best requires some sanding here and there.
But for the most part, these Bandai Star Wars kits can be fully painted, at least in the main colors, before assembly. In a few cases, I’ve actually fully pre-painted them, assembled the kit, and then just glued a few joins together. A quick scrape of the hobby knife removed excess plastic, and a brief brush touch up made it all disappear.
I still don’t have much of a head for math beyond the basic adding, subtracting, timesing and “guzzintas”. (Two guzzinta 4 two times…. etc. 😉 ) But what I have firmly grasped is that one Bandai Star Wars kit quickly multiplies into many. And the formula is not difficult – it’s just plain fun!
Next up for this kit will be the weathering. Quadratically applied, of course. 😉




Leave a Reply