The school where I attended middle school – 6th through 8th grade – was right across the street from a mall. It worked out rather well for me at times. If my mom or a friend’s mom was in town around the time school let out, we could head across the street, roam the mall a bit, and they’d pick us up.
It wasn’t the best mall in town. A newer one had been built a few years before, and it had pulled much of the traffic away. And an even newer one was being built – one that would eventually make the one across from school obsolete. But for the years I was in middle school, it was a great place to head to.
The best part of the mall was that it had a toy store. The front half of it was truly kids toys… little kid stuff. Dolls, old fashioned wooden trucks and trains, and other items intended for the preschool crowd. But the back half of the store housed a real live hobby shop. Airplanes hanging from the ceiling. Racks of paints. Stacks of kits. All manner of things a 12 year old who builds scale models would want to see. So it was most definitely a frequent destination.
The Fiscal Reality
The problem I had was of course the same one I wrestle with to this day – money. I rarely had any. And when I did have some, it was frequently too small a quantity to afford something from the “real” model store. Sure, I could head over to Kmart and pick up the same Monogram kits that I’d built time and time again. But the lure of the shop was strong.
They had exotic brands I’d rarely seen, let along built. Hasegawa, Airfix, Italeri, Tamiya, and so many more. The kits were glorious looking. Grown up modelers would often be there, and talk of the relative merits of this kit versus that one. I learned that any new release brought about some great discussion.
But as a kid who liked to build models continually, mowing yards for one month to get just one kit seemed a bit extreme. I could buy 10 kits from Kmart with the same effort. Still, those kits at the shop were very, very cool. I faced a dilemma. Build a really cool kit each month, or many of the same old things? What to do….
Green What?
My mom noticed I hadn’t made my usual trips up to Kmart to pick up model kits with my yard work earnings. Not sure what mischief her her 12 year old son might be getting into, she asked me about it.
“I’m saving up my money for a really nice kit. I want to buy more, but I can’t mow enough yards.” Sympathizing with my plight, she asked me if I’d like to use the S&H Green Stamps we had.
i knew what they were, in general. Each time she’d buy groceries at some of the local stores, they’d give her some stamps based on the dollar amount purchased. It might be a few strips, or an entire sheet. She’d bring them home, and dutifully stick them in a manilla folder. We’d been collecting them for years.
I wasn’t sure how a folder full of stamps would help though. Mom explained it to me. “They give us these stamps when we buy groceries. You can stick the stamps in the pages of a book. When you turn them in at the S&H Green Stamp Store, they work like money. I think they even have some models there.”
Green Stamps
This last part caught my attention. They might have models. We had a stack of those green stamps. And the Green Stamp store was in the mall. Across from the school.
Mom took the manilla folder full of stamps off of the shelf in the pantry, along with the book to stick them in. I started to lick and stick them, like you would a postage stamp. (Well… like we used to do with postage stamps…) Being a wise lady, my mom brought me a sponge, sitting on a saucer. She’d moistened it with water. “Just pull the stamp across the sponge, then stick it to the sheet of paper. Make sure to line them up neatly.”
For the next few hours, I stuck hundreds of stamps to dozens of S&H Green Stamp sheets. My mom had been stuffing them away in that folder for literally years, always intending to use them, but never doing so. Eventually, I was quite positive I was a Green Stamp billionaire. “No one could have ever had this many stamps” I told myself.
I convinced mom to let me go to the mall after school the next day. It was a Wednesday, so we’d all be heading to church for dinner and prayer meeting. The church was only a couple of miles from the mall. I could hit the mall, buy out the S&H Green Stamp store, and walk over to the church. I stuffed my pages of stamps into my school bag, and anticipated the kits I’d be able to get.
It’s Like A TIE Fighter, Only Advanced
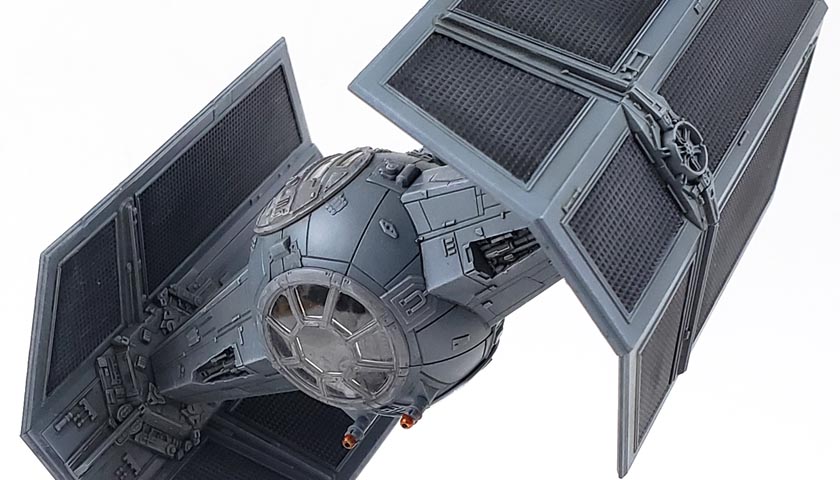
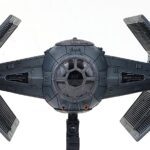
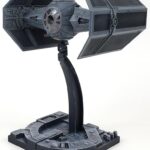
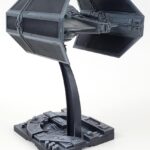
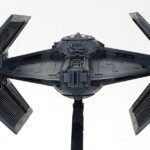
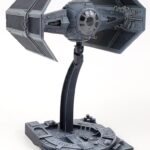
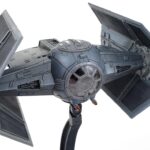
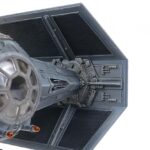
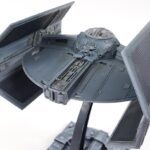
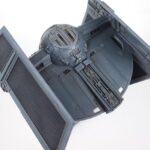
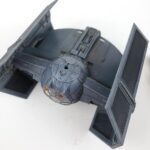
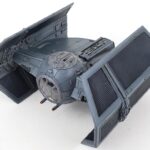
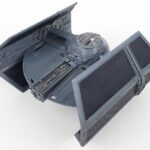
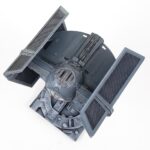
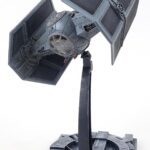
I’d already built Bandai’s basic TIE Fighter just a few months ago, so I knew this one would be very similar. The “ping pong ball” cockpit module and side extensions were pretty much identical. The Advanced version – which of course was Darth Vader’s mount in Star Wars – had solar panels of greater length, with the upper and lower sections angled in. Additionally, a sort of half-circle tail section was added aft of the pilot’s housing.
Interestingly, I’d seen one of those “behind the scenes” videos online just a few weeks ago. Many of the original ILM crew who had created the various vehicles from the original trilogy were interviewed. One in particular noted that the impetus behind giving Vader a different mount was simply so he could be easily identified in the space combat scenes.
Sith Lord, Schmith Lord… we just need you to look different Darthy boy! 😉
A Simple Inside
The cockpit for the Advanced TIE is identical to the regular old non-Sith Lord TIE Fighter, so if you’d like to read more about it, check out the previous build blog for that version. Basically, paint it gray, drybrush it gray, shade it gray, and then add a few decals. Unless you leave the top hatch open, very little will be seen. Even with the hatch removed, very little will be seen now that I think about it.
The main difference between the two kits is the pilot figure. The basic TIE Fighter has the black helmeted, slightly clueless looking guy from Star Wars. The advanced TIE Fighter has everyone’s favorite man in a black cape, Darth Vader himself. Well… a tiny, somewhat oddly shaped Darth Vader. His hands stick straight out in order to look like he’s holding the control column. However, the way he’s sitting, you could mount a small bit between his hands that looked like a newspaper and he’d look like… let’s just say he’d be right at home in his “chamber of solitude”.
I’ll Have That In Gray
Henry Ford is often quoted as having said “Any customer can have a car painted any color that he wants so long as it is black.” It’s kind of that way with TIE Fighters from the original trilogy. The imperial fighters were gray. However, I have read in several places that two colors of gray were used.
In Star Wars, they were painted a fairly neutral gray, as a bluish-gray color had trouble showing up sharply against the blue screens against which they were filmed. Neither George Lucas, or anyone at ILM, has returned my calls to confirm this, so I’ll just take the Interwebz at its word.
In Empire Strikes Back, and Return Of The Jedi, a more bluish gray was used. So while we actually see Darth Vader flying in the gray version, I like the blue/gray color better, so I used that. (Little known fact: Darth Vader had a step-brother who was a country singer. Name was Garth Vader.)
I still had some of my blue/gray left from the original TIE build. It wa a mix of roughly 7 parts AK Interactive Real Color Neutral Gray, 3 parts AKRC Off White, and just a touch of AKRC Blue. Owing to the fact that lacquer paints never cure, I simply added some thinner, swirled the paint back into existence, and loaded my airbrush.
The Painting
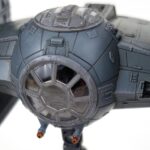
I’d decided to use the clear parts for the top hatch and front “windscreen”, so those were masked and painted straight neutral gray. The kit also comes with plastic parts that have no clear sections, so I added some tape to those and used them to mask off the interior. The entire model was given a coat of the blue/gray mix.
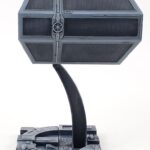
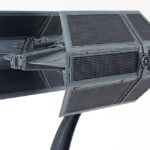
Bandai cleverly molded the solar panels as one large part, yet still in two colors. After examining the black portions, I realized there was enough relief along the edge that I could overspray the blue/gray onto the black, and later be able to hand paint the black sections and still retain a sharp line.
Because I was using lacquer paint, I did not prime. The kit’s fit was so perfect I didn’t need a “check coat”, and the lacquer adheres better than acrylic primers, so it did double duty.
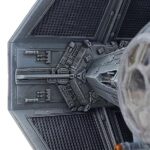
After the blue gray was on, the solar panels were brush painted with Vallejo Model Color Black Gray, and then various doors, panels, and a few greeblies were hand painted with a mix of VMC Neutral Gray and Sky Gray, just to break up the vast expanse of monotone blue gray. I considered doing some fading and shading with the airbrush, but ultimately decided a more “on screen” look that was cleaner would be nicer.
The Dark Side Of Weathering
I pondered for a bit on how much weathering I should do. Certainly because this was Vader’s personal fighter, it would have in theory received a high degree of maintenance. Maybe he even let the ship’s crew chief call him “Ani”… who knows? Anyway… it would seem logical that it was well maintained. (Had it been real and not make believe… but I digress… 😉 )
The problem I had was clean is so boring for me.
So I chose to do “light weathering”. Everything received a fairly thorough dry brushing with VMC Sky Gray. This not only suggested some chipping and wear across the model, but also helped define and highlight the various angles, many of which there are. (Thank you Yoda.)
Next I used some Starship Filth Oilbrusher from Ammo to make a slightly thick wash. This was carefully applied in the recesses and around raised detail. Rather than trying to clean off all the excess, I worked around the model to first blend it with a dry brush, and then on a second pass, used the brush lightly damped in odorless thinner to streak some areas, and clean others. It ended up being a bit more subtle than I’d intended, but not enough to warrant a do-over.
A few more greeblies were touched up here and there, a tiny chip added in a few places, and the laser “stubs” were based in Citadel’s Runefang Steel, and then overcoated with a generous dollop of Tamiya Clear Orange.
Green Stamp Reality
When I got to the Green Stamp Store, I found that they did indeed have several models available. Most were things I could already get at Kmart, so I felt a bit deflated. However, as I dug through the shelf, I found a couple of kits that gave me a new hope.
I suppose they’d been stashed towards the back by someone who needed to go home and lick more stamps, but behind the other kits were two from MPC – a 12″ tall Darth Vader, and a very large Vader TIE Fighter. I was quite happy about finding those… two kits I’d wanted, but had not been able to afford. These would hold me over for a couple of weeks while I saved up for my big kit from the “real” model shop.
I’d made the assumption that it would only take a sheet or two for any purchase, and that I’d have loads of stamps left over. Reality hit home hard though when I found myself turning over stacks and stacks of Green Stamp sheets in exchange for these two kits. I guessed they didn’t put much value in how much my parents spent keeping me in groceries.
Still, I was happy to have these kits. Apart from the hour it took to stick them in a book – an hour spent eating cookies, drinking Kool Aid, and watching cartoons – the cost for me had been zero. Good enough, I supposed.
The Bandai Star Wars Kits
Without a doubt, 12 year old Jon would have loved this Bandai Advanced TIE Fighter. I think he’d be quite pleased to know that his future self was still building these kits. (What he’d say about being overweight and mostly bald I’m not sure.)
The beauty of this kit is it’s one I feel I could recommend to any modeler, of any age and skill level. It’s all snap together, with no problems in fit whatsoever. Whether built out of the box with no paint and stickers only, or painted and weathered, the model offers great fun regardless.
Having built quite a few Bandai Star Wars kits, I think I’d have to rate this (and the regular TIE Fighter) near the top. The simple design means assembly is easy, and if painting and weathering are intimidating, these offer very low barriers to entry.
If my other calls to “build a Bandai Star Wars kit” have not moved you… maybe this one will. It’s just good, simple fun.

Leave a Reply