My 9th grade basketball coach was a very patient man. Though I had the height he was looking for, I did not have skill. Or coordination. Not even a smidgen of talent. Looking back, I can’t even say I was very motivated. Still, I liked being on the team, and I generally wanted to do well at the game.
He worked with me, day after day. After practice, he’d give me drills to work on that would improve my speed and coordination. Most were very repetitive, basic drills. I didn’t realize it at the time, but he was using a system that I’d become very familiar with in the Army – crawl, walk run. Start at the simplest, repeat it over and over, and keep adding things. Hopefully the sausage that comes out the other end is decent enough to make a meal, so to speak.
Getting Basic
We had a basketball goal set up in my driveway. It leaned a bit to one side, despite repeated attempts to straighten it up with tree limbs placed into the hole in the ground. And the rim sagged a bit forward. Still, for my purposes at the time, it worked.
Coach wanted me to work on my rebounding. The drill he showed me started by tossing the ball up against the backboard on the right side. I’d jump up, and using my right hand, bounce the ball back so it went over to the left side. I’d shuffle quickly left, jump up on that side, and using my left hand, bounce it back over to the right. Back over to that side I’d go, and repeat the process.
The purpose of the drill was to improve my hand eye coordination, my vertical jumping, and to drill into my head which hand to use primarily on which side. My mom told me years later she’d stand at the kitchen sink window, watching me do those drills (and others) for hours on end.
You Ever Get Bored Doing That?
Occasionally a friend would drop by while I was working on my drills. I’d continue my efforts, and they’d sit by the driveway watching me, and we’d talk as I worked. It might have been anything…. who had a new girlfriend at school (because it sure wasn’t us!), or maybe recounting a story of a particular teacher’s cruelty in assigning homework AND expecting it to be done. The conversation would ramble all over the place.
One particular day a good friend sat there as usual, and we were talking. I don’t recall what we were talking about, but it was the talk of 9th grade boys I’m sure. Nothing of great importance likely, because despite our opinions at the time, those were some of the best days we’d ever experience.
At some point, he got quiet for a while. The silence became awkward enough that I took my eye off the drills for a split second to see what he was doing. He just seemed to be watching me, a look of deep thought on his face. It puzzled me enough that I caught the ball, stopping my drill. “What is it?” I asked.
He looked at me with a quizzical look. “How can you keep doing the same thing, over and over, and not get bored?”
A New Old Kit
As I’ve explored the world that is Maschinen Krieger, I’ve stuck to the more modern kits from Wave and Hasegawa. They go together easily, and they’re the type of models you could generally recommend for any level or age of builder. Those manufacturers aren’t the “original” Ma. K kit makers though.
Originally, a company called Nitto produced the Ma. K kits. While the core of them was made of polystyrene, they were very much multimedia kits. Springs and wire were used for the various hoses and tubes, and flexible sleeves were used for the joint covers. And though the builds were fairly straightforward, it did take a little more work than your average all-plastic kit.
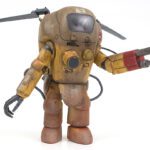
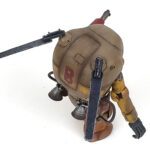
Up to this point, I’d not had a chance to build a Nitto kit, so when the opportunity made itself available to build the Fliege, I readily jumped on it.
Handling Those Joints
As I typically do, the process started with a thorough examination of the instructions and kit parts. Aside from the parts casting being a little less refined than its Wave counterpart, the Nitto fighting suit looked pretty good. I actually liked the spring and wire hose system better than Wave’s method of using polycap material. That stuff won’t hold paint… at least the spring could take it a little better.
But those plastic sleeve joints… I wasn’t happy with those. I’d seen them on finished models, and while they looked OK, and were easy enough to do, I personally felt they detracted from realism. Imparting a sense of realism to a scale model requires not using anything on it that “gives away” what it really is. Those little sleeves, to my eye, looked like little plastic pieces of tube.
Of course, the solution was easy enough, and was something I’d tried out before – replace them with Milliput.
Working With The Milliputians
I’d built the model up to the point of having all subassemblies ready – torso, legs, and arms basically. The kit had simple pegs that fit into polycaps for the joins. Assembled according to instructions, the plastic sleeves would go around these pegs. That’s where I deviated from the instructions.
Milliput is a two-part putty. There are other brands that work just as well, of course, but Milliput is what I had on hand. Once the two parts are thoroughly blended together according to the box directions, it can be shaped and molded as needed. Water keeps it from sticking, and as it dries reasonably slowly, it offers good working time to shape things.
I first assembled the model (minus the plastic sleeves), and positioned the limbs close to the desired position. Grabbing a small ball of the Milliput, I rolled it into a sausage, and stuffed it into the joint. Literally. I wasn’t neat and precious about it, I just stuffed it in.
Shaping The Sausage
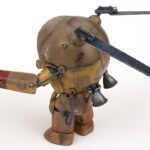
I continued the process on the joint until it was mostly full. The look I was going for was for the joint covers to be slightly smaller than the surround parts. Toothpicks and hobby blades were used to remove excess, making sure each was dipped in water first. Milliput is sticky stuff. Each time I’d shape it with my finger to make it smooth.
The process was repeated for all the joints. While it dries slow, I did work quickly. Once all the joints were filled, I did some minor repositioning to make sure it stood upright and everything looked like I wanted.
By this time, the putty was starting to set a bit. I moistened a toothpick, and used it to “sculpt” in some folds and texture on the joints. I tried to avoid leaving sharp edges, and give it all a soft, round appearance. A few areas were difficult to get to, such as around the ankle joints and waist. There were done in “besyacan” fashion…. best you can. 😉
Though I’ve done this before, I don’t feel like I’ve come close to nailing the use of Milliput to make joints. So I’ll be generous and rate it as “doesn’t look completely awful”. I set it aside to dry overnight.
Continuing On

Once the Milliput was dry, I used some files, a hobby knife, and sanding sticks to refine them a bit. I’d basically put too much on, so it looked too “poofed out”. Realizing I could have spent way too much time refining them, I eventually called it done and moved on.
My initial plan was to paint the model with Tamiya rattle can Racing White, and then add this “cool” looking blue leopard skin looking camo, inspired by a frog photo I’d seen.
Yes, a frog. I’ll just let us both ponder on that for a moment before continuing.
So I did the racing white thing, and the frog thing, and… it looked awful. Seriously awful. Even the frog was embarrassed. I didn’t even take a photo of it… I did make a screen capture from a Gross Models livestream I was on. So I got that going for me. Which is nice.
Time to rethink.
Why Does Google Keep Saying “Recalculating”?
My original plan had been to do a Mars themed fighting suit. I didn’t find any evidence of Mars fighting taking place in the Ma. K universe, but who is to say it didn’t happen? (Aside from Kow Yokoyama…) Or, rather, won’t happen when we eventually get to the 29th century.
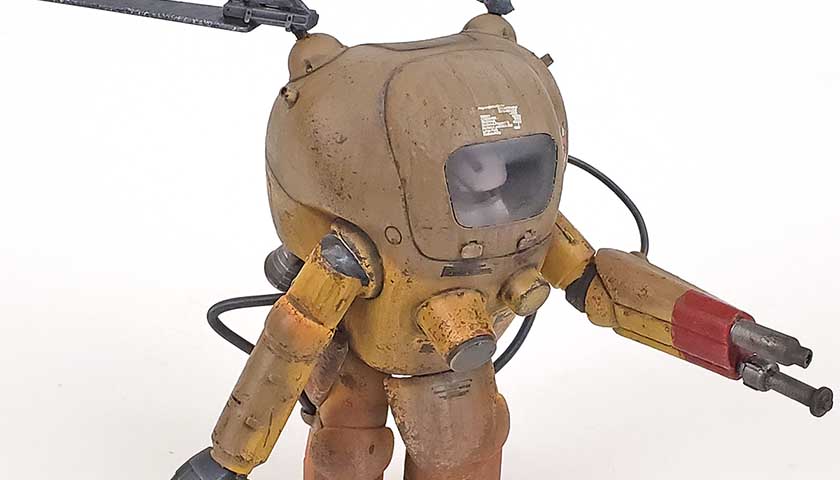
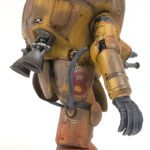
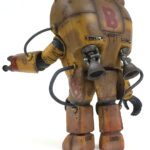
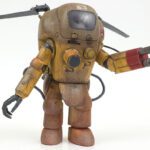
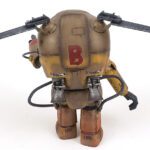
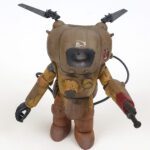
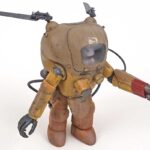
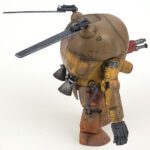
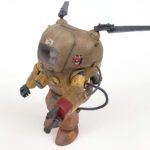
So after rethinking the direction I was taking, vis-avis this kit, I shifted gears back to the old Mars thinking. All of the previous paint work was toadally covered with AK Real Color Middlestone, and then some camo pattern was added with Dark Earth from the same manufacturer. Satisfied that the new look worked for me, I pressed on.
Weathering
The weathering on this model was fairly straight forward. I wanted a heavier, grimier panel line look, so I opted for Ammo’s Oilbrusher in the Starship Filth variety. This was thinned only slightly, and applied with a smaller brush. After a bit of time to dry, I lightly blended it all in with a brush damped with odorless thinner.
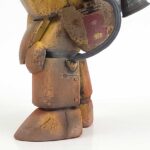
Paint chips were applied using Vallejo Mecha Color Chipping Brown, using sponge and brush methods. I focused chips lower down on the model, figuring that Martian rocks, various debris, and the odd Illudium Q-36 Explosive Space Modulator that might be lying around would create more damage on the lower sections.
Additional streaks and grime were added using several Vallejo Washes. These were applied in a quick “flicking” fashion with a #0 liner brush, with quite a number of layers of browns and tans going over the top of each other.
And Even More Weathering
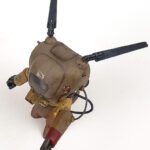
An airbrush was used to create some dust effects on the feet and lower legs, with Tamiya Deck Tan being applied. It was heavily thinned with alcohol, and slowly built up with the airbrush in very fine layers. A 2-1 mix of NATO Black and Hull Red from Tamiya provided soot and burn effects on the end of the laser beam thingies, and the thrusters on the back. I don’t know if lasers make heat effects, but I figured something was needed to fully convey “this is the part that goes ‘pew pew’”.
More washes, as well as some acrylic oil stains (from Vallejo’s Weathering line) were applied to get things looking as though they belonged there. The oil stains were a gloss product, and I left them that way to appear as fresh leaks.
A few more paint chips, some final oil paint smudges, and a light dusting of dark rust pigments was added to the feet. (Otherwise known as “Martian Dust”.) With all that in place, I called the Fliege done.
Pursuing The Unattainable
I looked at my friend, pondering his question. The thought occurred to me that I had never really put much brain power into examining such a notion. The look I gave him must’ve been akin to a pig looking at a wristwatch.
“I dunno… I guess I just keep thinking about getting better at it, and don’t really notice the boredom.” After a quiet moment, I resumed my drills… over and over.
Quite often I am asked “how do you do such-and-such?” I’ll give the answer as best I can, laying out the steps, the gotchas, the products, and the methods as best I can. Almost every time though the modeler will get back to me with some variation of “it didn’t work.” It may be “it didn’t work well”, or “it only worked partially”, or “hey, you’re an idiot, thanks for nothing chum.” (OK, that last one is an exaggeration… mostly. Mostly. 🙂 )
Nuttin’ Special
The thing that cannot be conveyed, but I believe is really the key to it all, is how much experience counts. The point of my basketball drills was not punishment, or mindless work, or even a process I’d use in the an actual game. The point of it all was to train my muscles to respond in a way automatically, so when actual game inputs started happening, the movement was burned into memory.
There is no secret sauce to weathering a model, or making Milliput joints, or airbrushing, or any of the steps we take. Sure, some tools and knowledge of their use is required. But the main factor in growth and improvement is experience. And you only get that through repetition. Over and over and over.
While I enjoy the Maschinen Krieger models immensely, I can say in all honesty that the reason I keep building them at this point is to gain experience. (Why else would I try frog camouflage…? 😉 )
The intewebz are a great place to ask questions. And there are plenty of good people to ask, and thankfully most make themselves available. But at some point, you simply have to build. Repeatedly. Do the paint, add the weathering, make mistakes and have successes. Others can describe it and demonstrate it all day long. Yet at the end of the day, each of us has to put in the time to grow. It won’t come any other way.
(Special thanks to Patreon supporter Chris Bernique for providing me with this awesome kit!)

Leave a Reply