As with most pre-teen boys, I was quite awkward around girls. I’d not fully departed from the “girls are icky” stage yet, but I’d seen glimpses of “maybe they’re not so icky” too. Regardless of where I stood at any particular moment though, I was consistently goofy whenever I had to deal with them.
Yet there was one girl in particular that for a while was the focus of my attention. I’ll call her Joan for the sake of the story. We went to the same church, and each Sunday I’d hurry to my Sunday School class, hoping to get a glimpse of Joan, and perhaps maybe she’d even sit near me. Of course, it never occurred to me what I would say if she did actually sit near me, and then stoop low enough to speak to me, of all people.
She was the All-American dream girl in my mind. Long, curly blonde hair, blue eyes, and the face of an angel. I don’t think she was aware of me in the least, other than being a random goofy boy in a group of other kids. I could only admire her from afar, never having the nerve to actually talk to her.
Aw, mom….!
I did almost get one chance. After church one day, a friend and I were standing outside talking. He had a sister a year or so older, and she came over to tell him they were leaving. Joan was walking with her, and as my friend’s sister drew near us, Joan actually stood right next to me. Right beside my personage. I was literally faint.
About that time, my mom walked my. She greeted us all, and everyone greeted her. Asking my friend’s sister how school was going, they politely discussed that. She asked Joan the same question, and I got to hear her lovely voice. I tried to nod and act as if what she said was all very important. As long as mom was engaging her in conversation, she’d have to stand right there, next to me.
And then it happened.
My mom looked at me with this inquiring look, her head tilted. I didn’t know what she was about to say, but I knew from past experience it would not be good. As her eyes squinted a bit, she leaned forward.
“Oh, my, that’s a big blackhead on your nose. You need to take care of that when we get home.“
My friend erupted into laughter, actually dropping to his knees. His sister laughed to, though more from an embarrassed standpoint. Joan, my dear sweet Joan, turned red, trying not to laugh, but her gaze was fixed firmly on the seemingly Everest-sized lump protruding from my honker. Now only mere inches tall, I simply slinked away…
A few weeks after that, Joan moved away. I don’t know if it was a desire to be as far from me and Mount Blackhead as possible, or if there was truth that her dad had been promoted in his job and they had to go to another town. All I knew was my dream girl was leaving me… and I’d never actually spoken a word to her.
Can I Sit With You?
A few years later, in my 10th grade year, the church youth group gathered to load up on a charter bus, and head to a large amusement park several hours away. I was quite a bit more confident by that time… in fact, truth be told, I was exceedingly cocky. Now I was an athlete, a guitar player, and I had a pretty sweet mullet going, so I was hitting on all cylinders in early 80’s American culture.
I sat on the bus, acting as if I were sleeping, trying to be nonchalant. A friend who was sitting next to me on the other side of the bus aisle grabbed my arm. I jerked my head up to see what had garnered his attention.
joan had climbed on the bus.
Not only did she get on the bus, she was walking down the aisle, looking for a place to sit. And she actually made eye contact with me.
With. Me.
She stopped at the row in front of mine. Pointing to the seat by the window next to me, she almost gave me a heart attack with her next question.
“Can I sit with you?”
Fighting to get myself under control, I stood up and said “sure, have a seat.” She smiled and slid past me. I sat down next to her. Suddenly here she was, the girl of my dreams, right next to me. I looked at her, and my cockiness returning, said “so how have you been?” She looked at me, smiled, and said “fine, how about you?”
The bus began to pull away, a 4 hour drive ahead of us.
The Actual Model Airplane Stuff
When I’d first got word of Eduard’s plans for a new Tempest, I was quite excited. Though not my favorite airplane, it was certainly in my top 5. And as a fan of Eduard, I was looking forward to what they’d do with the airplane.
Yet as I worked my way through the initial stages of the build, first assembling the cockpit, then assembling and priming the airframe, and next adding paint and decals, I was increasingly let down. Though I describe it in more detail in those previous blog posts, the basic gist of it all was I found that the kit was exceedingly fiddly in places, having some questionable engineering choices in others, and overall it seemed more about impressing collectors with the parts than actually being designed for people who build models.
I’m weird when it comes to kits. When I am excited about one, and it turns out to be far less than I expected, I have a hard time getting back into it. In fact, I’ll admit that the only reason I carried on with this project was I hoped it would make some decent content. (We’ll see…)
Still, once the paint and decals were on, all that was left was the weathering. For me, that’s the fun part.
Making Some Lines
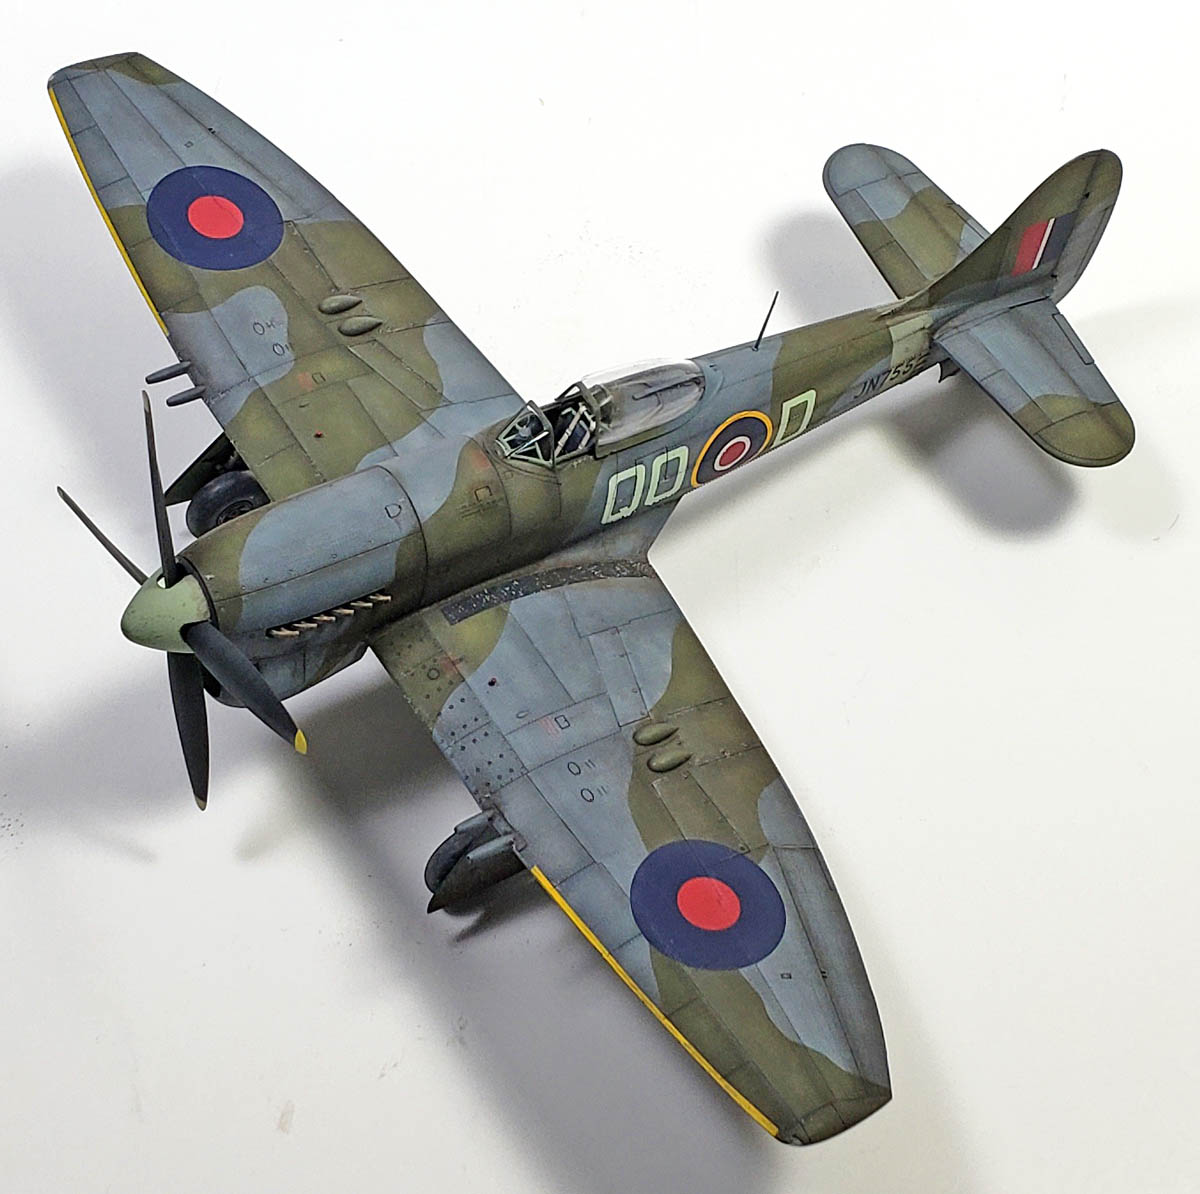
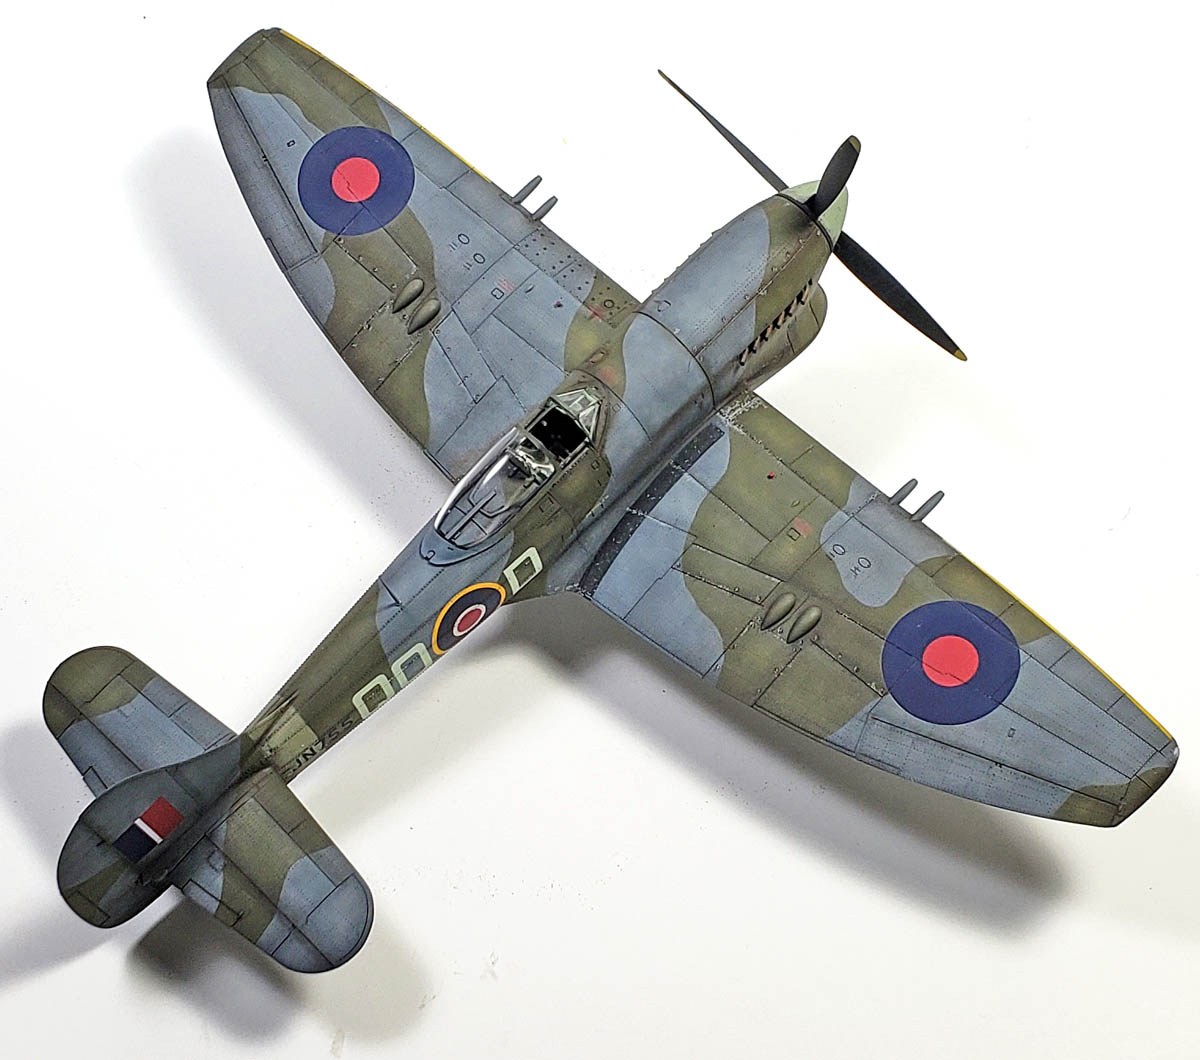
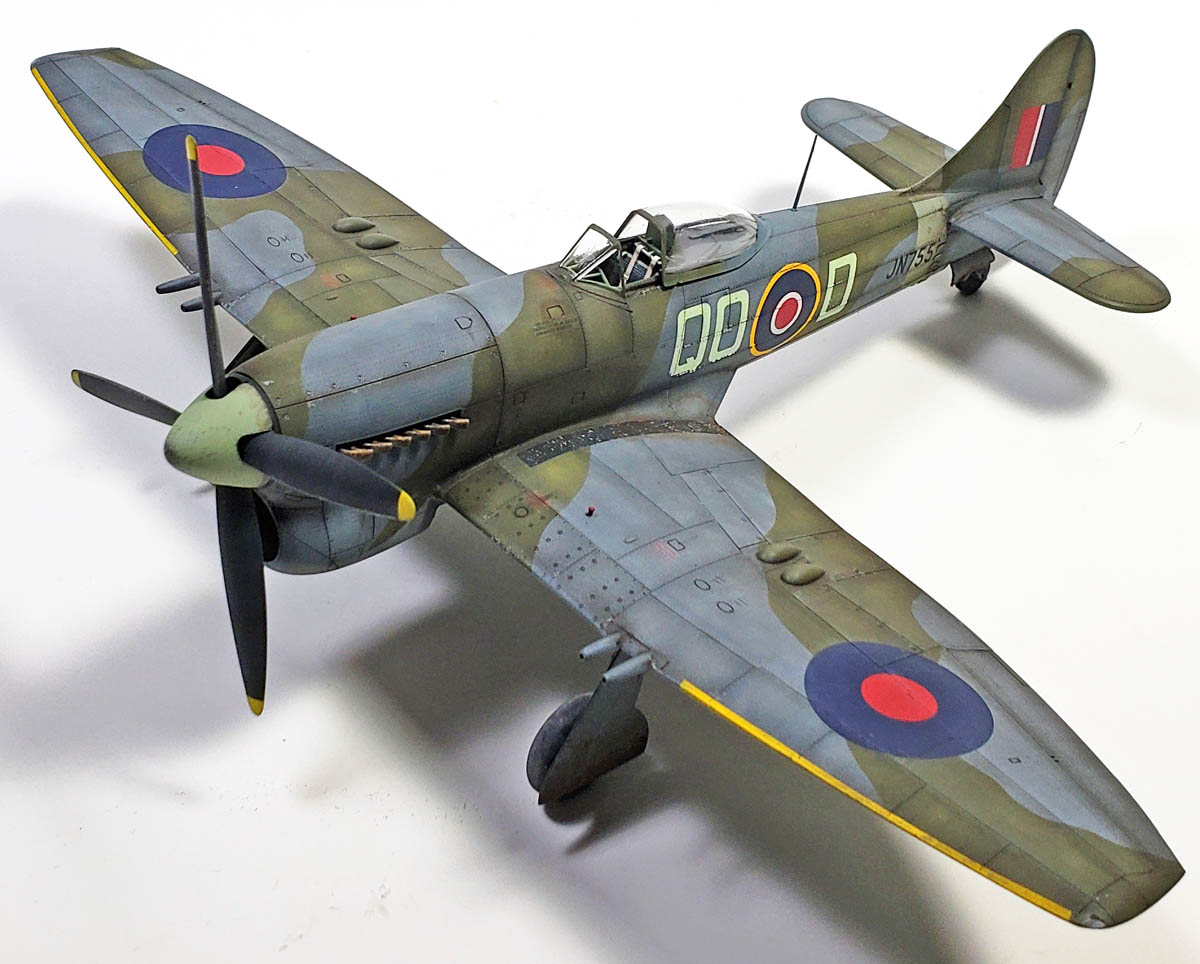
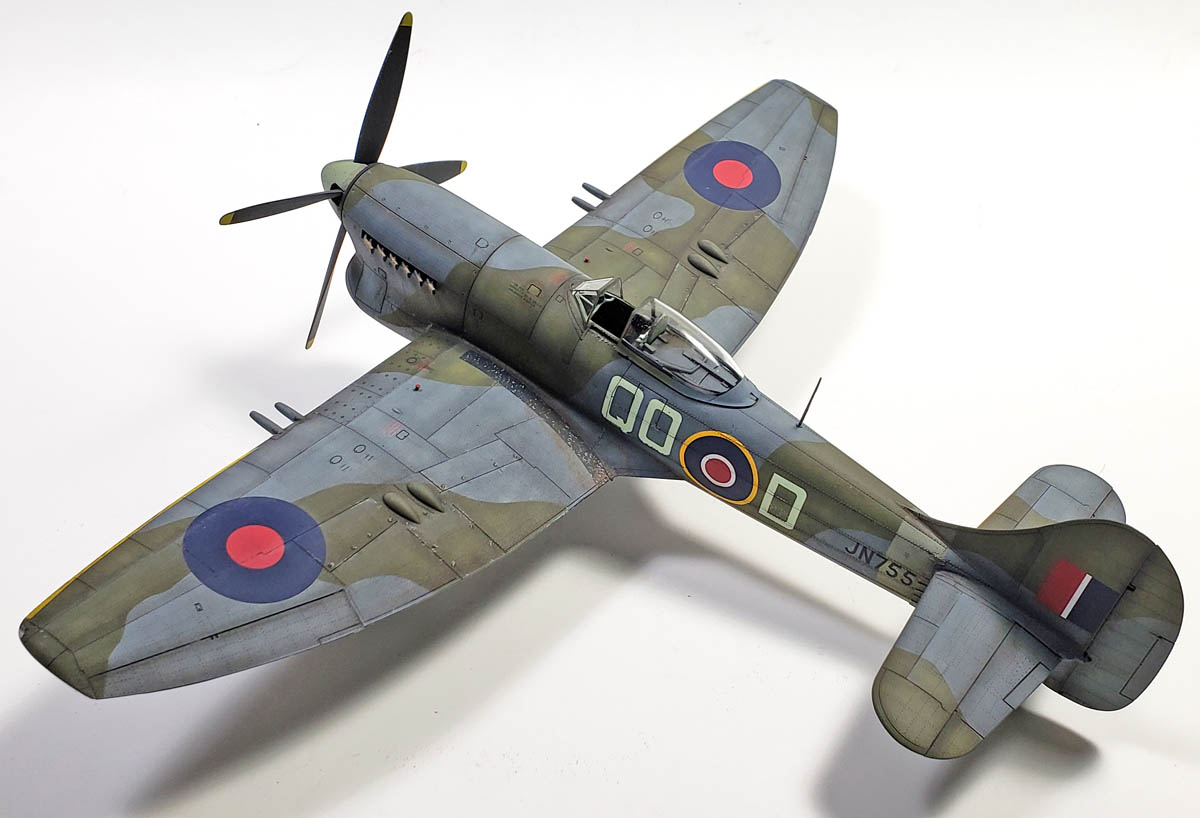
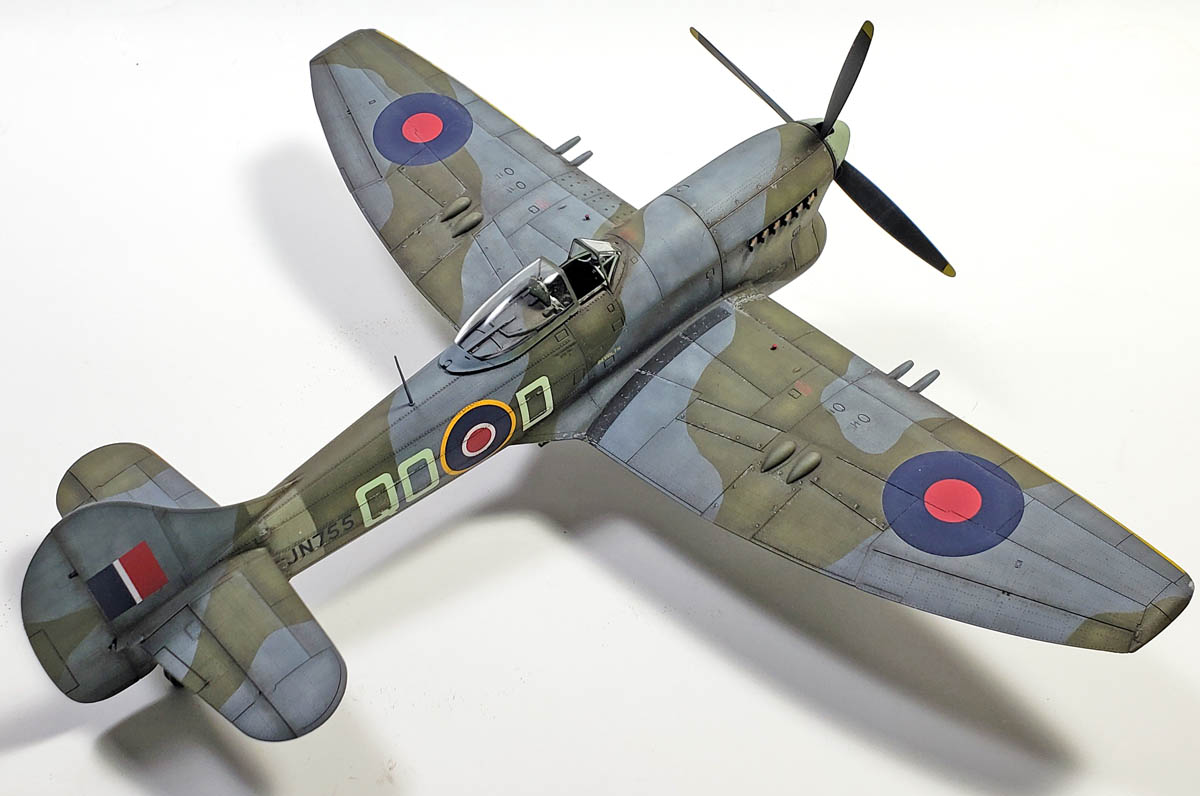
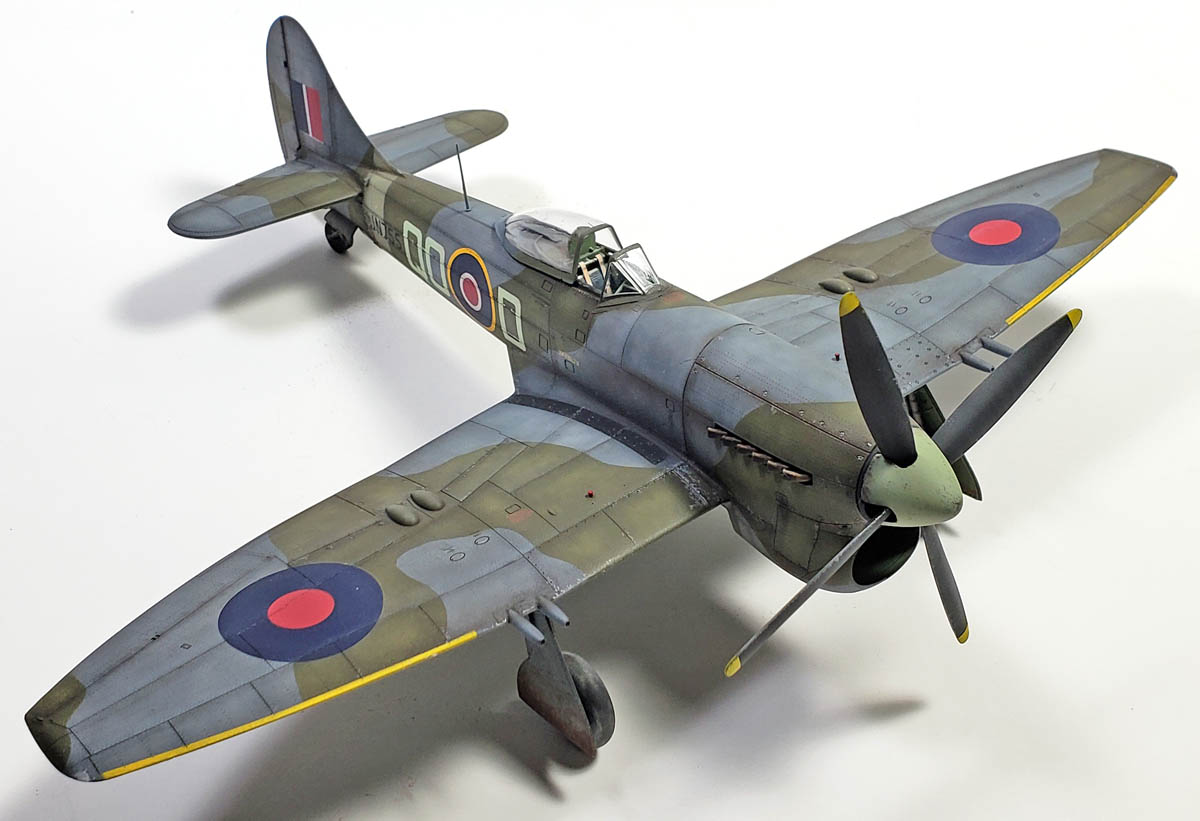
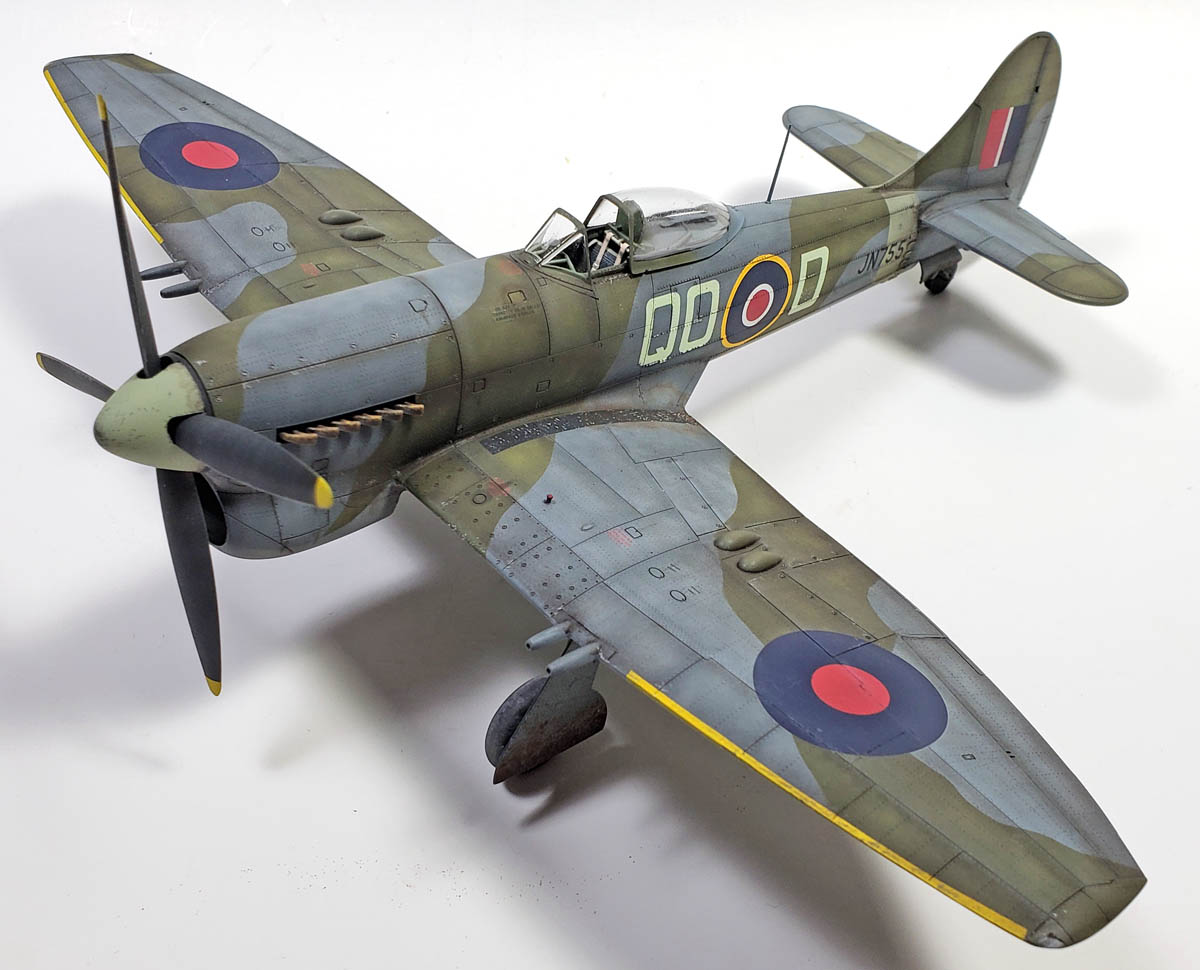
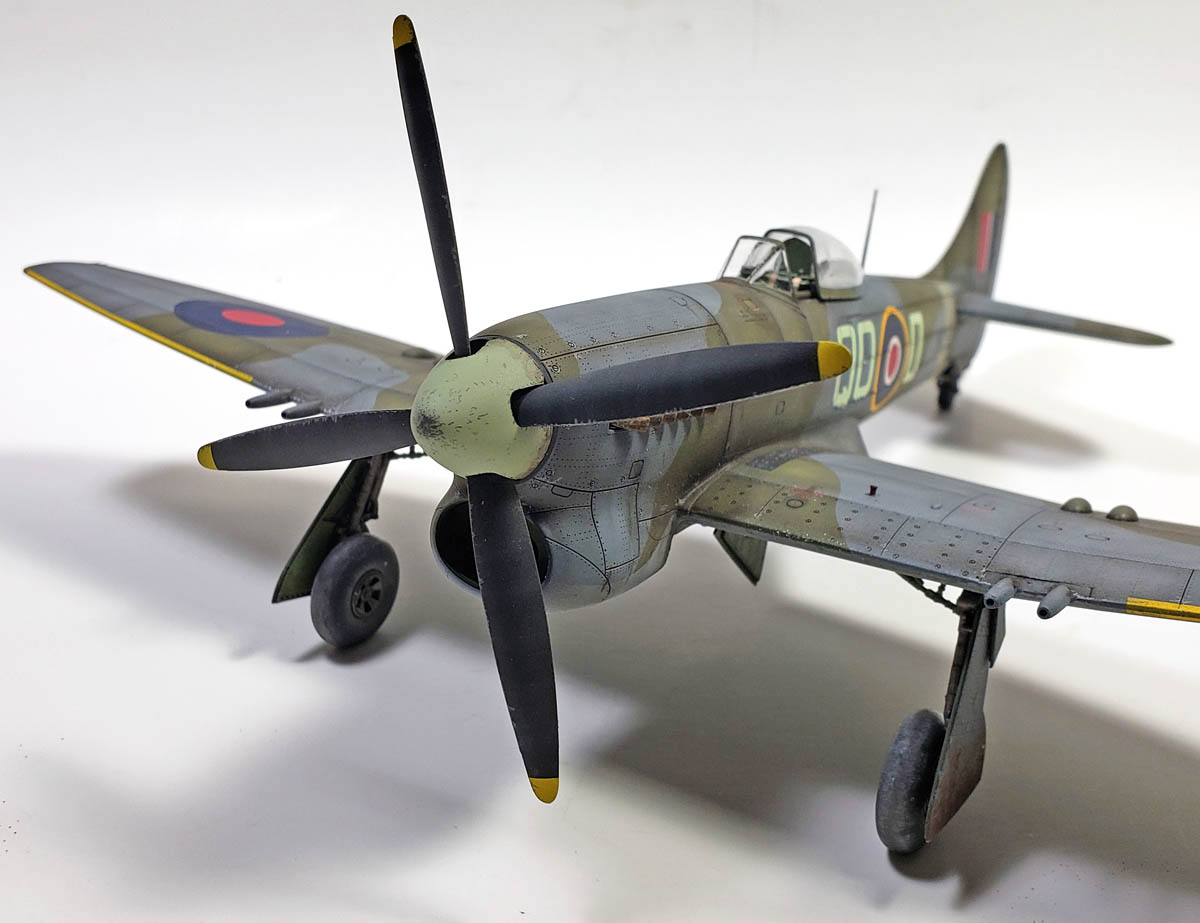
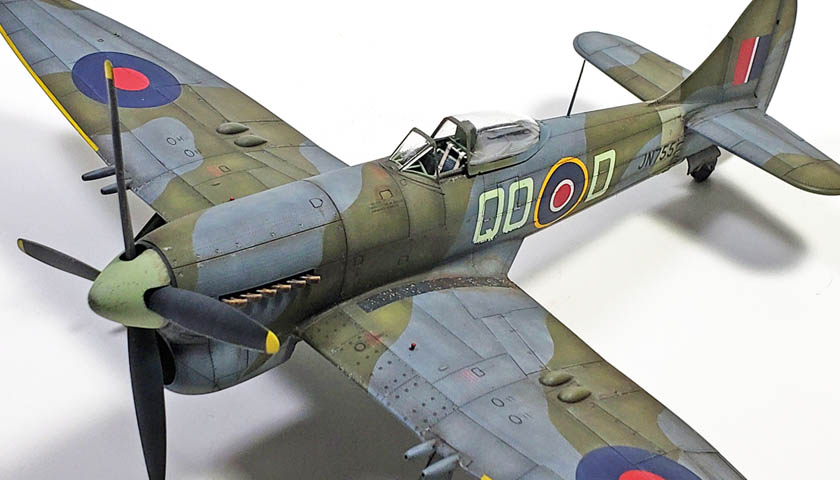
I’d already laid the foundation for the weathering with the initial paint work. I wanted to go for more of a “Spanish” look, so I’d emphasized the panel lines through airbrush work early on. With the surface fully glossed already, I began applying enamel panel line washes.
While I’ve been experimenting with acrylic weathering over the last few models I’ve built, I decided to drop back to what was familiar with this one. I’ve found that when a model does frustrate me, it’s usually not the best time to introduce other variables that may add to it. While I’m enjoying the acrylic work, I knew that my familiarity with tried and trued methods would keep things flowing smoothly.
The next step in my quest for a nod to a little Iberian style was to try to add some more volume to the panel lines.
I’d seen several modelers who work in that style employ an oil technique to add a bit of depth, using oils. The idea is to not only “clarify” the airframes features, but to suggest a bit of the distressed skin look so common to riveted aircraft.
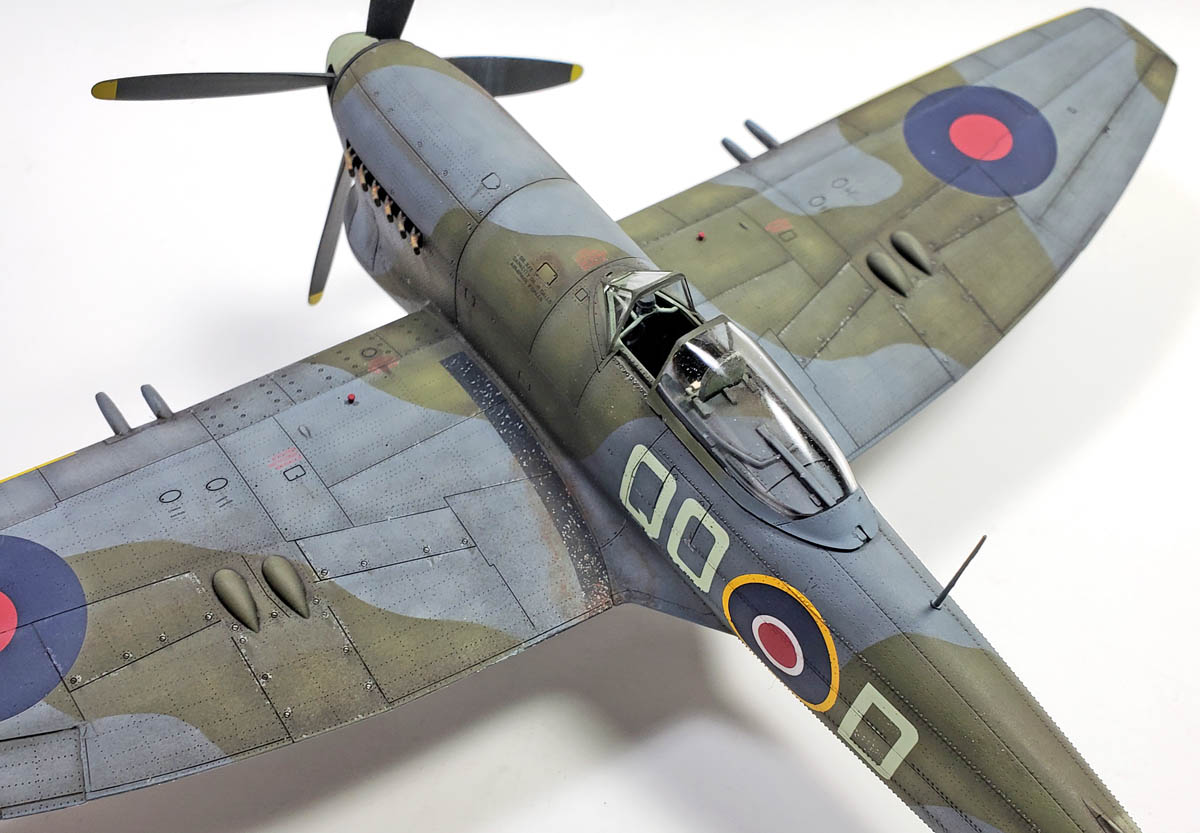
The method is fairly simply. Lighter oils are applied to one edge of panels – in this case I chose the leading edge – and then darker oils are applied to the opposite edges. Each is blended until only a bare amount shows. If done correctly, the eye is “tricked” into seeing a little bit of undulation in the surface.
While clearly leaning to the artistic side of the modeling argument, I liked it, and was happy with the result. It wasn’t perfect, but it was a learning experience.
Dealing With Warts – Literal And Figurative
The next step was to begin adding additional oils, stains, and other abuses across the airframe. For this process, a mix of both oils and enamels were applied. In some cases, I actually used the enamel products to blend and smear the oil paint, which can give a really nice effect.
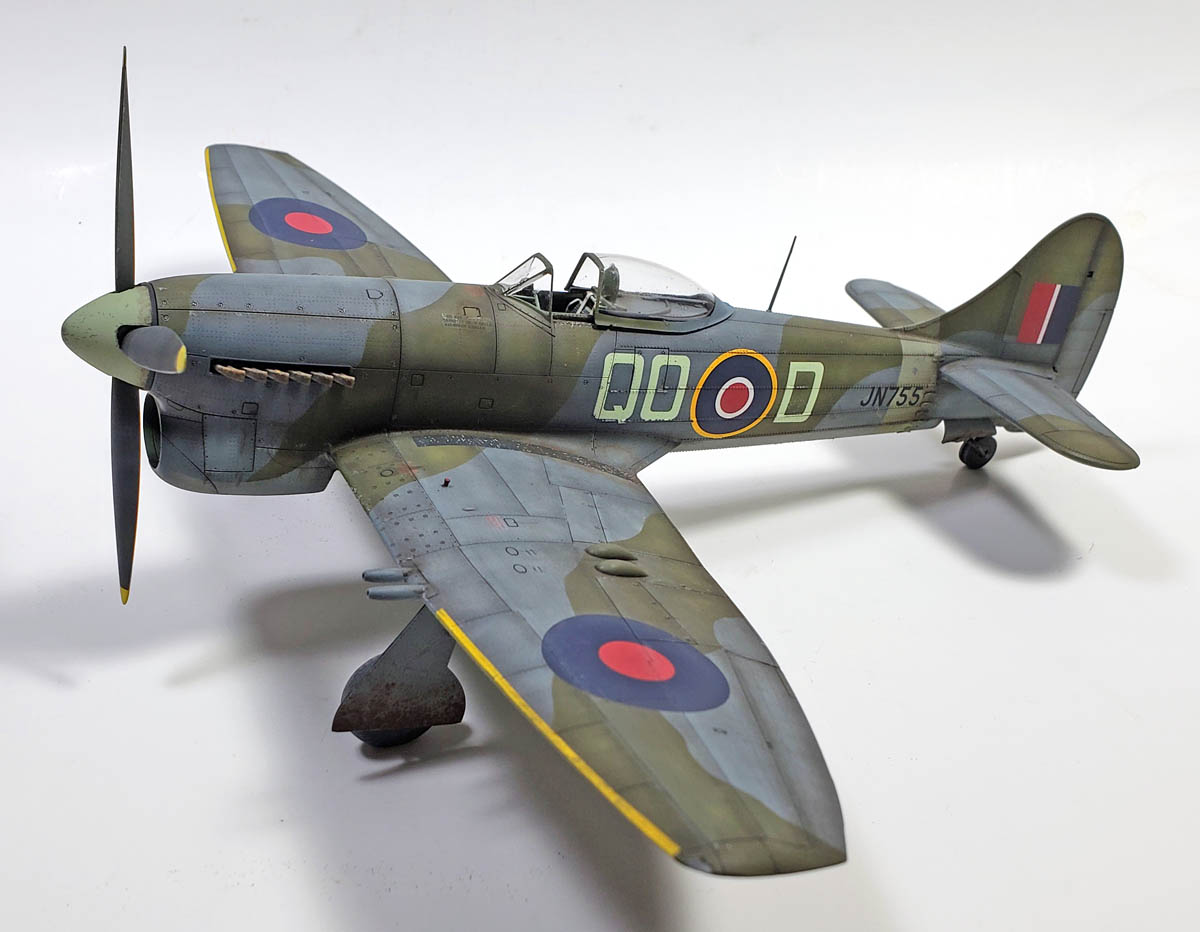
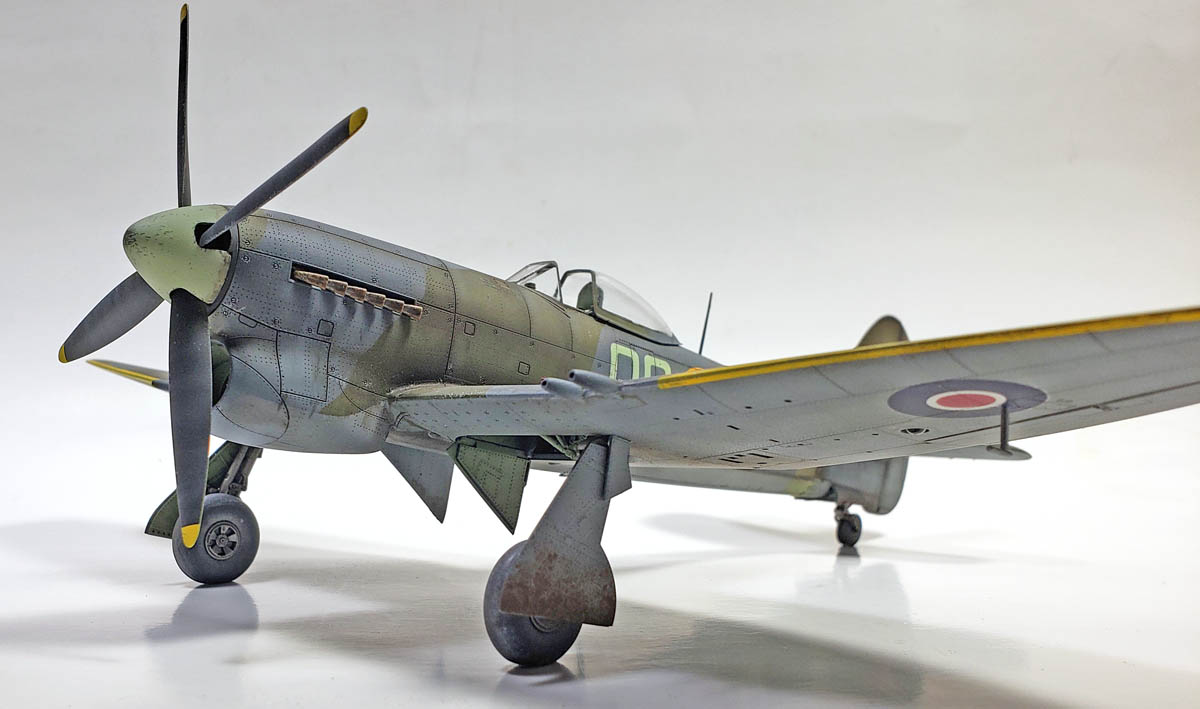
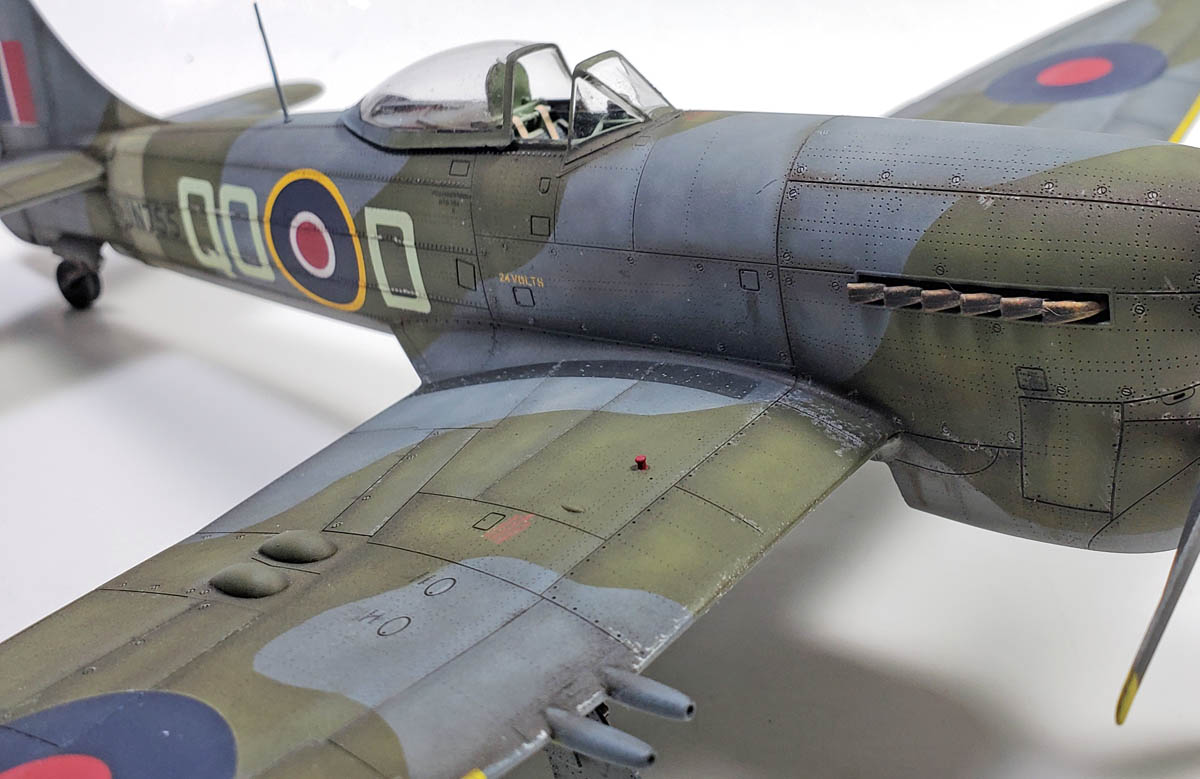
One of the parts of the model’s engineering reared its ugly head in this process. The aft portion of the airframe is covered with the tiniest of raised rivets. Quite a few aircraft in WWII were built in this way. By not flush-riveting areas directly in the airflow, time was saved. So quite often the leading edges of a wing would be flush riveted, and perhaps even puttied over, yet other areas aft of that may not.
The rivets on the Eduard Tempest are very evident. From a casting standpoint, they’re a stellar example of excellence in injection molding. However…
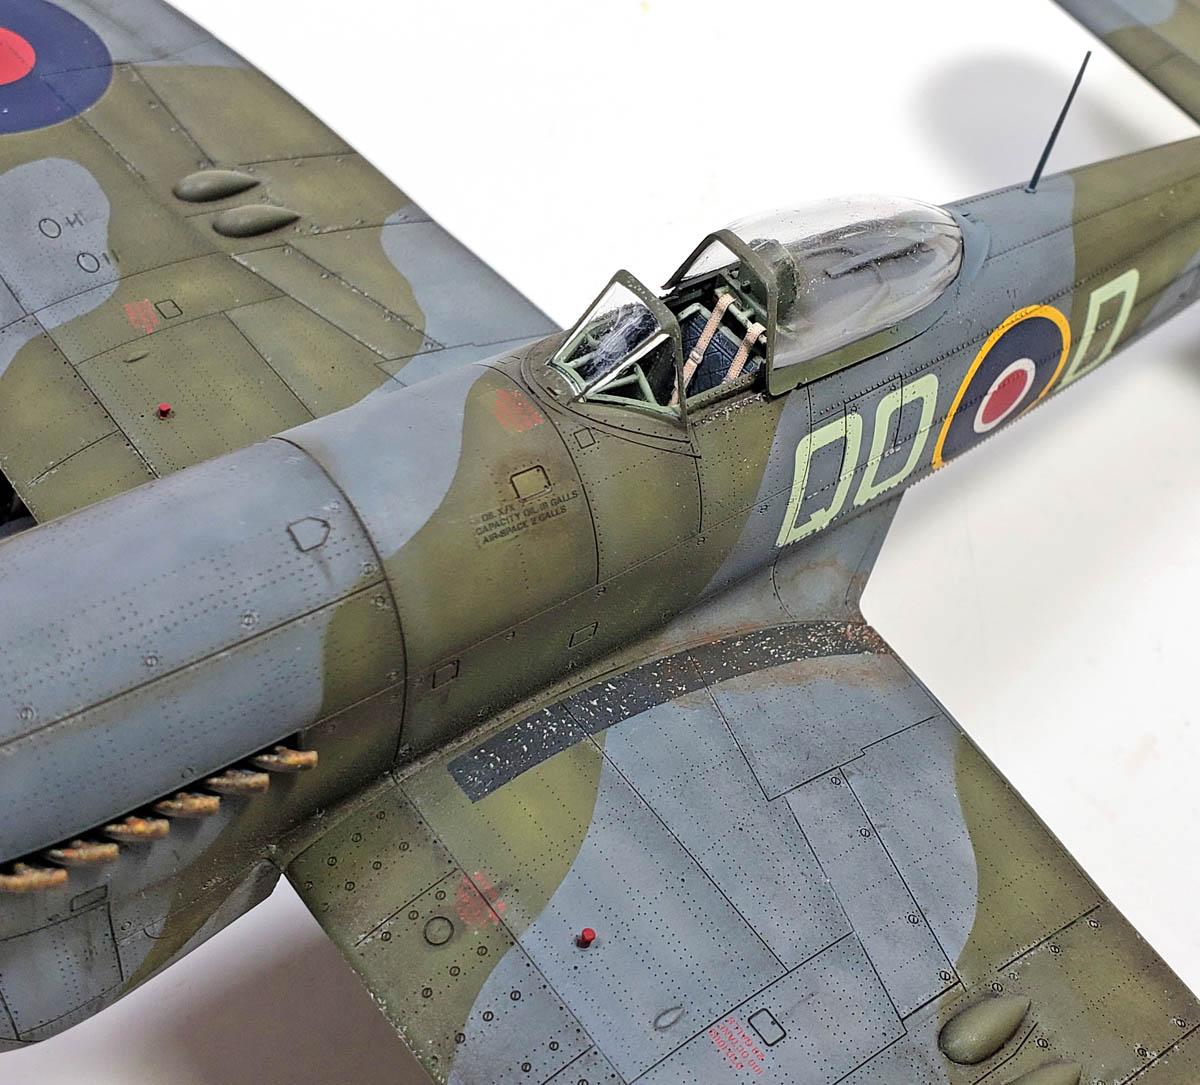
As I began to work with oils – a process of adding, and then taking away… some flaws in the system began to appear. Those tiny rivets absolutely tore apart cotton buds that I used to blend and remove the excess oil. Worst, every rivet grabbed hold of little cotton bits, leaving a most horrid “fuzzy” appearance. While I was able to clean it up, it was annoying.
To cap it off, the tiny P/E parts that make up the reinforcing bands on the aft fuselage were even worse. Despite many collectors starry eyed view of the wonders of tiny, thin pieces of metal, I’ve always felt they were quite impractical, and especially so when they need to sit perfectly flush on a fuselage. As with the rivets, they too grabbed everything in sight.
Driving On
Still, in a quest to simply finish the model, I moved ahead. Various chips were added with a Prismacolor silver pencil. I tried to keep it light. I hoped to convey a look of an airframe early in its life, not worn and battered with the “war weary” status imposed on it. Lightly applied in areas of footwear and along the wings leading edges, the focus here was on restraint.
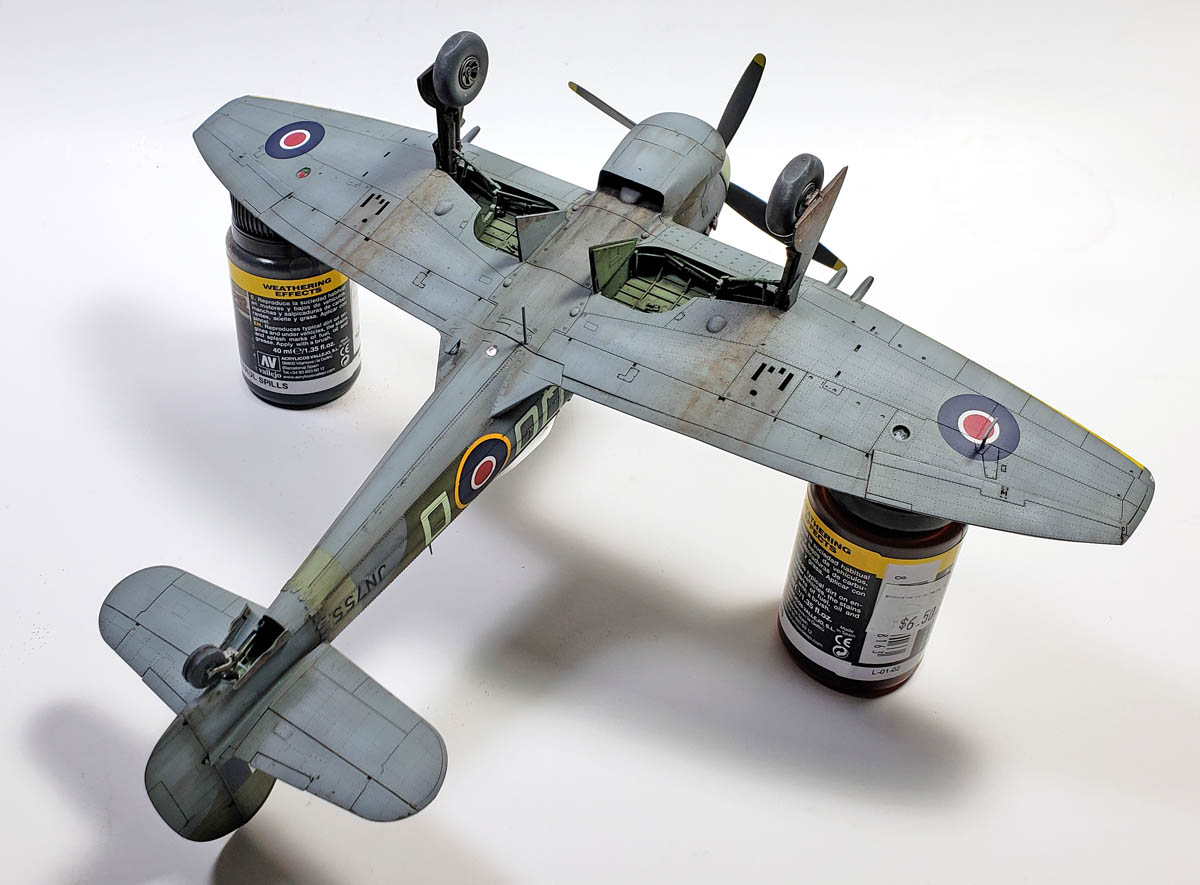
A few dry weathering pigments were applied, simulating mud and dirt on the lower gear doors, and also a touch on the wing walk to suggest the same there.
Once the oils and enamels were fully dry, additional airbrush work was employed. Tamiya’s XF-55 Deck Tan was used for some additional paint fading and blending, though in what for me was a very restrained fashion. My favorite NATO Black and Hull Red mix was then employed to add smoke and exhaust effects, and to enhance some of the oil staining added earlier. I resisted the urge to add further post-shading to the panels, as I felt it would go too far, and depart from what I hoped was a finish suggesting some “Spanish” influence.
Final assembly was a bit maddening, as the landing gear, antennas, and others dangly bits must be added. Most were too fine to have on during assembly, yet in a very modeler-unfriendly fashion, several simply had shallow indents on the model’s surface to glue these parts on. Still, get them on I did. All was then given a final matt varnish, the canopy masking was removed, and the model was declared complete.
The Bus To Reality
As we drove northwards on the interstate towards the amusement park destination, I was a bit surprised by a growing realization. Joan and I did not mesh.
It wasn’t that she was mean, or lacked intelligence. I can’t even say she was particularly vain – certainly not any more than I was. But all of those years of excitement I’d had about one day sitting close to her, talking to her, were getting washed away in a harsh reality.
She wasn’t who I’d built her up to be.
Of course, it wasn’t her fault. She was who she was. Sometimes people don’t fit, plain and simple. But as we moved along towards our destination, I realized I was just going through the motions of being polite.
Evaluating The Tempest
I think the best summation I can come up with regarding Eduard’s Tempest is that seems more focused on engineering than being buildable. Obviously it can be built. The fit, for the most part, is actually good. The overall detail level could be held out as a “best in scale” candidate. Yet Eduard’s focus seems to lose sight of the goal of any model kit is for someone to build it – and that building process should be enjoyable.
Certainly there will be modelers who really like this kit. I know my tastes are a bit odd. Yet I can’t escape the notion that it simply wasn’t much fun. The assembled kit looks good. Very good. No one would mistake it for anything other than what it is. Yet as I look back on the three builds of Eduard’s previous Tempest offering, I can’t help but notice that those were more enjoyable, despite being inferior in every way from an engineering standpoint.
Wrapping Up All The Stories
Joan and I spent the day together at the amusement park, and I did have quite a good time with her in the end. While I realized we didn’t seem to mesh on a relationship level, I was still a very vain 10th grader. Walking around with my arm around a beautiful girl was good enough for that day. We rode back on the bus, sitting together again, chatting the whole way.
I saw her a few more times, as they’d moved back into town. And while we remained friends, the fascination was gone. I later found out that she also felt the same way – good friends, but that was it.
There was a profound feeling of let down for me, of course. I’d really imagined great things, and to find out it was just simply plain old normalcy was hard to wrap my head around.
I feel that way about Eduard’s new tool Tempest. I’d really built it up in my mind, quite excited about the experience. To come face to face with the fact that it was just another model, with some good parts and bad, was a little hard to swallow. If this kit had come from Special Hobby or Revell, I’d probably be impressed.
But in some way, I guess I can relate Eduard to Joan. I’d hoped it would be more, and to realize it was not really changed the whole experience.
If you like Tempests, and want a highly detailed, great looking model to work on, this kit is the only choice. In final form it is hard to beat. If you’re simply looking for a cool, newly tooled kit – but your focus is less on subject and more on the build experience – this may not be the one for you.
It’s a solid kit. But I’d really hoped it would have been so much more. I wish Eduard would focus more on the build experience. The engineering is superb… but if a modeler can’t “mesh” with it, those finely cast parts are for naught.

Leave a Reply