If you attended the Old Dominion Open this past February in Richmond, Virginia, USA, it was almost impossible to not notice the excitement surrounding models from the Mobile Suit Gundam (MSG) universe. The host club had added a few categories for Gundam, and once word got out, enthusiasm grew. On the day of the show, there were nearly 100 models featured on the category tables – 10% of all models entered.
It was great to see, as I covered in this previous blog post. Two communities that don’t always get a chance to intermingle came together and I think they found out that a love of the hobby brought them together. It was a very cool thing to witness.
As I’ve been lucky enough to “swim in both ponds”, so to speak – traditional modeling and Gundam modeling – a few of my traditional modeling friends came to me with essentially this question: “Those look cool, and I’ve always wanted to build one, but what do I need to know to get started?”
The Seed of The Matter
This is part 2 of a four part series to introduce new and experienced modelers to the world of Bandai Gunpla kits.
Part 1 – Getting Started
Part 2 – A Basic Build
Part 3 – Get It Painted (Coming Soon!)
Part 4 – Weather It Up (Coming Soon!)
Thus was the impetus for what is planned to be a series of articles over the next few weeks/months that will go through the build of a simple Bandai Gundam kit in detail.
Now, if you’re already a Gundam builder (Gunpla builder… I know… more on that!), I probably won’t write anything groundbreaking. In fact, you’ll likely come away with a thousand things over the course of this that you wished I would have said. However, my goal is not so much to write an exhaustive treatise on the subject, but rather to equip both a novice modeler and the experienced traditional modeler with enough information to get them started.
And if you’re new to the genre, don’t sweat the million and one details you may not currently know. The MSG universe is huge, and has developed over decades. For now, let the focus be on simply building a cool model, and seeing how you like it.
After that, the exploration is up to you!
What Is A Gundam?
Simply put, a Gundam is a very tall (roughly 18 meters) bipedal armored suit piloted by a human. The genre got its start in Japan in early 1979 with an anime series called Mobile Suit Gundam. The universe is based in a future Earth timeline, with advanced technology, floating space colonies, and of course, war. (And teens full of angst… 😉 ) While this is a gross oversimplification, it’s basically all a vehicle for cool armored suits to do battle.
The series, aimed at kids, was of course accompanied by merchandising, with a huge push on plastic models of the various mobile suits featured in the anime. Over the years, new MSG anime series have emerged, each with their own plot, mobile suits, and distinctive features.
Fast forward to today, and the franchise continues to grow in popularity. According to Bandai’s own figures, the MSG model kits have sold an average of 12 million units per year for the last 30 years. While I don’t know what traditional model makers’ sales numbers are, the estimations I’ve been able to make would suggest Bandai’s numbers overshadows all the others combined.
A Few Terms
With 40 years of history, millions of units sold, and billions of dollars made neatly packaged into three paragraphs, I’ll move on to the actual models. 😉
One of the first things you may encounter are the terms “Gundam” and “Gunpla”. While “Gundam” can refer to the entire genre, it is actually more specific to the title character for any Mobile Suit Gundam anime series. So for example, in the original Mobile Suit Gundam, the “Gundam” was actually the RX-78-2 Gundam. All other “big stompy thingies” were (in general) referred to as mobile suits.
Gunpla is a portmanteau the Japanese started using that combines “plamo” (which is a portmanteau of “plastic modeling”), with “Gundam”, thus arriving at “Gunpla”. In essence, Gunpla is short for Gundam Plastic Modeling. Clear as mud?
The takeaway is that if you use either term, most folks will know what you mean. Only the twitchiest of Gunpla builders will pedantic enough to insist on precision. Just keep repeating to yourself “it’s only a hobby”. 😀
For the sake of clarity, for the rest of the series, I’ll use “Gunpla” to refer to the genre of model kits in general, and reserve Gundam for specific models that are “proper Gundam”.
Yet Even More Terms
To get us closer to actually building a model, a few more terms must be covered.
Most modern Gunpla kits come in four scales: 1/144, 1/100, 1/60, and 1/48. They are also defined by grade, the most common being High Grade, Real Grade, Master Grade, and Perfect Grade. All are push fit, and all feature multiple colors so that a model does not have to be painted.
Depending on the age of a specific model, or the series, or half a dozen other factors, there can be all sorts of variations of what I’m going to write next. But, in general…
High Grade kits are 1/144th scale. They feature fewer parts than other scales and grades. While the detail level is not high in this grade, it is still very good on most newer kits. They’re very affordable, generally.
Real Grade kits are also 1/144th scale, but are much more detailed. They generally feature full inner frames, greater color separation (more on that), greater parts count,and greater articulation. They cost a bit more, but are still affordable.
Master Grade is in 1/100th scale. These generally have a full inner frame, excellent articulation, and quite a bit of detail, both internal and external. Despite the greater parts count, construction is generally not difficult – it just takes longer. These are a bit more expensive, but affordable for most modelers.
Perfect Grade is 1/60th scale, and features a very large parts count, and all sorts of working gimmicks. As with Master Grade kits, they’re not really difficult in terms of assembly, but rather just incredibly detailed and a bit time-consuming. Because of their size and the sheer volume of plastic in the box, they are fairly expensive, generally pushing past the $100 mark – and up.
As I mentioned, there are exceptions to all of this. There are older High Grade kits in 1/100th scale. A fairly popular line is the Reborn 100, or RE/100, which are 1/100 in scale, but closer to a High Grade in design. The Mega-Sized kits are 1/48 scale, and are simple in detail, yet the size of a toddler. Other exceptions and variations exist, but frankly are beyond the scope of this article to cover. The bulk of the kits you will encounter, however, will fall into one of the scales and grades mentioned above.
Examining An Actual Kit
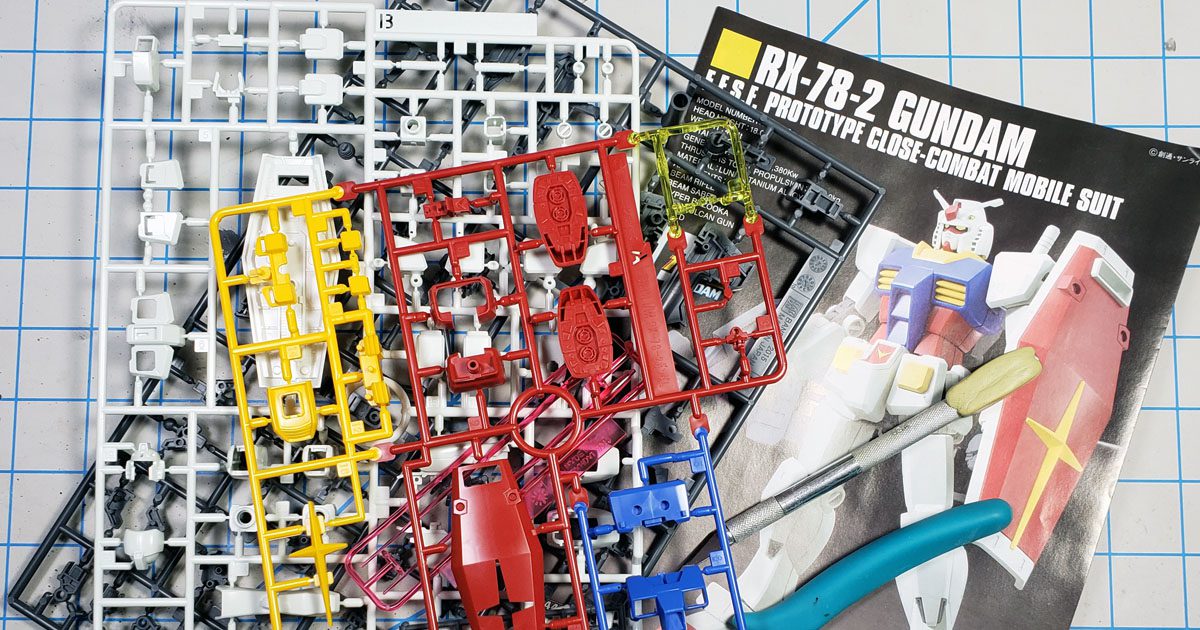
 The kit I’ve chosen for this series is the classic RX-78-2 Gundam, in a fairly recent High Grade boxing. I thought this would make a good choice for several reasons. One, it’s what most people think of when they think “Gundam”. Even if you’ve not seen the series or the models, if you’ve ever encountered the franchise, it was most likely this guy. Second, it’s a good kit to begin with. It has nice detail, easy assembly, and is not so “part heavy” as to frustrate a modeler in their first Gunpla build. Finally, it’s affordable. I picked it up for about $10. USAGundamStore.com has them in stock, and if you use the coupon code “zakuaurelius10”, you can get 10% off of that. (Be sure and check out the ZakuAurelius Youtube channel!)
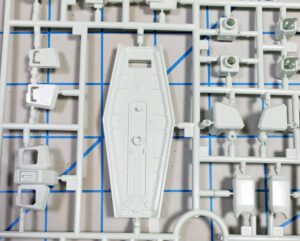
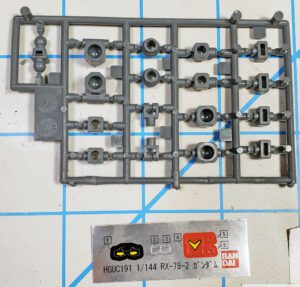
The kit features four multicolored sprues, a polycap sprue, a small foil sticker sheet, and instructions. Everything is colored so that no paint is required. Some kits may have more colors, and greater parts count, meaning the kit will have greater “color separation”.
Examining The Instructions
Bandai breaks their kits down as most manufacturers do, using sprues with convenient parts numbers. The instructions generally have a parts diagram, and they not only show the runners, but the type of material it is made of. “PS” is polystyrene”, “PE” is polyethylene, and so forth. Older kits may use ABS plastic on some runners.
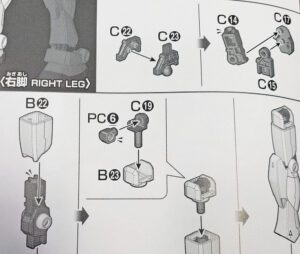
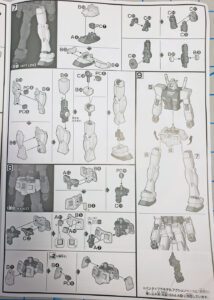
Bandai instructions are very clear, and well illustrated. They are also precise. They show very deliberate orientation of parts. The fit of their kits is extremely good – as close to perfect as I think one can get using injection molding. The general rule of thumb is that if something doesn’t fit, the problem is you – not the kit. Some areas even use little “bunny ears” to indicate areas that need special attention for orientation. I’ll cover this and other symbols in more detail in the actual build.
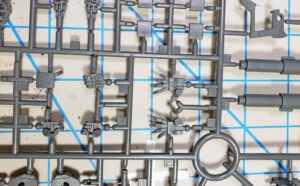
Bandai clearly marks their sprues with uppercase letters. They are helpfully “punched out”, so holding the runner to the light makes them easy to identify.
The kits come with colored sprues, which means the models don’t have to be painted. (Although they can be painted and weathered just as any traditional kit can.) The “A” sprue in most kits is a multicolored sprue – quite a cool thing to see. Often times a sprue may contain parts for a leg, as an example, so there may be two sprues that are identical – one for each leg. These often use the same letter. Other times, you may find runners that have an additional number designator. For example, a kit with runner “F1” may also have “F2”. Generally, F2 is a smaller section of the full F1 runner, but contains duplicate parts needed for some aspect of the build.
The general takeaway is to pay careful attention to the instructions. 😉

Bandai’s castings are very good, featuring sharp detail, virtually flash free sprues, and minimal mold seam lines. As this is a High Grade kit, surface detail is not as extensive as a Real Grade, Master Grade, or Perfect Grade kit, yet it still does look quite good.
You’ll also encounter some elements that aren’t always in traditional kits.
Bandai makes use of “polycaps”, which are rubbery parts that allow articulation and easy part assembly and disassembly. Polycaps are normally indicated in the instructions with the letters “PC”, and then the appropriate part number. They are generally durable, but it is best to avoid getting strong solvents or glue on them.
Kits also come with foil stickers, and general marking stickers. A few come with dry rub transfers. Even fewer come with waterslide decals – a fact that comes as a bit of shock to traditional builders. No worry – they can be built without any stickers, if desired. And there are aftermarket water slides available – some official Bandai, some third-party. Of course, any decals will work – I often use jet airplane stencils on my Gunpla.
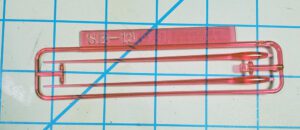
There are also “effects parts”. These are clear sprues that represent beam saber blades, laser blast effects, and other “gimmick” parts.
What Next?
This article is of course a basic introduction to building the RX-78-2 Gundam. While it is basically like any other model kit, knowing a few of the details going into the process will help you pick out a kit, and know what to expect.
For future articles, I’ll be covering a variety of topics, including:
- Basic, unpainted assembly of the Gundam
- Part preparation for painting
- Things to be aware of during assembly
- Material considerations when painting and weathering
- Base painting the Gundam
- Adding weathering effects
- The two-edged sword of articulation
- And most likely some other stuff I can’t thin of right now… 😉
If you’ve never built a model kit, or if you’ve never built a Gunpla, I can highly recommend giving these kits a shot. They’re great fun, and can be a nice break from your usual genre. While many may think of these as “kids’ models” (I did at one time), most quickly find that they have fun and unique aspects unique to them, and the very “made up” nature of the genre (it’s basically scifi, right?) leaves loads of room for personal interpretation.
Stay tuned for Part 2, when I’ll go through a simple, non-painted assembly of the HG RX-78-2 Gundam.
(If you’d like to see this model fully painted and detailed, you can look at this previous blog post when I built this same kit in 2018.)



Leave a Reply