If you’re not having fun, you’re doing it wrong.

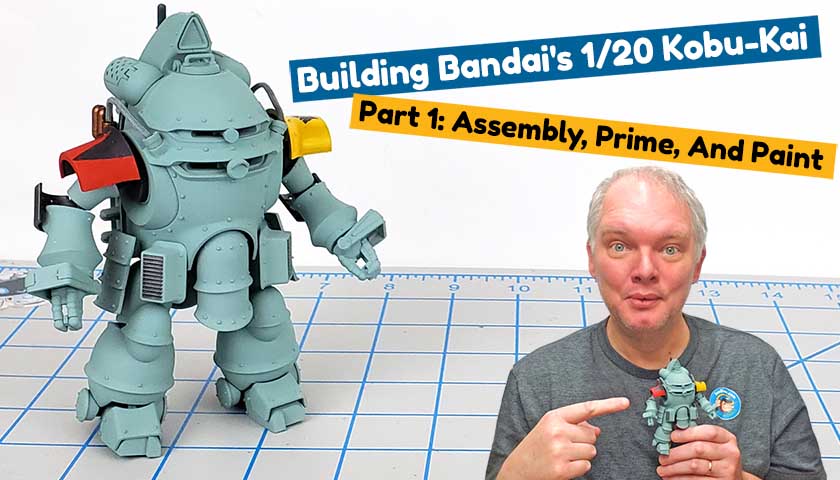
Building Bandai’s 1/20 Kobu-Kai (Ichiro Ogami Type) Part 1: Assembly, Prime, And Paint

One of the fun things about switching to building scifi subjects is the great variety of kits available. There’s literally no limit to the types of potential subjects. If you can dream it up, cast it in plastic, and put it in a box, there is room for it in the science fiction realm.

And when you stick the label “Bandai” on it, it automatically gets my attention.

When I first saw this model, I immediately took a liking to it. While I’d never heard of the game it was from – Sakura Wars 2, it’s cool steampunk vibe was enough to sell me on it. It almost has an “old medieval knight” look to it, yet at the same time an alternate universe vibe happening.

As far as assembly goes… it’s Bandai. While there are a few seam lines to clean up, as it is classified as an HG kit, they are minimal and easy to deal with. Detail is very nice. And the scale is 1/20th – meaning it’s going to be a great candidate for BIG weathering.

I did take decide to abandon canon colors, though, opting for something grimmer and darker. 😉

If you’re looking to build something different, Bandai’s HG Kobu-Kai (Ichiro Ogami Type) from Sakura Wars 2 is definitely the thing!

Comments

2 responses to “Building Bandai’s 1/20 Kobu-Kai (Ichiro Ogami Type) Part 1: Assembly, Prime, And Paint”

  1. Matt Kuhn

    Jon-

    Great vid on a different subject… maybe your ‘story’ could be that it’s a captured foreign machine used by your WarHammer people (I am not familiar with ANY of that genre)… just a thought…

    I have a couple questions about the paint in your pallet…

    Has any of it been thinned? To what ratio (ballpark is fine)…

    What do you do with the paint you dispense but DON’T use?

    I just started using a wet pallet for my acrylics and it seems to be working well for minimizing the wasted paint (for me anyway)

    Thanks for the constantly cool vids and being kind enough to share your techniques…

    mk

    1. Hey Matt! Thanks for your kind words, for watching my video, and for leaving a comment – I am grateful! 🙂

      For airbrushing, I tend to thin it roughly 50/50, but my real test is simply how it looks. (This 3 part airbrushing series may be useful if you’ve not seen it: https://www.youtube.com/playlist?list=PLZt56FNuWOKeOiywAlXlB-uAdF_VaJ_mj)

      Generally, I think the paints I airbrush with using the manufacturers recommended thinner, in this case Tamiya X-20A. That way, when I’m finished, I can actually pour the extra back in the bottle. I generally airbrush with Tamiya or Mr. Color paints, and this has worked very well. I guess I’ve been doing this long enough that I’ve gotten pretty good at guessing how much is needed, because I usually have little paint left. 😉

      A wet palette is a great way to extend paint and not use so much! I’ve recently started using a drop of Liquitex Flowaid in my brush painting with acrylics, after seeing that mentioned on a Vince Venturella video. That stuff is the heat! The paint flows so nicely, and lays down really flat.

      Thanks again, and happy day to you!

Leave a Reply

Your email address will not be published. Required fields are marked *

More posts