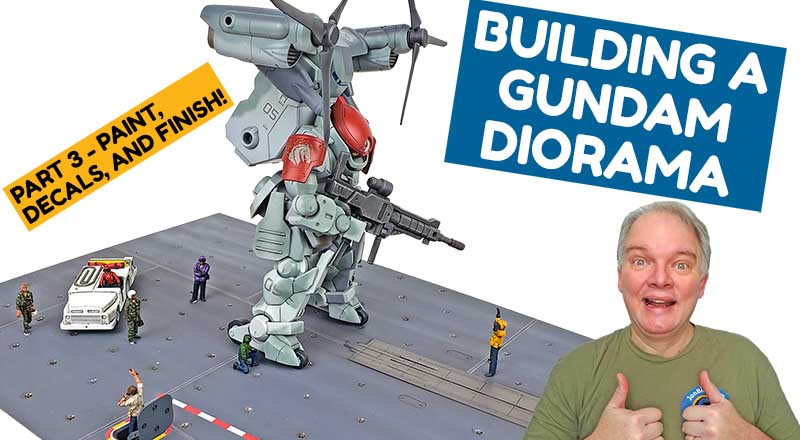
Building a Gundam diorama has proven to be a lot of fun! I’ve always built Gunpla as standalone models. That’s fun too, but something about placing it in a setting, even one as simple as this, really makes it come alive.
It certainly helped that the whole display is made from model kits. Normally when I think “diorama”, I picture lots of scratch work, or using various earth materials. Having this made completely from pre-made kits was almost a no-brainer… exactly right for me. 😁
Building A Gundam Diorama – Finishing It All Up
The primary focus of the final work was getting the paint on the mobile suit. I decided to do it with my airbrush, free-hand style. While I used to be a bit intimidated by that, but after a bit of practice, I quite like it.
There are three keys that I try to keep in mind when free-handing a camo scheme:
- Lower air pressure – I normally paint at 18-20 psi, but generally I drop that down just a bit for freehand work. Alternately, I may use my Patriot Extreme from Badger, which has an air adjustment knob to help reduce airflow. This allows for much better control.
- Thinner paint – I always go by the “skim milk” rule when airbrushing. For freehand painting, I add just a bit more thinner. It varies by paint, but it is definitely walking the line between “air-brushable” and “way too thin”. But that thinner paint, combined with reduced air pressure, helps reduce splattering and gives a nice demarcation.
- While I have done freehand camo with larger needles, I prefer a .2 or .3 for the work. The Patriot Extreme I used has a .3 nozzle, which worked very well. If you have something larger though, just make adjustments to thinning and air pressure and it will still get the job done nicely.
Overall, I’m really pleased with the outcome. It was definitely fun, and I liked how the “rescaling” worked out. While the concept is not realistic, I think it is plausible.
And it just looks kinda cool. 😎


Leave a Reply