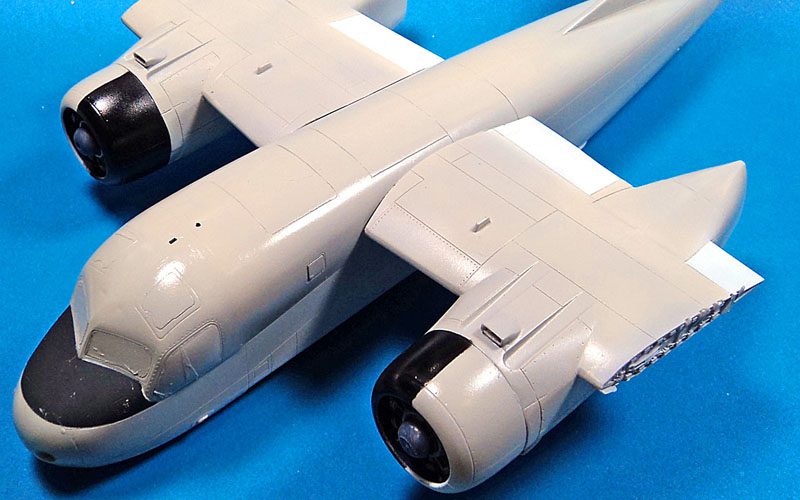
Some kits are easy. Some kits are difficult. And sometimes, an easy kit can be made difficult. I’ve managed to accomplish the latter on this S-2 Tracker.
The plastic, originally by Kinetic, is not too bad. While the fit isn’t perfect, at worst it has just needed a bit of filler here and there to even out a few imperfections. However, before I sealed up the fuselage, I made a really, really dumb error.
When building a model with tricycle landing gear, most of the time nose weight must be added to prevent “tail sit”. I’d tested the center of gravity prior to closing the fuselage- taping it shut, adding the wings, and tailplanes, and balancing the model at the point where the main landing gear would be.
Or so I thought…
I added enough weight to make sure it would stay nose down, and moved along with the build. After closing up the fuselage, I began to look through the instructions for the next steps.
And then I saw my mistake.
I’d looked at the instructions wrong. I’d measured the center of gravity based on the main landing gear being at the rear of the engine nacelles. Yet the instructions clearly showed the landing gear mounted at the front of the nacelles.
Maybe I looked at them upside down. Maybe there was a rip in the space time continuum and I entered a world where S-2 Trackers had their landing gear installed differently.
In any event, the weight I’d added in the nose was woefully inadequate. The CoG was almost two inches forward of my initial measurement.
Because this was a commission build, I resisted the urge to place the parts of the model in a pile and burn them. I had to come up with a solution.
I knew I’d already stuffed all the space forward of the cockpit with weight. There was simply no room left there. The only logical place was just aft of the rear cockpit firewall. But I would have precious little room to work with- the distance back to the newly discovered CoG would be little more than inches- if that.
I started by stuffing the nacelles with weight, forward of the pivot point, but that was not enough. Throwing caution to the wing, I grabbed my razor saw, and cut a chunk out of the lower fuselage along the panel lines just aft of the cockpit.
And I started adding fishing weights.
An adding them. And adding them. Eventually the number became ridiculous. All in all, I added 5 ounces of total weight, spread between the nose, aft of the cockpit, and the wheel wells.
But finally, testing showed the nose would sit down. Barely.
It took what amounted to a Quarter Pounder with cheese to make it happen. (Or, if you’re in France, a Royale with cheese…)
I added a few more weights to improve my margin of error- and then realized if all that weight broke loose, who knows what would happen? I began the braining process again, and in a minor spark of personal brilliance (which burned out my brilliance candle for about a week) I realized I could pack modeling clay around the weights to hold them in place.
And wouldn’t you know it, in my drawers of modeling supplies I pack away “just in case”, I found a big hunk of modeling clay. In black.
I stuffed it in and around the weight, and through the aft cockpit opening.
I was finally able to seal the hole I’d cut closed, and after some sanding and rescribing, I got on with the build.
I’ve had difficulties in the past painting the inner areas of nacelles after mounting the wings on a twin bird, so I tried test fitting to see if the wings could be installed after painting. Thankfully the test was successful, showing that at most a small bit of filler may be needed, which would just mean a minor paint touch up.
The bottom was painted with Tamiya’s XF-2 white, and the uppers with Gunze’s H51 Light Gull Gray. I’d read that this color was spot on, but to my eye, it looks a bit too red/brown. But I can live with it. What I do not like is how it goes on gloss. I’d forgotten that about Gunze. I prefer paints to be flat initially as it makes some of my weathering steps work better.
But it’s painted, and the test fit of the wings looked good.
If it weren’t for my nose weight gaffe, this would be a simple build.
It ain’t easy being me.


Leave a Reply