I recall the first time I saw “Star Wars”. Not “Episode IV”. Not “A New Hope”. Star Wars. The original. As it was titled when it first came out.
It’s hard to convey the impact that movie had at the time. To say it was stunning is a gross understatement. There hadn’t been anything like it, ever. Certainly I’d seen scifi movies and TV shows. At the time, as a 10-year-old, I thought Star Trek was the height of the genre. I’d seen UFO, and loved it too.
But the expectation was always aliens wrapped in tinfoil with horrible makeup, and sets that were obviously sets, with fake boulders and decorations that were from the local Five and Dime. And when spaceships flew, they did so in a manner that revealed where the fishing line was strung to hold them up. It’s just the way it was.
There were a few anomalies, most notably 2001: A Space Odyssey. Yet even as ground breaking as that was, it essentially showed one large ship floating slowly through space.
So when my 10 year-old self walked into the theater in Valdosta, Georgia, USA, that summer of 1977, I was wholly unprepared for what awaited me.
My friends had been talking it up, of course. They spoke of it like the only kid in the neighborhood who’d seen Disney World, while everyone else was only familiar with the traveling shows that popped up in grocery store parking lots from time to time. The wonders of what were described to me were so far beyond comprehension, I simply did not grasp the reality of what they tried to convey.
The screen flashed “A long time ago, in a galaxy far, far away…”. Then suddenly, the epic music exploded, as the classic text scrolled across the screen. (As I write this, 41 years later, I still get goosebumps and a lump in my throat thinking of it.) The words ended, and there was a brief lull, some quiet music playing. The camera panned down, and then…
Everything changed.
The ships did not skew at impossible angles. The laser effects were not contrived, obvious animations. The sounds… my goodness… the sounds!
I don’t think I breathed… I sat mesmerized. This must be real. It had to be. Nothing had ever looked like this. And though I’ve enjoyed the movies in the Star Wars series that have come since then (well… mostly… stupid Jar Jar 😉 ), nothing has ever approached the sheer excitement and thrill of that first one.
That X-Wing fighter
For me, the coolest thing of all was the X-Wing fighter. That movie launched hundreds of missions that my friends and I imagined, flying our X-Wing fighters around. Twisting and turning, battling the evil TIE fighters, blasting them from the sky. (Except for that one weird kid who always seemed to want to pretend he was a TIE fighter pilot…)
The X-Wing fighter simply looked more amazing than anything I’d ever seen. And I lived near an Air Force base, and daily saw F-4 Phantoms streaking by. They had nothing on the X-Wing. Nothing.
I drew the X-Wing fighter on every piece of paper I could. I made cardboard models to play with. When I managed to get one of Kenner’s X-Wing fighters to place my Luke Skywalker pilot figure in, I thought all of life would be downhill from there.
Yet, I suppose I wasn’t a very observant kid.
All Those Colors
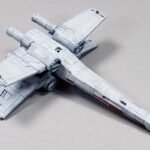
Fast forward to a few weeks ago, in 2018. (Imagine one of those George Lucas swipes… 😉 ) I’d had my Bandai 1/72 X-Wing fighter sitting in the model stash, waiting for its turn on the build bench. I’d briefly looked at the kit, impressed by the gorgeous detail. I gave a cursory glance at the decal sheet, and raised an eyebrow… I didn’t recall that much color. Oh well… I knew I could sort it out when built.
As I began construction, I really looked over the markings. In all these years, I’d never really paid full attention to how varied they were. In fact, it was downright odd. The exterior appeared as if the special effects department invited a senior ladies quilting bee club in to help them decide on the colors.
I actually went to the Tubes of You on the Interwebs to watch a few clips. Was that how they were? I knew my Kenner X-Wing fighter had a few orange stripes on the side. A model I’d built as a youth was basically white, red, and a few bits of gray.
How in the world did I miss all that color?
I suppose that the simplest answer is I was always so caught up in the action, the drama, the story… I missed seeing all the details.
Painting The Kit
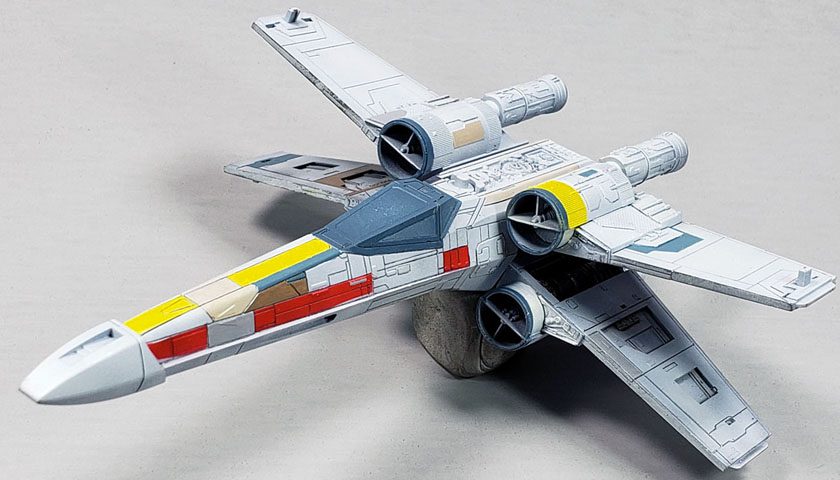
The kit supplies decals for all the various colored patches, down to the smallest detail. And while Bandai deals have worked well for me in the past, I decided to give painting the markings a try. While it would be quite a tedious job, I knew that the final result should look better – if I could pull it off.
I started by priming the model in Badger’s Stynylrez Gray primer. Over that, I began to randomly mist on splotches of Vallejo Mecha Color Off White, which is a very cool gray color. This would allow later pure white highlights to be added that actually showed up.
For the major colors areas – primarily red, yellow, and the blue/gray canopy framing, I chose to mask those areas off and airbrush them. It was a process many modelers are familiar with – masking for 20 minutes so you can airbrush for 20 seconds. And to give adequate drying time between colors, I did one color a day.
After the third day, I decided my patience for masking of the rest of the colors was probably not up to the task. So grabbing my palette, hairy painting stick, and several bottles of paint, I began to slap paint on.
I did try to stay faithful to the colors on the decals. Well, as faithful as possible as one can by only using colors from the bottle, with no mixing. Fortunately, I have a large selection of bottles to choose from… probably too large. In a few places, it’s quite close to what is shown on the decal sheets. A few others… not so much. Here and there I messed up the pattern a bit. There’s a blue/gray color on the upper left wing – that should be on the right. I thought that consigned the right wing to looking a bit bare, so I picked out a spot to apply my own patch of light gray. In a few other places, I decided to confine the pattern to stay within panel lines, just to make things easier. And a few others areas that are not quite so good will become the targets for the first paint chipping I apply. No better way to cover up goofs than with weathering! (Which is why all of my models are weathered! 🙂 )
It actually took a few hours to get the paint on, as I tried to do multiple thin coats (Duncan would be proud!) for each color.
With all the colors on, I decided to do the panel lining with a sharpened mechanical pencil. Normally I would give the model a gloss coat, and then apply enamel panel line washes. However, Bandai plastic does not play well with enamels, if you’ve not carefully primed all parts. (And even then it’s an iffy proposition.) And I knew I had not carefully primed all parts. At best I had haphazardly primed them.
Using my mechanical pencil would avoid needing to worry about any of those problems. I set a sanding stick next to my work area, and every few minutes I’d sharpen the tip of the already tiny lead. (I used a .5mm pencil.) This allows for the pencil to get right down in the recesses. It leaves a nice dark line in the recess, and any excess graphite can be brushed away, or even smeared gently with the finger to create subtle streaks. And if a stray mark is made, the eraser can be used to gently rub it away.
The pencil can also be used to mark around raised detail. I did make sure it was extra sharp for each pass of the lead, and kept it angled right into the detail to get it as clean as possible.
Later, when I really get into weathering the model, I’ll continue to use the pencil. It makes great paint chips that are scaled nicely, and is also excellent for producing grime and streaks.
Next Steps And Wrapping Up
With the paint and panel lining on, the X-Wing fighter is ready for the next stages. I do plan to use the striped decals for the upper and lower wings, because masking those would be an incredible pain. As they will be applied to relatively flat areas, I don’t have to worry about them conforming to detail. And there is still plenty of streaks, grime, chips, and other abuse to apply before calling this one finished.
So far I’m really enjoying this kit. Its layout does require a bit of planning through the construction process, but nothing that looking through the instructions carefully won’t sort out. I have realized in retrospect that I should have simply glued the wings in the open position, as I plan to have it posed on the Death Star display base included in the kit. Live and learn, right? 😉
The most satisfying part of this build though is simply how pleased my 10-year-old self is with the whole thing. It’s like running into a friend you haven’t seen in decades, and as you catch up with them, it was as if no time had actually passed.
Yet it’s also made me examine all that has transpired since those amazing days of 1977. Growing up, getting married, having kids, career, etc. In some ways I realize it’s a time and a place I can never go back to.
But…
I can pick up my X-Wing fighter, fly it around my model room, making all manner of laser sounds, and remember those days in 1977.
A long time ago, in a galaxy far, far away….


Leave a Reply