There is a classic scene in Indiana jones and the Last Crusade that I’ll never forget. The movie, starring Harrison Ford as the heroic adventurer, and Sean Connery as his father, is about a quest for the Holy Grail. When Jones finds it, he is accompanied by the dastardly Nazi arch-villain. Presented with a large selection of chalices, they must pick which one is the correct one. The Nazi picks an ornate one, dips it in the water, drinks from it, and immediately dies a horrible, Spielberg directed death. An old knight, guarding the chalices, deadpans a classic line… “He chose poorly.”
I now realize that when I decided it was time to build another P-40, I chose poorly.
Both this AMTech 1/48 P-40E, and a Hasegawa P-40E, were sitting in my stash o’ models. And I’ve built them both before, so I know exactly what they’re about. The AMTech kit doesn’t look bad when it’s finished. The Hasegawa kit looks better though. It has better cockpit detail out of the box, better surface detail, and better fit.
But in my mind, I’d narrowed my choice down to one thing that stood out: Hasegawa’s use of inserts.
Hasegawa’s basic idea is not bad. Engineer the parts of a model so that various inserts and sections can be swapped out, thus maximizing the number of versions that can be built. And because the P-40 series varied so little from the D through the N model, it’s not a bad premise. The core of the fuselage was the same, with only the tail section, some panels on the cowling, and the area aft of the cockpit needing to be changed. So Hasegawa designed it’s P-40 series to take advantage of that.
Unfortunately, I over-remembered the effort needed to account for those inserts. And I vastly under-remembered the effort it takes to get the AMTech P-40 series into shape.
He Chose Poorly
To top it off, because I’d only paid $2 for the AMTech kit, and around $40 for the Hasegawa kit, the numbers game influenced my decision, figuring that in terms of profit, I’d net more in the process if I built and sold the AMTech kit.
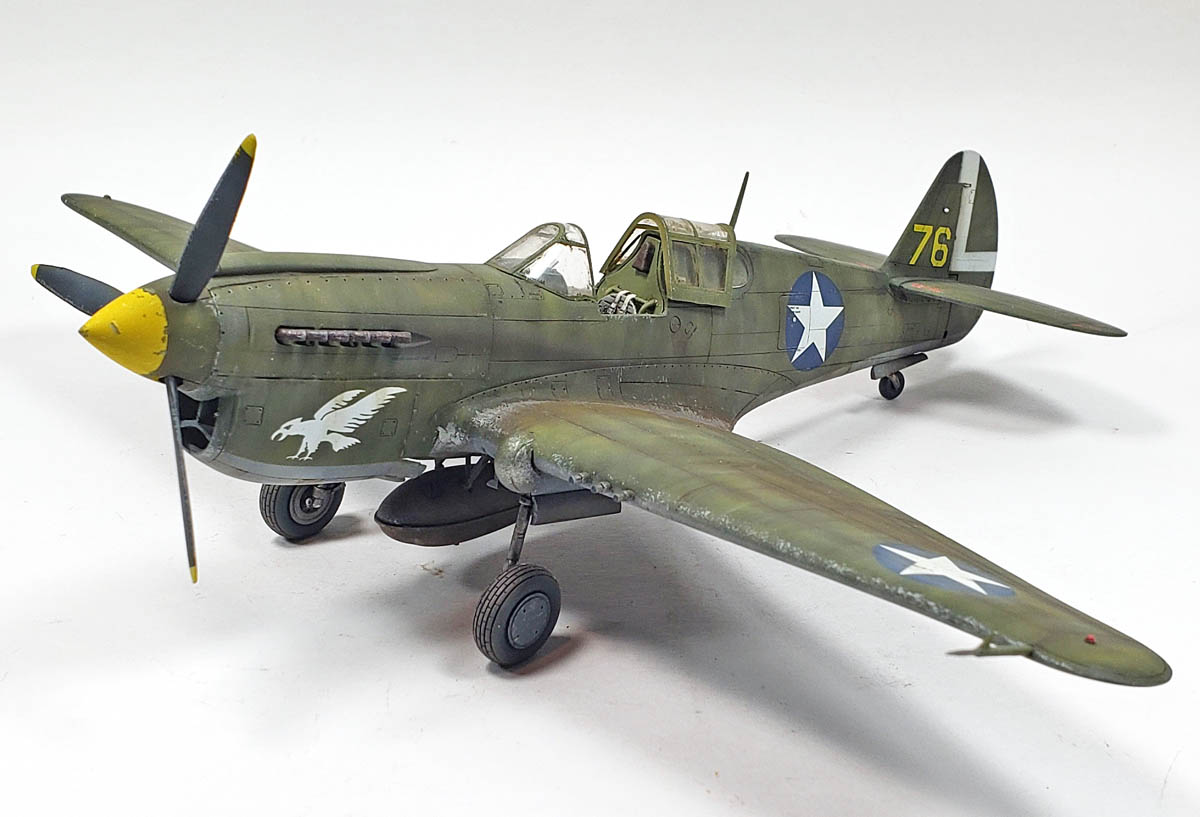
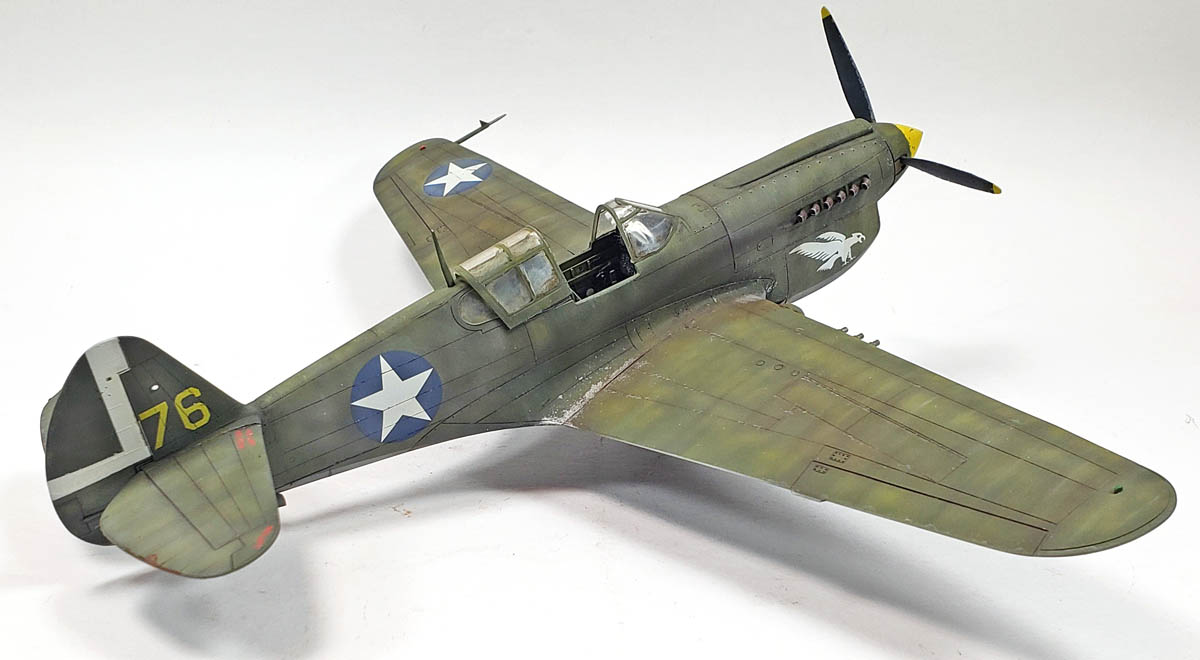
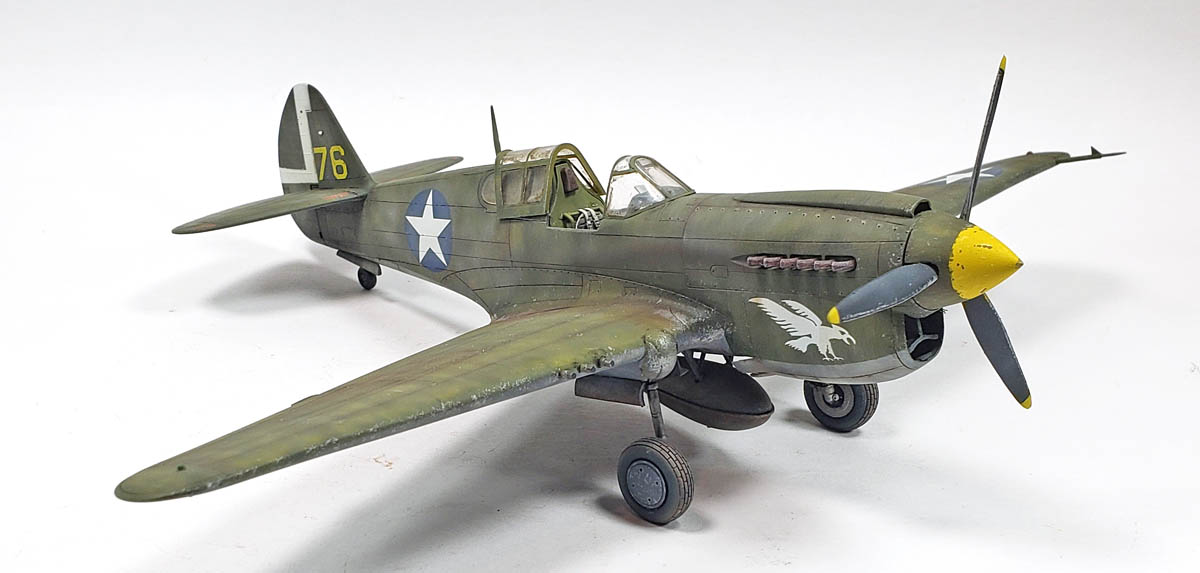
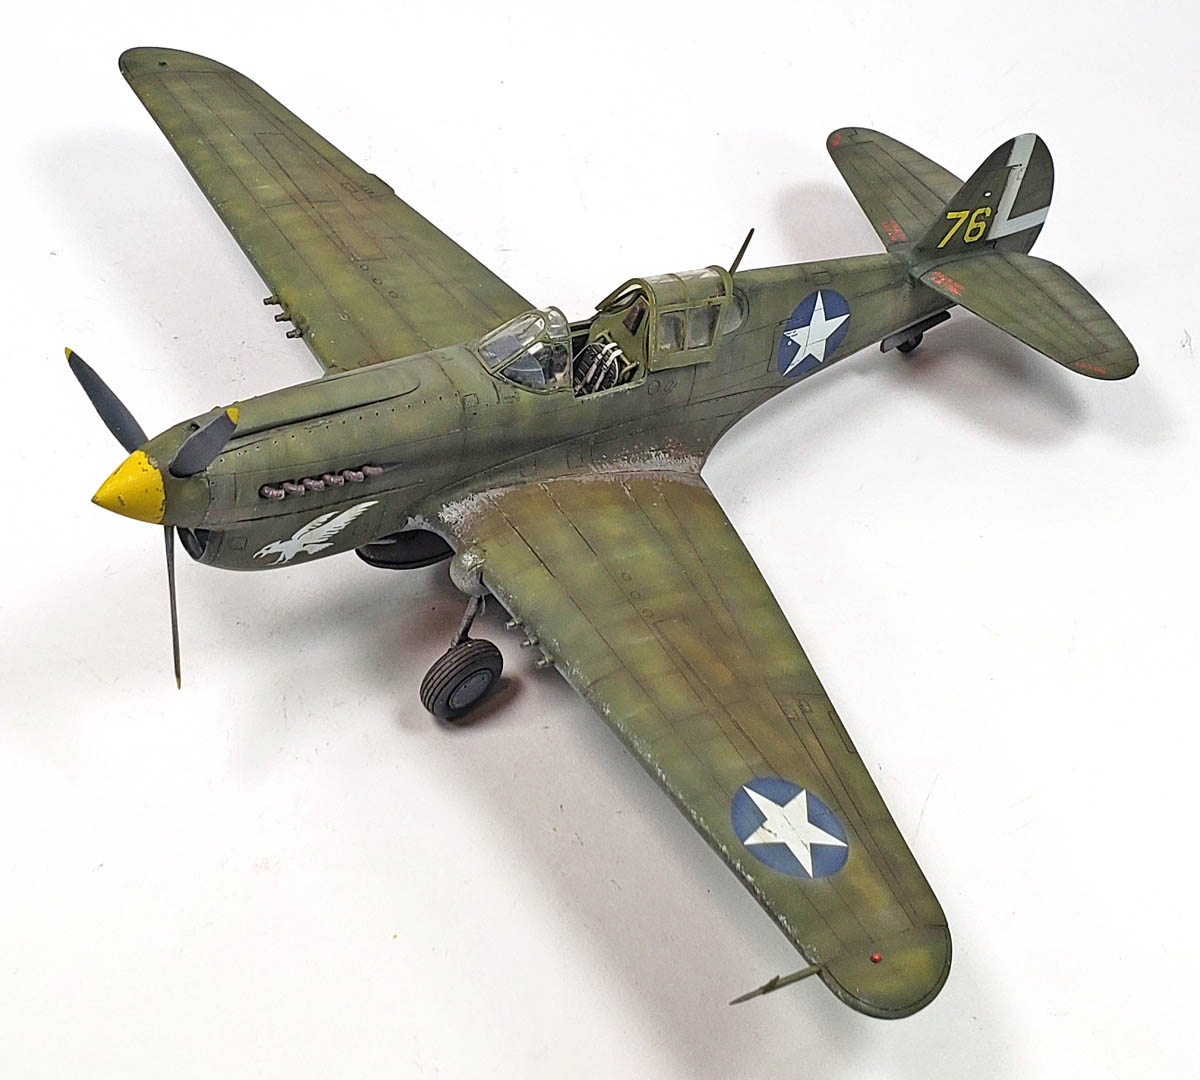
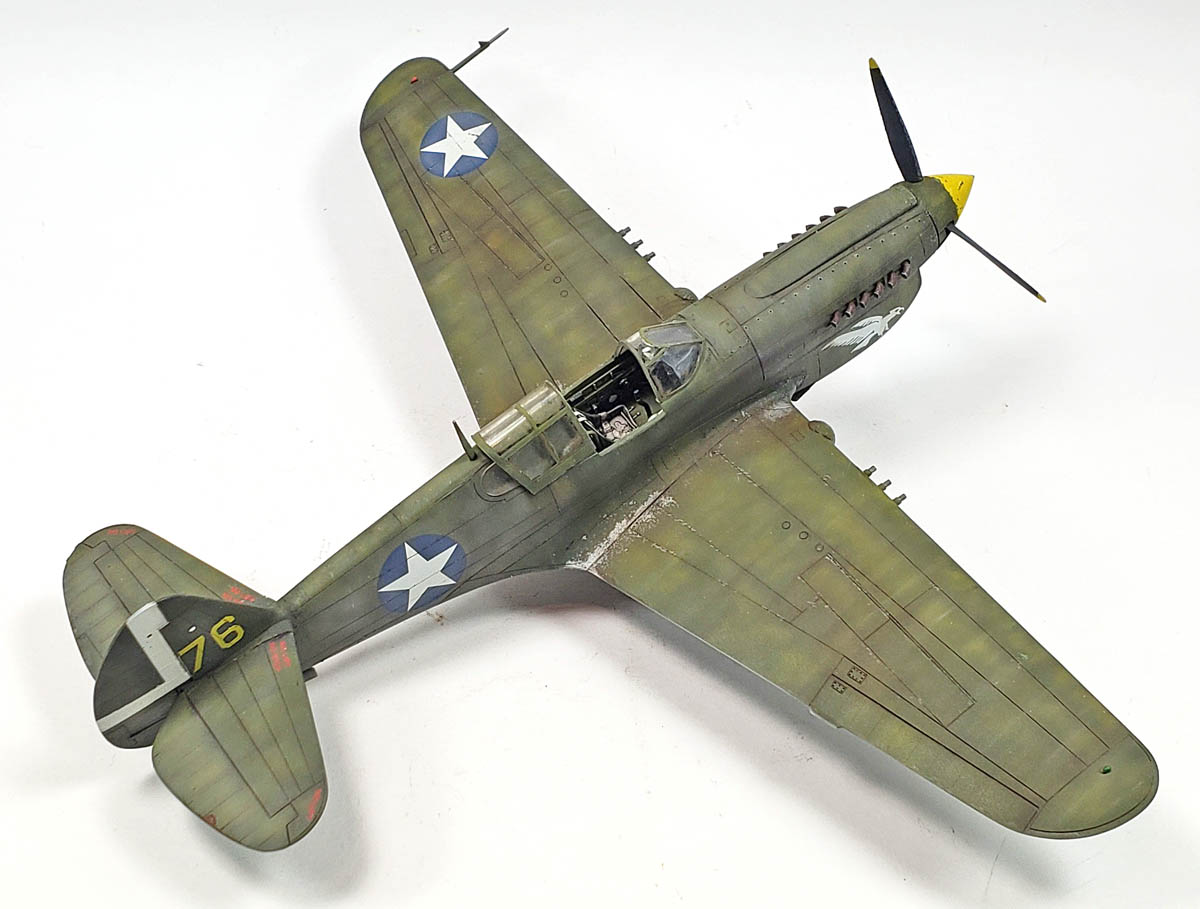
Of course, the kit is buildable. The photos are proof even a doofus like me can glue it together and paint it. And nothing fits particularly awful, either. It’s not like a Special Hobby kit, where one fuselage half is a quarter-inch shorter than the other one. (I’m looking at you, Il-10…)
But none of it fits really well. Sure, a little modeling skills applied will solve all the issues. But as I get older, I find I have less and less patience to do those things. It’s not that they are hard, per se. It’s all just putty and glue and sanding and scribing. Yet more and more I find that I simply would rather build a kit that doesn’t fight me. I guess I have gotten over the need to prove to myself (or anyone else) “I can build this kit”. I’ve built horrible kits… that Special Hobby Il-10 comes to mind… and survived.
With so many nice kits available though, I’m asking myself more and more “why go through it?”
Somehow, I forgot all of that. The part of me that still thinks he’s younger and more enthusiastic said “Yeah, we can do this!”
I need to make a note to older self… take the younger, enthusiastic self out behind the woodpile and demonstrate what we used to call in my Army days “wall-to-wall counseling”.
Cry Me A River, Bub… What About This One?
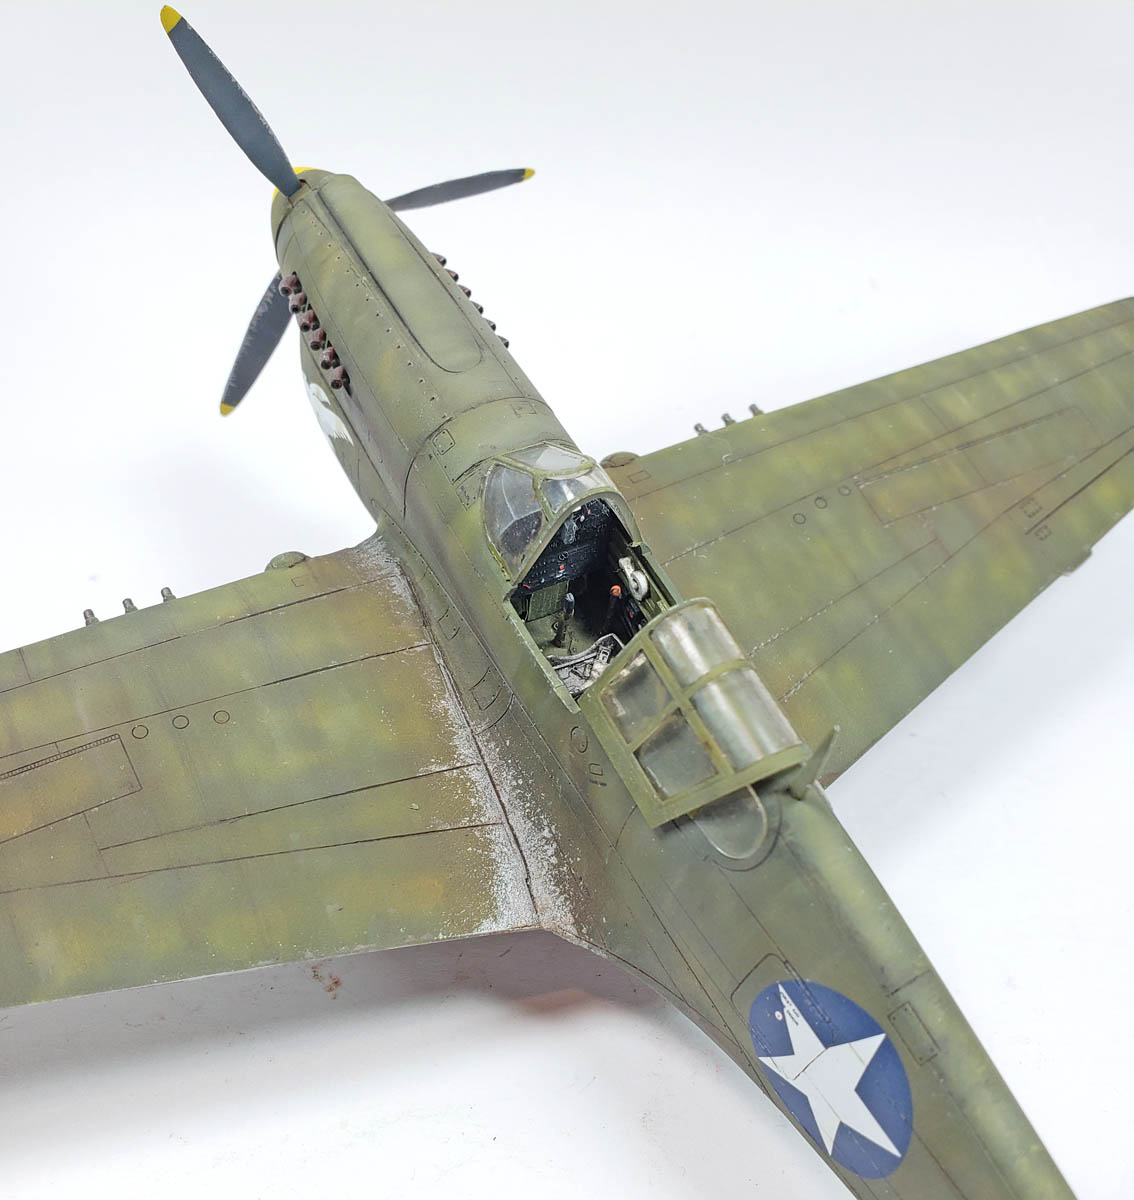
After the last thrilling installment of “So Why Did I Decide To Build Another AMTech P-40?”, the model was painted, waiting decals and further weathering. I like to weather my decals along with the rest of the model, so I applied a gloss coat of Future in preparation for that.
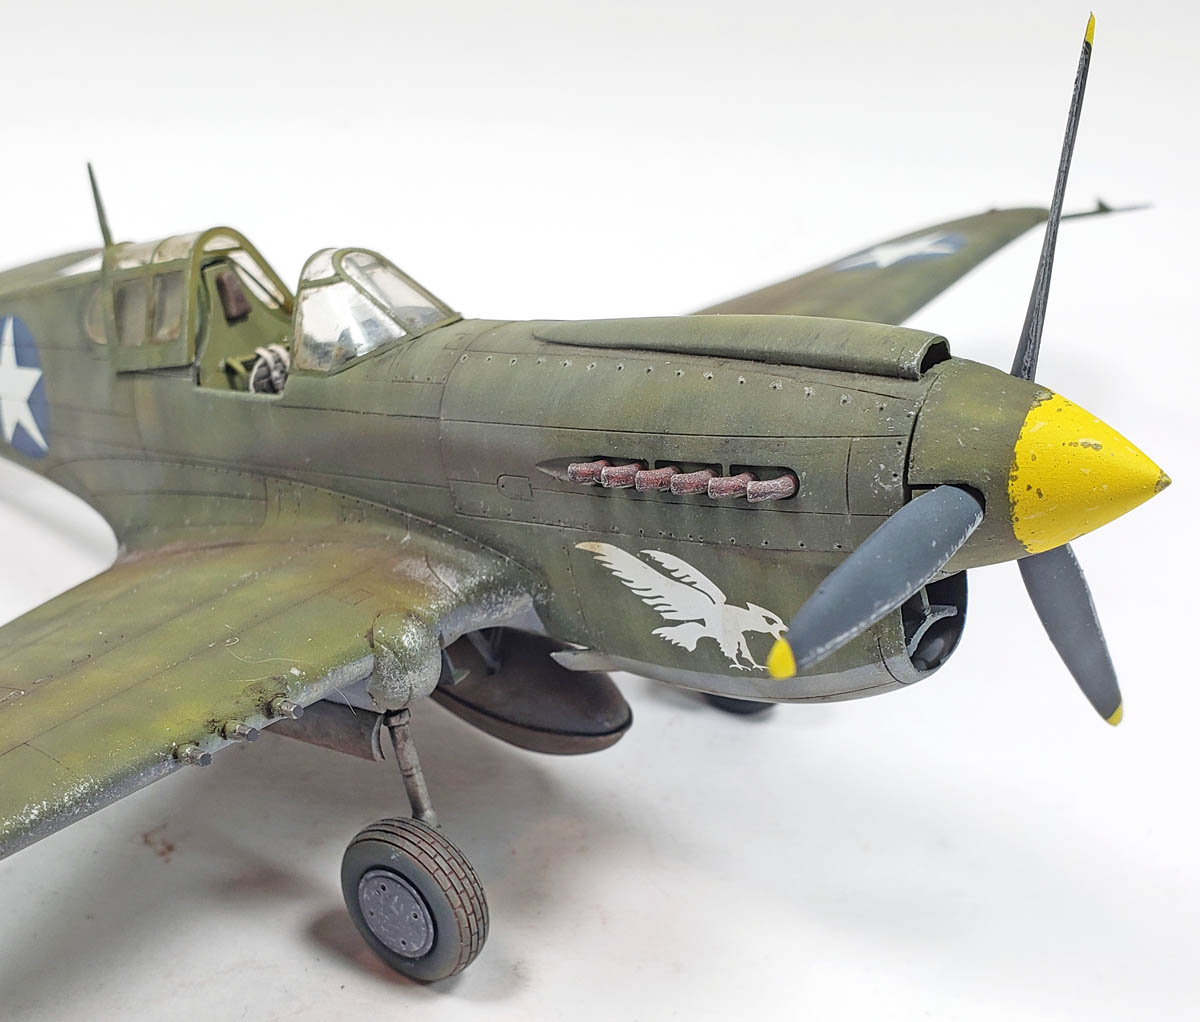
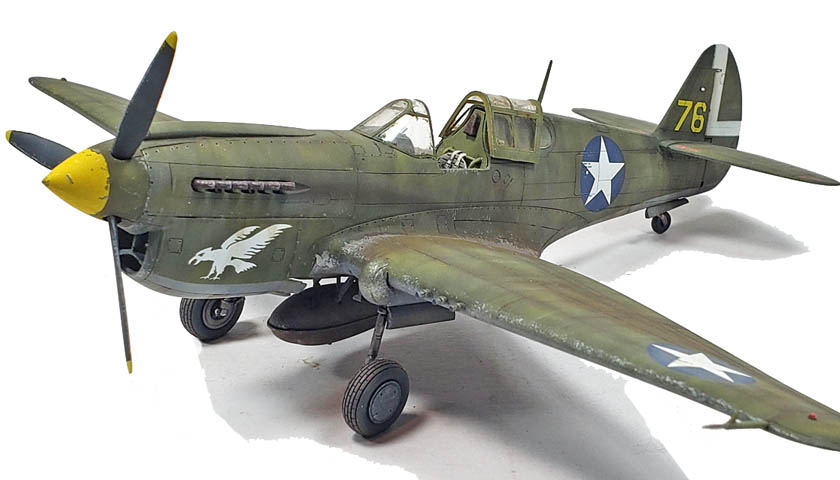
Decals were from an aftermarket set. It was an old Super Scale set I had in my embarrassingly too large collection of aftermarket decals. I chose it for one reason – simplicity of scheme. There wasn’t a lot of masking to do on this one, really. And olive drab, especially the US version of it, weathered horribly. Meaning “lots of modeling opportunity”.
The decals went on quite easily, using the method I outlined in this previous blog entry. With those in place, I gave the model another gloss coat to seal the decals in.
Panel lines were given a treatment of Ammo of Mig Deep Brown Panel Line wash. For years, I’d mixed my own washes each time I built a model, using either artist’s oils or enamel paint. One time I picked up a bottle of pre-mixed wash, and after using it one time, decided at that point the convenience was worth the minor cash outlay. It’s not that a better product, really, but simply convenient.
I like using the Deep Brown color, as opposed to black, or a darker shade of the base. A darker brown color leaves things looking a bit grimy, and it also works nicely across a wide range of color. I have tried other colors, and at times, when I am going for a look that is not specifically grimy, those work. But Ammo’s Deep Brown is my go to 90% of the time.
With that applied, and time given to fully dry, I applied a satin varnish coat. The next steps would involve applying various oils, and I find that those work better when the surface has some “grip” to it. A glossy surface means they will just wipe right off, and leave little to no color. A satin finish gives them something to cling to – and thus you get a nice effect.
I used a combination of Ammo of Mig Oilbrushers, and various tube artist oils. I’d already applied a dot filter prior to the decals, but I added a bit more to grimy up the markings, and to adjust the look in a few areas I wasn’t happy with the previous dot filter application. Other areas received some simulated oil stains, dirt streaks, grime accumulation, and other various blemishes using the oils.
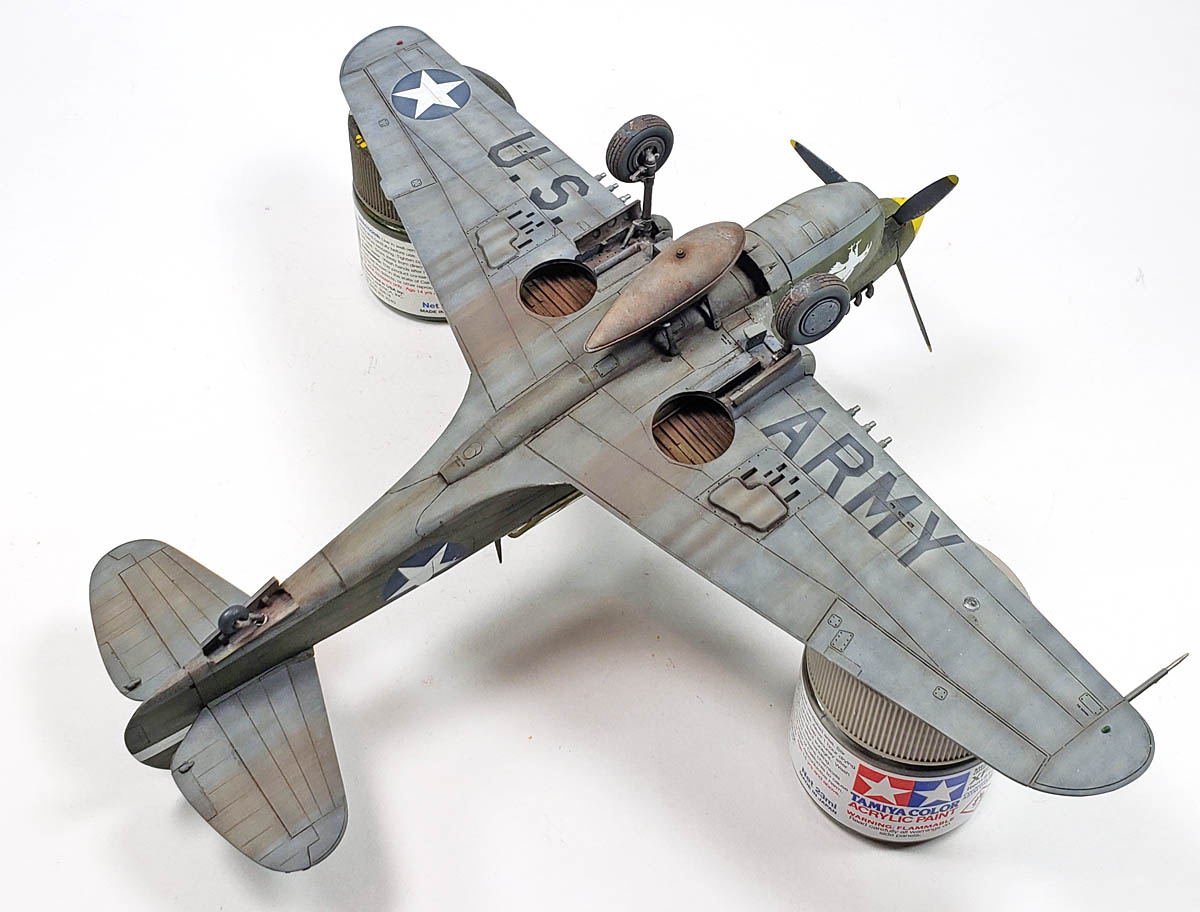
After a few days for drying, I went over the model with a “fade” coat applied via airbrush. I use Tamiya XF-55 Deck Tan, thinned heavily with 91% alcohol. The ratio is probably 90% alcohol to 10% paint. I apply it using a “scribbling” motion, varying the distance from the airbrush to the surface of the model randomly, anywhere between very close up, all the way out to about an inch. I don’t focus much on the center of panels, but rather go over the entire model. This method also does a nice job of fading the decals, taking off their bright, shiny, new look.
Once that was on, I began to do a panel line post-shade. I prefer post-shading because I believe it gives far more control, and does not require me to be too careful about covering up pre-shading. For post-shading, I use a mix of two parts Tamiya XF-69 Nato Black, and one part XF-9 Hull Red. I thin this as described above. The idea is to have it thin enough that it takes 3-5 passes to start building up color. This allows the color to be very subtle, if you’d like, or you can keep layering it on until it’s quite grimy. It’s also great for exhaust stains, shell ejection port streaks, and other grimy weathering.
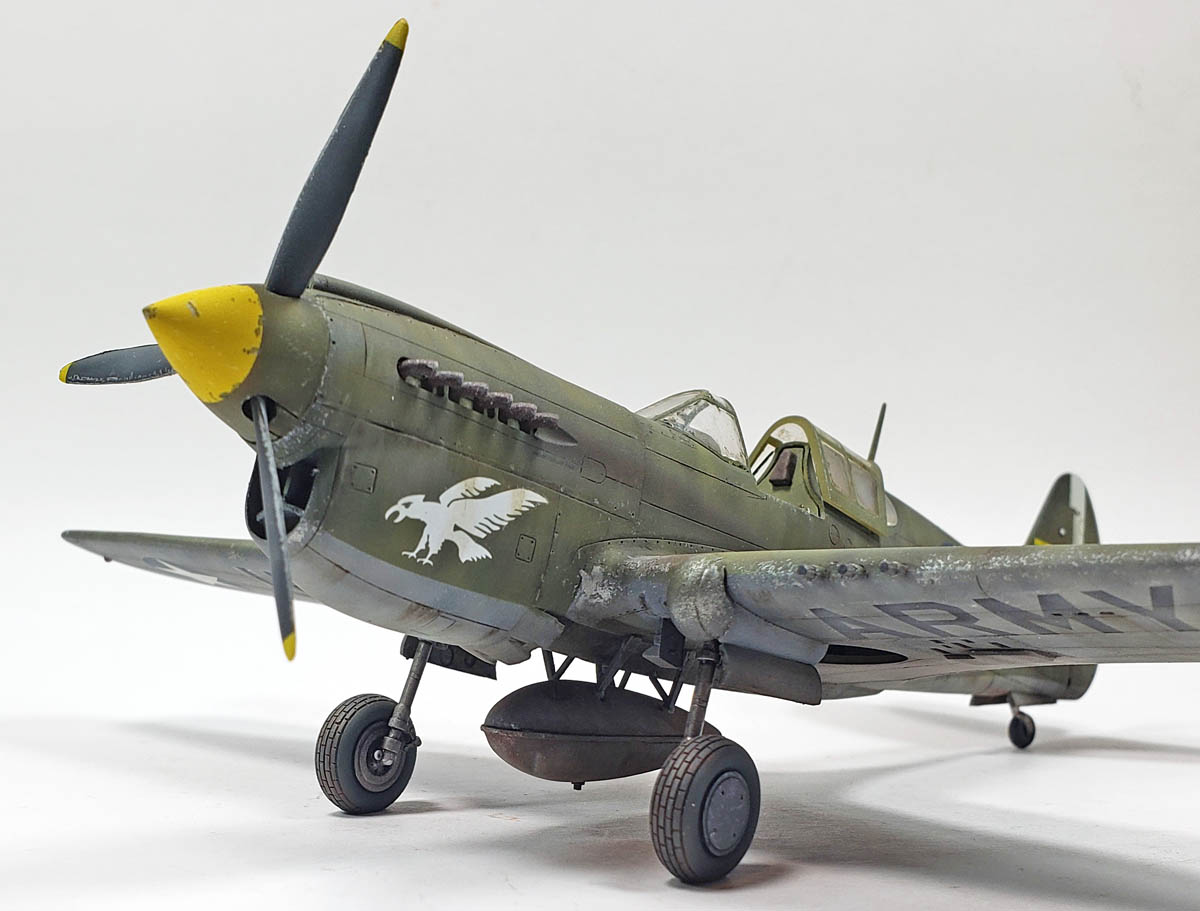
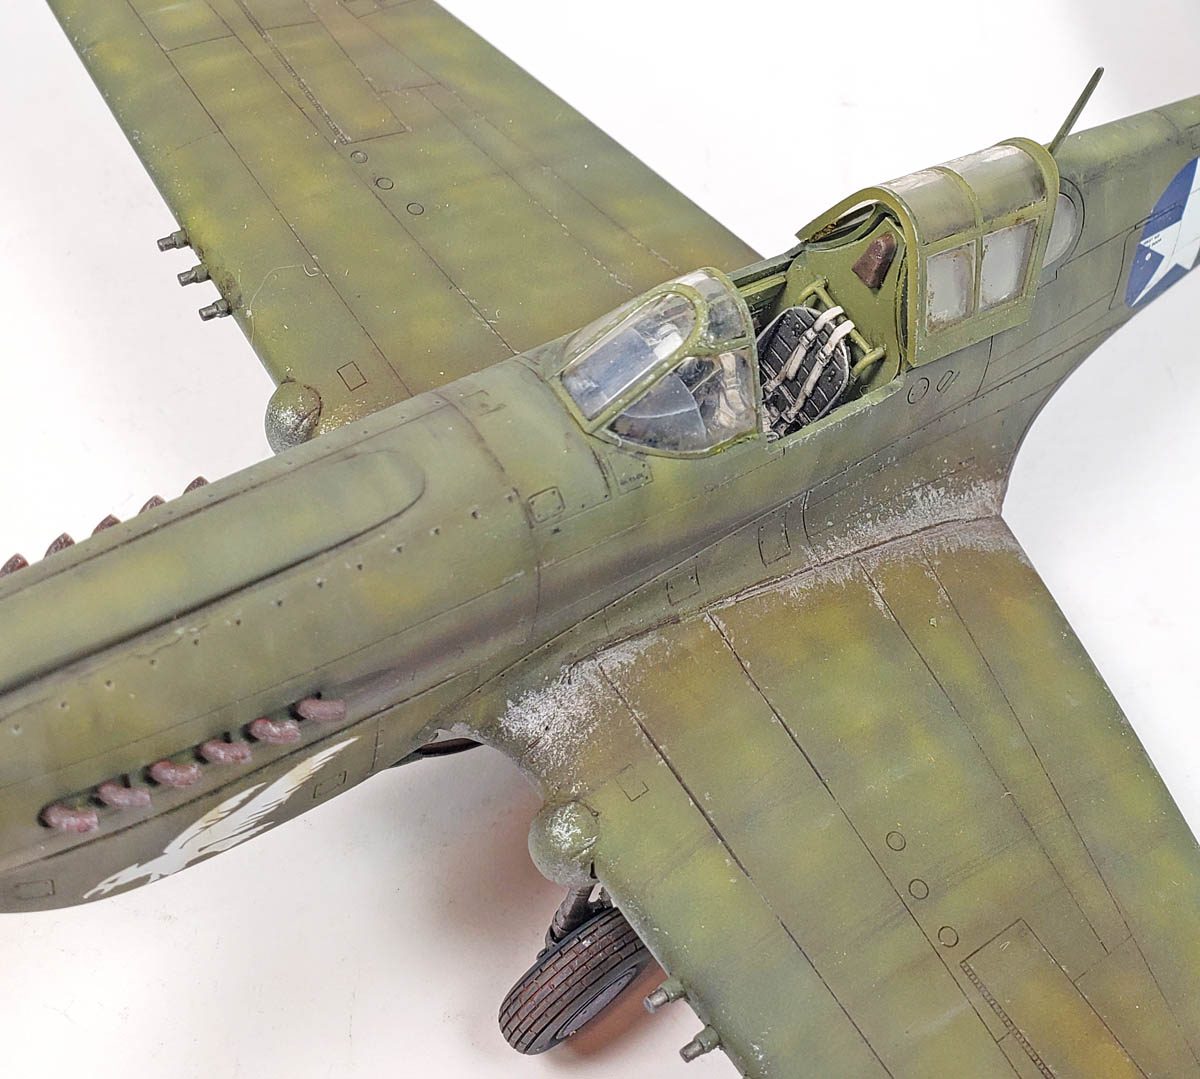
With the grime applied, I added the paint chipping, using both the sponge application for larger areas, and a Prismacolor silver pencil. The Prismacolor pencil allows the sponged areas to be refined, and is very precise for small spot chipping and streaking. I like to do the chipping near the end of the build, as otherwise all of the previous layers of weathering would go over the top of it, and give it too grimy an appearance.While certain areas of paint chipping could look older, areas such as where the pilot clambers up the wing to get in the aircraft, or where the crew walk to service it, would have been constantly in use.
A final step was to add some pastel chalks, ground down to a fine dust. I applied these on the wing roots, where the guns would have been reloaded, and underneath where mud would have kicked up on landing and takeoff. A final flat coat of Vallejo’s Mecha Color Matte Varnish was then applied, and all final dangly bits glued on.
In the end, I was fairly happy with the overall finish. I’d wanted to really throw a lot of weathering techniques at this one, just to see how varied I could get the tone, and still try to make it look believable. I think it’s right on the edge – some people will like it, some will not. I’m OK with that. It’s a great reference for me to look at in future builds to see what I need to apply to achieve the effect again – or to avoid it. Knowing the limits of the envelope helps me avoid busting the envelope every time.
It’s only at the end that I realize how my poor choice of base kt to start with played into the overall finish. This kit has some problems- the left wing has a large warp on the upper surface, the cockpit detail is less than stellar, the panel lines are OK but not greatly detailed. I believe I would have been much happier in the end with this same finish on the Hasegawa kit – inserts of not. It’s not a bad result, I suppose. Hopefully, I’ve learned my lesson.
Choose the kit you start with wisely! 🙂


Leave a Reply