It was just a little over a year ago that I was in the depths of modeling doldrums. Burned out after a decade of building large numbers of aircraft over and over, I realized I needed a change of some sort. I’d spent most of my time building WWII single engined fighters, with Spitfires, P-40s, and P-39s representing a large bulk of it. And I had enjoyed them, no doubt about that. But it was just getting a bit old.
I’d introduced a few jets into my “production line”, a genre I’d never really built much of. At first, it seemed like just the thing to breathe fresh air into my work. But it quickly grew stale… it was basically the same techniques and colors, only different shapes.
In one of those serendipitous moments of life (word points! :D), I happened to run across some videos about building things called “Gundam”. I’d been watching videos about various weathering techniques one evening, and had drifted off to sleep. The Youtubes had continued to autoplay, and I awoke to a video about a Gundam thingy called a “Perfect Grade Zaku II”.
I wasn’t sure what it was, really… I’d always thought of Gundam as snap together kits that kids played with. I’d somehow never seen them built as actual models, with painting and weathering. And it looked really cool.
I stopped by a local hobby shop, and picked up what appeared to be the simplest and cheapest Gundam kit I could find – something called an HG IBO Graze Custom. I had no idea what all of that meant.. or why the little dude on the box art seemed so angry… but it looked cool. And it was $15. My weekend project was a go!
I took it home, snapped it up… and loved it. The Custom Graze looked pretty cool right out of the box. I yanked it apart, did some drybrushing and weathering, and put it back together. A kit I could build twice. How cool was that? I decided to try it again… this time pulling it apart, and giving it a proper primer coat, and painting it up. Still nothing fancy, but I had loads of fun.
My modeling doldrums seemed to have slipped away… I’d build more Gundam. (Which I’d now learned were more properly called Gunpla!)
Great – So How Does That Relate To The Jegan
When I’d rebuilt the Graze Custom that third time, I’d gotten a bit silly and painted the inner frame a metallic blue color. I kept reading “Gunpla is freedom“, so I figured why not? When I blogged about it, I called it the Funky Blue Frame of Funkiness. I always liked the look of that blue frame.
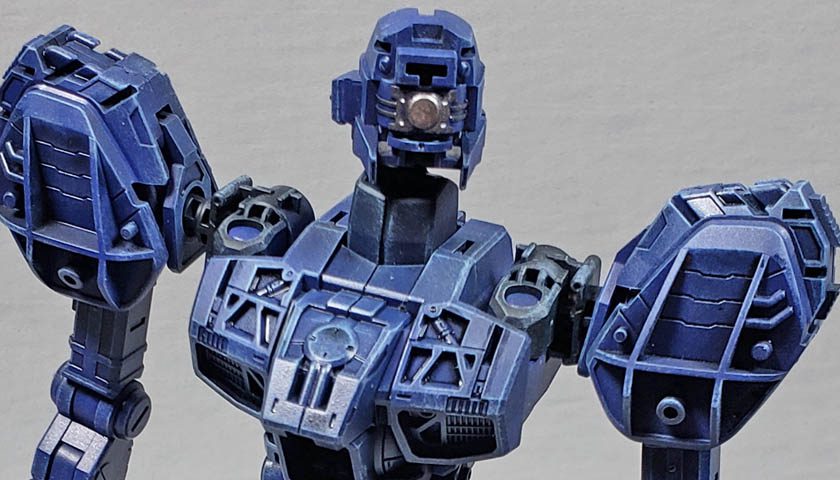
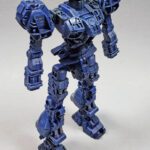
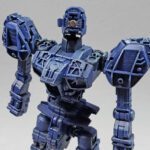
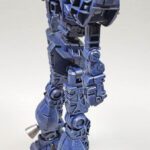
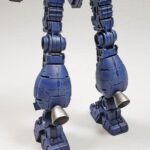
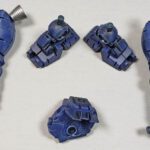
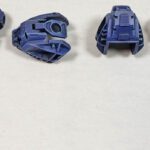
When my newly released Master Grade Jegan arrived a few weeks ago, I was quite pleased to see that Bandai had molded its frame in a dark blue color. While I normally do the inner frame parts in either a dark gray or a gunmetal color, I began to mull over in my mind doing this one in blue, just as the plastic was cast. The idea of doing a sort of “anniversary blue frame” had a certain appeal to me.
So after priming the parts in black, instead of grabbing my usual colors, I reached for Vallejo’s Mecha Color Titan Blue. As the exterior armor of for the model will be a light green, with a few darker gray/green accents, I thought the blue showing through might be nice. There are some other colors on the mobile suit – spots of orange here and there, and of course the obligatory “shoot me here” red in the center of the chest.
The Jegan has received some criticism for the simplicity of its parts, which is not an unfair assertion. It is fairly simple, even though it is a brand new tooling. While the kit does have a full inner frame, the exterior armor is more like a High Grade release, with very little in the way of panel lining. Still, I do prefer my kits to be simpler.
All of the frame parts were given a coat of Titan Blue, and then drybrushed with Citadel’s Fenrisian Gray. While the inner frame does not have a large number of distinct, working parts, it actually has a load of cast in detail. It reminded me a bit of my Master Grade Sniper II build, only without all the working gimmicks.
After the drybrushing, I painted a few of the piston details with Ammo of Mig Gunmetal, though I realized that little of it would be seen once the armor was on. I briefly considered painting more spot detail, but ultimately decided to wait and see what could be seen once the armor was on the frame. While I get the idea of painting everything, even if it can’t be seen, is appealing, the reality for me is trying to have fun building AND keep the stream of things going so I can blog it takes precedence. So to save a bit of time, I held back on further paint detail.
The final step for the inner frame was doing what many modelers call a wash, though some call it a shade.
I’d learned early on that you have to be careful doing this with Gunpla. Bandai is known for the incredible fit of their models. I’d read that the way this is achieved, aside from excellent engineering and production standards, is by leaving out a step most model makers use in the production of kits.
(Warning: What follows is an amalgam of info I’ve collected. I am not a plastic, err… chemistry maker person engineer dude thingy. I don’t even know the right word, so… I may be COMPLETELY wrong. But I found all this info on the interwebs, so it must be right. Right? 😉 )
Most of us have seen how injection molded kits are made. A large metal tooling is made, into which melted styrene plastic in injected. The mold is then opened up, and the parts are popped out – we call it the sprues, very familiar to any modeler.
At this point, most model companies put the sprues through a process called baking. They are heated up in a sort of oven – not to the point of melting of course. (That would be a bit counterproductive.) This process changes the plastic, making it harder, a bit more brittle, and… key to this discussion… much more resistant to chemicals. Meaning enamel and turpenoid thinners.
However, this process can also shrink the plastic a bit. Not necessarily a great deal, but enough that it can cause fit issues. Most manufacturers have their process down to the point that it can be accounted for – but not perfectly.
Bandai does not bake their plastic. This is why it feels a bit softer, and more flexible. And it is why it fits with such incredible precision. And I’d guess it helps with durability with all the articulation. So it serves a very good purpose.
However, it also leaves the plastic much more susceptible to stronger thinners. Let some enamel thinner get into an unprimed joint or other part of articulation, and the plastic is like to simply fall apart. Despite the care I’ve taken, I’ve had it happen once. It wasn’t pretty, either. I was able to glue the parts back together, and all was well. But – I wanted to avoid that problem.
Uh, About The Wash…
Right. Sorry for that diversion. Anyway…
A way around the Bandai plastic bug that I’ve begun to favor is making use of Citadel’s Shades. These are water based washes, available in a variety of colors, and so far in my experience, they’ve been completely Bandai plastic safe. The use is a bit different from standard enamel or oil washes, though.
Typical usage is to gloss coat an area, apply an enamel or oil wash, and then wipe off the excess. With Citadel Shades, there is no “wipe off” part. Once it is dry – which happens very quickly – it is there. So for more precise washing/shading, finer application is required.
I have found that making use of their Gloss Shades helps reduce surface tension, thus reducing the “tide marks” that can result from the use of acrylic washes. And if the Gloss shades are applied over a gloss coat, the results are very, very nice.
For this model, because I wanted the inner frame to have a somewhat grimy look, I opted for using the Gloss Nuln Oil, but over the paint’s satin finish. It provided a nice bit of shadowing for recesses and detail, and acted as a “grime” coat. In a few areas, I went for precision of application, mostly in shallower recesses. In areas with larger recess and shadow, I applied a heavier application. Applying the Nuln Oil went fairly quickly.
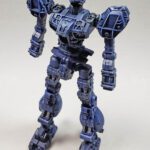
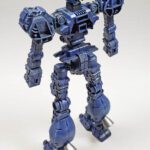
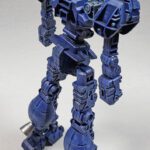
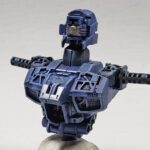
I decided at this point to give the frame a very loose test fit. In the photos, you may notice that not all of the parts are fully pressed onto pegs, etc. That is by design – Bandai’s tolerances are so close, getting things back apart can often be a problem.
Admittedly, this blue frame looks quite different at this point. It’s not the usual Gunpla frame. I think once the lighter green armor is over the top of it, with a few more color splashes here and there, it will look quite distinctive.
At least that’s what I am hoping. 😉
Despite the criticism I’ve read regarding this kit, I am really, really enjoying it. It really embodies what attracted me to the genre in the first place – simple fun. Nothing fiddly or tiny about it. It is looking cool so far, and I am really looking forward to getting the armor on and painted.
If you’ve started losing a bit of the fun in your hobby life, perhaps a foray into another genre may help? I know it did me. Maybe give something far out from your typical experience a try. I think building giant stompy robots was about as far from WWII fighters as I could have gone – and it made all the difference in the world!
It really refocused me on the whole point of this hobby – having fun.
And what’s more fun than a Funky Blue Frame of Funkiness? 😉

Leave a Reply