
A Saturday afternoon at your local hobby shop. As one modeler looks at the stacks of plastic kits, another walks up.
Modeler 1: Hey man, how have you been doing? Haven’t seen you in a while!
Modeler 2: Hey! I’m alright. Been busy with life you know. Things have calmed down a bit, so I thought I’d build a model.
Modeler 1: Cool! Glad to hear things are going better for you. What are you planning to build?
Modeler 2: I was looking at this one. {Picks up Trumpeter’s 1/48 Firefly}
Modeler 1: Oh, no… you don’t want to build that one.
Modeler 2: Oh? Why not? What’s wrong with it?
Modeler 1: Well, you know Trumpeter. Details may be wrong. It may not be shaped exactly according to plans. It will look totally wrong. It’s definitely not contest worthy.
Modeler 2: {Opening box} Hmmm… yeah, that wouldn’t be good. Let me look at this here… Ummm… well, it looks like a Firefly. I mean, I don’t think anyone would confuse it for a can of peas. And I never enter contests anyway.
{Laughter}
Modeler 1: That’s funny. Yeah… I mean, it does look like it, in general. But I read that the chord of the wing is slightly off. And the cockpit is mostly fiction. And the tires just look bad.
Modeler 2: What’s “chord”?
Modeler 1: What?
Modeler 2: What’s “chord”? I don’t know what that is.
Modeler 1: You know. Chord. The chord of the wing.
Modeler 2: Yeah – but what is it? Is it the thickness, or the width, or something about the taper?
Modeler 1: Well, it’s the chord… I dunno how to explain it.
Modeler 2: {Shuffling through the parts} Well, it looks like a decent kit. I’m just wanting to spend some time building an airplane, really, just to sort of get my mind off of things.
Modeler 1: Yeah, but don’t you want it to be right? You’ll spend all that time working on it, only to have it be wrong… that would be bad. I mean, to build that is just enabling them to keep producing bad kits.
Modeler 2: But it’s just going to sit on my shelf.
Modeler 1: Maybe, but it’s a matter of personal pride, you know. To know you did your very best, to know…
Modeler 2: Look, I don’t want to be rude, but I’m not worried about all of that stuff. We’re barely getting by financially. I had to save up for 2 months just to get this. My wife is recovering from surgery, my blood pressure is too high, and the septic tank is backing up. I don’t know if I can save up enough money to pay my tax bill next April, and my car keeps breaking down. I’m facing enough in life without making my hobby another problem on the pile of things I deal with. Frankly, I’m not too worried if this thing looks nothing like a Firefly. It looks cool to me, I like the paint scheme, and I know it will go together without a problem.
Modeler 1: Oh… sorry man. Didn’t know you were facing all that stuff.
Modeler 2: Thanks… {awkward silence} So… uh… I guess I better pay for this and get going. I have to meet the insurance adjuster for the damage to our roof from the storm.
Modeler 1: That stinks. Hope that goes well for you.
Modeler 2: {walking towards the checkout.} Thanks. I’ll talk to you later.
Modeler 1: OK. See ya! {Begins looking at the model boxes on the shelf.} Oh – yeah! Special Hobby makes a Firefly that is much more accurate!
Modeler 2: NOT INTERESTED!
{Fade}
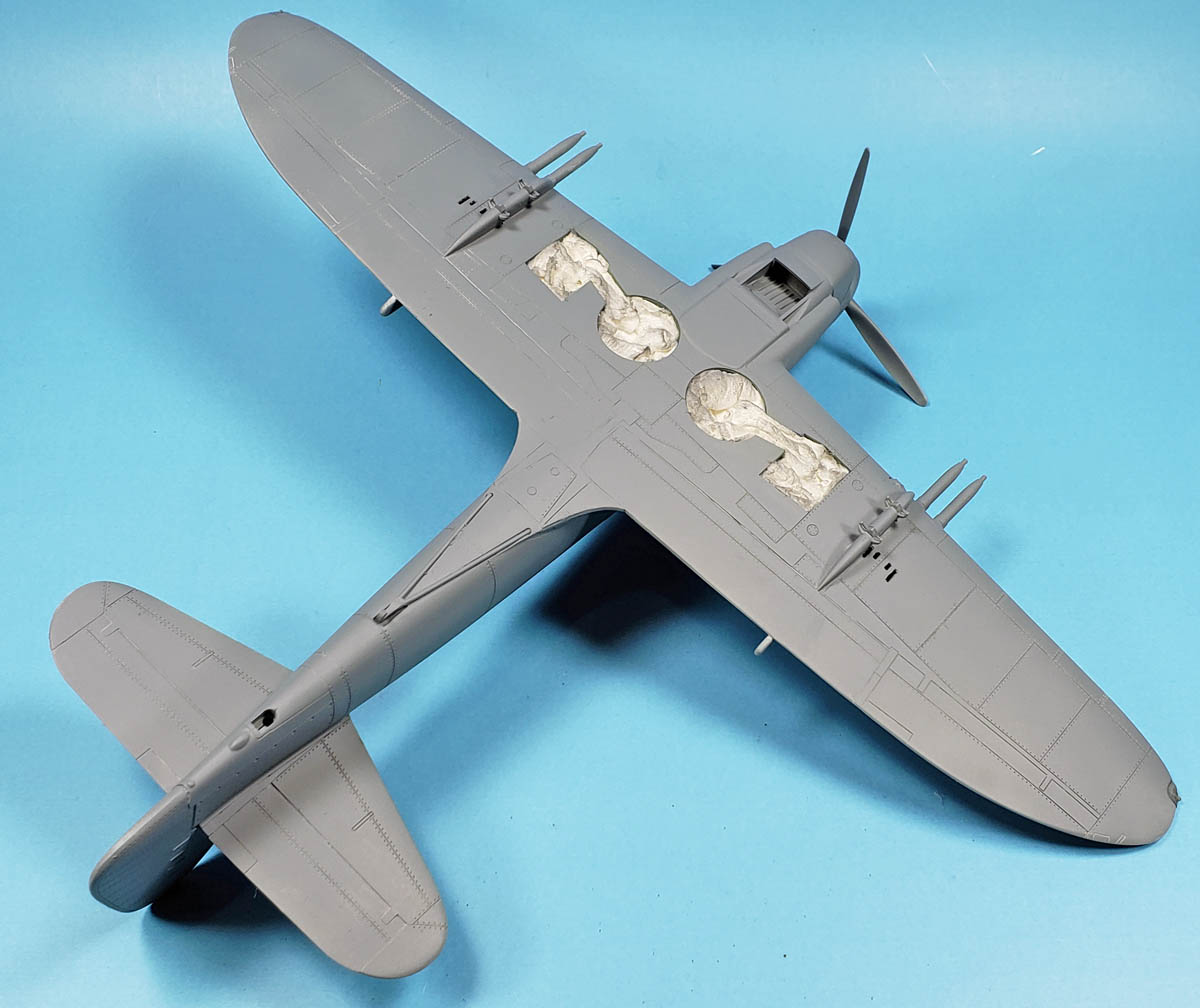
Building And Priming The Firefly
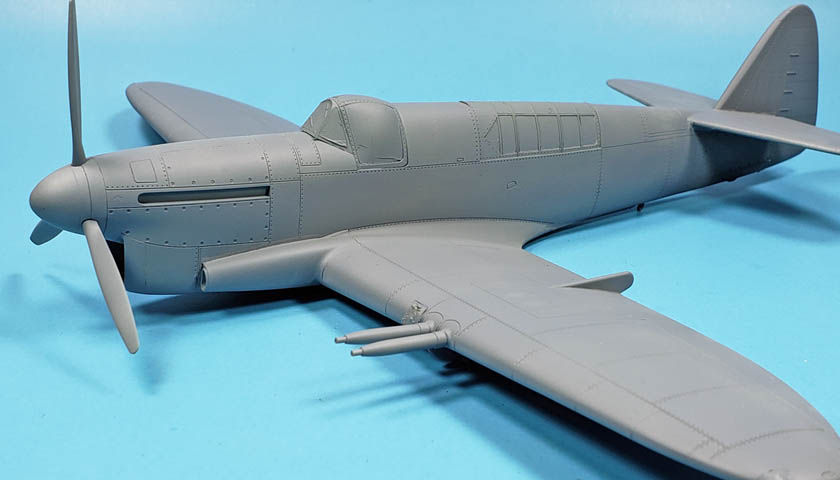
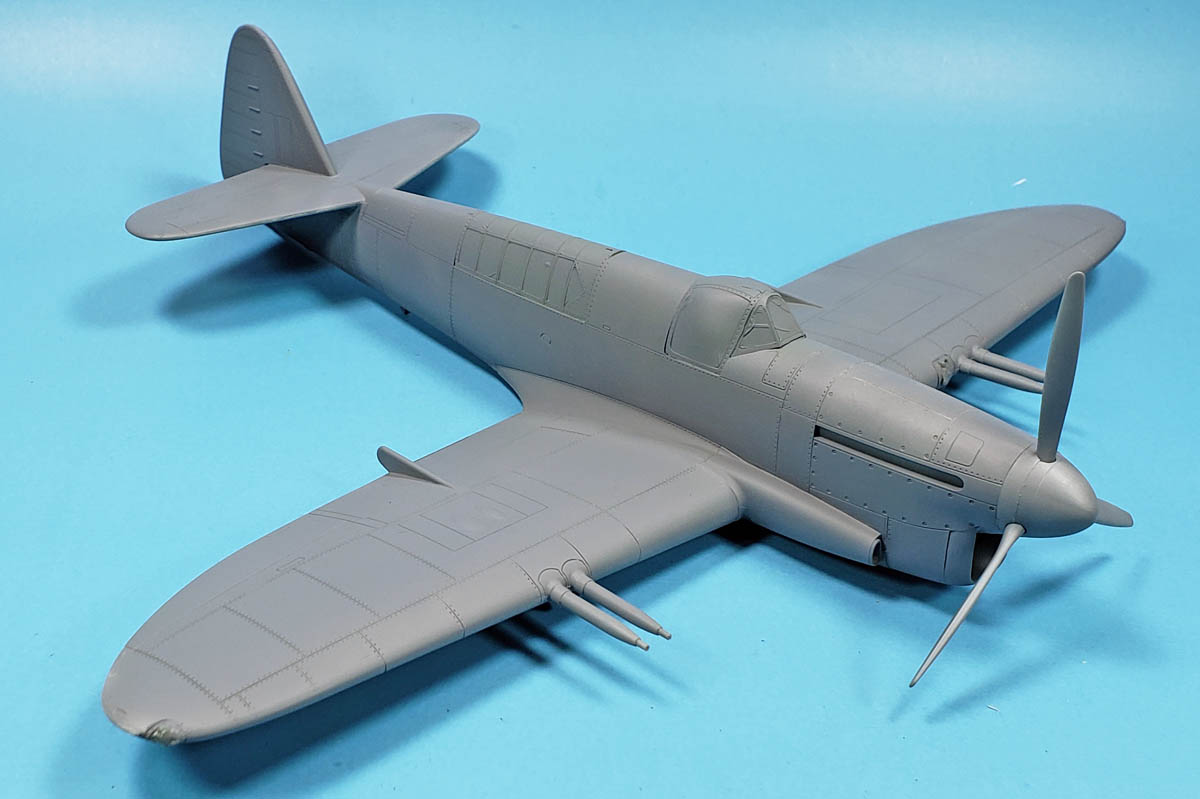
After I’d painted and assembled the cockpit, I began to do some test fitting of the parts into the fuselage halves. The tolerances on the kit are extremely tight. If you build the kit, be sure that both the forward and aft “modules” are tightly assembled. Even the slightest gap or misalignment will mean that fitting them into the fuselage halves is almost impossible without some alteration.
To help in building the crew sections, I carefully trimmed all alignment tabs and slots to make sure everything slid together without any problem. I also sanded all mating surfaces to make sure there were no burrs, mold artifacts, or nub marks to hamper assembly.
Once assembled, a test fitting of the parts into one fuselage half was so precise and snug I could have skipped gluing them in place. Trumpeter did a great job in engineering the kit. There are internal ribs and slots that set the exact alignment for the interior modules, so there is not any question as to where they go or how they are aligned. With both the forward and aft sections in place, and the forward air intake also, the test fit of the other fuselage half was almost perfect.
There was the slightest hairline gap along the top of the join, just forward of the rear observer’s section. I quickly took a look at the rear observers section, and sure enough – there was a small ejector pin mark along one edge of the forward firewall I’d missed. I sanded that down with a file, gave it a test – perfect fit.
With all the parts aligned nicely, I applied a bit of Tamiya Extra Thin cement at a few points inside, set the other fuselage half in place, and used more Extra Thin to join things. A good squeeze along the length of the airframe showed everything was joined nicely. I added a few rubber bands to clamp it, and set that aside to dry.
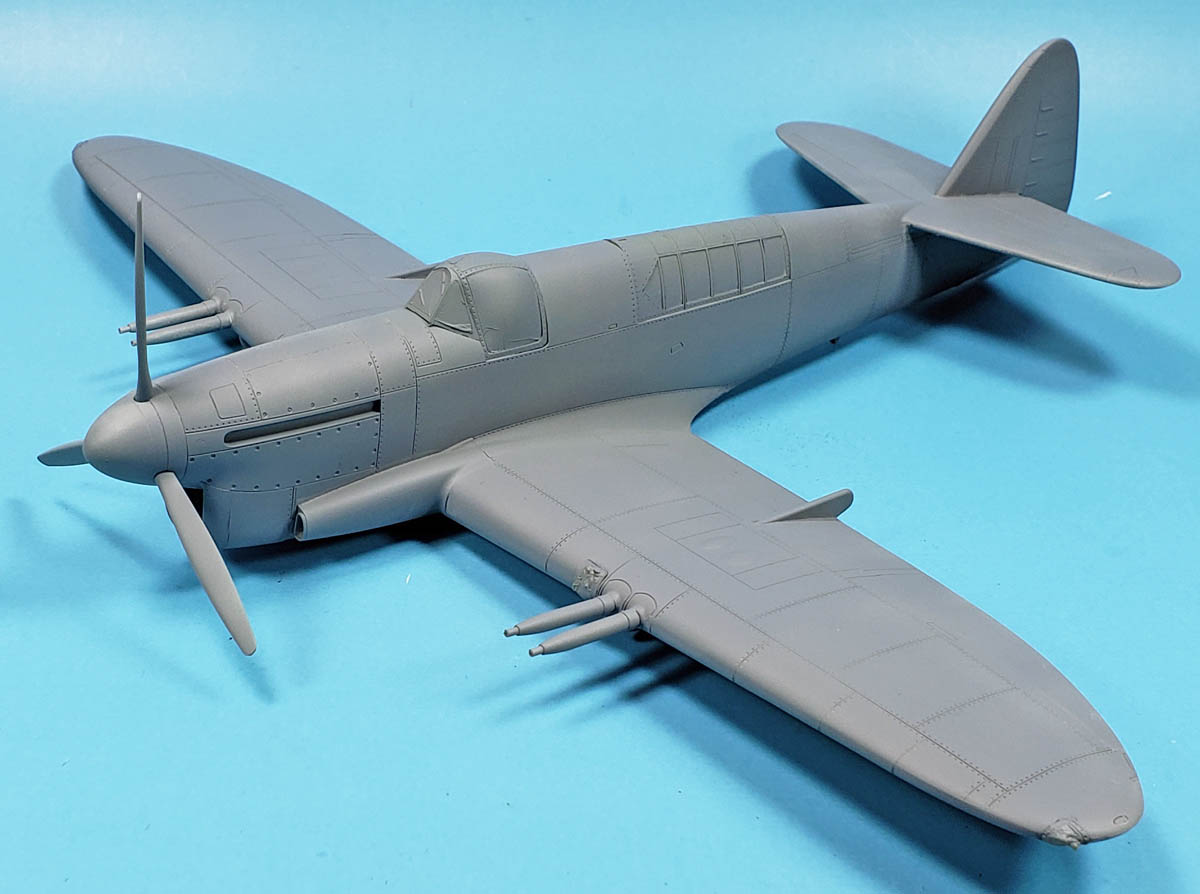
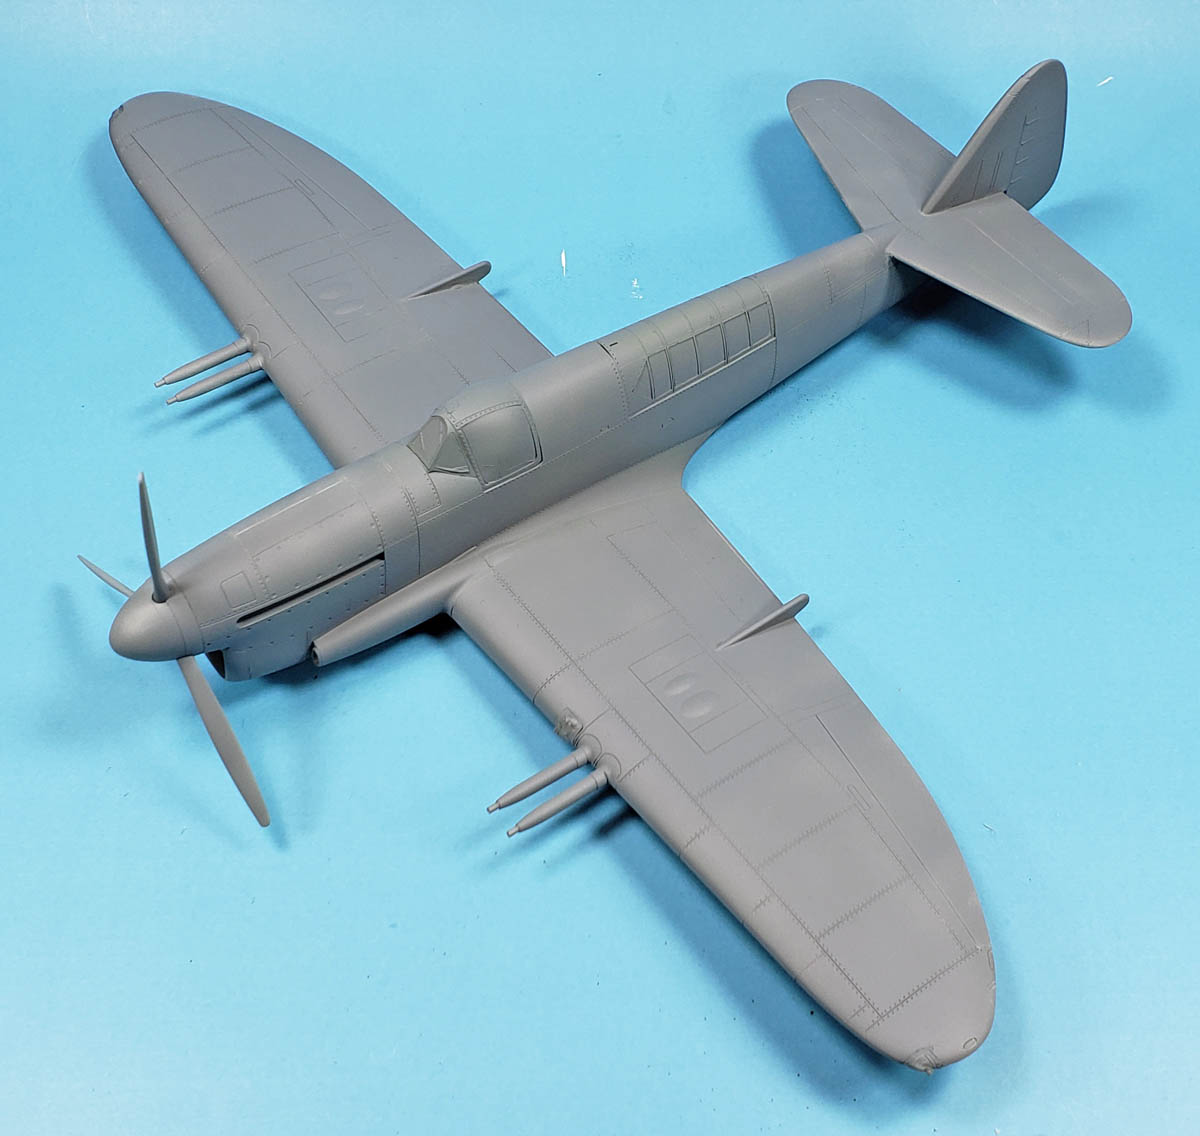
The wing assembly was equally simple – two upper wing halves joined to a single piece lower wing. Alignment was good, though there was a bit of an edge overhang along the leading portion of the wing. Nothing significant really – literally a few swipes with a sanding stick took care of it.
I did make a slight modification to the flaps. The kit’s default positioning is in the lowered (landing) position. However, I wanted them in the up position. A quick trim of the mounting tabs, and a bit of fitting and sanding had things squared away and the flaps glued in place.
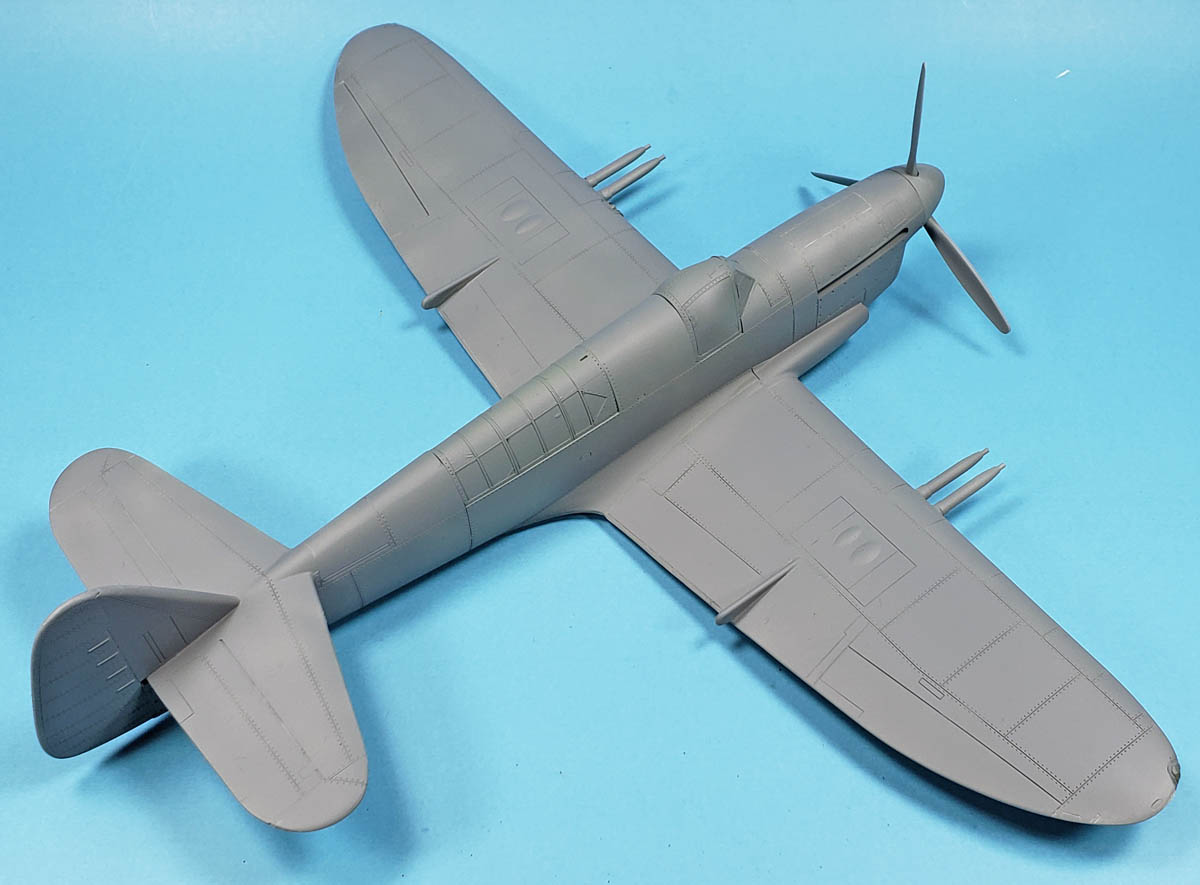
Once the fuselage was dry, I sanded smooth the seam lines. My practice is to always paint on a coat of Mr. Surfacer, even if they look good, just to avoid surprises later. When that was dried and sanded, I added the two air intakes that run along the lower fuselage half and fair into the wings, as well as the underside lower cowl part. All fit very nicely, with just a bit of Mr. Surfacer used to hide some hairline gaps along the joins.
The first test fit of the wing seemed a bit of a problem. The aft section of the wing part did not want to snap in place into the lower fuselage. Instead of going straight for the sanding stick though, I examined the entirety of the wing to fuselage join area. I always try to remember the simple rule “if something does not fit, something else is in the way.” On the upper rear left, right at the aft filet area, the parts were not perfectly fitted. The tolerances were so tight that just a hair’s width of overlap was causing the problem. I gently pinched the fuselage in a bit, pushed the wing in place, and with a satisfying click, it all fit.
Perfectly.
I’ve rarely seen a wing join go together so well. I added more Tamiya Extra Thin, pushed things together to assure a good weld, and moved on.
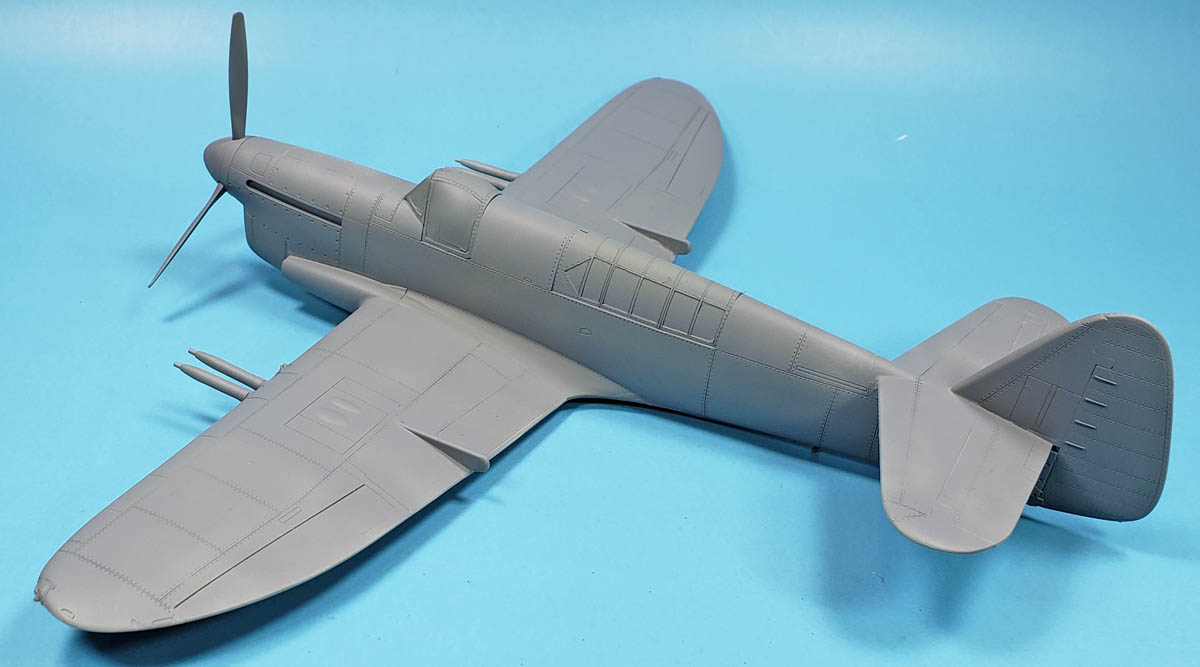
The tailplanes were equally simply. Trumpeter designed them to be a single piece sub-assembly (for the horizontal stabilizer), and the vertical stabilizer slotted into it, the rudder being added last. Again, the fit was perfect – everything was aligned exactly without any effort. What little play may have been present in the vertical stabilizer was accounted for by adding the rudder. While I know that part of the ease of assembly was due to the shape of the Firefly’s tail, I do wish all airplane kits were so nicely done. They left virtually no room for error.
I moved on to the clear parts, and it was here that I did find the only snag in fit. The aft canopy section needed a few swipes of a sanding stick fore and aft – exactly 4 on each end with a 320 grit stick – to fit in place. The problem was encountered with the forward sliding section over the cockpit.
While the cockpit is not spectacular, there are enough bits and bobs visible to warrant an open cockpit build. And while the forward windscreen and sliding canopy portion fit well enough if closed, having the sliding section open was a problem.
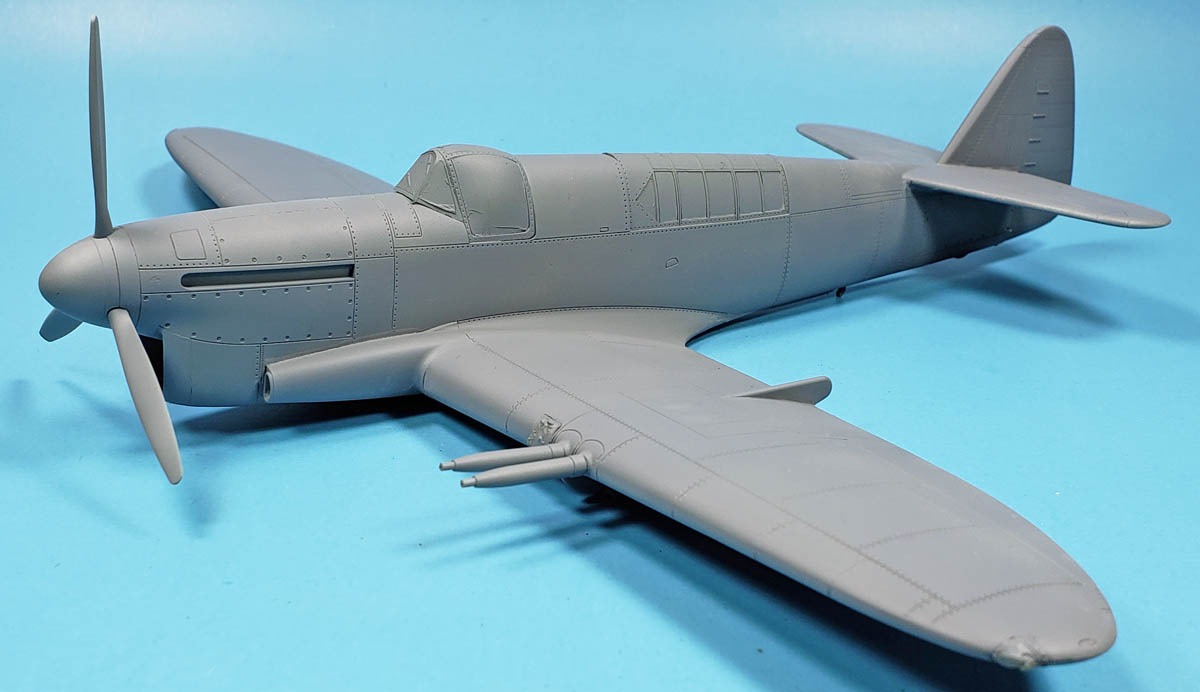
As with most aircraft kits, the sliding section was not designed to be open. I’ve never understood why manufacturers don’t account for this. When I set the canopy in the open position, it rode way, way, way too high, by about an eighth of an inch. On some kits I’ve gotten away with pushing it down a bit and gluing it in place, praying the whole time it would not split. On this kit, the risk was just too high. Though I briefly considered attempting to plunge cast my own canopy section, I decided to pick the path to the most rapid forward movement and simply glued it in place. When I’d built the Special Hobby Firefly a few years ago – which had a single piece canopy, and was thus closed up – it sold quite nicely. So I hoped the same would happen for this one. (We’ll see…)
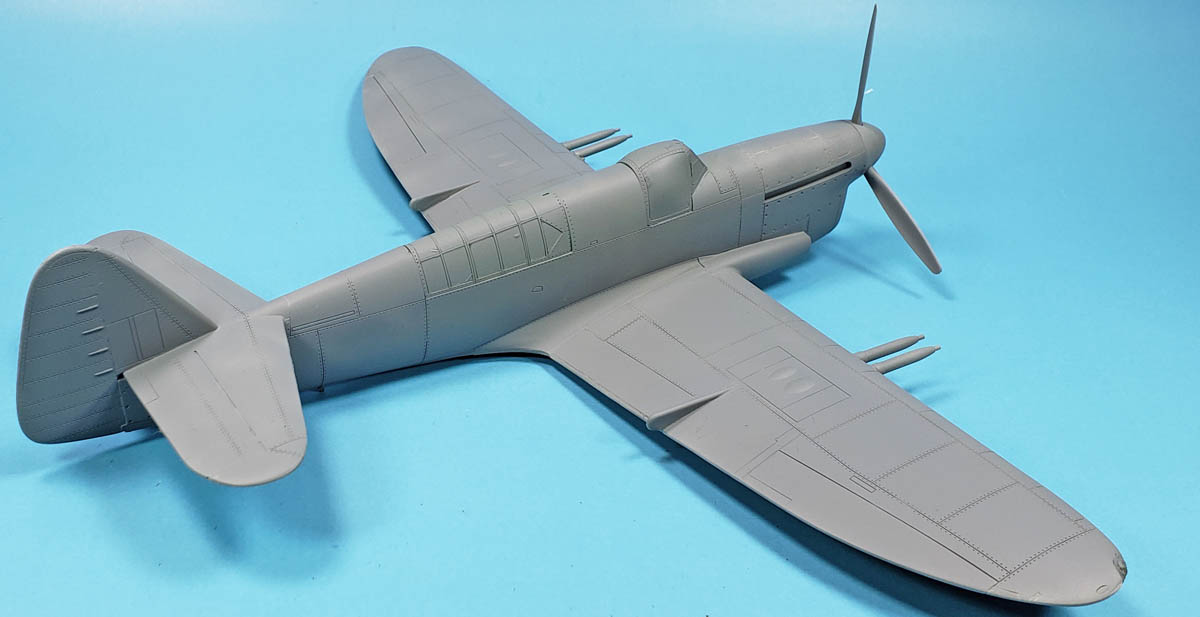
Canopy in place, I added the two underwing bomb racks with their shackles, and closed up the mounting holes for the rockets. I wanted this model to have a clean configuration. It’s simpler to build, simpler to ship, and just generally less fuss. Plus, I’ve never really been a big fan of things slung underwing. Cleaner is nicer in my opinion.
All that was left was to add the primer. Opting for Badger’s Stynylrez Gray, I coated the airframe using my Badger 105 Patriot, my all time favorite airbrush.
Next up of course will be the painting. As this bird operated in the South Pacific, it will have a really faded, worn appearance. I’ve always loved the Fleet Air Arm colors anyway, and they can be weathered so nicely, so I’m excited about that stage of the build.
The Play’s Epilogue
While the story at the opening of this blog entry is a bit dramatized, the basic gist is true. Many times over. I’ve stood in my local model shop, and either had a conversation like that, or overheard it.
Now I’m not saying pursuit of accuracy is a bad thing. If that is your goal, pursue away. But the accuracy wars are bad for the hobby. People forget that it’s just a hobby. If your enjoyment of the hobby is contingent upon accuracy, that’s fine. And if you’re enjoyment of the hobby has nothing to do with accuracy, that’s fine too.
Just don’t make your criteria the list by which all others are judged.
Building models – any model, of any genre – should be about fun. Enjoyment. A break from life. There’s enough conflict, strife, drama, and just bad “luck” to go around for everyone. No one needs it entering into what should be a joyful, relaxing pursuit.
I suppose if I can draw this to conclusion in any way would be simply to make an appeal to be a positive contributor to the community. There can still be discussions about accuracy and how models look and everything else – all done with civility. We can all choose how we respond to any situation, or even if we respond at all.
Focus on the fun. Be nice. Be helpful. Be encouraging. Be honest. And if the situation calls for it, be quiet.
You never know… your light may be as a bright Firefly in the dark. 😉
Leave a Reply