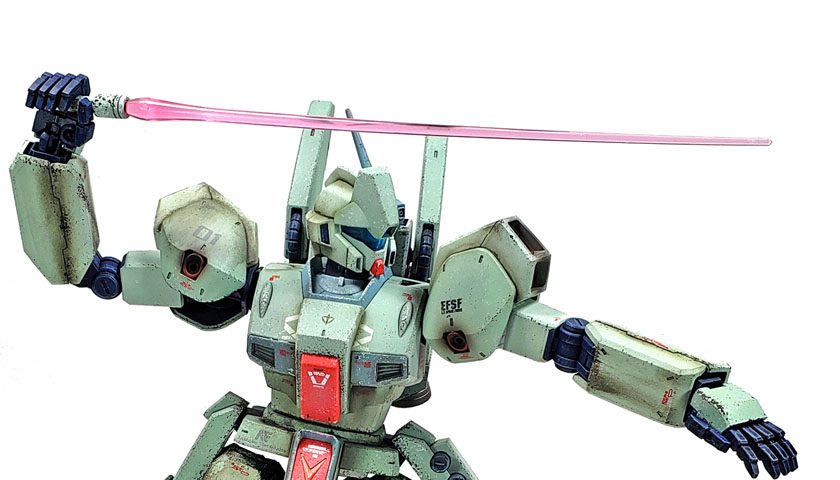
Over the course of the last 14 months, I’ve built and painted 15 Gunpla. And while I’ve enjoyed every one of them, I think this Master Grade Jegan is a stand out. Not because of the result… it’s just the same stuff I always do. Decent enough, but nothing special. What has made it stand out is the journey to completion.
When the kit was first released, I read some criticism that it was too simple, lacking external panel line detail, having only one rifle and one beam saber, and that generally it was just a bit “meh”. But as I looked at photos and videos, I realized “this is the kind of kit I like to build.“
While I do like kits with good detail, and plenty of little greeblies to paint, I’ve realized that trying to build those kits every single time – especially at the volume I build – really wears me down. And quite often that super detailed kit may not be the most satisfying.
This Jegan has been just about the perfect Gunpla kit for me.
Sorting The Colors

The inner frame is cast in a darker blue color. At first, I was going to opt for the standard German Gray look, but as I sat during lunch breaks, nipping and denubbing the parts, the blue color grew on me. The thought came to mind that the dark blue might look really nice with the lighter green, Ultimately, I stuck with it, and detailed that in my blog entry covering the frame painting for this kit. Now that I have finished the kit, I am quite pleased with the result – so much so that I plan to explore other frame colors in future builds.
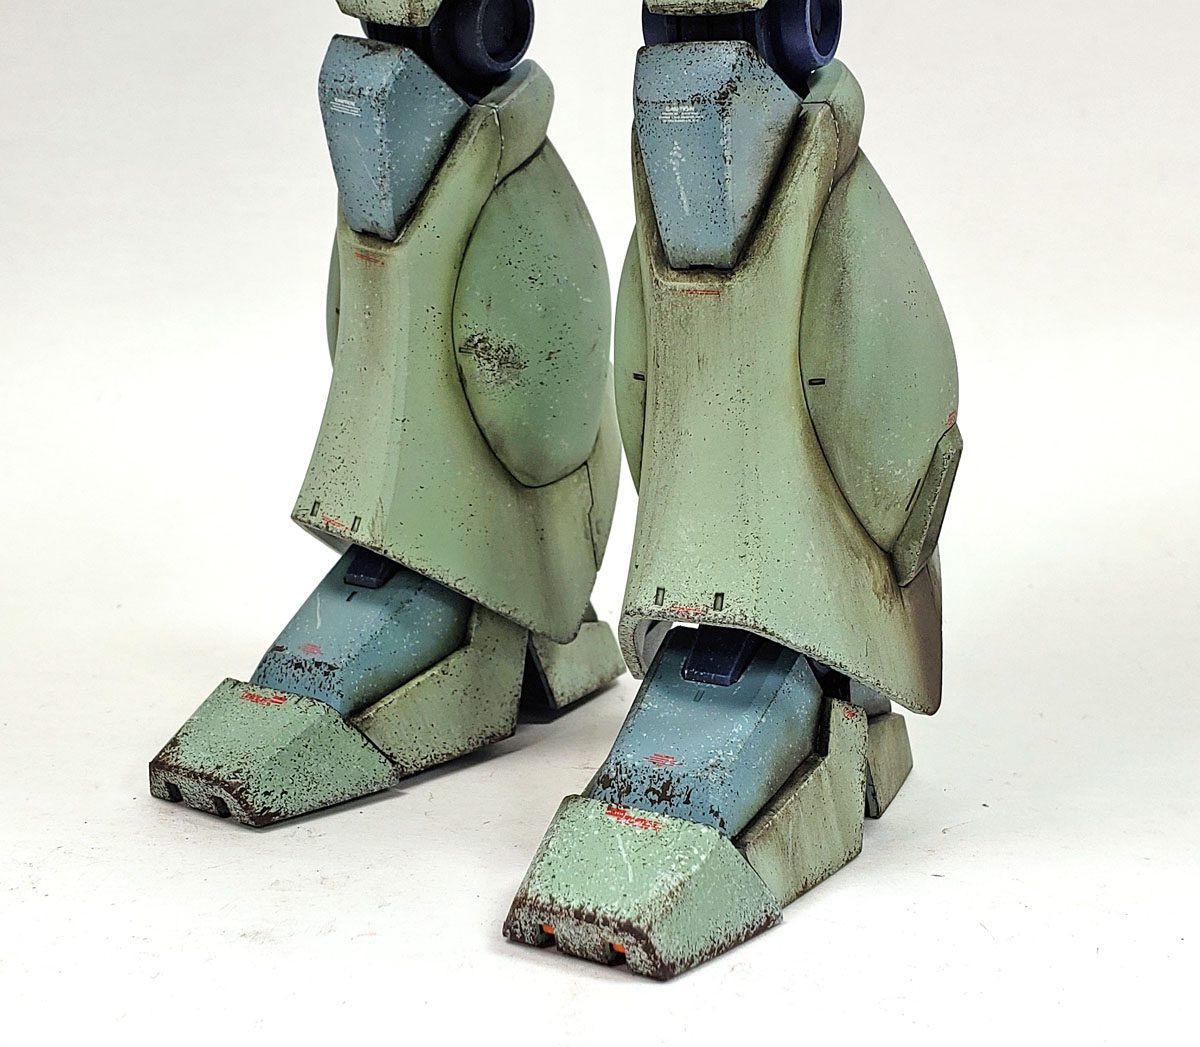
Outer armor parts, in the box, were mostly a minty green, with a few being darker grey/green, and some small red bits. Initially, I wasn’t in love with the pale green, but because the suit appears that way onscreen, I wanted to stick with it. Looking the kit over, I realized that the problem was not so much the light green, but the fact that it was all one color, with nothing there to break up the great expanses of minty freshness.
I opted to use two shades of lighter green, breaking up the monotone look, while still staying reasonably close to canon. I also liked the gray/green color, and thus introduced it in a few more places on the mobile suit, most notably the knee armor and chest vents. (You can read more about that process here.) I feel like these choices really worked nicely. When first examined, the scheme does not seem “off canon”… it looks right to my eye. Only if you are very familiar with the suits appearance in the anime will you pick up on the differences. I can’t say this is a custom scheme, really, but I think it’s enough of a logical variation to make note of.
Decals were added over a glossed coating, the markings being sourced from various Bandai and third-party sets. I know everyone (including myself) tires of hearing complaints about Bandai’s lack of waterslide decals being included in their kits, so I won’t bother making complaints about Bandai’s lack of waterslide decals being included in their kits. But if anyone from Bandai is reading, please note that no one likes the lack of waterslide decals being included in the kits.
😀
Adding The Grime
Weathering was started with some airbrushed shadows, using a darker, heavily thinned gray/green color. I wanted to preserve the “greenishness” of the underlying armor. However, when I finished it, the overall impression it gave me was that of algae growing in the shadows. {sigh} No worries though… I knew I could alter that a bit with other weathering later.
Next came the chipping. This is the stage in any Gunpla build that is make or break for me. I’ve tried every chipping method out there, and have come to the conclusion that my chipping stinks, no matter what method I use. Executing the methods presents no problems. Doing so tastefully, with an eye towards good distribution and density for the environment I am imagining it to battle in is always the problem.
For this build, I wanted the suit to appear as if it was well used, having been in constant battle, but also that it was mostly in space – no dust or dirt or mud on the feet. I also imagined that most chips would come from small bits of floating debris, or fragments from other suits being destroyed. (And if you watch the anime, most of those were Jegans… but I digress.)
I decided to stick with the sponge method. This is a simple way to add chipping, requiring only a small piece of sponge. I normally cut a section about 1/2 inch square, fold it over, and clip it in my tweezer clamps. The sponge is then dipped in paint, dabbed on a paper towel, and then randomly and lightly dotted on to the model. It’s somewhat like drybrushing, only instead of brushing, you dab it along.
I started with a very light white/green color, to represent chips in the paint that did not fully go through the paint coating to the underlying super-future-space-composite-secret-armor stuff. While I focused mostly on edges, I did hit the open armor areas too. If you’ve ever watched any Gundam anime, you know how the suits are shown grappling and bouncing off of each other quite often, which I imagined would cause no end of dents and scrapes.
When these were completed, I then switched to a dark brown color, to represent the chips going all the way through to the underlying super-future-space-composite-secret-armor stuff. Again, these were dabbed on randomly, concentrating on the edges of the armor. In a few areas, I made sure to deliberately build this color up in places where I’d built the lighter white/green, and in others to allow them to be on their own.
In the case of both colors, I really tried to make the chips very, very small, and only build up a few areas. I did pick a few places on the suit to build up some major scuffs, as I imagined it might appear from a larger strike impacting the armor.
The external blue and red areas were similarly chipped, using light and dark colors appropriate for this areas.
And Even More Grime

The next step was to add some stains and streaks with oils and enamels. I was very cautious in this stage, as I did not want the odorless thinners to eat away any of the joints should it get into the gaps. For most of the process, I used dry brushes to apply the oils and enamels, and also for smearing and removing excess. In a few places that I did use thinners, it was confined to open armor areas, and only gently wiped with barely a hint of the moisture on the brush.
For the upper legs, I resorted to adding a coat of heavy chipping fluid, and some airbrushed enamel engine grime over that. I like how this looks on mobile suits. In imagining how they’d work, I theorized that the impacts at the hip joints would have to bear tremendous stress – and thus fluid leaks. Future stompy robots they may be, the laws of fluid dynamics still apply. Anything under pressure will eventually leak. Plus… it just looks kinda cool.
The final step in weathering was to add some smoke effects to the various thrusters. For this, I used my standard (and favorite) mix of 2 parts Tamiya XF-69 Nato Black, and 1 part XF-9 Hull Red. Heavily thinned with 91% alcohol, this can be misted on in a very controlled manner, so that the color can be built up slowly. Once on, it looks very, very smoky to my eye – much better I think than the standard Tamiya Smoke.
Everything was sealed in with my favorite matt varnish, Vallejo’s Mecha Color Matt Varnish. I can testify that I like because I purchased the 200 mL bottle. 🙂
The Journey, Not The Destination
While I know that the finished Jegan would win no awards, or appear on the cover of any magazines, I am quite pleased with it. The real result, in my mind, is not just the final product, but the sum total of the journey to get to that point. Every step of this build was enjoyable. No seam lines to deal with, no fiddly bits to assemble, and everything just worked. I was happy with the frame color, different as it was, pleased with the armor colors, and quite delighted with how the two work together.
In short, kits like this are why I build. While my process is mostly the same for every build, the results are not always the same. The journey may be fine, but the result not so much. In some cases, the opposite may be true.
Yet every now and again, everything lines up just right. The finished model can be set on the shelf, and I can step back and smile.
In a way, I’m glad they’re not all this way. Because if they were, I’d not realize how enjoyable kits like this can be. So I’m thankful for the hard ones.
They really make the Jegans of the world stand out.


Leave a Reply