During my elementary school years, we lived near an Air Force base that was home to a wing of F-4 Phantom II fighters. Many of the people in the neighborhood worked at the base. Additionally, there were quite a few retirees in our community. More than a few had flown fighter planes in World War II.
Though my dad had been a tanker in the Army, he’d learned to fly later in life, earning his private pilot’s license. He loved to get to know the many WWII veterans. His fascination with all things aviation, especially from that era, was passed down to me very early. He proudly recounted years later that my first word was “aipane”… no doubt the result of countless hours of prompting on his part.
As I grew, I read about the very airplanes those veterans flew in the skies over Europe and the Pacific, and for a kid, amassed a pretty deep knowledge of them. Several of my friends had the same love, and we’d gather together to build models, and recite all of the various details we knew about speed, horsepower, wingspan, and the ultimate factor – “cool”.
At the time, I thought nothing could be cooler than a P-51D. Shiny and silver, with a brightly decorated nose. The bubble canopy reflecting sunlight, and of course it had to have the dorsal strake… whoever thought it would look good without that?
My closest friend and I had an odd habit of “claiming” airplanes. Almost like imaginary trading cards, we’d argue over who “owned” the P-40E, the P-38L, the P-39Q, or the F4U-1A Corsair. Unlike trading cars, though, only one of us could own a given model of airplane. (Why? Because 9 year olds… that’s why… 🙂 )
And ownership was serious. We’d get in literal knockdown, dragout fights over who had what airplane. And we’d take it right down to very specific details. One particularly hard-fought dual resulted in me laying claim to all Corsairs prior to the F4U-4… which meant I had rights to what the Black Sheep actually flew – not the ones we saw on TV. (We knew how to spot the Hollywood imposters!)
But his favorite plane was one I didn’t put up much of an argument about, the P-47. I mean, it was cool enough. Big and bulky, loaded for bear, it could definitely make any bad guy run away. But I was not all that impressed by its “coolness”.
For one, the P-51 was just so sleek. It simply looked nimble, sitting still. Plus, all of the pilots my dad knew had flown Mustangs, and they were obviously cool. So while I had put up a hard fight – and won – for the P-51, I gave up my claim to ownership of the P-47 without nary a word. (Plus I knew if I gave up all rights to all things Thunderbolt, that was a bargaining chip… 😉 )
Enter Star Wars
In 1977, the world changed for us. Star Wars was released. Every kid my age was stunned. Mesmerized. Astounded. Toys, lunch boxes, and afternoon play focused on that one subject. And of course, we began claiming Star Wars stuff.
I immediately claimed the X-Wing fighter. He claimed the Millenium Falcon. I grabbed ownership to the Landspeeder. The decision between Landspeeder and Tie Fighter had been tough one, but ultimately the Landspeeder won out. Because Luke, obviously…
As the rules worked in our weird system, he got next pick. I was a bit sad over my impending loss of the Tie Fighter, but I had both of Luke’s vehicles, so that was a bonus. But then he astounded me.
He said “I pick the Y-Wing fighter.“
“The what?” I was confused. What was the Y-Wing fighter?
“I pick the Y-Wing fighter. It was the one that attacked the Death Star alongside the X-Wing fighter.“
This was some new information. I hadn’t even noticed there was anything other than X-Wing fighters.
Bandai’s Y-Wing Kit
While this is the first installment of my build experience for this kit, I can already fast forward to the conclusion. Buy it. Build it. Enjoy it.
Many kits can ebb and flow in the build experience, thus making it hard to judge early on. But I’ve built Bandai’s A-Wing and X-Wing fighters, as well as the Snowspeeder, and enjoyed them all. Plus, I’ve built plenty of Gunpla, so I am quite familiar with Bandai’s quality.
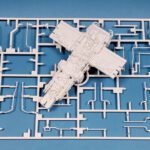
As soon as I opened the Y-Wing box, I was very impressed. The sheer amount of detail cast into this kit is almost unbelievable. The “real” space fighter was an almost impossible collection of tubes, pipes, boxes, and greeblies. It was as if the ILM folks decided to just put all available parts on one frame.
Bandai’s recreation of it seems to have captured them all, in glorious, sharp detail. I’m quite sure that someone with a good eye and sound knowledge of older kit parts could actually pick out which detail came from which kit when the studio models were originally built.
Now, the kit is not the simplest of the lot. I’d give that nod to the A-Wing fighter. It would not surprise me if the Y-Wing actually had double the parts of any of its Star Wars brethren. Yet as I assemble the kit, none of it is difficult. There are loads of parts, but it’s like Lego… click, click, click, click. It just comes together. The hardest part so far has been handling the GIANT fold out instructions Bandai included with the kit. (Remember using old style road maps? Kinda like that…)
I decided to build the full forward section, all the way up to the gloss coat. As the main portion of the hull, with all the tubes, would take some time, I thought this would give me some jo of progress. Because Bandai breaks down the assembly into subsections, doing so meant I would focus initially on step 1. (With about a dozen sub-steps.)
That Office
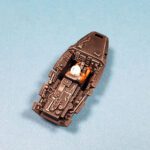
The cockpit is gorgeously detailed, made up of a simple main tub, a stick, instrument panel and console section, and a pilot. While decals (and stickers) are included, the raised detail is so nicely done, I could not resist painting it.
I started by priming it with black primer, and followed this with a drybrush of Vallejo Sky Gray. This really helped “pop” the detail out. A coat of Citadel Nuln Oil Gloss was next, which darkened the recessed areas again, and provided further contrast for the light color. Further details were picked out with white, red and blue.
The pilot was primed with white, and then given a coat of Vallejo Model Air Rust Orange. I like using this color for Star Wars pilot suits. It “reads” orange, but is not so bright as to look cartoonish, in my opinion. Details were then brush painted in – white helmet, gray straps, black details, and a metallic red visor. I also gave the seat leather padding, knowing it would be lost with the pilot in place. Another Nuln Oil shade was applied, and a touch of highlighting.
It Looks Like A Viper’s Head

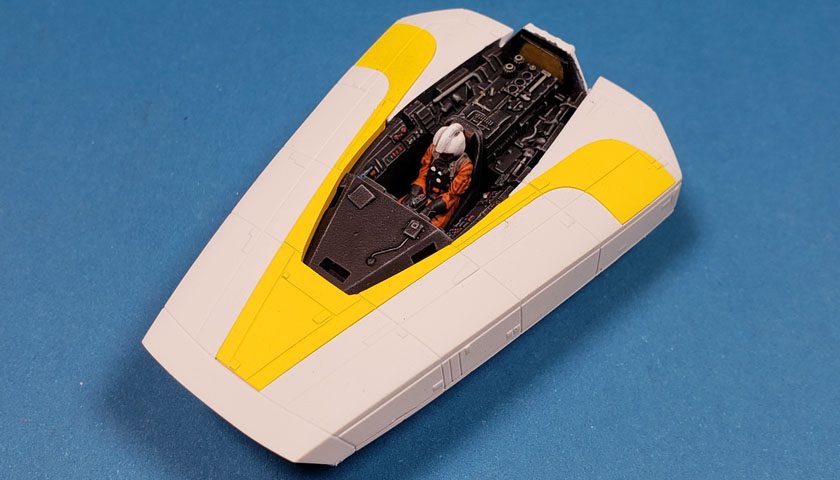
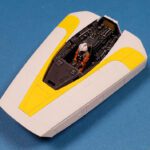
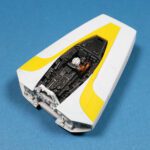
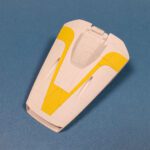
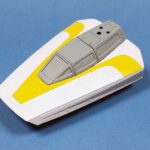
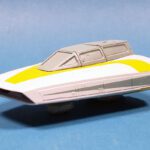
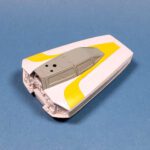
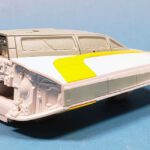
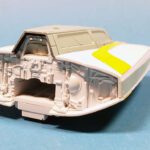
The forward hull itself is simply an upper and a lower half, with a smaller bump added underneath. I assembled these together, and then did a test fit of the yellow parts. The fit was perfect – so perfect that I realized I could paint them separately, and simply add them afterwards. No masking needed!
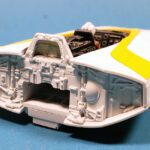
One small modification I did make… at the rear of the cockpit, there is a small opening that Bandai, for some reason, did not include a clear part for. I cut a small piece of clear sheet, glued it to the inside, and brush painted its edges black to mask them. I then masked the outer area prior to painting.
The main hull was painted a special mix I use of Tamiya paint. It’s mostly XF-2 White, with just a few drops of XF-55 Deck Tan added for warmth, and some XF-69 to make it just a bit gray. I labeled my jar that I mixed it in “Spaceship White”. It’s much like the Mecha Color Offwhite or Ammo Cold Gray I often use, but with the benefit of the wonderful airbrush behaviour of Tamiya.
The yellow parts were painted with a 50/50 mix of Tamiya XF-3 Flat Yellow and XF-2 White. With those painted, I snapped the finished cockpit tub in the white hull, and snapped on the yellow parts. Perfect fit!
The Clear Choice
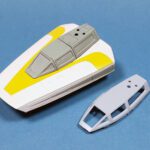
The canopy is a bit odd. A light blue colored part is included, with no clear glazing, which I suppose allows the interior to be seen better. A three-part clear option is provided, but is set up so that the center section is positioned opened. I wanted the cockpit closed up, as I planned to show it in flight, but I did not want the “windowless” version. A quick check showed that partially snipping the mounting tab for the middle clear section allowed it to be snapped in closed up. I masked off the clear parts with Parafilm M, gave it a coat of black primer, and then Tamiya’s XF-23 Light Blue. While it’s not a spot on match for the kit plastic, I thought it was close enough that when in place and eventually weathered, it would look nice.
The final bit for the forward hull was deciding how to add two small stripes on either side of the structure. The kit decals were a light blue, close to the XF-23, but not exact. I decided to mask the area off and paint it, small as it was. This proved far easier than I’d expected it would, and after 10 minutes masking, 1 minute airbrushing, and 10 minutes cleaning the airbrush, I had my nice stripes in place. The canopy parts were snapped on, and I thought it all looked the part.
Oh, Yeah… The Fireball
“You didn’t notice the Y-Wing? It was the one that blew up made a rolling fireball on the surface of the Death Star!“
Ah… now I recalled. Funny thing was, I’d been so captured by the X-Wing, I’d paid little attention to the Y-Wing. A few weeks later, seeing the movie again, I finally saw it.
And it made sense.
The Y-Wing was to the X-Wing what the P-47 was to the P-51.
I decided my friend could take full ownership of the Y-Wing. I had the X-Wing, fair and square. (And I’d snapped up the Tie Fighter too. He had to settle for the droid’s escape pod, poor kid…)
As I sat building this Bandai Y-Wing kit, I chuckled as I recalled those days. Further study of WWII aviation history gave me a true appreciation for the P-47 Thunderbolt, and what a mighty workhorse it really was. Plus, I found out that airplane version were not actually determined by how to make things look cooler. Turns out they had actual engineering and performance goals in mind. Who knew? 😉
And I must say that Bandai’s 1/72 Y-Wing Fighter has given me a new appreciation for this wonderfully imaginative space fighter. Though its shape is not the sleekest, and its collection of parts hanging out looks a bit unfinished, from a modeler’s perspective, it is tops in my mind. It screams to be weathered. And Bandai’s engineering make it a pleasure to build. While there is still a bit of work to go, I can already see this one shaping up to be the best of the lot.
Now, if you’ll excuse me, I have about a zillion more tiny tubes to put in place. All perfectly fitting of course!

Leave a Reply