When I was a kid, I was really bad at understanding colloquial sayings, and getting words confused. It sometimes made for hilarious mistakes, especially as I look back on it.
One time I was at a basketball game with my grandmother. My uncle – her son – was still in high school, and played on the team. I was quite young, probably two or three, but the memory is very clear for some reason. I was quite puzzled by all that was going on. People seemed to jump up and down, and shout a lot, and there were some fellows running about in a big open space below us, bouncing a ball around.
Sometime during this event, my uncle began running down the court very quickly, bouncing the ball in front of him. This seemed to excite and please everyone around me, as they stood up and began to shout. At first I was worried they were angry at my uncle. Maybe he’d stolen their ball? However, as people clapped and cheered, it dawned on me that all the folks were very happy.
And then it happened.
My grandmother… sweet, gray-haired Ma, the lady who made delicious meats and beans and pies and cake, the woman who pushed me on the swing and sung songs to me as I fell asleep, suddenly began advocating violence that was quite shocking.
“Shoot! Shoot! SHOOT IT!”
She shouted this over and over. It was quite upsetting, of course. Why was she wanting my uncle to shoot someone? Who was going to be shot? I saw people running behind him… maybe one of them needed to be shot for trying to steal his bouncy ball?
Before the gunfire could break out, my uncle inexplicably jumped up in the air, and threw the ball away. Just tossed it up. All that bouncing and running for naught. There the ball flew, one which he’d apparently worked so hard to get. A battle so serious that it caused my dear grandmother to order bustin’ a cap, to use modern vernacular. It went through some ring hanging in the air, and everyone seemed to cheer louder.
Thankfully, this seemed to placate Ma, as she was no longer calling for the execution of the person, or perhaps persons, who were attempting to steal my uncle’s bouncy ball.
I was understandably relieved. Yet quite puzzled.
But It Looks Nothing Like A Sword
My dad confused me too. Quite often I’d hear him explaining some matter of business, or yard work, or church matters, to one of his friends. He’d discuss in detail whatever the thing at hand was, usually quite animated as he explained. And more often than I can recount, he’d get this look, one which seemed to speak of something profound about to be passed on, and then he’d just change subjects.
“So it’s a two-edged sword, you see?“
One minute he’s talking about the finer points of life insurance, or the horsepower of the lawnmower, or some finer point of Biblical doctrine, and then he completely and randomly began talking about large-scale war cutlery.
I was thoroughly confounded and perplexed each time. In my mind, I’d run back through the discussion, considering all the points that had been made up until that time. None of it led to a discussion of swords.
And then just as abruptly he’d be back to the original topic. More discussion ensued, and the matter of swords would be left behind as though it had never been brought up at all.
So Y are You Telling Us All This?
As I’d described in the previous blog entry about this Bandai Y-Wing build, getting the model to the point that it was ready for weathering was quite an undertaking.
While Bandai did their typically stellar job in terms of fit and engineering, all those piping parts presented a perplexing problem. Each one had a separate step in the instructions, requiring that part and model be aligned precisely to assure correct placement. It was not difficult work, but it was quite tedious.

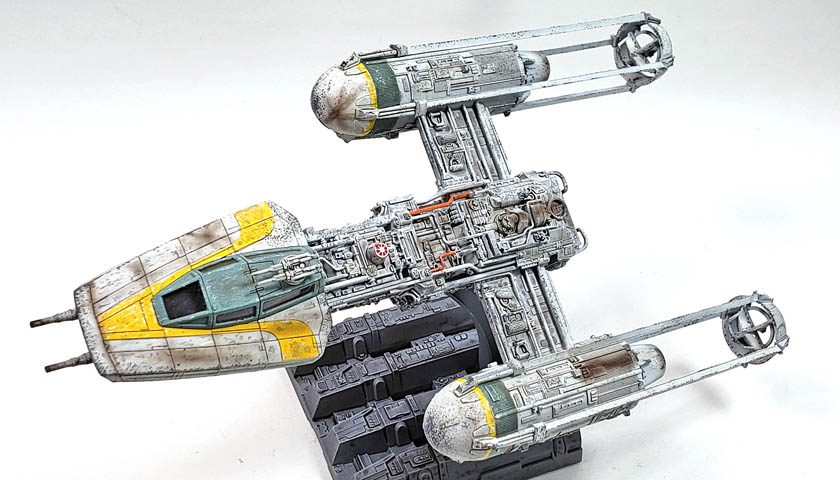
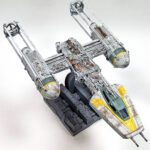
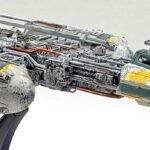
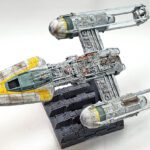
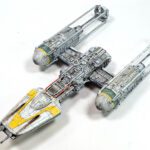
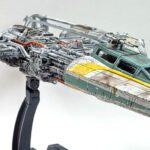
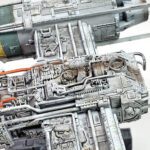
Of course, the payoff was readily apparent… the model looks astonishingly like the one we see on screen. The evidence of Bandai’s attention to detail is visible throughout. I’d have to imagine that they used an actual studio model as the basis for the castings. How else could you explain the presence of a shovel mounted on either side of the outer fuselage?
It is quite fun, actually, to look over all the greeblies on the kit and try to pick out the various parts. The shovels are obvious, of course. Various bits of tank parts, uniform accoutrements, and who knows what else, speak to the scratch built nature of the original studio models. I’m sure no one was concerned about sticking a shovel on the side of a space fighter. The thing was designed to be filmed in flight… not sitting still for close examination. Thus the goal would have been to just have “stuff” all over it.
And Bandai faithfully recreated all of this, which I think contributes to the overall fun and joy of this kit.
Yet… All Those Pipes
Still, all that detail left me with a perplexing problem. How do you weather it?
My initial inclination was to simply dump wash all over it. But that presented some issues.
First, there was the Bandai plastic bug. While enamel washes are quite useful and flexible for most builds, shaking hands with how Bandai plastic reacts to them is no small matter.
As best I can gather, Bandai’s plastic fits so well because it is not baked after being taken from the molds. Baking is a process that does exactly what it implies – the parts are heated in an oven. Obviously not to the point of melting, but hot enough that a chemical change takes place. The material not only hardens up, but becomes much more resistant to the chemicals modelers use – especially enamel thinners.
However, the trade-off is fit. Some shrinkage will occur. And while steps can be taken to predict and minimize this, there is still enough shrinkagen to cause models produced in this way to have some fit variation. So by avoiding this step, Bandai can assure top-notch fit – but at a price.
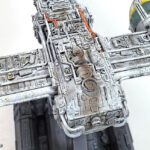
The second problem with a good wash was the difficulty of wiping off the excess. All those greeblies and pipes and recesses made it incredibly difficult to get access to… well, all the space between the greeblies and pipes and recesses. Even a more Bandai plastic-safe method, such as an oil paint “gunk wash”, was generally out of question.
All that detail created a problem.
Slicing Through The Problem
I realized I’d have probably been far better off having painting and done the initial washing and weathering before assembly. But with the model sitting in front of me fully assembled, that was out of the question. And while it was push-fit, and I’d used very little glue, there was no way on this green earth I was pulling off all those pipes.
I started by giving the entire model a good, thick, detail clogging coat of Future, airbrushed on. This would give me a good surface to work on without endangering the paint underneath.
Next, I started coating sections of the model in water. Plain old water. This was followed by a thinned, heavy application of Citadel’s Nuln Oil Gloss. Having added the water prior to this meant all that Nuln Oil flowed into every recess and crevice, but its “wateriness” meant it did not collect to badly on raised or flat surfaces. Once applied, various brush sizes could be used to draw up the thinned shade mix where it wasn’t wanted, as it had a bit more working time than Nuln Oil normally has.
It wasn’t a perfect method, but it moved the ball down the court, so to speak.
Once I had the full model coated with what I started calling a “slosh wash”, I set it aside to dry. Once dry, I could then go back and more precisely and selectively add in straight Nuln Oil Gloss where it might be needed.
All The Rest Of The Weathering
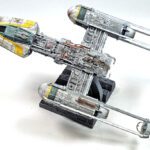
The rest of the weathering was quite standard. I was aiming for a quite dirty look, as still photos from the movie showed they were presented as fairly well beat up. However, I wasn’t trying to replicate any particular on-screen Y-Wing, but rather to simply capture the general look of it.
Various streaks and grimy areas were layered up with heavily thinned Vallejo Washes, Pigments, and other acrylic weathering effects. I was quite liberal in my application, working a section at a time. If I felt something had been a bit too overboard, I used a touch of Vallejo Airbrush Thinner and a pointed brush to clean up areas and then re-apply. I found I was able to work on areas in this manner as much as half an hour after application. I don’t know if that is near the limit of the time for removing acrylic weathering, as I didn’t push it beyond that. Also, having a good gloss coat, fully cured, really made that removal technique work.
I also interspersed some drybrushing in, which helped tone down some areas, and brought out the highlights. For this I used a very wide, flat, and soft brush, allowing just the barest hint of Vallejo Flat White paint to be deposited with each stroke. This gave much greater control for color buildup. By using such a soft brush, I avoided removing any previous layers of paint and weathering – something a too stiff brush can do if you’re not careful.
The final weathering step was to add in some smoke and stain effects, using a very heavily thinned mix of two parts Tamiya XF-69 Nato Black, and one part XF-9 Hull Red. I used alcohol for the thinner, allowing me to take advantage of its quick drying time. When i was satisfied with the overall look, a final coat of Vallejo Mecha Color Matt Varnish sealed it all in.
So… Dad… About That Sword?
One day I finally asked my dad why he always seemed to bring up swords in conversations. He gave me a look that my own parenting experience now recognizes as a cross between avoiding laughing out loud, and thinking “oh dear, I’ve raised an idiot.”
He patiently explained that it referred to the fact that many times a thing that is good or beneficial can also be bad, or difficult to deal with. Just as a two-edged sword can cut both ways, so can any particular circumstance. The very thing that is of benefit can also be that which creates problems.
I think that Bandai’s Y-Wing Fighter is just that… a two-edged sword.
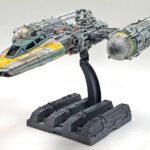
Of all the Bandai Star Wars kits I’ve built – A-Wing, X-Wing, Snowspeeder, and now this Y-Wing, the Y-Wing is absolutely the most detailed and faithful looking recreation of the models appearing in those iconic movies. The sheer amount of surface area on this little kit is astounding, given all the bumps and lumps and pipes and greeblies.
And despite all of that “surface character”, it almost falls together… slow a fall as that is. While it takes a while, and careful attention must be paid, assembly is straight forward. It all just fits. Perfectly, precisely. Every time. The fact that they were able to balance such parts complexity with elegant build simplicity speaks to how good Bandai really is. This is a company at the top of their game.
I Sense A But Coming
Yet… the very thing that makes this kit so astounding is exactly why it is a bit daunting and difficult. All those parts do take an incredible amount of time. This is not quick snap-up kit for a rainy afternoon. A thorough paint and weather job is not a simple matter. Careful planning and consideration have to be taken every step of the way.
In fact, I really feel that only now – having built and completed this model – am I actually equipped to build it. Part of me would like to do this again simply to apply all the lessons I learned.
So while this is certainly a great kit, a fun kit, a truly astounding kit, I can’t say I’d recommend it for everyone. It’s definitely not what you give your 9 year-old-nephew for Christmas. Give him the A-Wing or Snowspeeder. And if you’re looking for a cool scifi build, but one that is simple and quick, this is not the kit for you.
However, if you want to build something epically cool, even if you have to spend a little time on it, this is definitely a model to pick up. It shows a manufacturer at their pinnacle, and recreates an iconic part of media history in astoundingly faithful detail. You’ll have a good time doing it, and will be able to have a great looking model in the end.
Just don’t shoot anyone with that two-edged sword while playing with your bouncy ball. 😉

Leave a Reply