While this is only my third Maschinen Krieger kit, I’ve quickly come to appreciate the simple design and construction. The kits are designed to be push fit, and though it’s not quite at a Bandai standard, it’s still very good. If all traditional model makers followed this standard, I think modelers would be much happier. (Except for you, Tamiya and Eduard. Y’all doin’ a’ight. Hold whatcha got. 😉 )
The sequence is simple enough – build the torso, then the arms, then the legs. Each step is clearly documented in the simple instruction sheet. A few areas on the torso may seem like they require three hands the first time you build one, but before long even those steps go by without a hitch.
One of the things that attracted me to Gunpla builds was that the construction was simple, fairly quick, and got me to the point I like the most – building and painting. All three of the Wave Ma. K kits I’ve built have fast-tracked that process beyond Gunpla. I built this kit in about 90 minutes. The whole thing, and that was at a leisurely pace, really.
And by going along with the style of the genre – adding texture to the suit – filling and sanding seams is pretty much not needed. I glued the parts in place, sanded the edges for a smooth transition, and then just textured over it. More on that though….
Adding Some Extras
I wanted to branch out just a bit on this SAFS Mk. III Raptor, and add a few additional details. Because the Ma. K ethos is built on imagination and scratch work, I figured I’d be right on target with the universe. Still, I didn’t want to do anything overly complicated.
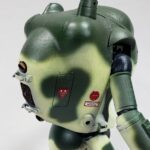
The first step I took was one I’d meant to do in my previous SAFS build – I simulated fasteners on the various hatches. Many times I see models that have raised dimples, like screws, added as hatch fasteners. However, being a Spitfire fan, I’ve always favored the Dzus-type fasteners, which appear as small recessed divots.
 Several years ago, a friend in England sent me a tool that was quite handy for simulating this bit of detail. The tool, called a grainner or beading tool, consists of a wooden handle and a variety of metal punches. The end of each punch has a small recess in it. When pressed into plastic, it creates a nice circle, yet leaves a raised area in the middle.
I selected one of the larger sizes, and began adding fasteners to the various hatches. I thought this worked better for a military suit. In my own Army experience, most equipment had recessed type fasteners, which helped prevent them from snagging on things and being broken off. So even though Ma. K is just made up scifi, I thought adding a touch of real-world logic would help “sell” the look of it.
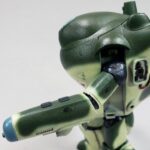
Additionally, I used a scribing template to create some small access hatches on the laser arm, and added fasteners to them.
Applying The Old Imagination
I also applied some imagination for a feature. While it’s fun to add detail, I always like to imagine why that detail is there. As I considered what to add, I thought about some sort of external piping. As I considered why it would be there, I went back to my Army days.
Quite often a piece of equipment would act odd. While it was exactly like every other one it was lined up next to, a little quirk might develop. One thing may overheat inexplicably, or there would be a loss of power at times with no explanation. On occasion, we’d resort to “field expedient” fixes that, though they be unorthodox, would work. And that’s what was needed ultimately – a piece of equipment that worked.
Thus, my imagination thought about how a laser that overheated would be dealt with. Surmising that most of the cooling apparatus would be housed inside the arm, I pictured how it would look if a clever mechanic jury-rigged an extra coolant pipe to go outside the armor- thus bringing temperatures down. And of course they’d need to monitor it.
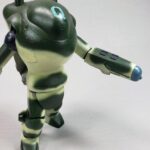
I quickly drilled two holes on the inner part of the laser forearm, and used a piece of lead solder wire to make the pipe. Initially I’d added it on as a straight piece. As I examined it closer though, I liked the idea of putting a bit of a “kink” in it. Maybe it was using a pre-existing piece of pipe. Or perhaps testing showed it needed to be a certain length to effectively cool. In any case – I liked the way it looked.
I then added a few small plastic strips to the existing rectangular bumps on the forearm, and again employing my beading tool, made two small indents on each. My original thought was that these were fasteners, but once in place, I realized the beading tool also made very convincing little recessed lights… what Bob Ross calls a “happy accident”.
So with that small but fun little detail bit in place, I moved on to the one part of Ma. K I’m still not quite enamored with.
Those Infernal Joints
It’s not the first time I’ve said it, and I doubt it will be the last. I am not a fan of articulation. Though I love building my stompy robots, that part of it for me is a real drawback. While I do leave many with full articulation simply because I know the eventual buyer may want it that way, I don’t like it.
And because Wave’s choice of joint material seems to be a plastic that is more impervious to things sticking to it than a politician’s reputation, I’ve had to learn some workarounds.
I’d noticed many modelers used various forms of two-part putty, such as Milliput, to cover or replace the joints. As I had some Milliput, I went for that, as I’d had some success on the previous SAFS kit.
My method was not real precise, I’ll admit. I packed in the putty, smoothed it over with water, carved away excess, and shaped it as I could. While I was happier this go around than I was with the SAFS, it’s still far from where I wanted it to be. However, the joints were now much easier to paint. And lessons I’d learned in my previous build came to play here- I used enough Milliput this time to make sure everything was locked in place. No more Mr. Floppy Robot Man. 🙂
As the Milliput offers enough drying time to work with, I could also get the model posed in a fashion that I hoped would make it look as if it were “in action”. I’m not sure if I really achieved that, though, as it could also look as if it is pointing out where the beans are on aisle 9 at the grocery store. (Maschinen Krieger gotta eat! 🙂 ) Either way… once that Milliput cured, posed it was.
Roughing It Up A Bit
On my first Ma. K build, a New Rally Pawn, I’d textured the model with Mr. Surfacer 500. For the SAFS, I’d stepped up to a more rough surface with Tamiya Basic Putty. While I liked them both, I could not decide which I preferred.
For this Raptor, I decided to go back to the Mr. Surfacer, and replicate that finish. I did it more for comparison sake, as I thought that because the Pawn was the first one, I may have not properly thought about the texture in and of itself, as I was exploring everything. But with this tiny bit of experience behind me, I felt I could now better focus on individual aspects. (Yes – sometimes I waaaaay overthink my work. 😉 )
Using an old, round, #4 brush, I started applying the Mr. Surfacer 500. I worked a section at a time, first painting on a thick coat without too much regard for texture. Once the section was covered, I then went back over it with the same brush, stippling the still wet surface in a dabbing motion.
Because the Mr. Surfacer had just enough time to start surface drying, this creating a lumpy texture that was fairly pleasing to my eye.
I’d mentioned earlier about how quickly one can get to painting a Ma. K kit. Part of the reason is because almost all seams can be ignored. The texturing process, by default, completely covers them over. If any do show after adding texture, it’s a simple matter to just add a bit more. So this process not only imparts a cool look to the model, it also eliminates a step most other models must go through.
Green, or Green?
With the surface textured, I moved on to priming.
While it is true that the Mr. Surfacer also acted as a primer, I wanted to add a proper primer for a few reasons.
One, I’d left some areas of plastic bare. As personal preference, I like for the hatches around the suit to not be textured. I’m not sure why, really – I just do. So those areas, and a few others, were still bare plastic. Second, I wanted everything to be returned to a single color that would give some shadowing.
As I always do, I went for my Badger Stynylrez Black Primer. I gave the whole model a good coat of it, and set it aside to dry for a few hours.
For the paint colors, I was inspired by Lincoln Wright. In a video he produced about painting a Ma. K Seapig, he’d described his reasoning for using a light yellow base color. I thought it looked sort of cool, and figuring that the best way to learn a genre is to follow those ahead of you, I opted for that.
I did as Linc did – I mixed a few drops of yellow into white, and gave the whole suit a coat of it. At first I thought it looked a bit lemony and stark, and I almost did a repaint. However, I decided to leave it as it was, so I could determine how much weathering might tone it down in case I used a similar scheme in the future.
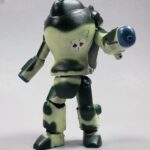
For the camo color, I wanted a brighter but dark green, and chose Tamiya XF-26 Deep Green. I heavily thinned it with Mr. Color Leveling Thinner, and applied it with my Badger Patriot Extreme, using a .3 nozzle. Once I had that in place, I reverted to my white/yellow mix, and did a bit of edge cleanup. I liked the look of it, and set it aside for the evening.
What Was I Thinking?
The next morning, I picked up the model to continue work, and was horrified. I don’t know if I had been tired, or the light was bad, or the paint fumes overpowering. But that Deep Green looked awful. It was so bright that it almost looked comical.
My frustration rose up, and I initially thought about repainting the whole thing. In fact, I picked up my Black Stynylrez and started shaking the bottle to do just that.
Then I spotted a bottle of Tamiya XF-65 Field Gray. Hmm….
Reasoning that if an overspray of that did not work, I could still blast it with primer again, I added some thinners to my color cup, a bit of the XF-65, and began the process of carefully overspraying the model.
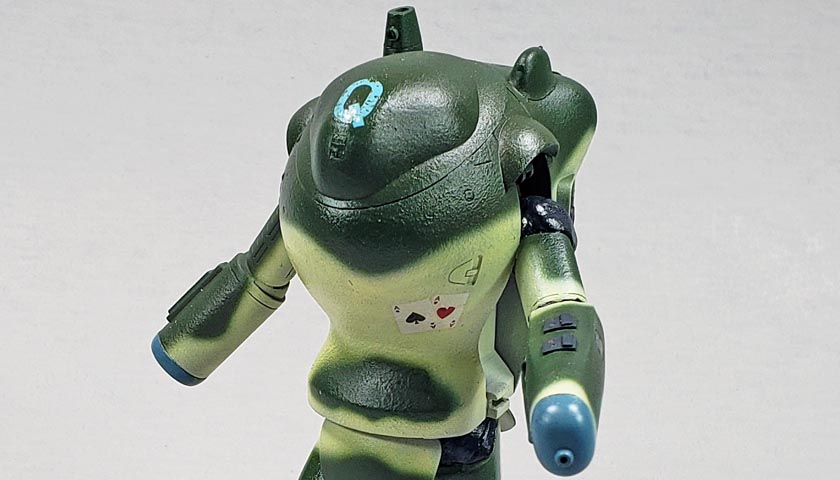
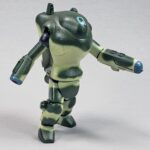
Happily, it rendered essentially the color I was going for originally. The dark but definitely green of the XF-26 was retained, yet the desaturation provided by the XF-65 brought it down from “happy pine tree in a cartoon” to “deep green for mostly military purposes”.
A few more painting bits were done by hand. The joints were all painted with Vallejo Model Color Black Gray, and the ends of the arms were given a coat of Vallejo Model Air PRU Blue, just as a bit of “color splash”.
The model was gloss coated with Future, and a few decals were then applied. I considered using all the supplied stencils, but I’ve realized I’m not a fan of those little markings. While they can add a nice touch, I suppose, to my eye, they just seem out of scale. I’ve always felt a model should be viewed as if from a real viewing distance – maybe a foot or two away. So if I’m standing 20+ feet from this suit (if it were real), I don’t know that I’d see more than some of the larger warning or brightly colored stencils. All the tiny writing would disappear for the most part.
Plus… stencils are a right paint to apply.
So I figure it’s best to have a logical story as to why I don’t apply stencils, other than just “because lazy”. 😉
Trust Me – Just Build One
With all of that finished, the model is now ready for weathering. For me, the whole point of everything else prior is to get me to this point. I love the weathering process. And because of the scale of this kit, it really lends itself to some dramatic effects that would seem way too overblown on models in the other scales I build.
If you’ve not built a Maschinen Krieger kit, I’d highly recommend giving one a try. They’re a great way to break out of a genre rut – which I’d fallen victim to – and they’ll challenge you to stretch your skills a bit. While I will admit they can be a bit difficult to find at times for a reasonable price, just keep looking around, find a bargain, and give it a go.
I’m really starting to think that Ma. K is the “hidden gem” in scifi modeling for someone who has never explored the genre. While Gunpla is a lot of fun, Warhammer is great, Star Wars is cool, and Star Trek iconic, Maschinen Krieger is unique. The whole genre was started by a modeler, so it holds a special place in plastic scifi history. Its scale means you’re working with a very different canvas, one that invites bold strokes and dramatic statement.
If nothing else, you’ll have a fun, cool, stompy robot thing to sit on your shelf.
(And yes, I know… it’s not a robot… 🙂 )

Leave a Reply