I don’t recall how old I was – perhaps 6th or 7th grade – when I went to my first “real” amusement park. I’d been to those little traveling shows that set up in the parking lot of the Piggly Wiggly in the town I lived in. They were fun, I suppose, but in a scary sort of way. The rides were small, the structure and assembly was questionable, and the folks that worked there often scared me quite a bit.
So as I rode the church bus north on I-75 through Georgia, heading to Six Flags in Atlanta, I was not sure what to expect. While I’d heard all the stories about how wonderful and amazing it was, my frame of reference was limited to those traveling carnival experiences. I was simply having a hard time even grasping the reality of what was before me.
As we arrived, I strained to see out of the bus window as we rolled through the parking lot. Giant roller coaster rails soared above the trees, as the cars flew around them at impossible speeds, the riders screaming and laughing. Even with the bus windows closed, the air was thick with the scent of cotton candy and caramel.
By the time we pulled to a stop, our youth group leaders were having a hard time holding us back – especially me. They finally convinced us that the only way to get in was in an orderly fashion, so we dutifully complied to get the process rolling. Lining up outside the bus, we began a quick walk to the gate. The youth leader went up to a window, had a brief conversation, and then motioned us to walk through the turnstile, one by one.
I held my breath as I walked up. What if something went wrong? Perhaps they might decide I was not allowed in? I pushed the fellow ahead of me, almost as if to try to sneak in behind him. Finally I was through!
Then yet another delay… “Everyone gather around”. They broke us up into groups – one adult with four or five kids. Thankfully the adult with my friends and I was a fellow who was still in college, and we thought he was the ultimate in cool. After getting instructions on check in times, and emergency procedures, we were turned loose.
The Big Ride
After a quick huddle, we all agreed on our first stop – The Great American Scream Machine.
This was a legendary rollercoaster, massive for its time. Everyone had talked about how fast it was, how high it went, how sharp the turns were. As we ran to get in line, it loomed up before me, a massive creature that I was sure would dwarf even the biggest dinosaur or battleship. (Those were the biggest things I knew of at the time… 😉 )
Though the sign where we entered the line spoke of a half hour wait time, I was not worried. We laughed and told jokes, and oohed and ahead each time the roller coaster cars swooshed by. The sounds of the riders screams only grew louder, increasing the anticipation of the ride that was to come.
Finally, our turn arrived. We stood waiting for the car to offload its previous lucky riders, and we stepped up. I’d been fortunate enough to be right up front. Attendants scurried about, making sure everyone was locked safely in place. That done, the car suddenly lurched forward, rolling slowly out of the covered area, and up we went.
The wheels made a steady clanking sound as we climbed further and further into the sky. Emerging above the tree line, it seemed to me as if we were almost climbing straight up. Higher and higher we went. The friend who sat next to me was describing what it would be like, but I just sat and grinned, taking it all in. Finally, we arrived at the top.
There was a brief pause, and for a moment I was staring straight ahead into space, and it looked as if nothing were ahead of us to prevent a horrible, crashing plunge to the ground below. The car traveled ahead a bit more, and began to slowly point down. Ahead of me was an enormous length of track, pointed almost straight down it seemed. For a brief second, I gasped.
And then they released the car to let gravity do its thing.
Building The Knight
To say I’ve had fun with this build would be much like saying Everest is tall, the Marianas Trench is deep, or grilled cheese sandwiches and tomato soup is good on a cold winter day. Those words simply cannot adequately convey the reality they describe.
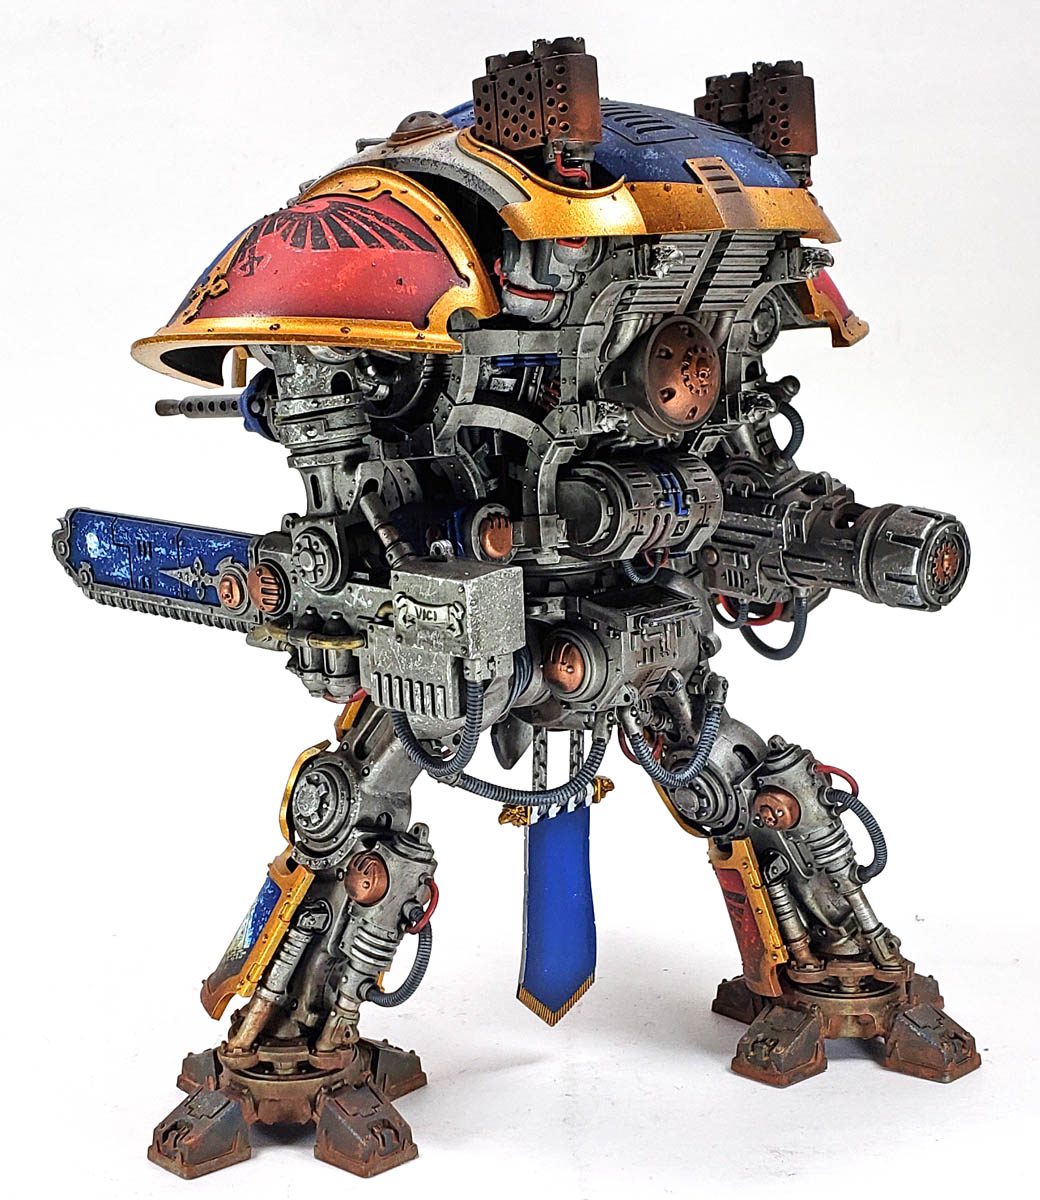
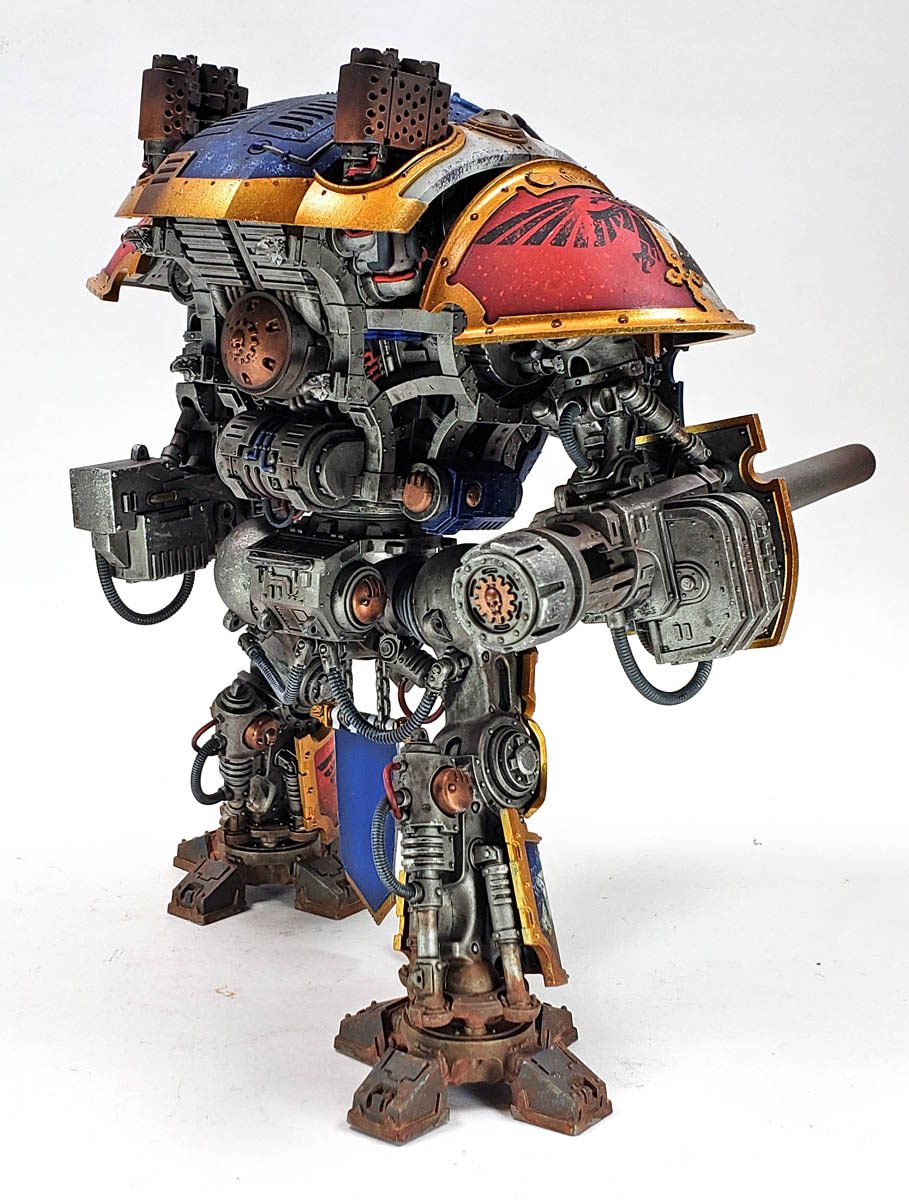
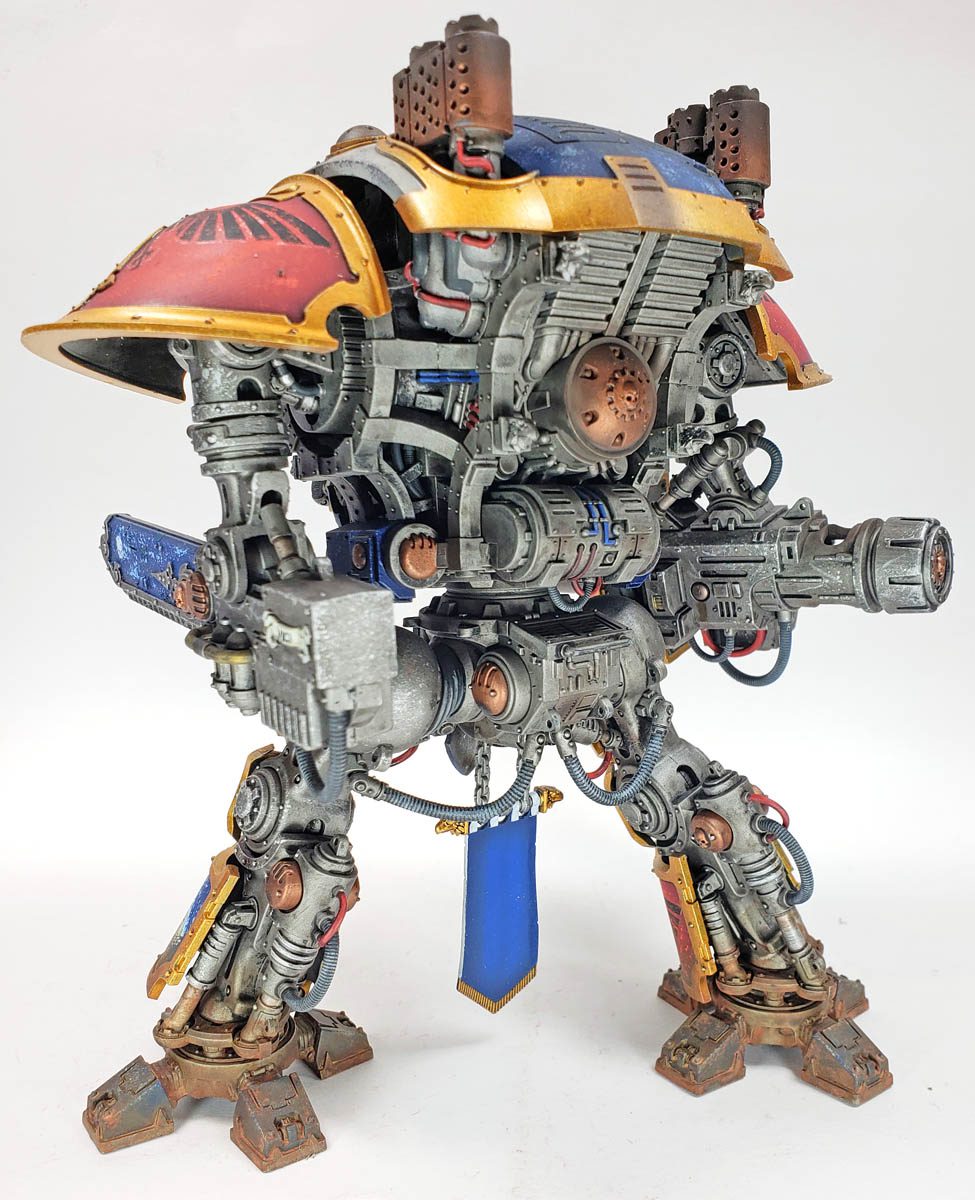
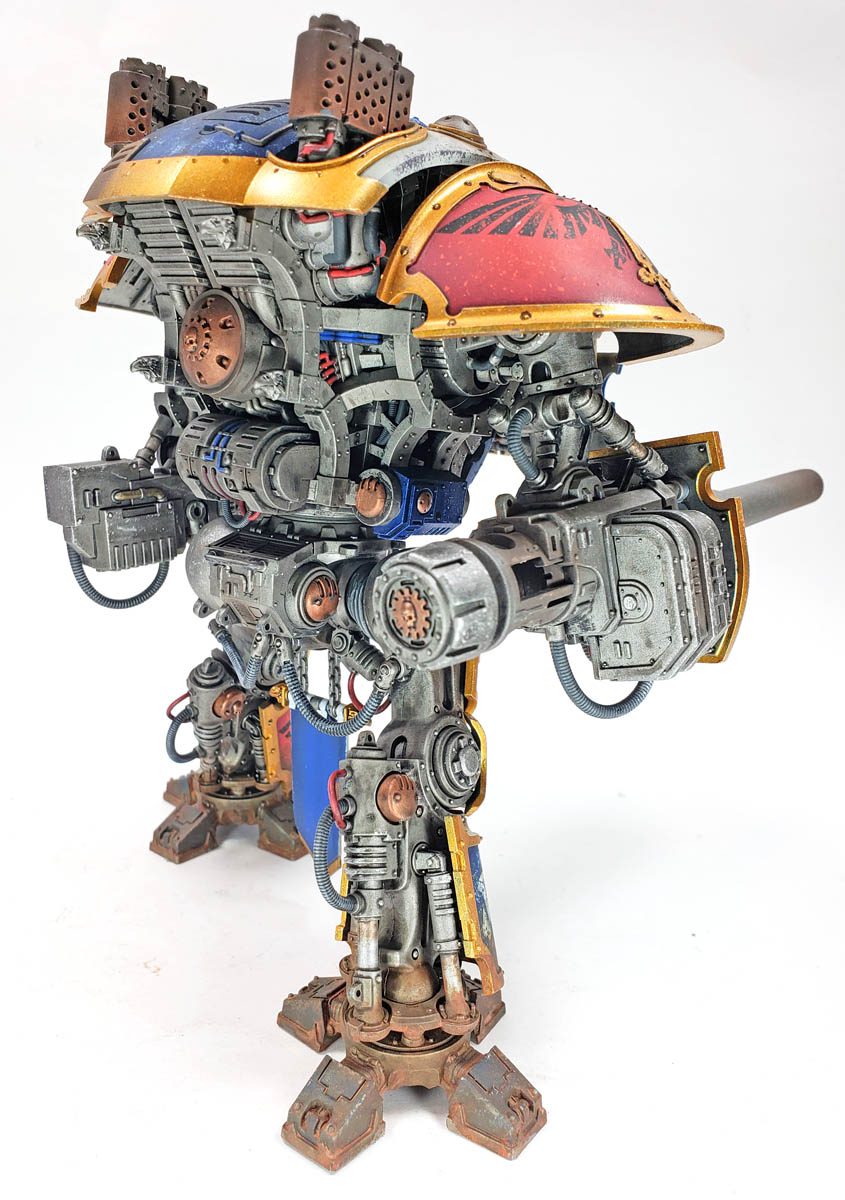
Building the frame for the Knight was enough of a model building experience in and of itself that it could almost count as something completely separate. It’s loaded with detail, and a modeler could literally spend days on it if they chose, simply detailing and weathering all of the protrusions and greeblies that abound.
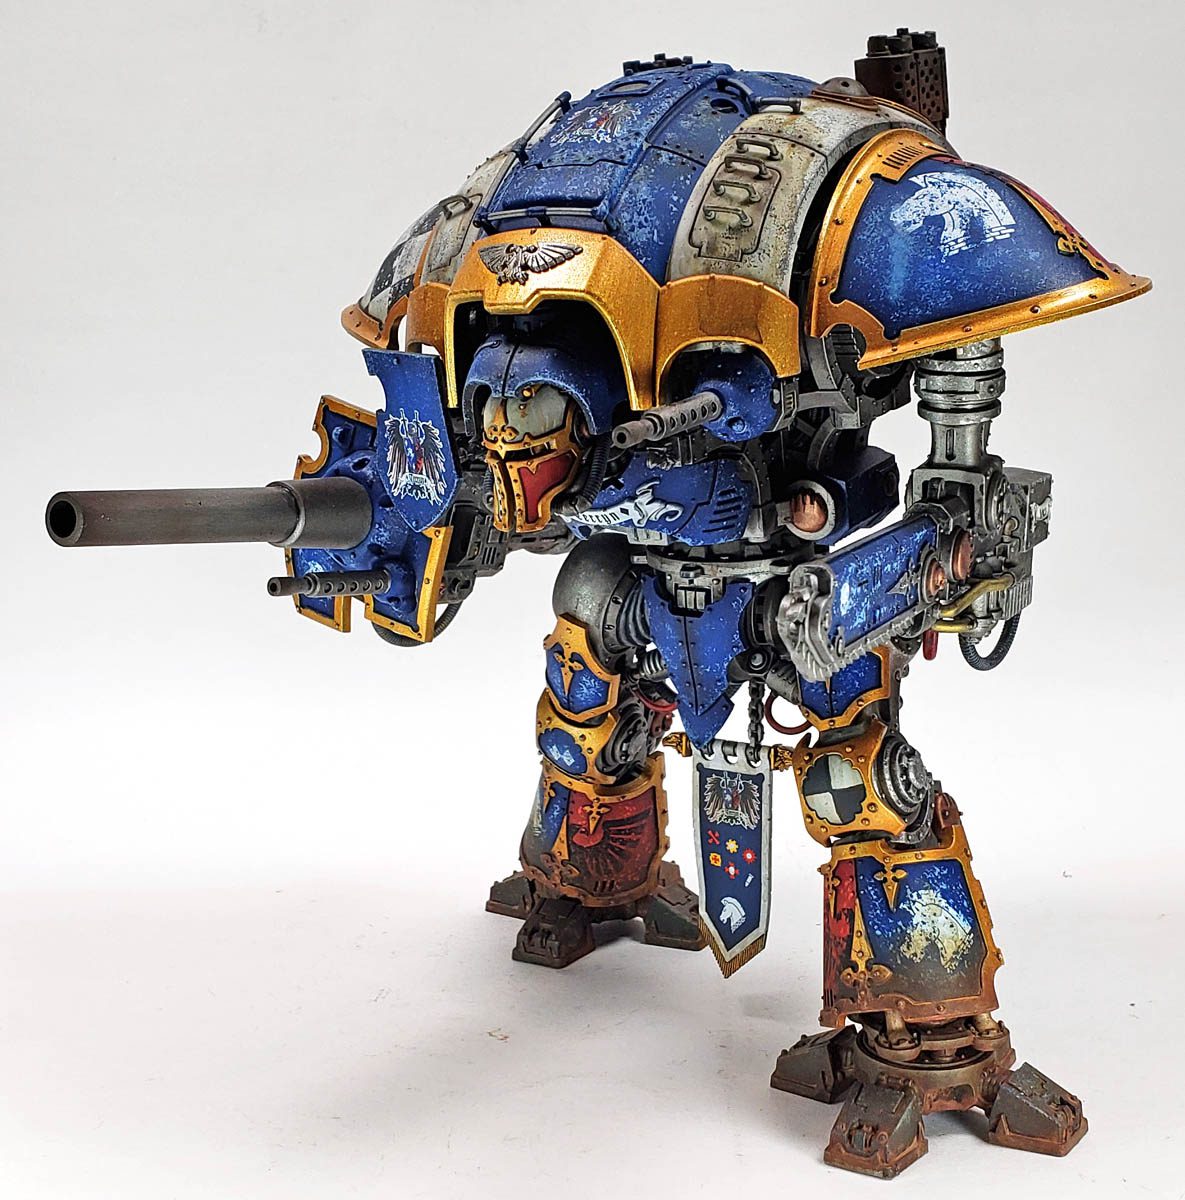
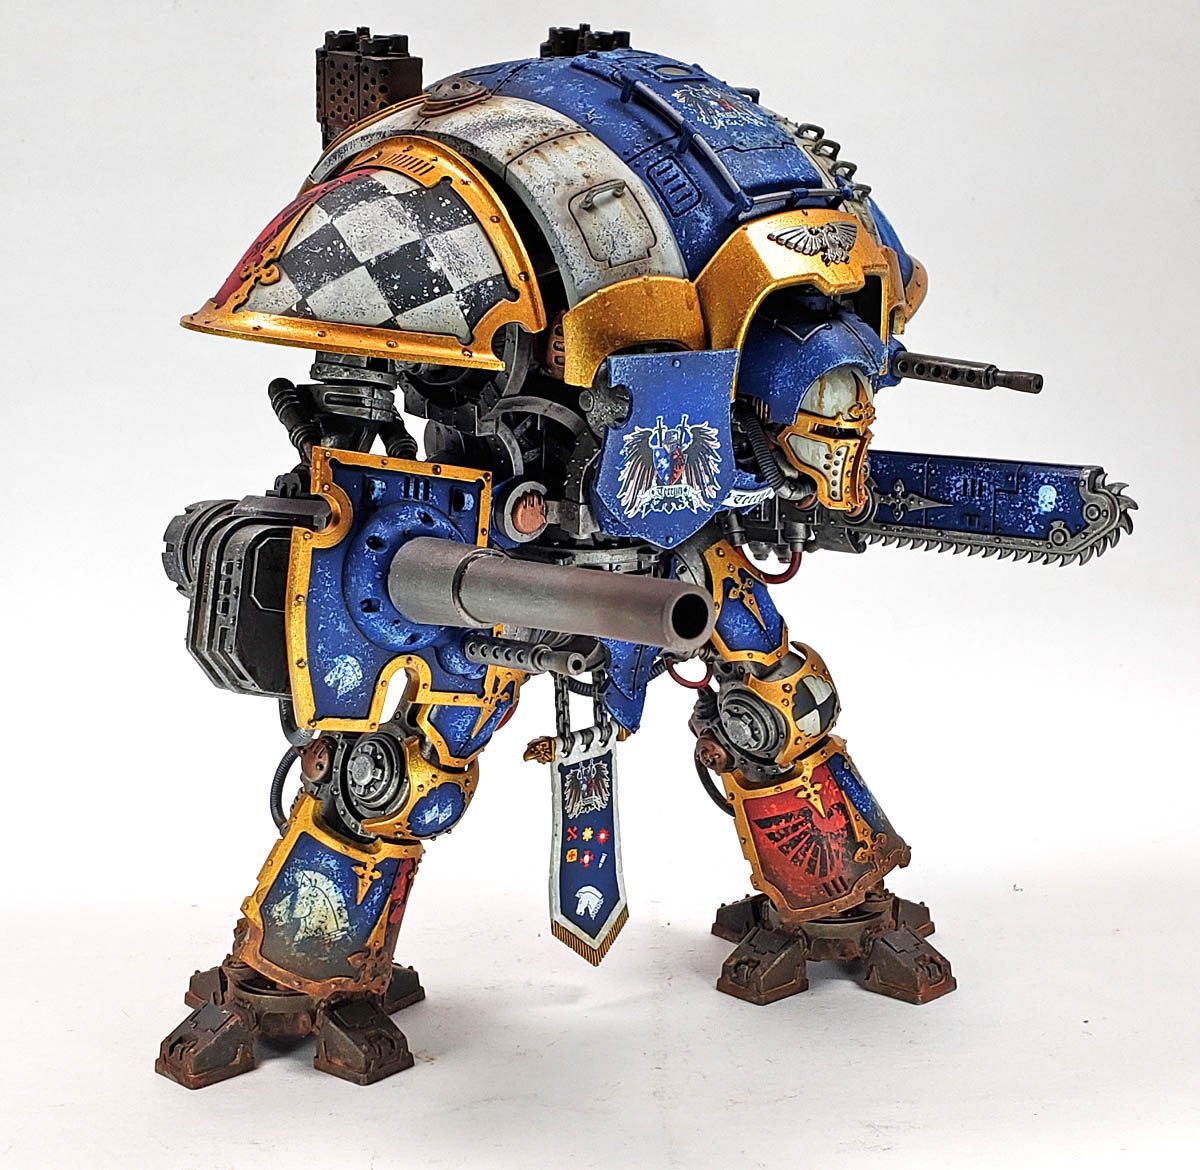
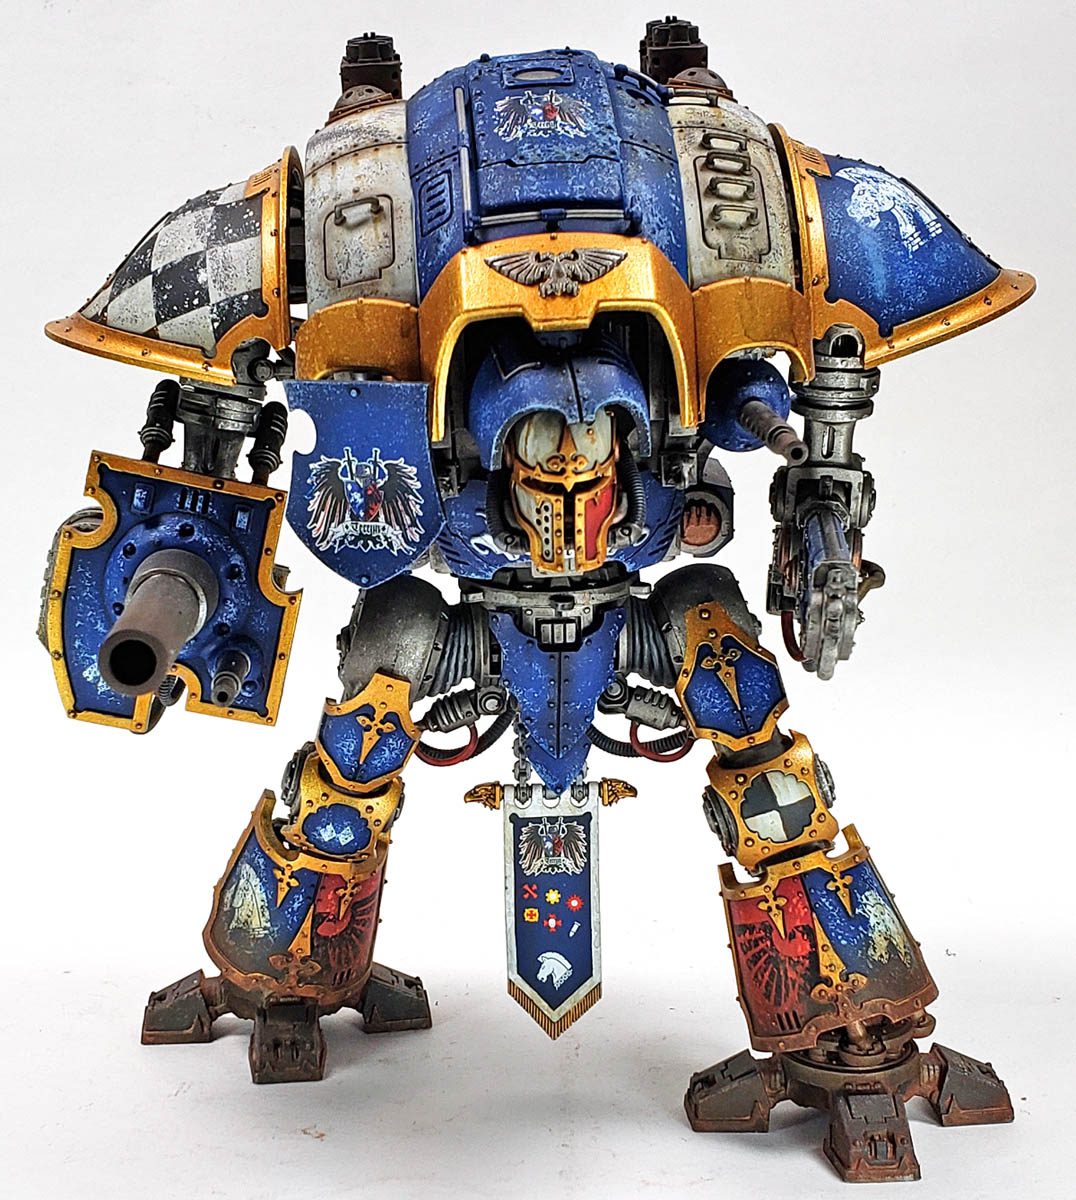
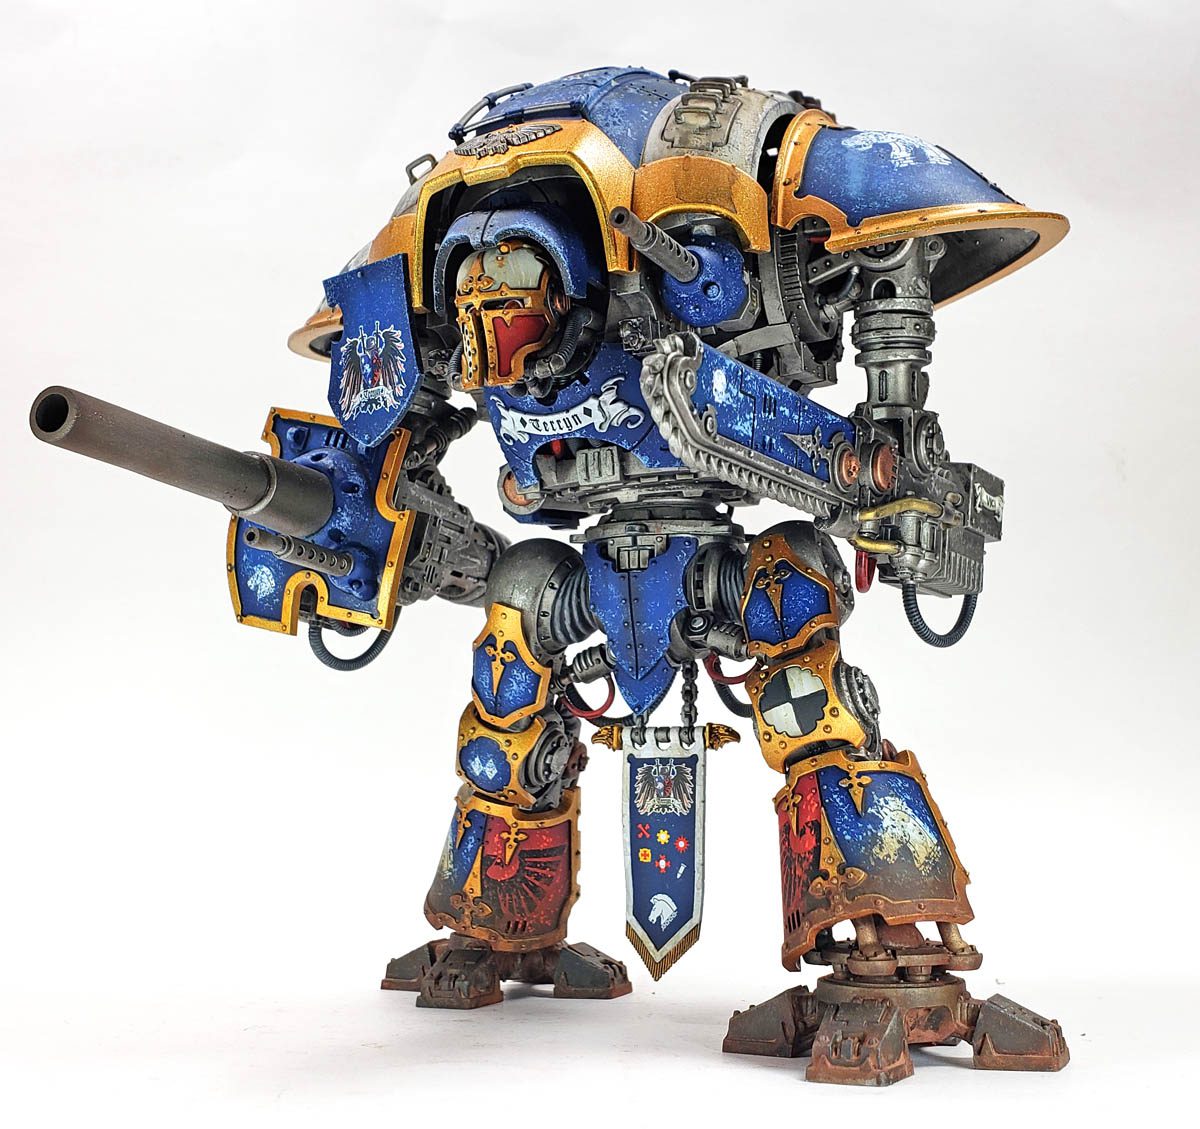
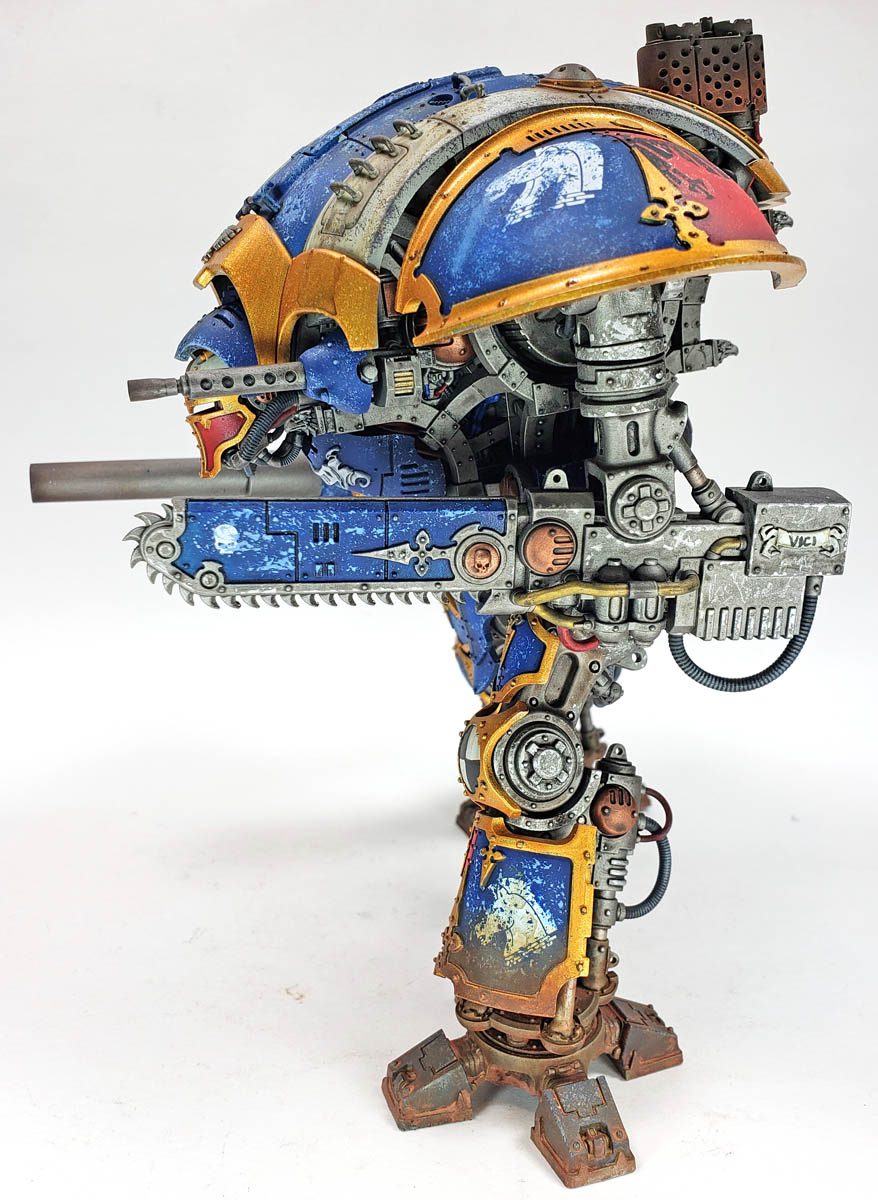
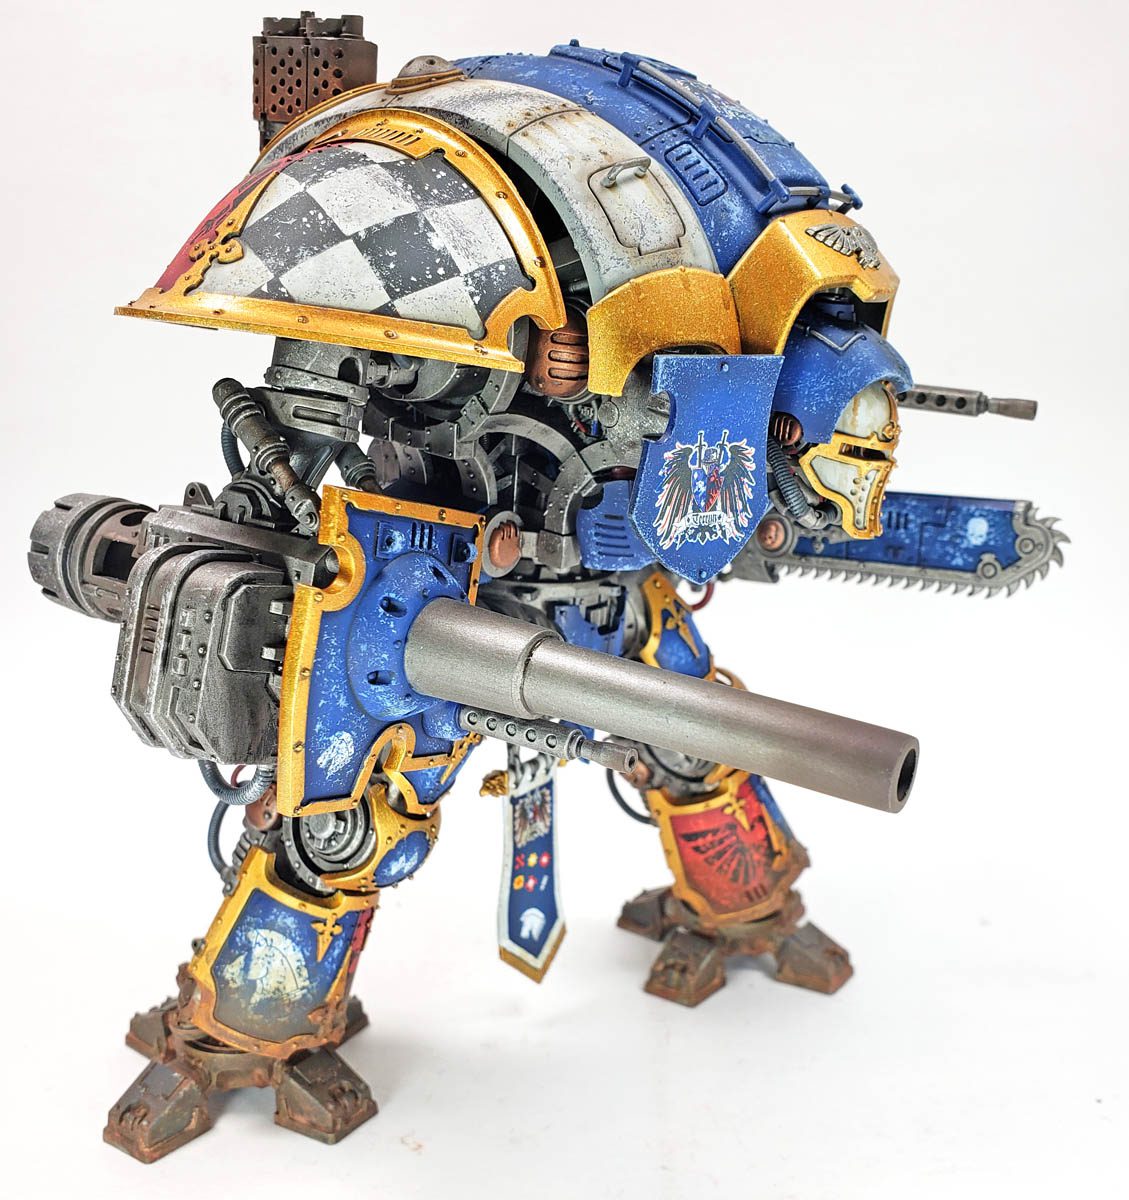
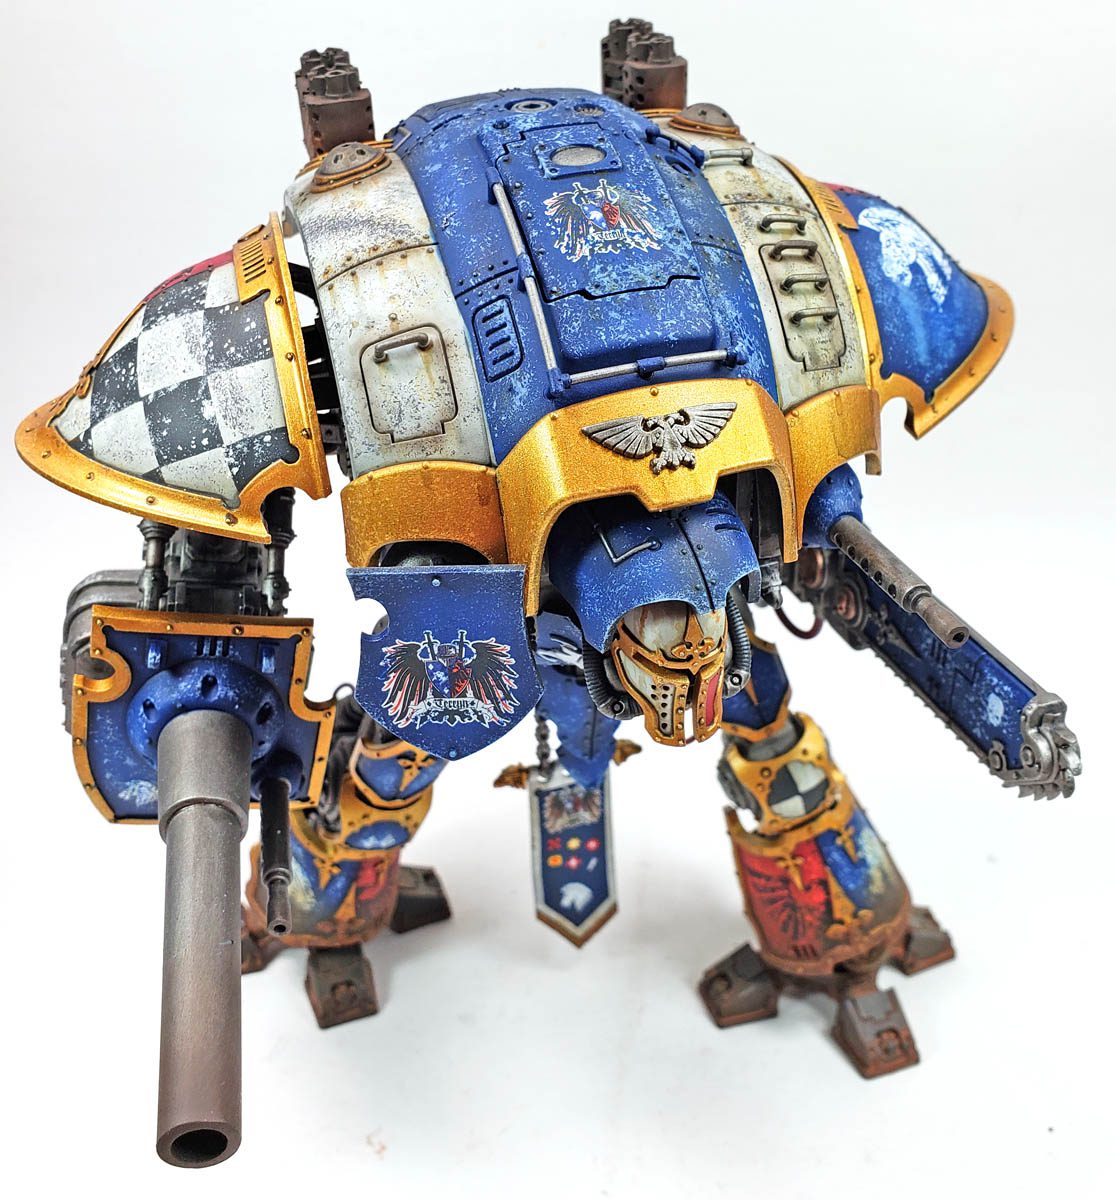
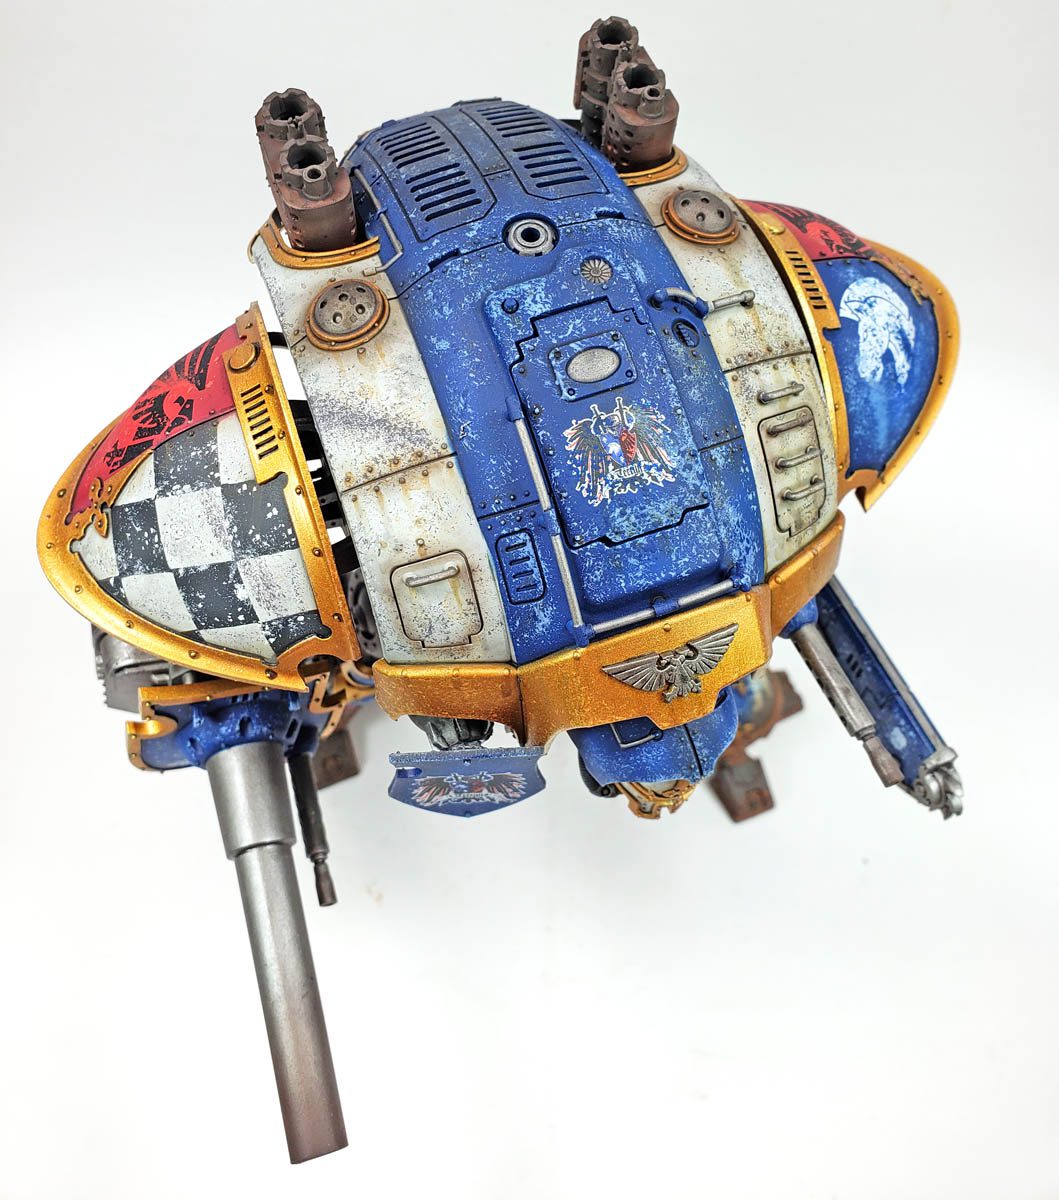
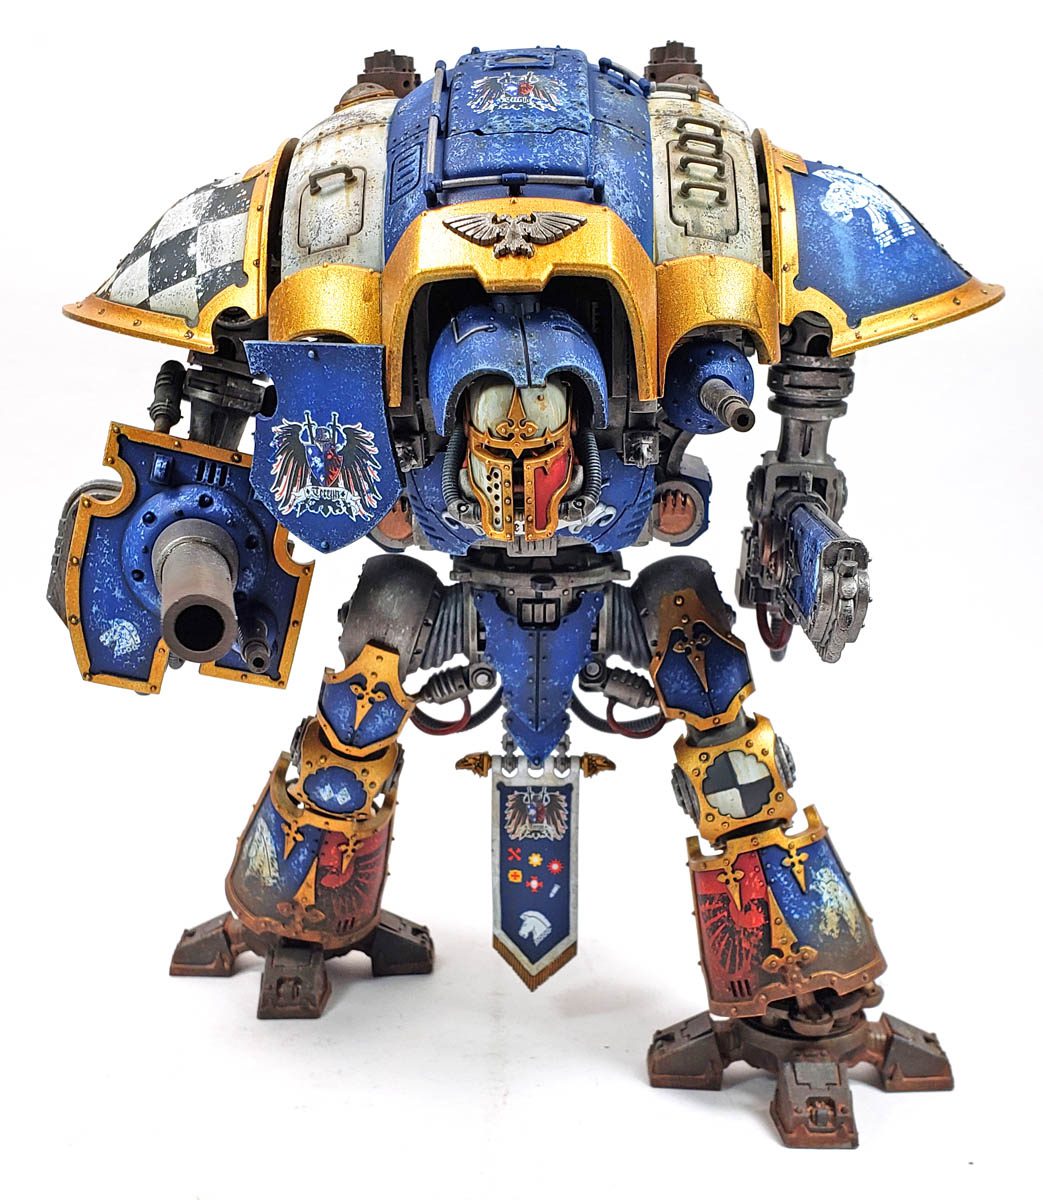
Yet after that, more fun followed, as the various armor pieces were given their colorful adornments, including a checkerboard pattern that was quite fun to paint. And all that gold bling… it wasn’t in the least tedious, but actually rather fun to brush on. The armor parts were added to the frame, and then came the step I’d been looking forward to the entire time – weathering this beastie.
Making It Look Messy
I started with a shade (wash), which would help deepen panel lines and shadows. Having gloss coated all of the armor parts, Citadel’s Nuln Oil Gloss was used. With my trusty #0 liner brush, I started with the recessed panel lines, being careful to get the shade only down into the recesses. In the areas that I strayed, a few minutes dry time was allowed, and then the offending mark could be gently swiped away with a clean brush moistened with Vallejo Airbrush Cleaner.
For other areas, I “discovered” a new trick – new to me at least!
In adding the Nuln Oil around larger raised detail, it was quite easy to end up with a bit of a sloppy application that left some rough edges. And while it could be cleaned up as described previously, that method often left a very hard edge. As I thought through ways to address this, I decided to adopt a method I’ve employed with enamel and oil products.
Improvise, Adapt, and Overcome
Quite often with oil/enamel products, I will pre-wet the surface with odorless thinners. This helps the later application of my chosen weathering media to flow better.
I wondered if this method might work with the Nuln Oil. So a grabbed a second, clean brush, dipped it in my water, and wet the area around a bit of larger raised detail. With a nice puddle around it, I next touched a brush loaded with the Gloss Nuln Oil to the pool. As expected, the color immediately flowed all around the detail.
However, it also flowed right out to the edge of the wet area, forming a very dark ring – far beyond what I wanted. Having anticipated this might happen, I grabbed a third brush that was dry, touched it to the outer edge of the pool of water, intending to draw up the excess – which it did.
However, it also seemed to make all of the color “suck up” right to the perimeter of the raised detail. It was almost as if the water had been pulled away, but the color was not – and it retreated to where the moisture was – right up against the detail.
What is it Bob Ross says about “happy accidents”?
I continued applying this method, trying variations on it, until I had the application down pretty well. The pattern became easily repeatable – apply water, add Nuln Oil, draw up excess, watch the magic. I believe the key to it all was in the fact that it was gloss on gloss, which greatly reduced surface tension.
More Chips, Sir?
The chipping phase came next. I’d decided I wanted this one to be heavily chipped… no restraint needed.
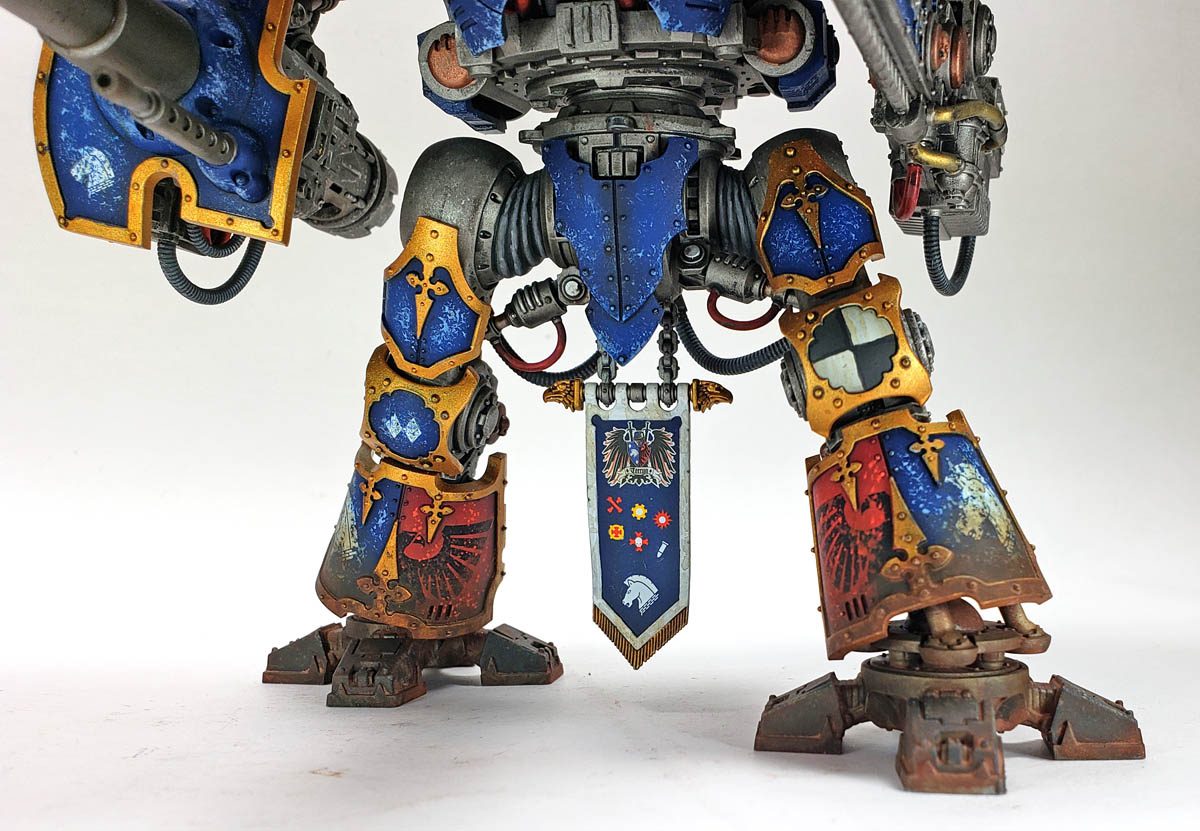
First I applied chips on the decals, using the base paint applied with a sponge. This would simulate the markings being worn down to the layer of paint directly below. In a few areas, I deliberately went heavy, planning to later join that chipping with later applications to form a large area of wear.
A lighter color was then employed – light blue over blue, and a pinkish red on the red. For the checkerboard, light gray was used for both the dark and light areas, as it worked quite well for both, and simplified application. In all cases, this was applied with a sponge.
A final step was added in the sponge-chipping that I’ve not done before. Ai went back to the base color for each section of armor, and went over the previous chipping. I liked the effect it gave, breaking up the lighter chips into an even more random fashion. Care must be taken during these steps, as overly aggressive application, or paint that is too thick, can result in some unwanted surface texturing.
Some final scrapes and chips were applied with my #0 liner brush, just to add a few areas of heavier wear.
Don’t Look Ethel!
After the chips came the streaks and stains. (Much like when I eat chips in a restaurant…. stains everywhere! 😉 )
As I’ve been doing on all my builds lately, various acrylic weathering products were used. I started lower down, first building up the lighter streaks and grime first. I tried to make sure the application was thoughtfully haphazard, if that makes sense. While I did want randomness, any thing that stomps around in mud and dirt will eventually get fairly full coverage over the entire surface. So unless I was going to model Big Stompy just walking out of the unit motor pool and into the woods, a fairly heavy amount of grime would be called for.
I worked my way up the model, dialing back the application the whole way. What started as simulated mud and dirt at the bottom gave way to general griminess and rain streaks higher up.
With lighter colors applied, I then went to what I’d best describe as the middle and dark tone, each being successively built up, but in lesser quantity all around than the previous layer. having written that, it sounds as if I put a great deal of thought into it, but in reality, I rarely put much thought in anything. 🙂 The essential element is to let the previous layer dictate the current layer’s application – but with occasional strays outside of the lines for randomness.
More streaks were added, using various rust tones. In my experience applying rust, I feel a multi-colored approach sell the effect best. Employing a dark, middle, and light rust color, I built these up in a few areas, trying to be very restrained. For the most part, I think I was too subtle. The effect looks OK, but it comes off as more grime than rust. I think next time I’ll deliberately use some brighter rust colors for some tonal variation.
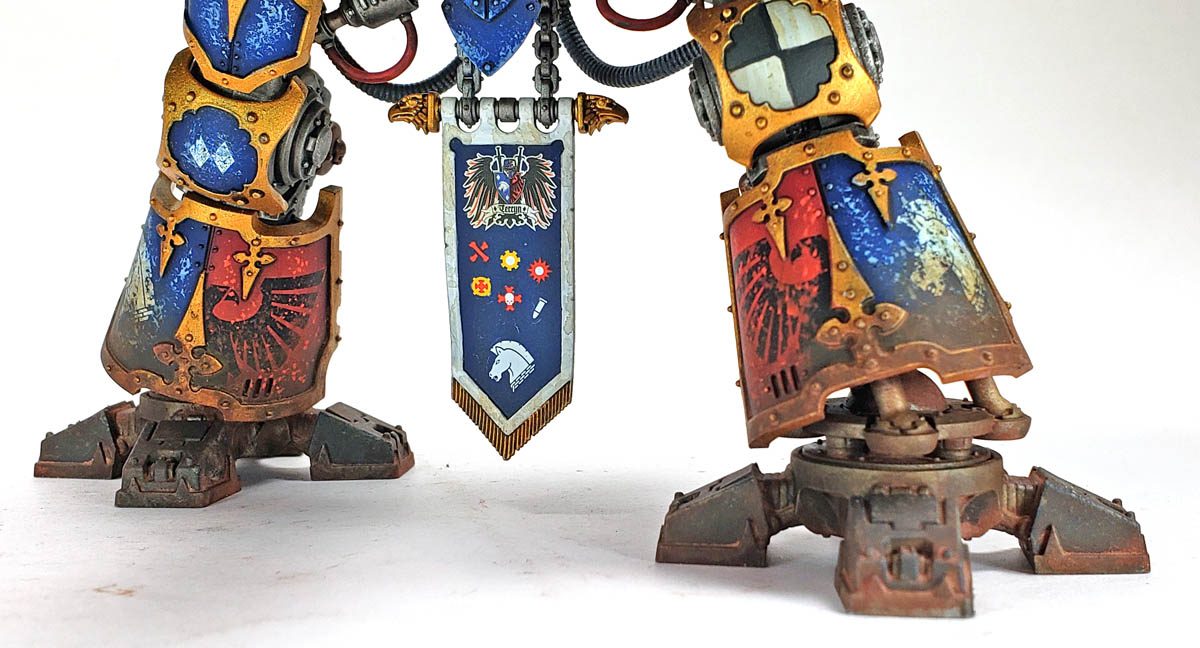
More dirt was then applied, mainly focused around the feet. Various pigments and washes were applied, bits at a time, until I achieved the build up that I wanted. I used Vallejo acrylic washes as my pigment fixer, and it provided the double duty of not only adding a browny, grimy, dirty look, but also fairly well locking the pigments in place.
A final touch up of Citadel’s Agrax Earthshade, an earthy colored shade, and cousin to Nuln Oil, restored some of the areas of recessed panel lines that had been made a bit too light with previous weathering steps. Once dry, all was sealed in with a matt coat, using Vallejo’s Mecha Color Matt Varnish.
All About That Base
The base was a nice resin one from Elrik’s Hobbies. I’d previously used their bases on the Armiger Helverin. They are nicely cast, with gorgeous detail, and come in a variety of styles and shapes. While they work great for 40K, I did a bit of testing and saw that they scale nicely for Maschinen Krieger also… Hmmm…
I opted for a simple paint procedure. I primed in black, base coating in a light tan, brush painted other details (including a checkered pattern for the cast in tiles!), added a shade, lighter dry brush, and then stains and streaks. The whole process took little more than an hour, as much of the application was “wet on wet” as I’ve seen Bob Ross do in painting. The result, to my eye, was a good-looking base with not too much effort.
The Plunge
As the car tipped over, I learned why it was called “The Great American Scream Machine”. A mixture of sheer terror and absolute joy manifested itself in a guttural scream as we plunged down. Hands in the air, eyes wide open in exhilaration… I don’t think I’d ever had that much fun up to that point in my young life. It was every bit as fun as my friends had told me – and then some.
The rest of the day just built up on it. More roller coasters, tilt-a-whirls, log rides, cotton candy, hot dogs, and the great fun of watching one of my friend’s puke all over a spinning tea-cup made for a great day. As the sun went down, and time came for us to leave, I was sad to see it end.
That’s the way I feel about this build. More than a few people have told me how much fun it is to build. The amazing amount of detail crammed into is almost excessive, but for a modeler, it’s a glorious romp through the hobby. Yes, it’s a darn expensive kit, I’ll admit that. But it’s also one that I think anyone who has the slightest attraction to building it should do at least once. It’s a journey to be savored. (Thankfully, this kit was provided to me! So bonus! 🙂 )
As we drove away from Six Flags, I couldn’t wipe the giant smile off my face. It had been a grand and glorious day. And the best part was that I knew our youth group returned each year. “I’ll be back here…” The ride home was full of contentment.
As I look at this finished Knight, I’m content. Not because it’s the best example ever built – I know it’s not that by any stretch. The contentment I’m speaking of comes from having enjoyed the process, of not getting too caught up in perfection, and simply enjoying the ride.
The best part?
Just as I knew I’d return to Six Flags some day, I know I’ll build another Imperial Knight.
Because this one came in a dual boxing.
To cross universes a bit, and quote Yoda… “there is another.”
Oh boy… 🙂

Leave a Reply