Recently, I was quite sick with a respiratory infection. At first, I thought it was just a cold, and for a few days I stayed home, whined about my condition, and enjoyed plenty of chicken soup and Gatorade.
However, on the third day I was sick, things changed. My breathing became a bit difficult. The low temperature I’d had on and off started to climb. The congestion in my chest grew worse. And overall, I felt miserable. Even chicken soup was no consolation.
My wife spoke wise words. “Go to the doctor.” For once I did not argue.
Once I arrived at the doctor, and after the requisite wait time, in several succeeding smaller rooms, I was examined. As soon as the doctor listened to my breathing with a stethoscope, she announced “yeah, you’re very badly congested.” Immediately they got to work. It started with some form of breathing treatment that went on for half an hour. Then more listening to my breathing, and several checks with machines that had blinky lights and made “ping” sounds.
Then came the dreaded pronouncement. “You’re going to need a shot.” A steroid shot specifically. But a shot.
I hate shots.
(And the fact that it was steroids means whatever hope of a pro sports career I had is now down the drain. But I digress…)
The nurse dutifully came in with the implement of doom, that sharp tipped little demon in her hand. I thought it would go in my arm, but I was wrong. “This will need to go in your hip.” It turns out that “hip” is a euphemism for “upper butt cheek”.
So mustering up all the dignity a 50+ year old man can do when lowering trousers in front of a stranger, I prepared myself. Just as I expected, she uttered those dreaded words….
“This may sting a little.“
Stay On Target Red Five
The hard part about writing a critical blog post is remaining objective. As a modeler who waves the banner of “it’s supposed to be fun”, I find myself often reluctant too be very critical. Most problems in models can be worked through with a little effort. Generally, they are simply speed bumps in a process that is fun overall.
However, I occasionally run into a kit that I’ve anticipated greatly, and thus had high expectations of. So when some problems creep up, even if they’re really not difficult in the bigger picture, the impact on my enjoyment is negatively compounded. And what might be just a minor issue on a “lesser” kit (in terms of my expectations) suddenly becomes a real disappointment.
So with that in mind…
“This may sting a little.“
Assembling The Tempest
After building up the cockpit and getting the fuselage together, which had its own issues. I began to tackle the full airframe.
Parts breakdown is conventional. Two fuselage halves; two upper wing parts, one lower; two-part horizontal tailplanes; and separate control surfaces.
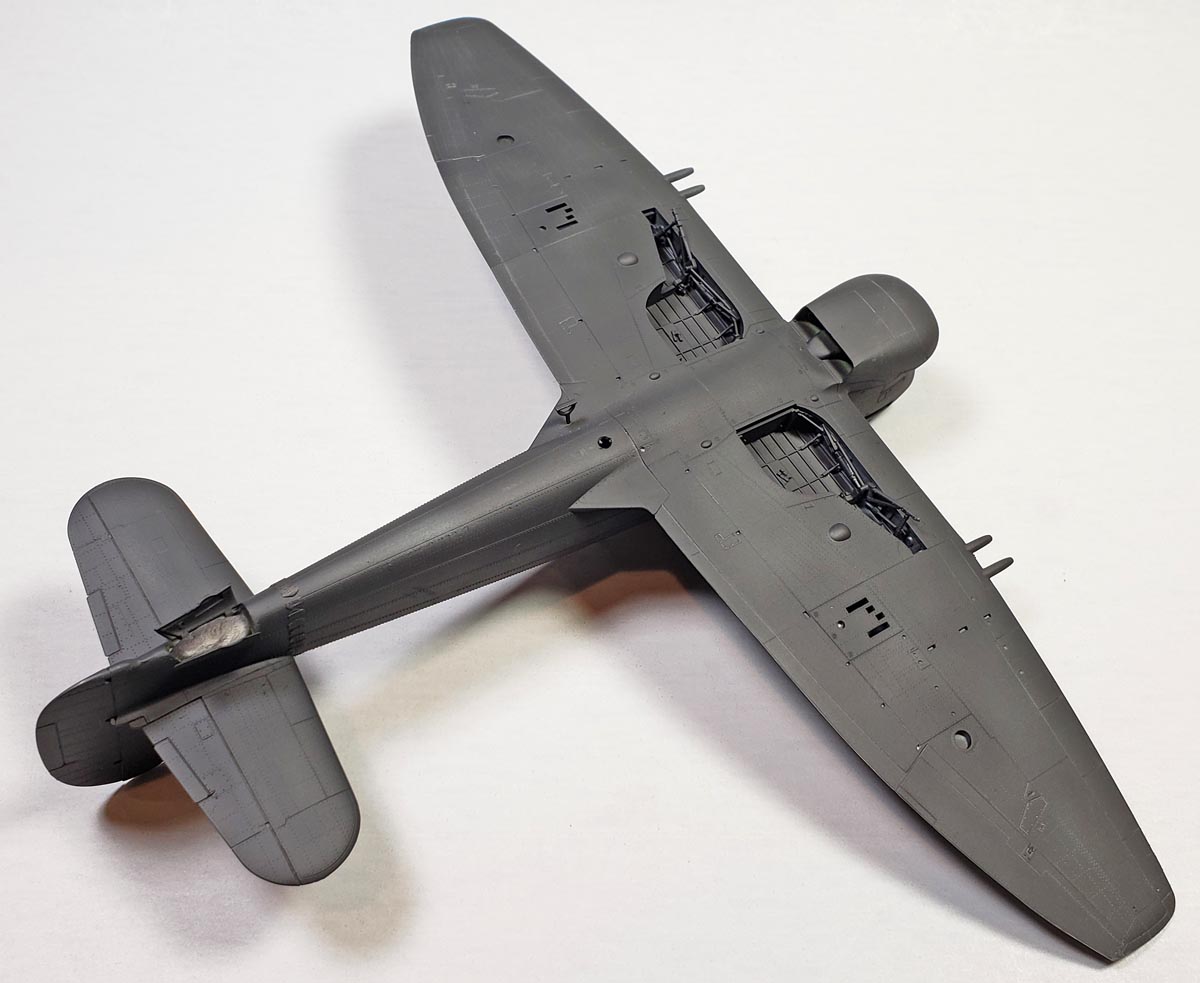
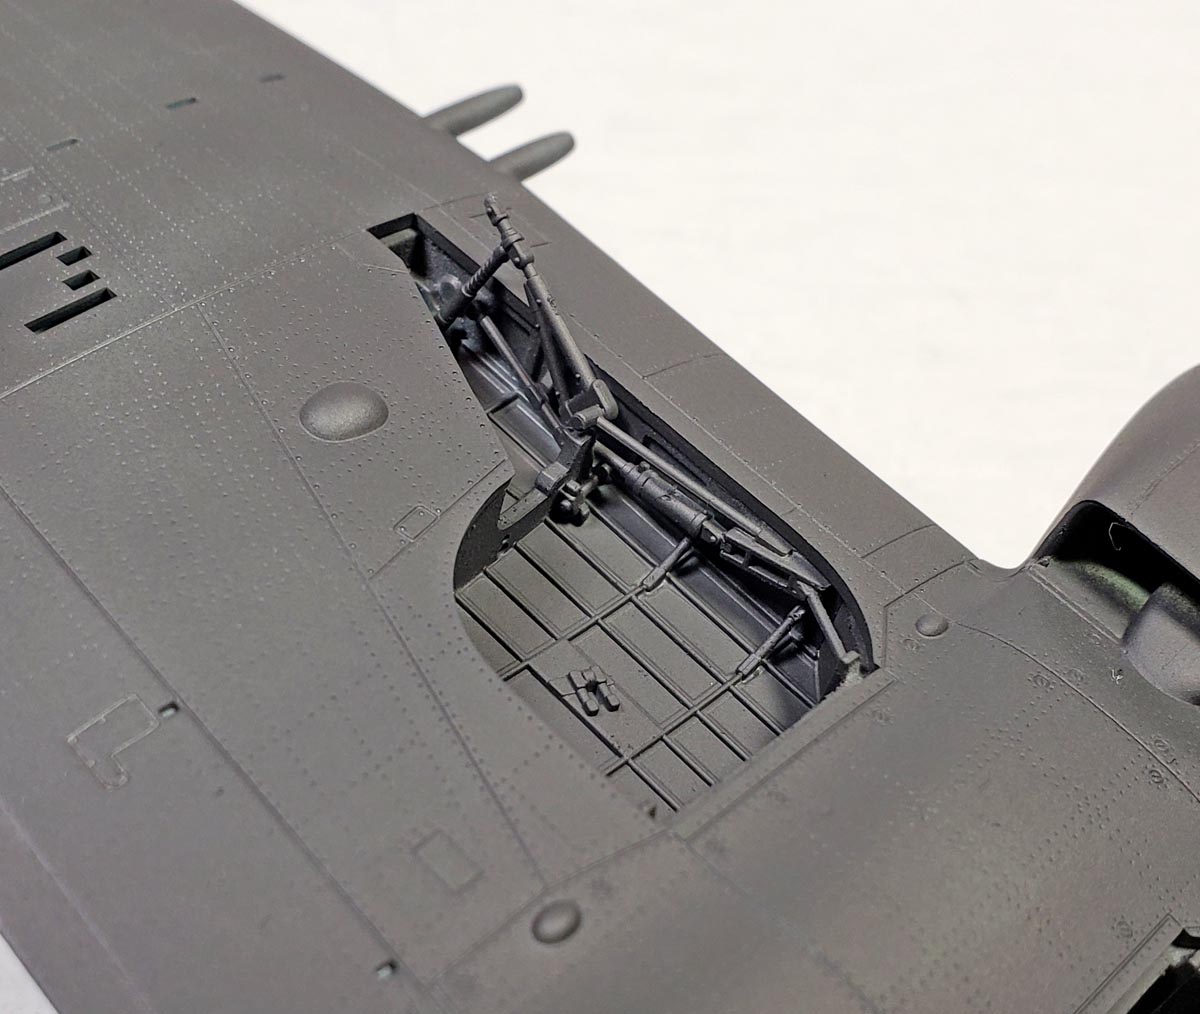
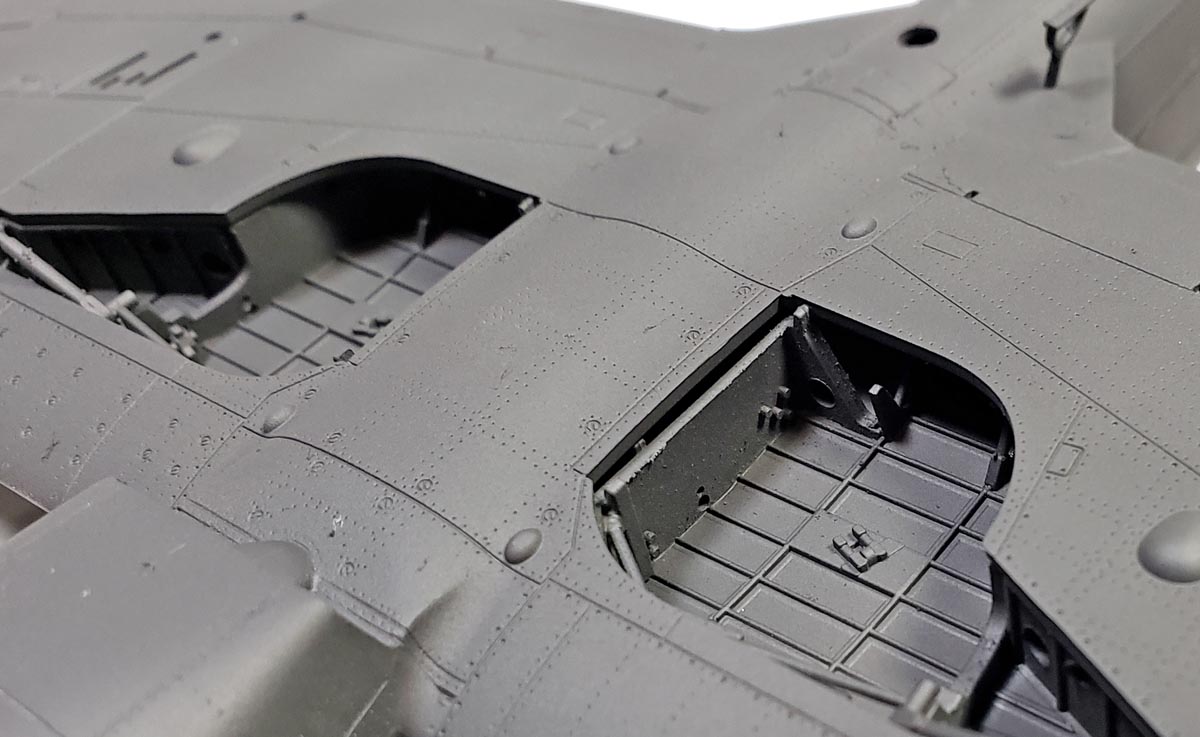
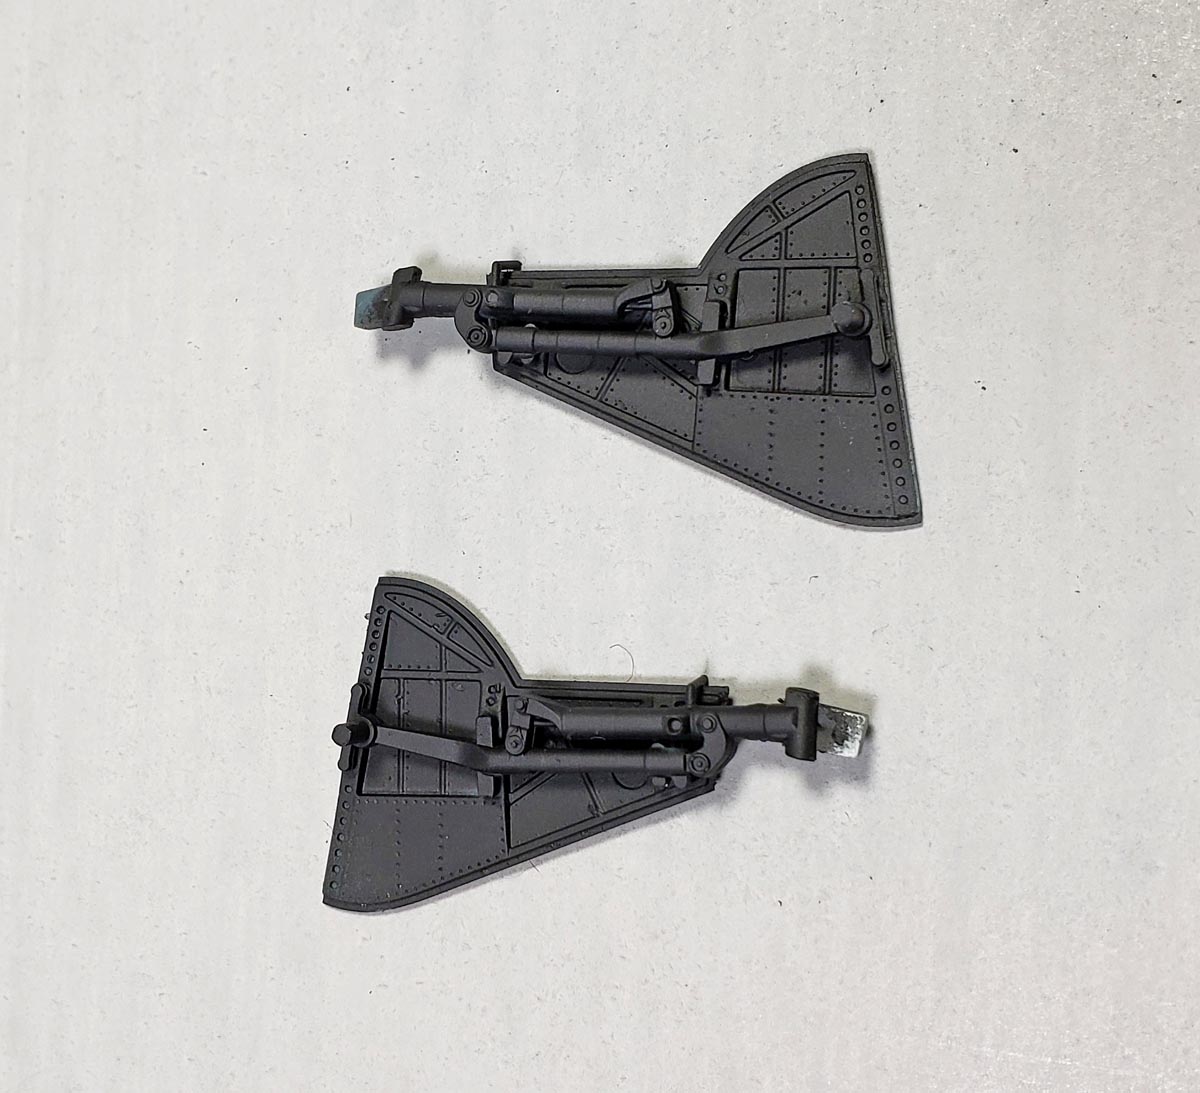
The landing gear bays are very detailed, and built up through quite a number of parts. Yet despite the number of parts, it all fits together just fine, and provided the part numbers and placements are kept track of, assembly is easy. I do recommend trimming off the small actuator arms on part E79, as it’s a certainty to be broken off during painting and weathering. It can simply be glued in place later.
So far, so good.
Strut Your Stuff
The Tempest’s landing gear was quite sturdy, consisting of a fairly thick strut and gear door assembly, which Eduard nicely reproduced. There is also a detailed retractor arm that connects to it. I wanted to test fit these parts, so they were assembled for some dry fit.
I was quite disappointed to see that the struts connected a bit loosely into the wings. The Tempest had a definite forward rake to the gear, so that little bit of play in fit would mean getting it right would be a bit difficult. However, a further problem was quickly noted.
The retractor arms fit to the front of the landing gear bay, and are supposed to connect to the landing gear strut. However, if the gear strut is aligned with just a slight inward angle (as I’ve read is correct…) it does not reach the retractor arm. Only by pulling the strut into an odd-looking inward angle will the two meet.
I’d thought about relocating the retractor arms further out, but then decided to simply add a bit of sprue into the gap to close things up. But being a new tool kit, I found such poor fit a surprise.
Having sorted that out, I began to test fit the upper and lower wing halves.
Never The Twain Shall Meet
A test fit of the upper and lower halves of the wings turned up another problem.
The expectation, of course, is that the leading edges of the upper and lower parts will meet fairly flush with each other. On some kits, it’s quite good, others not so much. My assumption that being Eduard, this area would be no problem.
Turns out I was wrong.
At first test fit, the forward edges did not meet, a small gap showing along the length of the entire leading edge. I looked for the obvious suspects – ejector pin marks, but none seemed to be the culprit. A small alignment pin was sanded down, but that didn’t seem to work either.
After some close examination, I noticed that the area just aft of the leading edge, on the inner surfaces, was flat. Making a guess that these flat areas were not meeting exactly parallel, I used my hobby knife to scrape the area down just behind the leading edge. After several minutes of work, a test fit showed the theory to be correct. While the intent was for these parts to mate perfectly together, they did not. Only after scraping away considerable plastic did I get a reasonably good fit – one that would still require a bit of filler.
It was then I noted that the upper wing had just the slightest overhang beyond the lower wing, in the area from the guns to the fuselage.
What’s The Flap About?
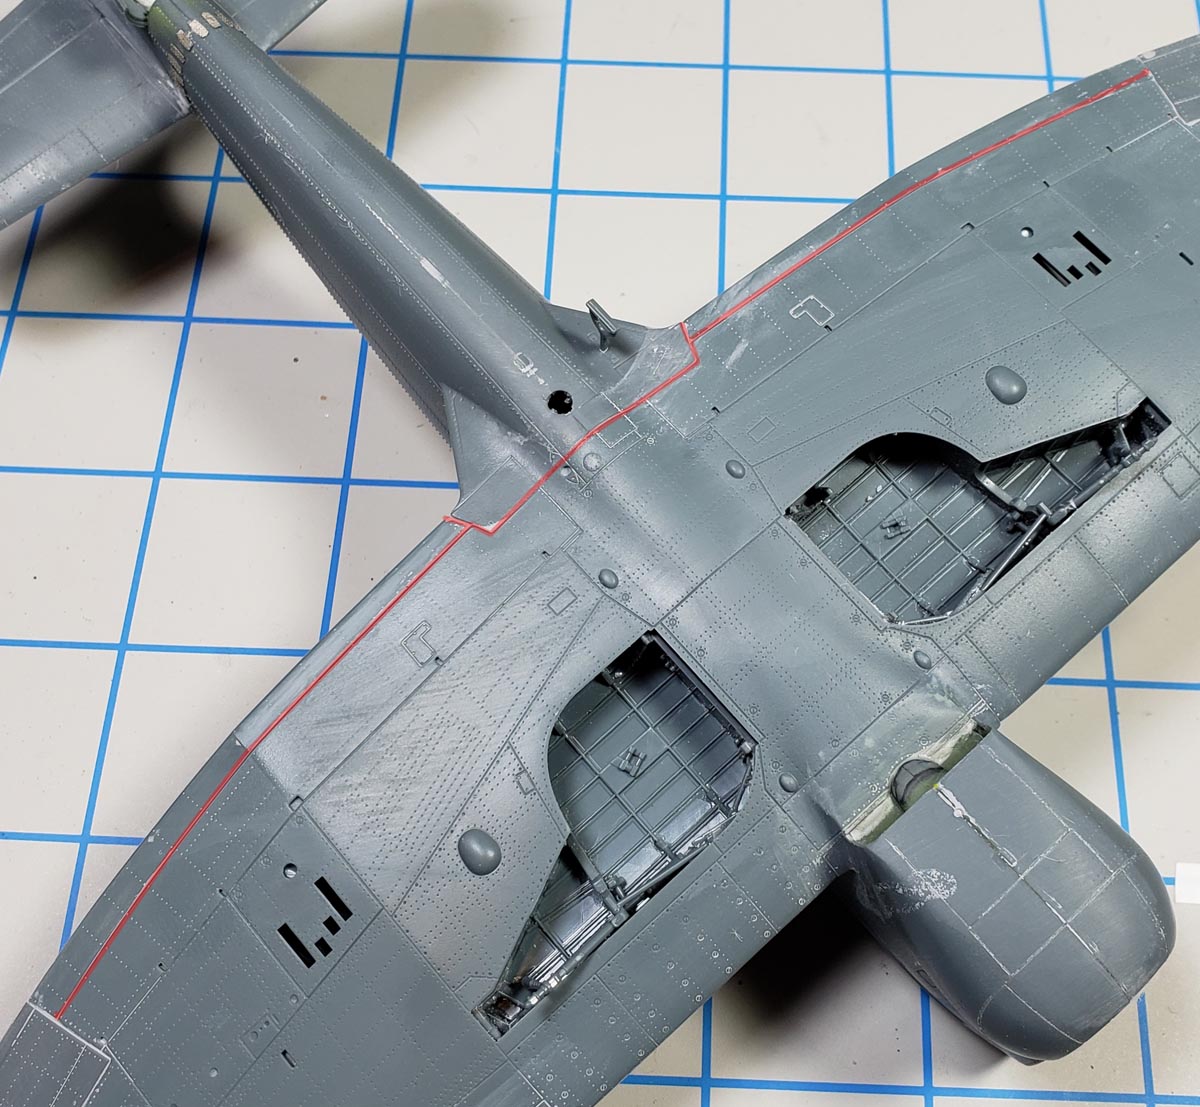
My search for resolution to that problem led me to look at the lower wing fit at the aft part of the wing.
In a bit of clever engineering, Eduard cast the lower flap part into the upper wing, allowing for a very nice, thin trailing edge. I give them credit for thinking of that.
However, instead of casting the entire lower flap into the upper wing, they only did the first bit – the rest of the flap being on the lower wing. What resulted, of course, was a maddening seam running the full length of the Tempest’s very long flaps. Given the ultra-fine detail cast into the surface, this would make sanding the seam a bit difficult. And to compound matters, the fit of the two parts was not flush, resulting in a noticeable step up from the aft section of flap to the forward.
At this point, I realized the high hopes I’d had for this build being a lot of fun were draining away.
But It’s Buildable, Right?
I really like the Tempest. Of all the RAF aircraft of World War II, it really has a brutish, purposeful, yet somehow sleek look. In my mind, it is to the RAF what the Thunderbolt was to the USAAF. A chunk of metal that will ruin your day. So I’ve been really looking forward to this build since it was announced in late 2015.
Of course, this made my expectations quite high. “But it’s Eduard”. I thought. They don’t build bad kits. They have probably the best ability in the industry to cast gobs of petite surface detail into their models. And generally the fit is good. It’s not quite Tamiya, but I believe that in general, it’s better than the rest of the industry.
And the kit is certainly buildable. Not a single thing on it can’t be addressed with basic skills present in most modelers bag of tricks. And overall – it’s looking to be gorgeous. Detail upon detail. It captures the real thing’s lines like no kit in history has in my opinion.
But…
My hopes were high for this kit. And I’d paid a fair price for it. The retail on this one is $60. While not extravagant, it’s still a bit to choke down for a single engined fighter. Given the expectations, the price, and the fact that it was a new tool kit, I felt quite let down.
So What To Do?
When I run into issues like this, I generally take one of two routes. Set the model aside until a future date (which may never come), or take the time to fix it. However, I want to finish this kit. Both for publishing reasons, and simply because I want to have a Tempest built up.
So I decided to just plow through, ignore the issues, and just get it assembled.
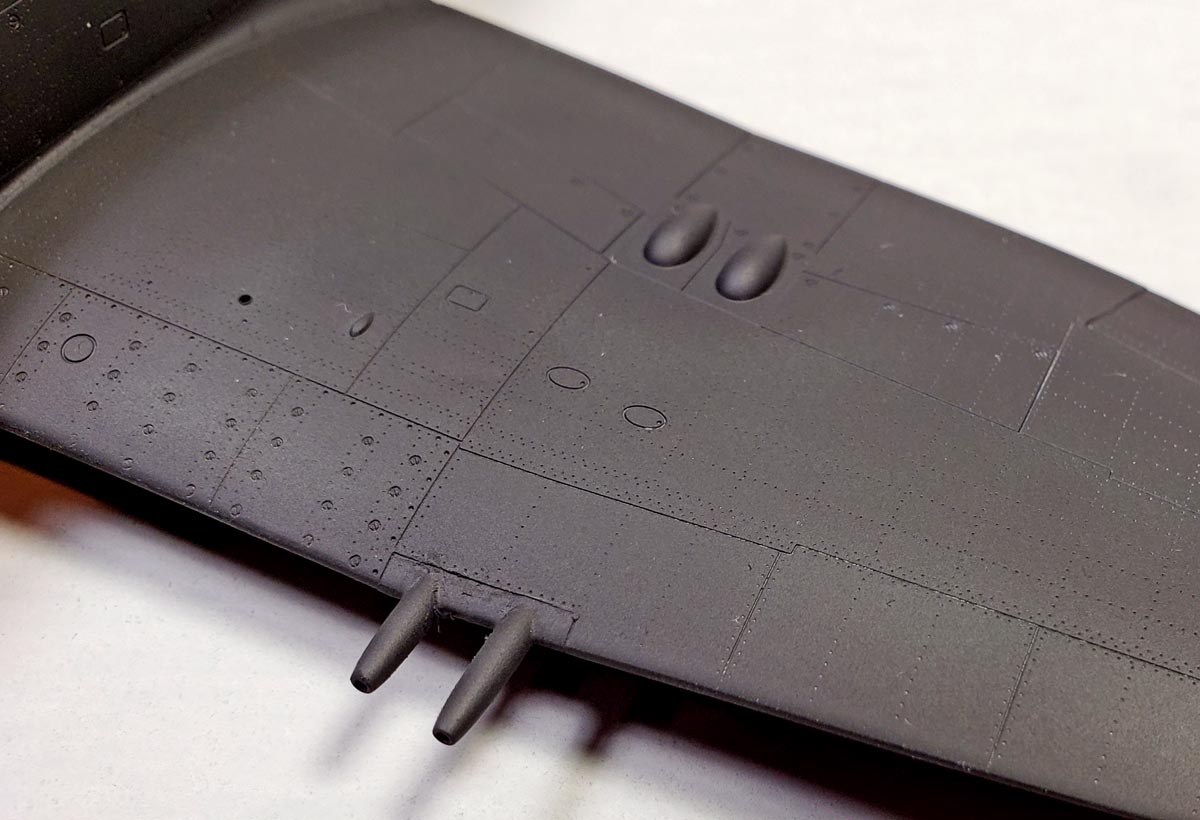
The wings were glued together, and some filler applied to the leading edges and then sanded down – detail lost or not. Some sanding on the inner wing surfaces in the flap area addressed the steps, and those areas were glued and simply filled with Mr. Surfacer and cleaned up with a cotton bud and alcohol.
The tailplanes were assembled, with a bit of sanding needed to make the leading edges a smooth curve. The elevator and rudder parts fit well enough. Ailerons are also separate, these requiring some sanding on either end to fit cleanly.
The wing fit to the fuselage was good overall, only a bit of Mr. Surfacer needed to close some hairline gaps.
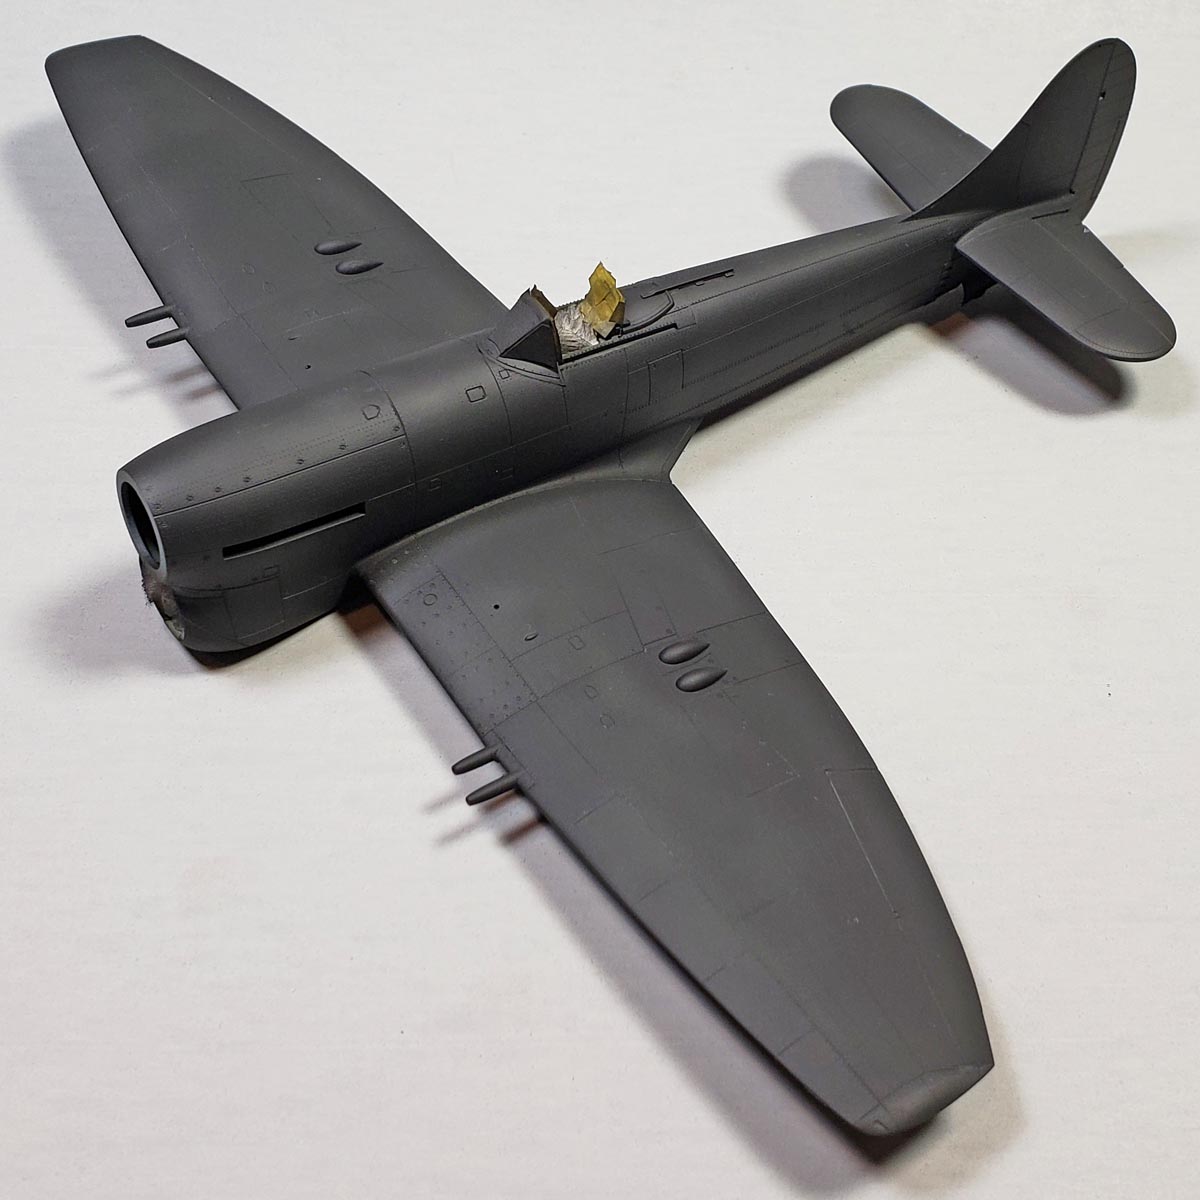
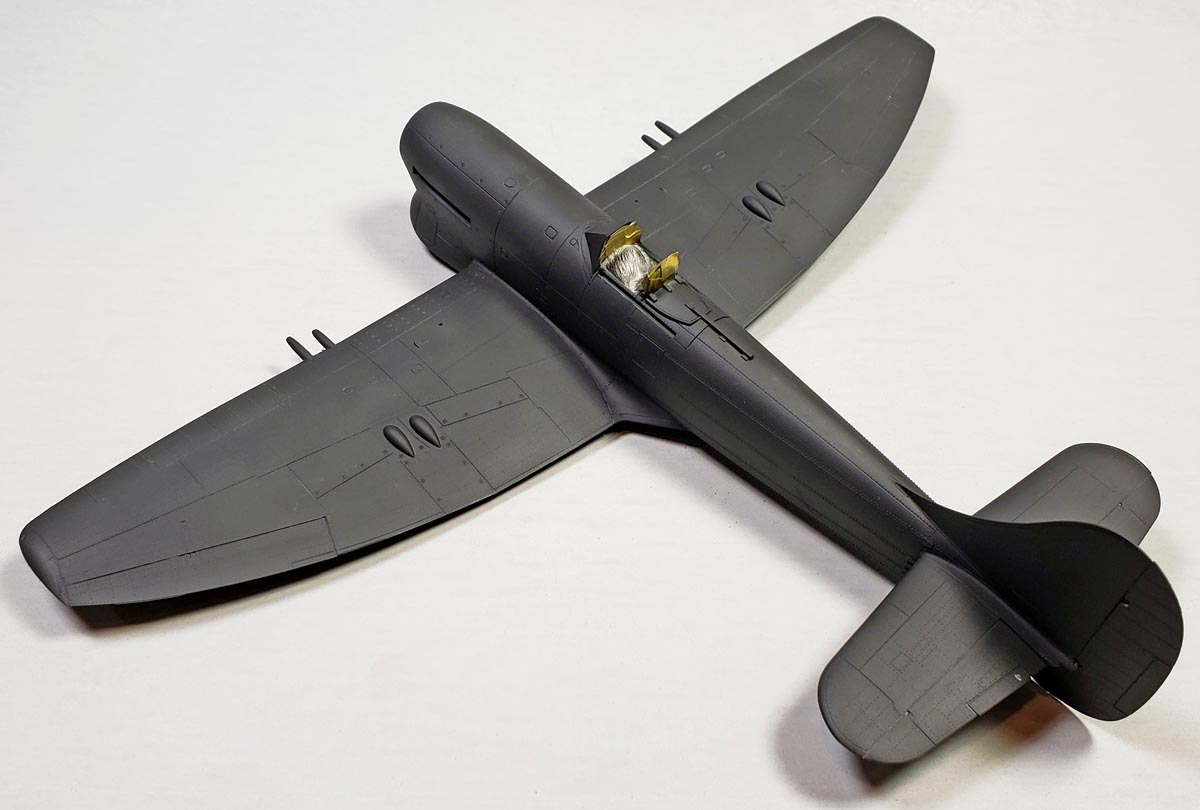
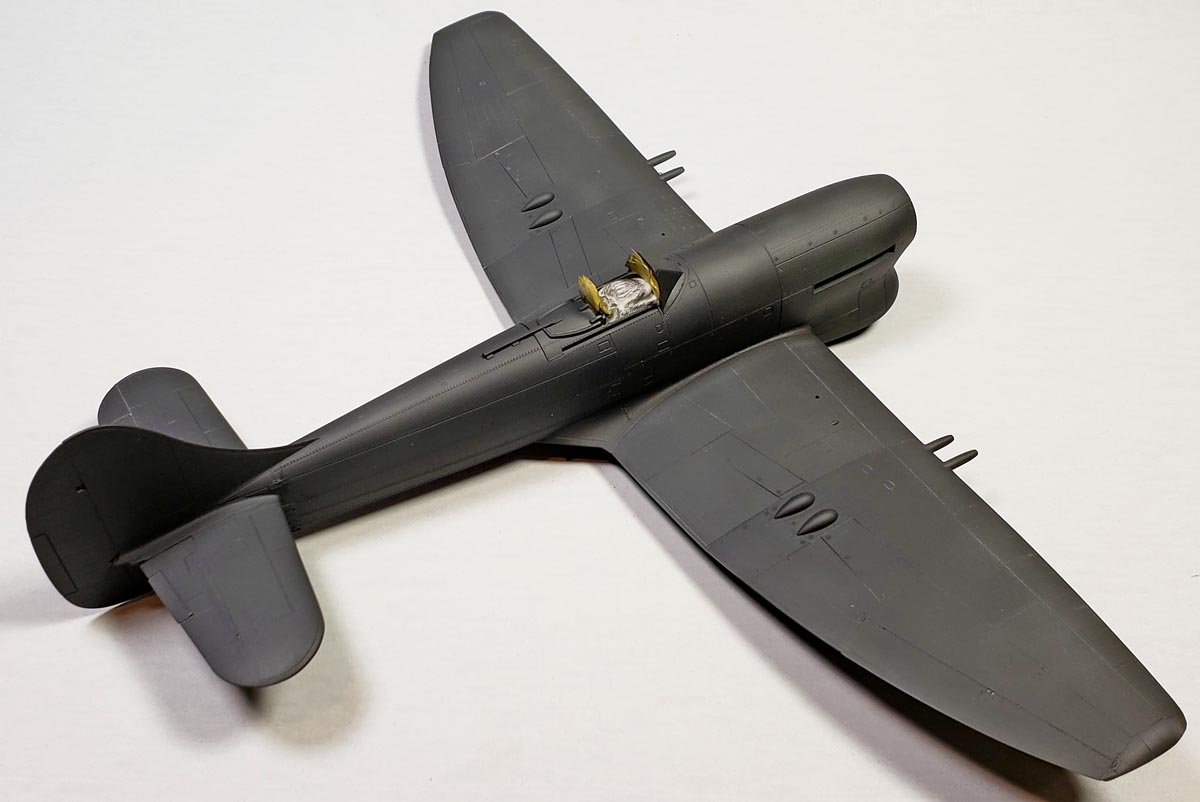
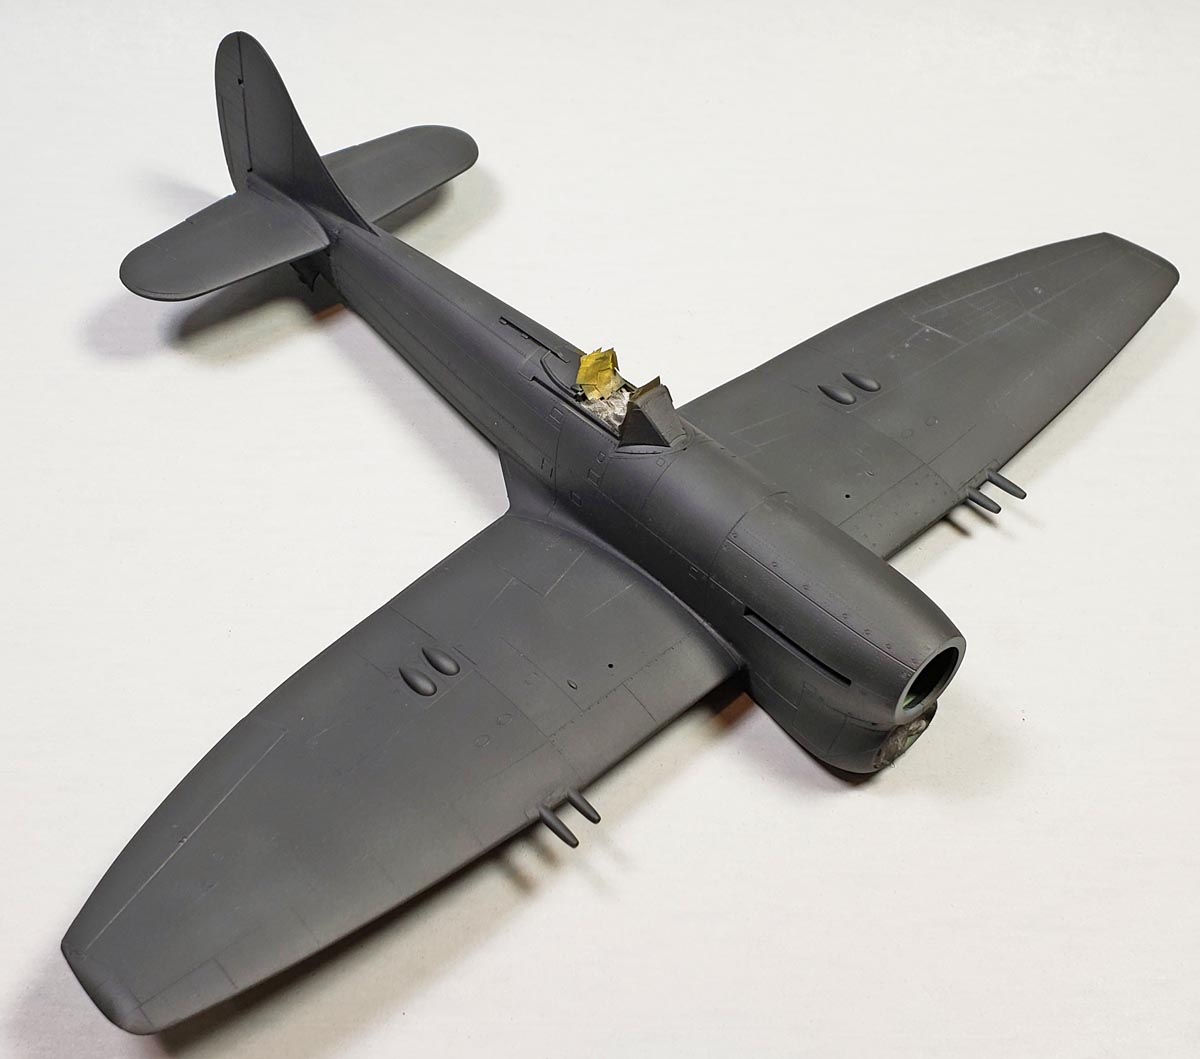
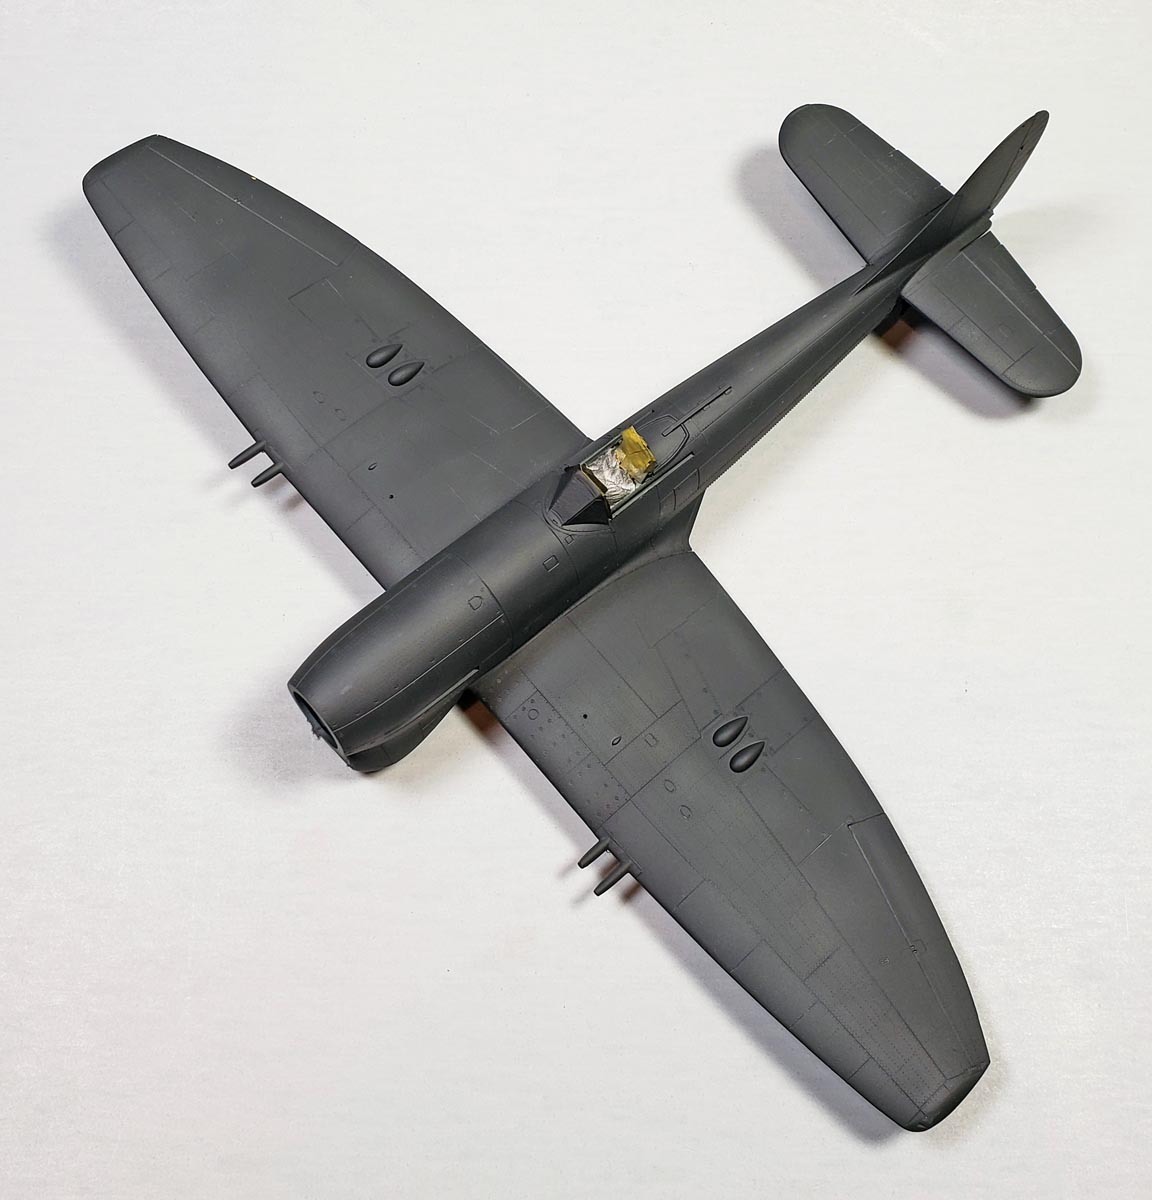
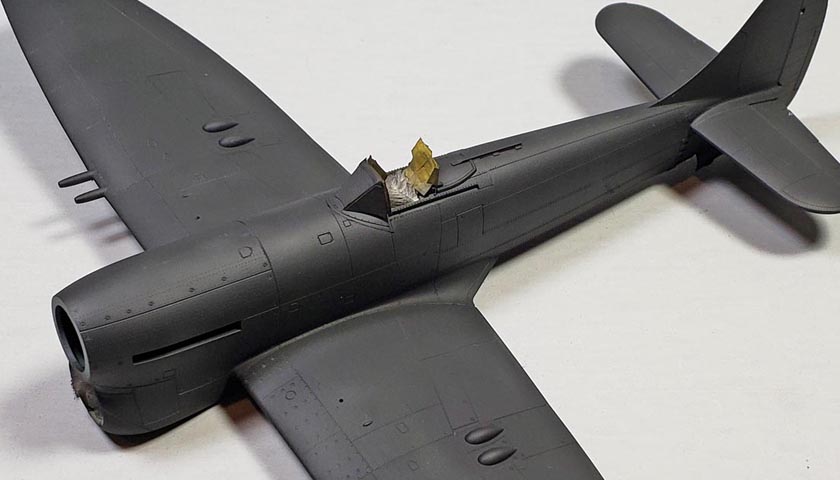
With all of the major airframe parts assembled and sealed, I primed everything in Badger Stynylrez Black.
What’s Next
I’ve still not decided if I’ll further address the large gap in the flaps or not. My frustration and artistic side is telling me to just weather it as if it were an organic panel line, and be done with it. My modeler brain is advising to go through the pain of fixing it. The side of me that publishes a blog is realizing I have a few weeks before it comes up again the writing cycle, so I may just let the two sides war it out and see what happens.
As I did in my previous entry on this kit, here are a few things that might be helpful if you build the kit.
- Flash on tailplanes – be sure and clean those up well or the fit will be hampered. (Yes, there was flash… light as it was, but it was there.)
- Mounting tabs on tailplanes – There are some HUGE connection tabs between the tailplanes and sprue connections that require a lot of trimming.
- Wing leading edges – As I mentioned, you will probably need to scrape the inner edges down. Test fit, test fit, test fit. And then check the leading edges for a smooth curvature with no overhang.
- Flash on rudder – as on the tailplanes, it does affect the fit.
- Part E74 and E16 – don’t miss them before adding F8. (Ask me how I know this.)
- Wingtip lights – They don’t fit well. I glued them in place, and then sanded them flush.
- Trim crossbar from F8 – I don’t know what Eduard was thinking, but part F8 just won’t fit without breaking the little crossbar. I cut it off.
- Aileron sanding to fit – It took about 10 swipes on each outer edge, and then the fit was perfect.
- Tailplane leading edges – There was some overhang here, as on the wings. I sanded it smooth.
- Underside seam through the flaps, etc. The jury is still out for me.
Eduard Weighs In
Now, you may be thinking “well, that’s your example of the kit, and maybe you did something wrong.” While I certainly don’t doubt my ability to flub a kit many, many ways, I’m simply hearing too many voices echo what I’ve encountered. As mentioned in the previous blog entry, Paul Budzik’s videos on his build mirrors almost exactly what I’ve encountered. Additionally, several friends reported the same problems. And since publishing the first blog post, a few folks have contacted me and their reported experience echoes the same problems.
It’s not gone unnoticed. In the latest Info Eduard, Vlad Sulk, Eduard’s president, addresses some of these issues. In his opening editorial, discussing the kit, he notes:
Even if the Tempest is itself a complex model, even without alternative parts, we accepted initial criticisms as relevant and made some adjustments where possible. Criticism was levelled against the undercuts of some parts. Some technological adjustments were made in an effort to address this, and I think this has been largely successful and some of the parts, notably the rudder and ailerons, are an improved affair.
I am glad that Eduard responds to issues. I really am. Not every company does.
He specifically noted the flap area, which has been adjusted for the upcoming Series 2 release:
We also made a seemingly simple adjustment to the wing to allow the upper wing to mate up with the lower wing better especially in the area of the trailing edge. In this regard, I would like to thank those that pointed this out and even suggested that they would accept a thicker training edge of the wing. That I really am quite skeptical about, I think they would bitch loud and clear, but all in all, I take it as a positive experience.
When the Series 2 kit comes out, I do hope it fits better. But I’ve looked at that kit’s instructions, which are available online as a PDF. While the fit of the parts may be improved, it still leaves a large gap to deal with. And while they may have made other adjustments, none were noted, so the assumption I’ll make is that all the other issues I’ve encountered so far will still be there.
Wrapping Up
Now, as I mentioned earlier, the kit is very good. It’s certainly buildable. I am not for a moment suggesting that you not buy it. Aside from deciding how to handle the “flap gap”, I’ve worked through the hard parts with no more than basic modeling skills applied, and it’s ready for painting.
And it looks every bit the Tempest. The long, graceful wing. The brutish front end. It’s huge rudder projecting up from the fuselage. I’m not much of a shape fanatic – “looks close enough” is good enough for me. But even to my relaxed eye, this thing looks right. So it will definitely produce a lovely looking reproduction of the Tempest.
But my disappointment still stings, just like the shot in my “hip” at the doctor’s office. The sting is brief, and I’ll get over it. Eventually, this model will be painted and weathered, and I’m sure I’ll enjoy the process. Hopefully it will look good in the end.
The biggest result, though, is a loss of confidence in Eduard. I know they will continue producing very accurate, very detailed models, featuring some of the finest cast parts on the planet. They will be very buildable, and come with gorgeous decal options.
However, I don’t know that I’ll allow myself to get my hopes so high again. It happened with their Spitfire Mk. IX, and now with the Tempest. In both cases, I shelled out for the newly released kit – always in Profipack form – at full retail. I won’t do that again.
Next time, I’ll read the reviews thoroughly, see what others say, and then ultimately wait for the Weekend Edition kit to be released.
In a few weeks, I’ll get to the paint and weathering on this one.
But just like getting a needle stuck in your butt, the memory of the sting remains longer than the pain itself.

Leave a Reply