I keep a list of things I’d do- or not do- if I ever own a model company. High on the “do not” list is engineering a kit so that the builder must try to glue interior pieces to one side of the fuselage, then somehow align it with the other side- with no real alignment slots or tabs provided.
I recently ran into that with Eduard’s (ex-Roden) 1/48 Gloster Gladiator kit. The cockpit builds into a nice little sub-assembly that has some locating “pins” on its edges, but there aren’t really any good corresponding holes or notches in the interior. And trying to get it lined up properly- and then mate the other fuselage half to it- was getting a bit frustrating.
And the instrument panel was giving me fits. (Or rather- no fits.) The instructions merrily pointed an arrow to say “stick it here”, but actual placement was a bit ambiguous, and test fitting showed that the photoetch faces were too wide (no surprise there…), and the plastic they were mounted on was also. (Go figure.)
I realized it would be much easier to slide the IP in from the front, and glue it in that way.
So I decided to resort to a simple but effective technique for getting all that stuff into the fuselage, and still (generally) maintain my sanity.
First, I glued the back half of the fuselage together. Starting at the leading edge of the vertical stabilizer, I ran some glue aft, follwing the contour of the rudder. I stopped applying glue on the underside, right at the small hole for mounting the tail wheel. With everything squared up and the tail glued, I set it aside to dry thoroughly.
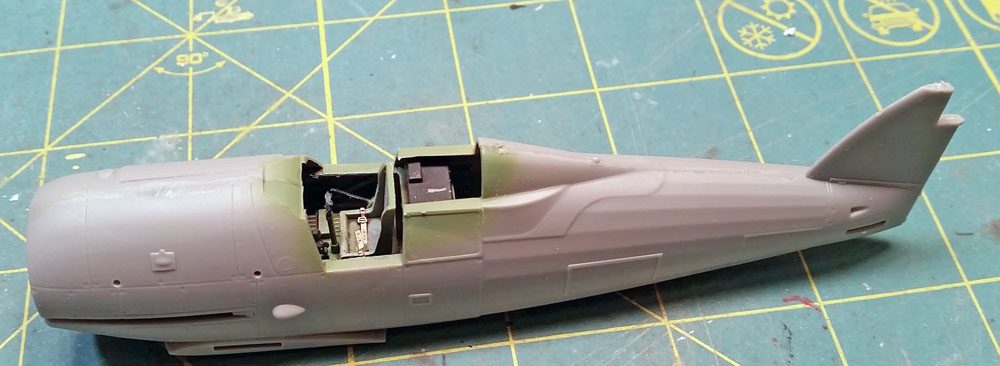
Once that was dry, I could pull the forward fuselage halves apart, and holding the first part to be fitted – a radio deck- with tweezers, set it in place inside the fuselage, and make adjustments. (For the photos I used a paintbrush to hold it open, as I had to hold my camera.. 🙂 Normally I’d use my hand to hold open the fuselage.)
Once that was properly placed and the fuselage “snapped” back into place, I glued one side of the deck into the fuselage half. I left the fuselage closed up, holding the radio deck in place. Once dry, I could then pry the fuselage apart once more, knowing the radio deck was aligned just right.
I pulled the fuselage back apart, and using my trusty tweezers again, grabbed hold of the main cockpit structure, and got it set in place. With that aligned correctly, I could then apply some drops of glue to hold it- again doing so on one side only.
I could slide the instrument panel in from the front cowl area, and glue it into place. And because I still had not glued the fuselage halves together fully, I could still pry them apart to make adjustments for the instrument panel. With it in place, I again glued one side of it.
With all interior part in place and properly aligned, it was then a simple matter to apply glue to the rest of the fuselage join. I also applied a few drops of glue to the interior parts where they had no been glued, just ot make sure they were tacked in place. (A glue bottle with a long needle-type applicator is very handy for this.)
Not all kits are engineered to be friendly to this method, but the next time you’re trying to get those internal parts lined up, consider giving this a try.


Leave a Reply