The area I called my “workshop” growing up was a storage room that ran along one side of our carport. It was as long as the carport was deep, and about 4 feet wide. One end of it was my dad’s space, but the other end was all mine.
Dad had set up a little workdesk for me. It was hinged along the wall, so if needed my work area could be folded up. For the most part, however, my workbench stayed down. The work area looked much like any modelers work space – paints, glue, brushes, thinner, and a work surface covered in all manner of paint splotches.
At the time, I used enamel paints, as they were all the local shop carried. I had quite a few colors, ranging from the basics all the way through more specialized colors. I even had a few rattle cans, as I’d learned how to get those sprayed on fairly smooth.
Trying New Paint
I don’t recall the model, but I know it needed a light blue color. Opening up my bottle of light blue paint, I discovered it was dried up. Because the storage space I worked in was outdoors, my paints took a terrible beating – hot Florida summers did them no good, and then cycles of occassional freezes in the winter were even less friendly. Of course, I didn’t know about all of that. I just saw I had chunks in the bottle – not paint.
I looked around at my other paints, hoping I had some blue and white to mix. But I was out of blue also…
Looking at the other end of the work area, I saw my dad’s little pop-top cans of house paint. Maybe he had a good color? Hopping down from my chair, I went over to his side of the space, and after looking over what he had, I selected a nice light blue that should do nicely.
Just as I’d seen my dad do many times, I pried open the lid, and grabbing a stir stick, began to thoroughly mix the paint. After it looked appropriately agitated, I grabbed my dried up jar of light blue. Using a screwdriver, I cleaned out most of the chunks of dried paint. Then carefully holding the stir stick over the bottle, I let paint drain off until I now had a full bottle of paint.
Happy with my good fortune and cleverness, I closed the lid, and headed back to my side of the storage room to get to painting.
Coloring The Spitfire
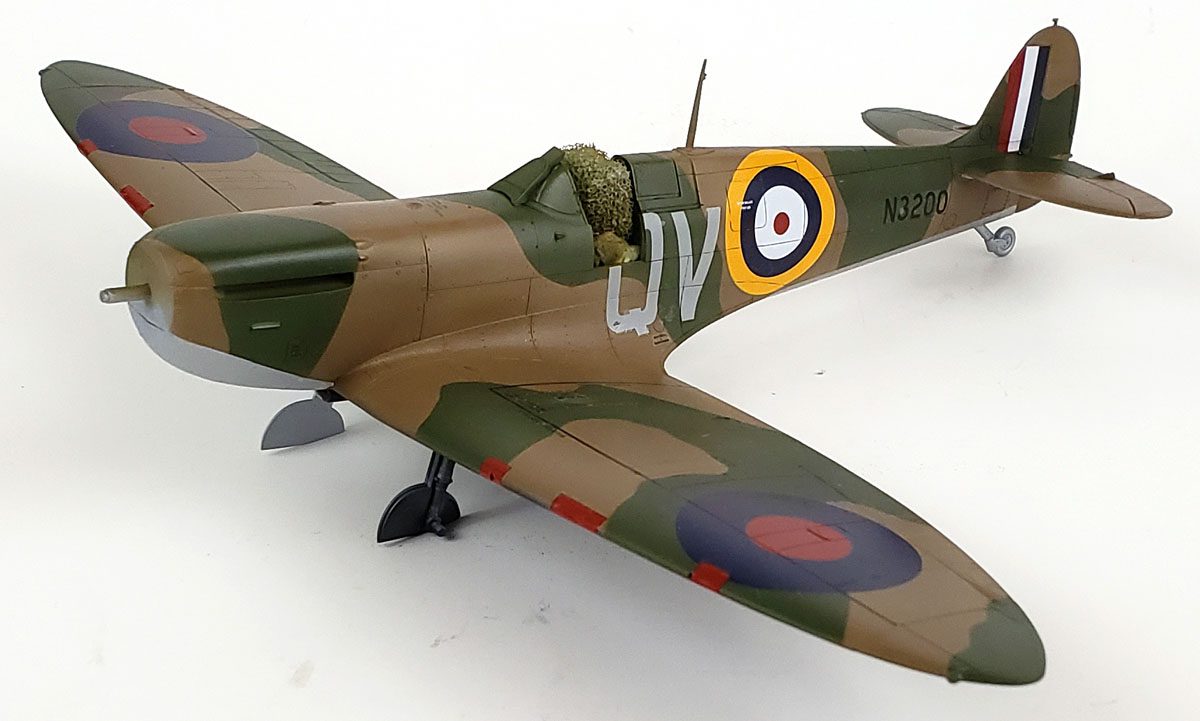
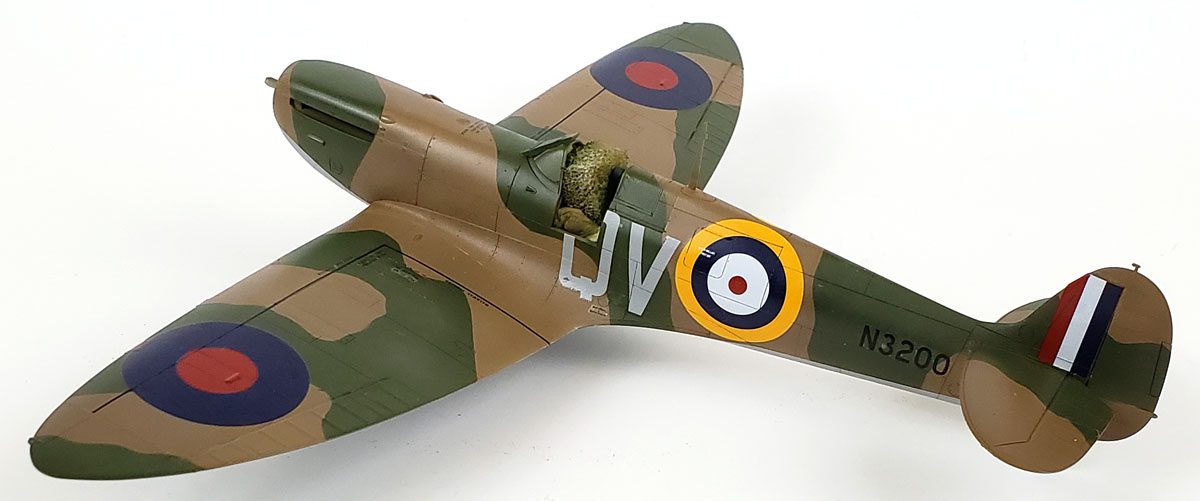
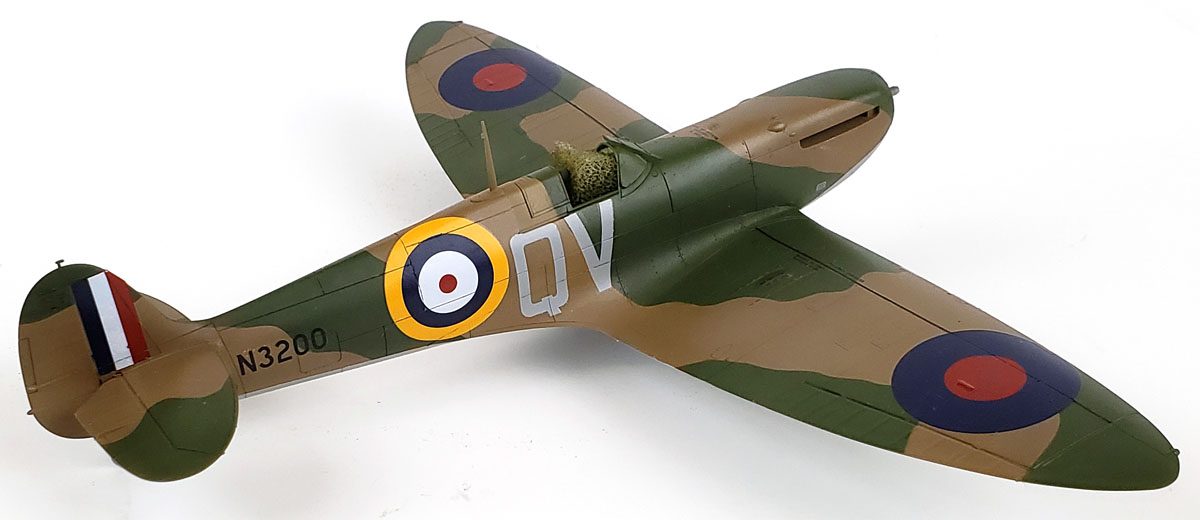
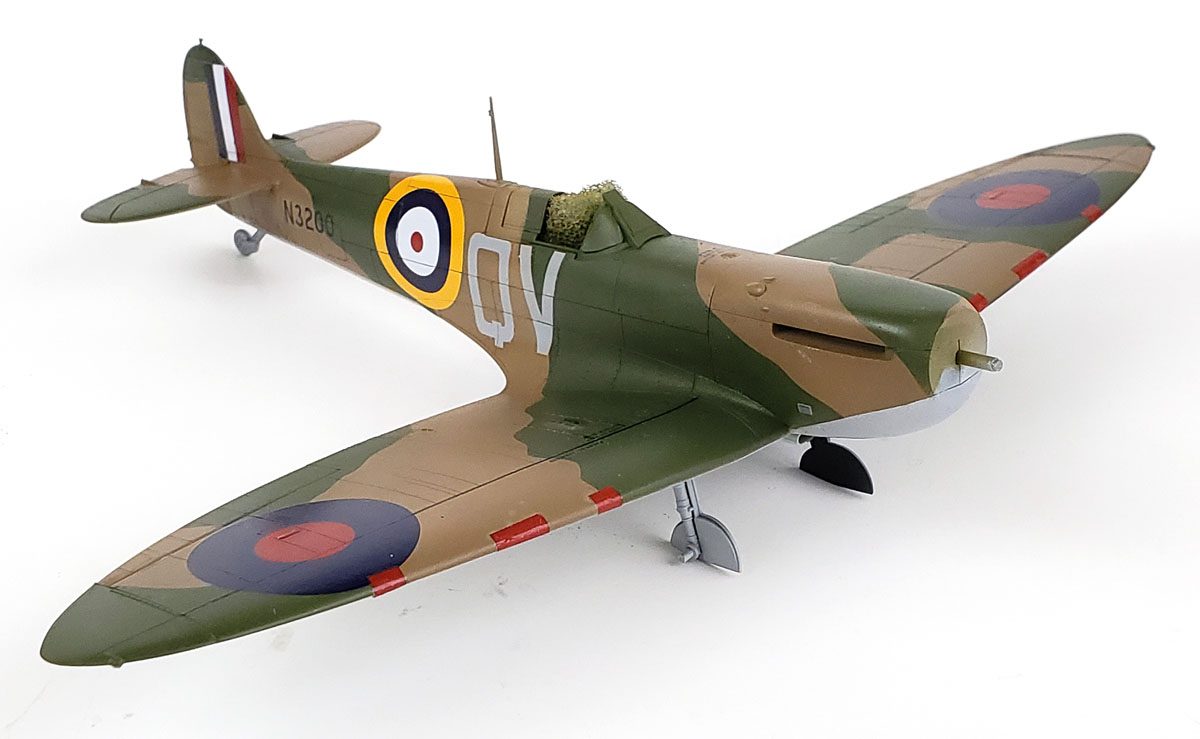
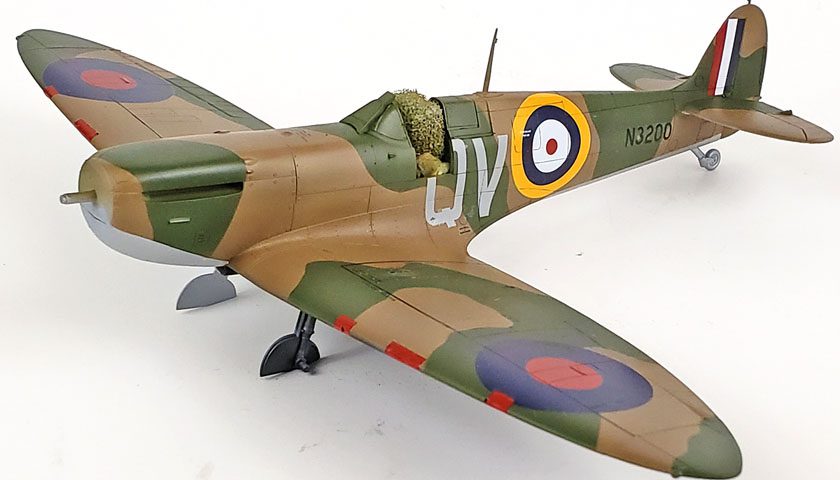
With the airframe assembled and primed, the next step in the process is paint and decals. The kit offers three options – one with the aluminum lacquer undersides, one with the white/black wing split over aluminum lacquer, and another in the more familiar Sky color. All have Dark Earth and Dark Green on the upper surfaces.
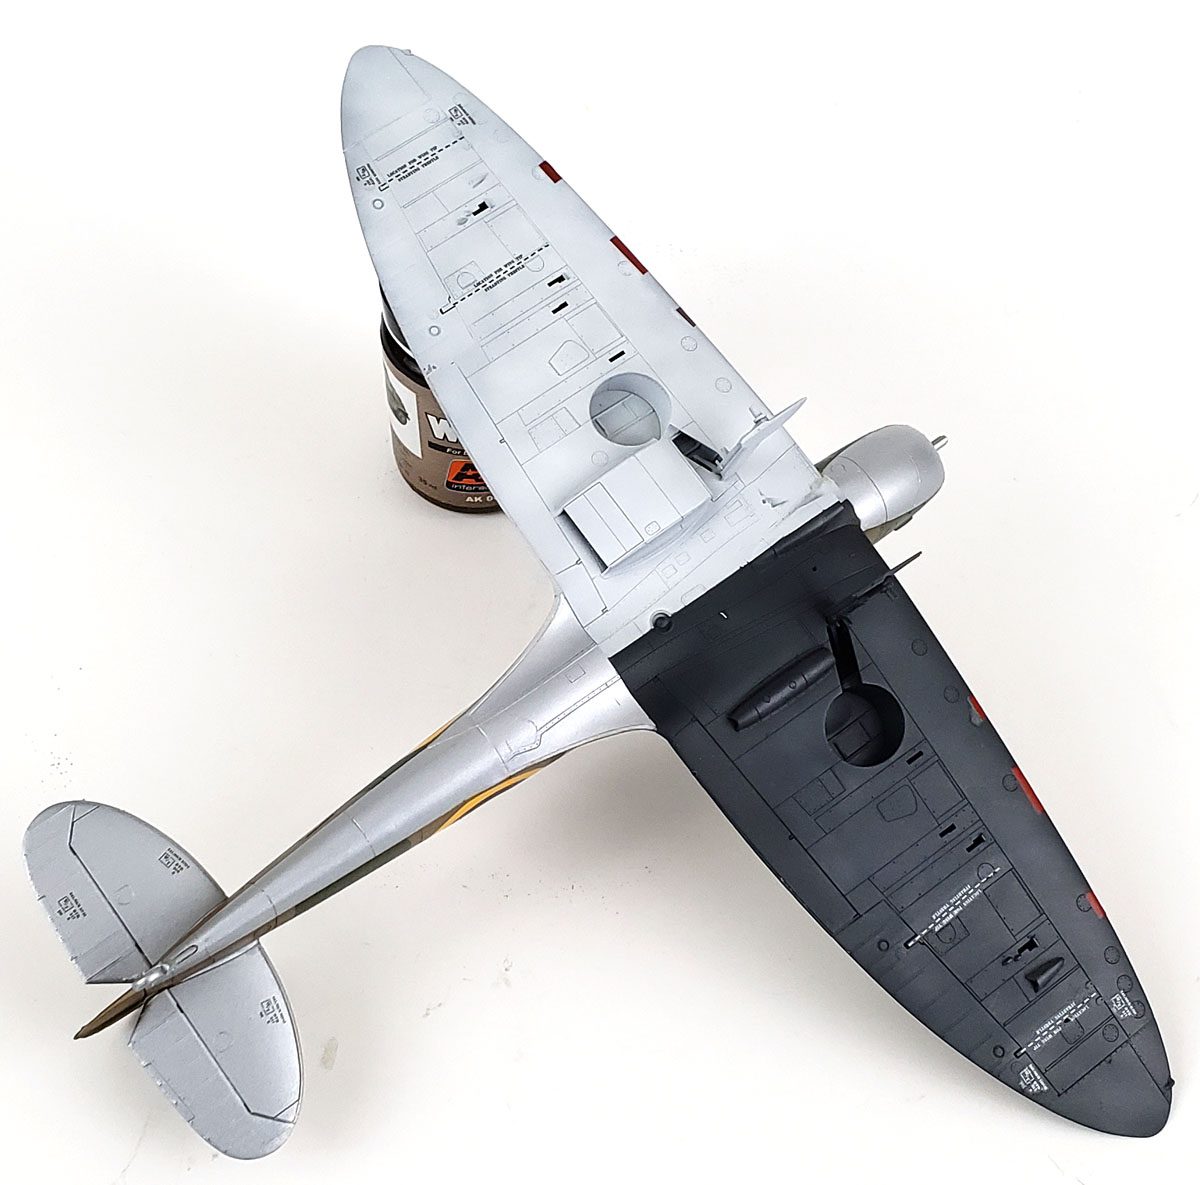
I opted for the black/white version. I’ve always thought it looks a bit cool. The intent behind the scheme was to make friendly aircraft more recognizable to British anti aircraft gunners. However, it must not have helped much, as the scheme didn’t last too long.
The Importance Of The Order Of Operations
In school, I was never much good at math. Come to think of it, I wasn’t much good at anything except keeping the people around me laughing from my wit. 😉 But when it came to math, I couldn’t fake it. Once you moved beyond the multiplication tables up to 12×12, I was lost.
One thing I could never recall was something called the order of operations. To this day I can’t remember it. You either do all the addition first, or all the multiplying. Which one it is I can’t recall, but I do know if you get it wrong, you’ll pretty much fail all the tests. Which prompts a letter home to your parents. Never a good thing…
When it comes to painting models, the order in which the paint goes on is also important. Not accounting for it can leave you painting coat after coat to try and cover what’s underneath.
Planning For The Order
I wanted to start painting the undersides, as is required by Intergalactic Peace Treaty. 🙂 Black, white, and silver all have their special properties when it comes to painting. Black, of course, will cover most anything, and even the slightest overspray will shade nearby colors. White doesn’t cover well at all, but it will tint everything it touches. Silver can be finicky, as it will take on brightness based on what is underneath.
I also wanted to put down a primer coat. While all of the paint I’d be using was solvent based, a solid primer would give the initial color a good, consistent undertone. And if I needed to “reset” the surface for additional colors with more primer, that would be easy.
Deciding that after priming I’d start with the silver color, I grabbed Tamiya’s AS-12 Bare Metal Silver, a rattle can paint. As the area to be sprayed was small, I’d just shoot it right from the can. By starting here, I could then spray white over it. While silver and gray are different, of course, in terms of what was underneath the white, it would show about the same. With white and silver on, I could then add the black, because it covers everything. Proper order of operations achieved.
Getting To It
With the plan mapped out, I got to work. The AS-12 was sprayed on with a few quick passes of the rattle can. It’s a great silver color to work with, as it sprays great from the can, or it can be decanted and airbrushed, going down very nicely. As it dries very fast, I fairly quickly masked off the silver areas in preparation for the white.
For the white, I started with my “Spaceship White” mix, which is a few touches of light gray and deck tan in white, all Tamiya paints. Airbrushing this on first, thinned with Mr. Color Leveling Thinner, I next proceeded to do some paint distressing, using Tamiya’s XF-1 White. This broke up the monotone surface, and provided some contrasting tones.
Masking that, I moved on to black. The first layer was XF-1 Flat Black. A distressing coat was added using highly thinned XF-63 German Gray, to break up the uniformity of the flat black. With the undersides painted and masked, I moved on to the upper camo.
A New Favorite Emerges
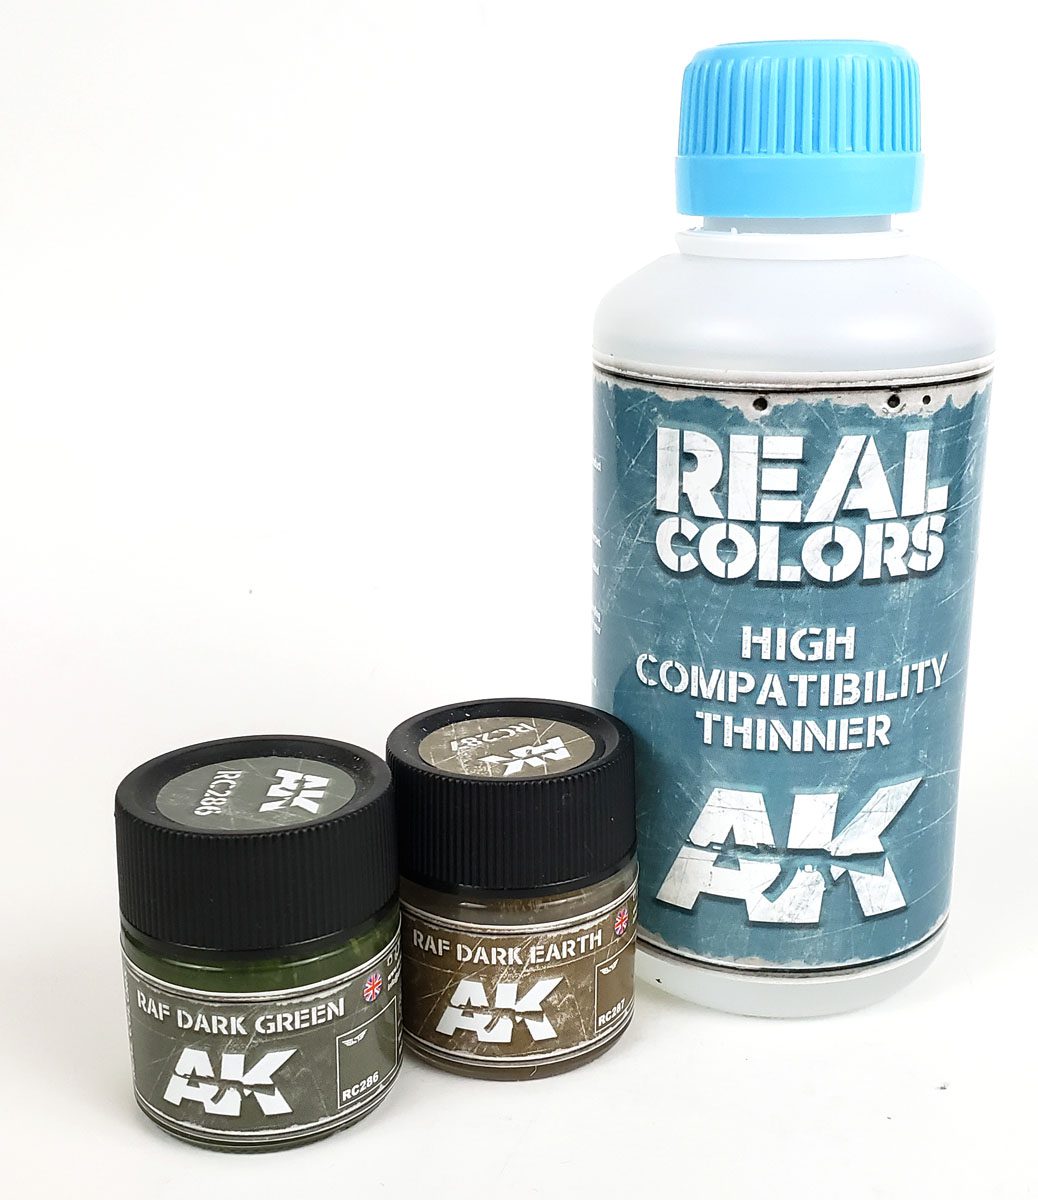
In the past, I’d used various brands to paint the RAF Dark Earth and Dark Green camo pattern. While I was generally happy with the results, it was never solidified so much in my mind that I wasn’t looking for a better solution. Though I was generally OK with the colors, the ease of application and cleanup sometimes left me a little frustrated.
I’d tried AK Interactive’s Real Color (AKRC) lacquer paints on a recent Gunpla project, and was very impressed with the one color I used for that model. I’d decided to try more, and thus ordered AKRC RAF Dark Green (RC286) and RAF Dark Earth (RC287), as well as a bottle of AKRC High Compatibility Thinner.
While I’d seen in a video that AK had released that Real Color paints were compatible with other lacquer thinners, I like to try new paints with the recommended thinner, so I can be sure and understand how it works.
Starting With The Earth
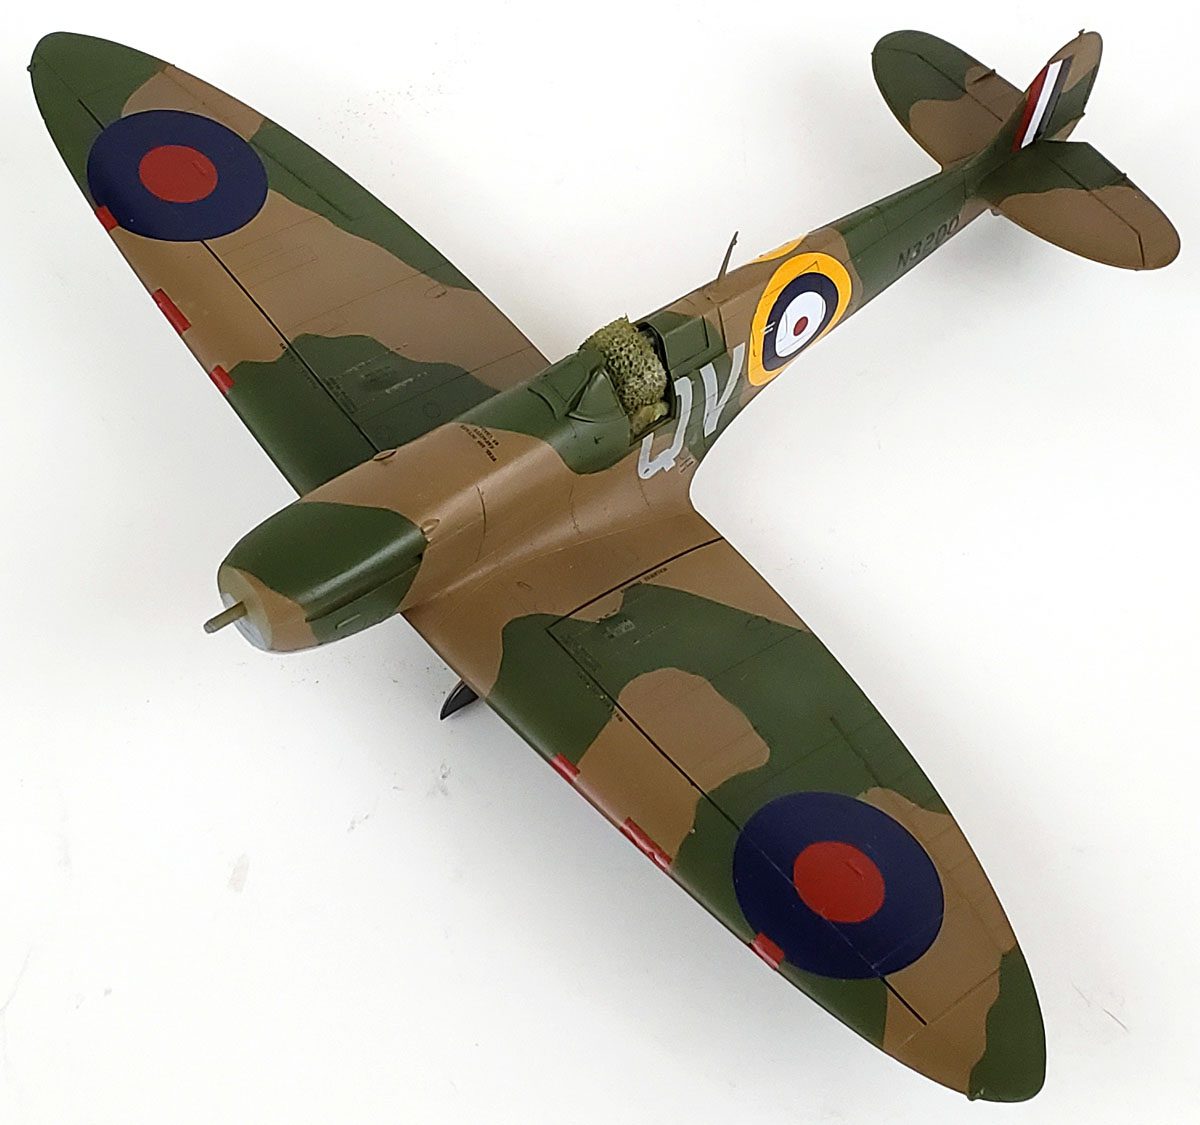
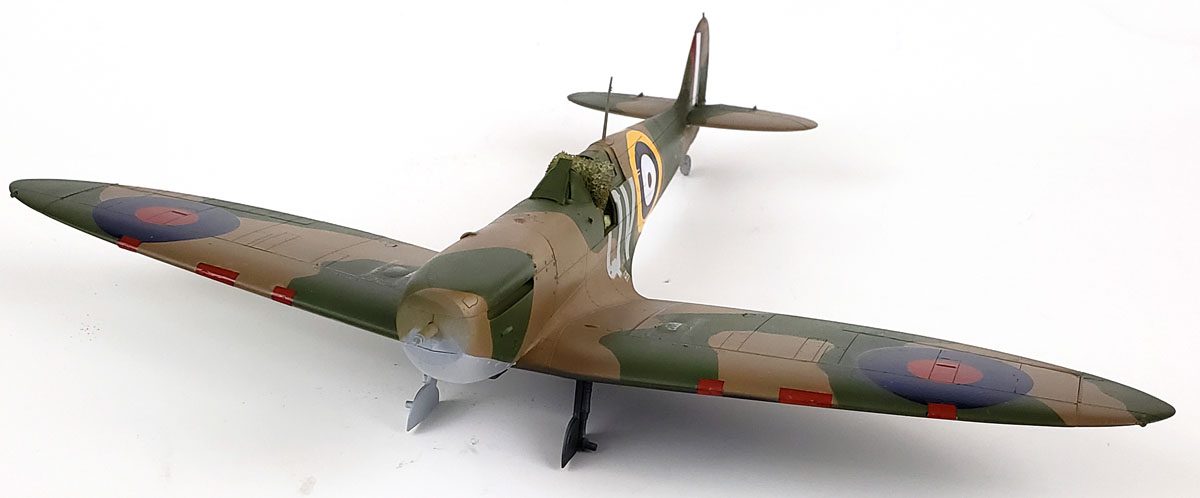
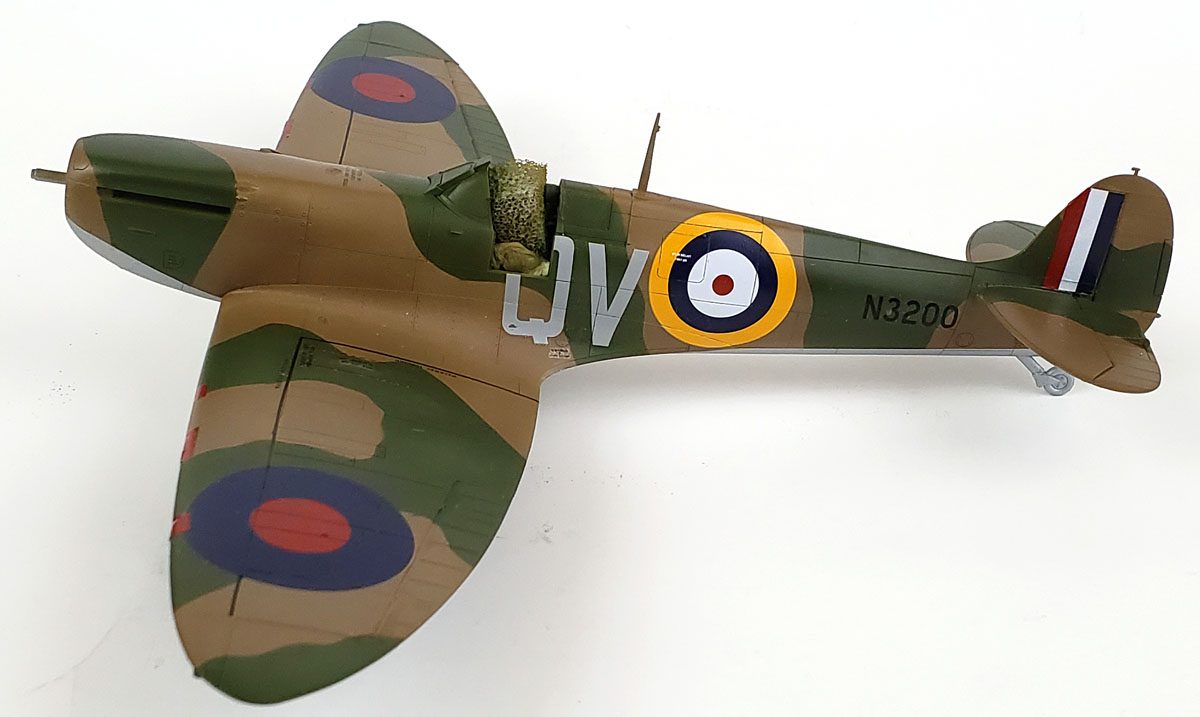
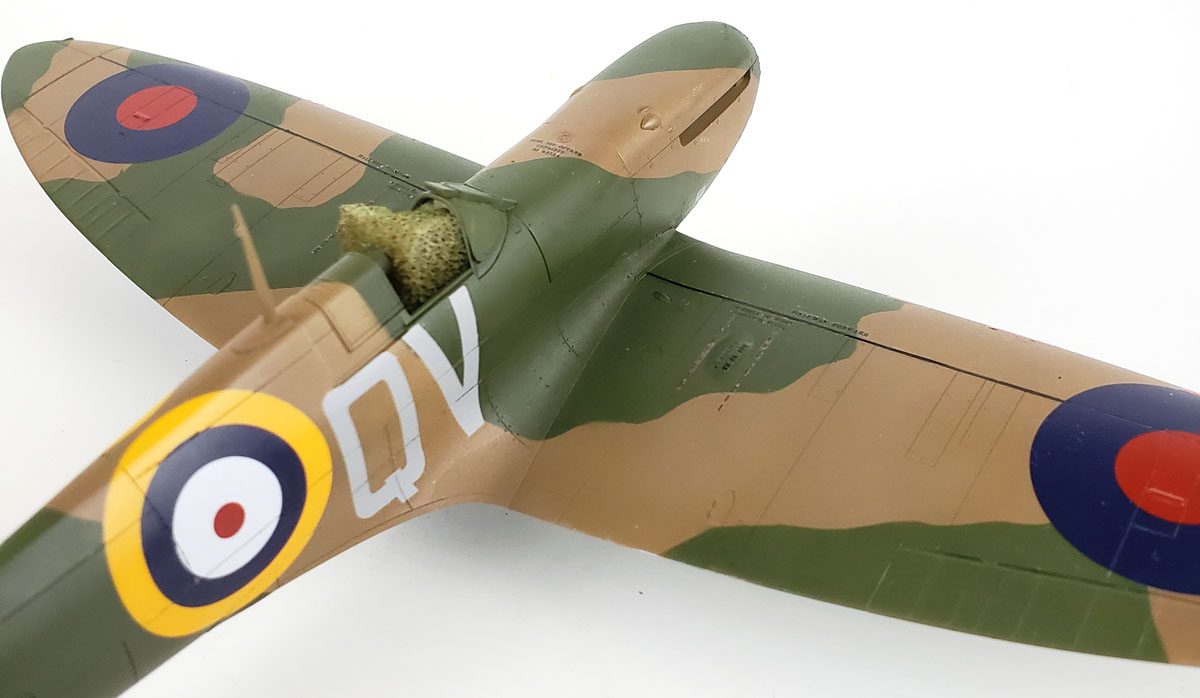
I started by adding the Dark Earth color. As I planned to mask the camo pattern, I decided to paint the entire upper surface in that color. This would do two things. First, it would “reset” the upper surface to a single tone. While it had been primed in gray, hints of the underside colors poked through here and there. To make sure I was getting a uniform coat down, a good covering of the dark earth would help.
The second thing it would do was give me some surface to experiment on. I could test areas of light, medium, and heavy coverage, as well as drop the air pressure down a bit and do very fine work.
I started the process with my Badger Patriot, which has a .5 nozzle. Thinning the paint about 50/50 with the AKRC thinner, I got good coverage immediately. As with the Gunpla previously, the paint went down very smooth – smoother than any other paints I’d used in the past. (And trust me – that is a lot of paint.) Tests showed it was equally adept at coats ranging from mist to wet. As long as it was not so heavy as to cause drips and runs, the paint leveled wonderfully and resulted in a very smooth finish.
A light distressing coat was then added, using Tamiya Deck Tan.
On To The Green
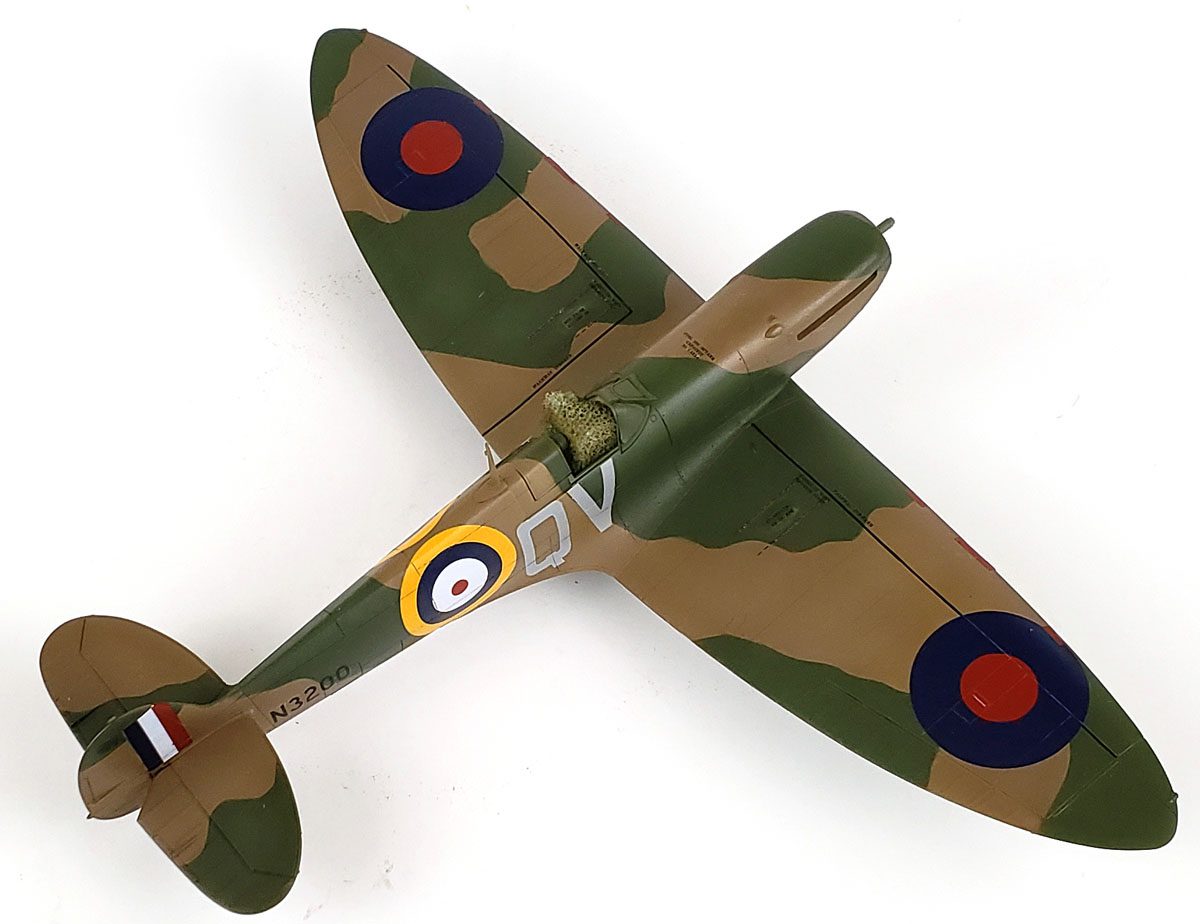
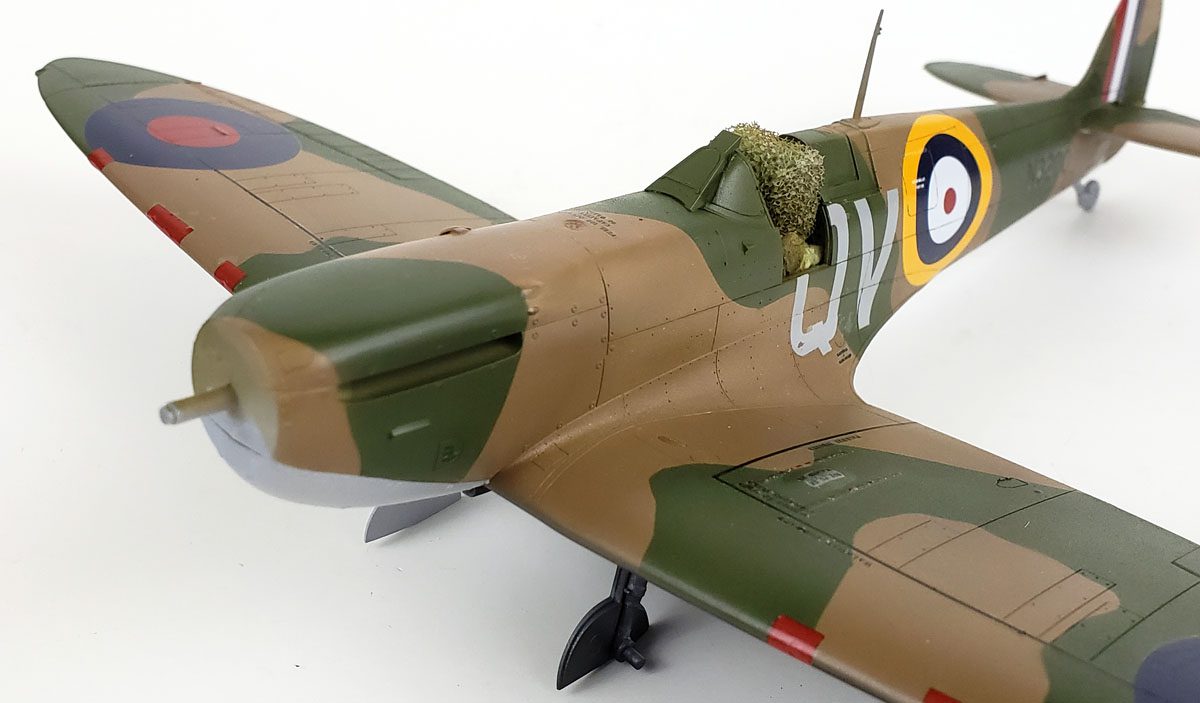
Allowing the paint to dry for several hours, I next masked off the camo pattern using Tamiya tape. Switching to the AKRC RAF Dark Green, I applied that color with a Badger Patriot Extreme, which has a .3 nozzle. I found that I liked the smaller nozzle much better. While the .5 did a good job, the AKRC paint flows so perfectly through the airbrush that I felt the smaller needle gave better control.
As before, various “weights” of applications were applied, ranging from mist to wet. All worked great, and each dried to a nice, smooth, consistent finish. A bit of distressing was added using Tamiya Yellow Green.
Them Decals
With the paint on and the model unmasked, I applied a gloss coat of Future to prepare the model’s surface for decals. I’ve never been a huge fan of Tamiya decals. While their registration and color are usually good, they’re always a bit too thick for my tastes. While I typically order aftermarket decals, on this one I simply forgot. Checking in my stash of Spitfire decals did no good either – I had nothing on hand for this particular scheme. So Tamiya decals it would be.
I’ve found the trick to getting them on nicely is patience, a sharp hobby blade, and loads of Solvaset decal softener. I’d apply a decals, and after using a cotton bud to work out the water underneath, I’d give the whole thing a good application of Solvaset. After about 15 minutes, I’d use a new #11 blade in my knife to carefully slice the decal along the panel lines, and apply more Solvaset.
I’d then allow that to dry for roughly the same period, and repeat the process. Once I’d done that, the model was set aside to dry overnight. By the next morning, all was dry and generally snuggled down. I then inspected the decals for panel lines that stil weren’t quite right, and where needed, used the hobby blade and Solvaset combo one more time.
A Note On the Wingwalks
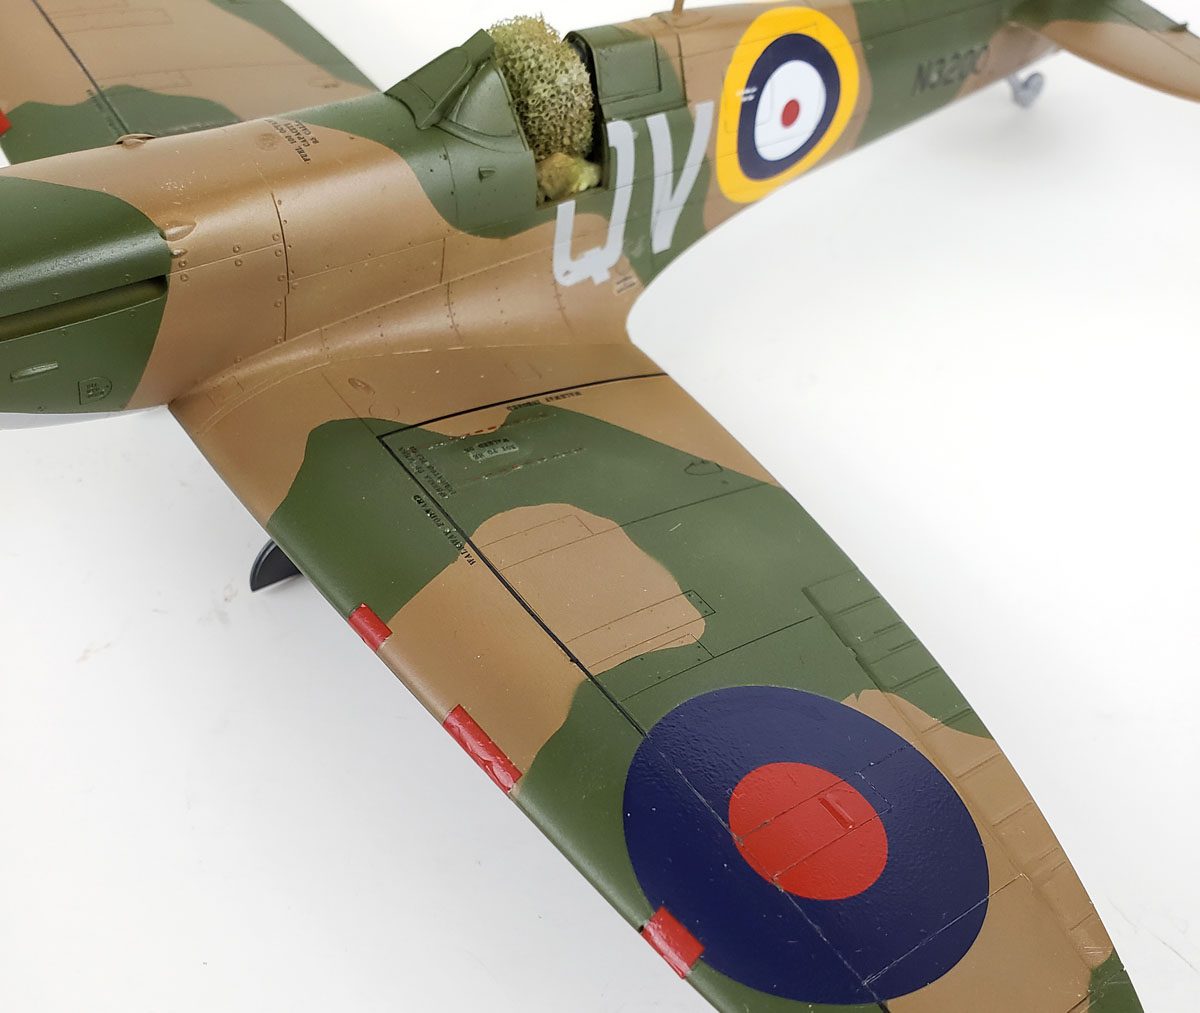
Spitfires had narrow wingwalk strips on the upper surfaces of each wing. These were in place to inform maintenance crew where to walk, or not walk, as the case may be.
Many Spitfire kits provide these decals as one long strip, this Tamiya kit being no exception. Some modelers assume this means they go over the national roundels, but that’s not actually the case.
However, if applied first, as a single decal, even the most careful post-application prep will mean you’ll have a small ride showing through the roundel once placed over the top.
To avoid this, I always cut the long wingwalk strips into pieces. I start applying them away from the roundel. This allows a final section to be placed flush up to the edge of the roundel, and any excess can be laid over the wingwalk strip already in place. This process avoids problems and yields a very good result in my opinion.
With paint and decals in place, this stage of the Spitfire build is finished, ready for weathering to be applied.
Back To The Carport
When I began applying some of my dad’s paint to the model, I was a bit horrified. It was thick, way too thick for model use. I tried thinning it with all I had on hand – enamel thinner – and while it did improve somewhat, it wasn’t much.
But as I’m ought to do even today, I persisted long past the point that it made sense. The entire surface of the model was given a coat of that stuff – covering all detail. The result, when dry, was a thick skin of light blue.
A Much Better Result With AK Interactive Real Color
Happily, my experience with AK Interactive’s Real Color paints has been the polar opposite. They went down very smooth, cleaned up easily, resulted in a very smooth and durable finish, and the airbrush cleanup was the smoothest and easiest I’ve ever experienced.
I’ll admit I am a paint skeptic. Whenever a new paint brand (or new to me) rolls around, I always assume that the king to knock off the hill when it comes to airbrush application is Tamiya. I have shot practically gallons of the stuff on hundreds of models, and I know how it works – and I really like it.
However…
AK Interactive’s Real Colors have sold me. They are, in my opinion, a superior paint. The range of colors far exceeds Tamiya’s line. They spray smoother, have virtually no tip dry, and cleanup easy. But perhaps the biggest selling point is that they are forgiving. That has always been a key point for me with Tamiya – just thin it and go. Real Colors are equally forgiving, being quite happy at slightly thick consistency, yet working nicely all the way down to very thin consistency. Mist coats, mediums coats, or wet coats all snug down nicely.
I don’t plan to toss my Tamiya paints – there’s too much money invested in them. But, when I need to buy a new bottle of any color, I’ll be asking the local shop to order the AK Interactive Real Color bottles for me. They’re just that good.
Wrapping Up
In the end, I actually peeled away all of that thick paint from my model built in the carport. Doing something I rarely did, I waited until I had some money to buy a new bottle of paint. Hitting the local hobby shop next to my school, I picked up a proper modeling paint, and continued on my merry way.
I’m really happy with how this new-tooled Tamiya Spitfire is turning out. Despite a few questions about some engineering, once built, it renders the Spitfire’s gorgeous shape wonderfully. And I’m double happy with how AK Interactive’s Real Color paints have performed in applying the upper camo finish.
The next installment in this series will be the weathering and final finish!


Leave a Reply